While you are on Windows 11, it is highly recommended that you keep installing the latest updates available to you. Installing the latest updates ensure that your device remain safe and secure to operate. But sometimes you may not be able to install the latest updates as expected and at the end update fails for any anonymous reason. In this article, you will read how you can fix the failing updates in Windows 11.
Page Contents
Windows Update keep failing in Windows 11
Fix 1: Run Windows Update troubleshooter
Once you see updates failing, you must run the Windows Update troubleshooter that is already included in your Windows 11. The troubleshooter can help you identify the root cause and fix it accordingly, without requiring manual action from your side.
To run the Windows Update troubleshooter, you can perform these steps:
1. Right click at the Start button and select Settings.
2. In the Settings app, go to System > Troubleshoot > Other troubleshooters.
3. In the list of Other troubleshooters, click on the Run button next to Windows Update.
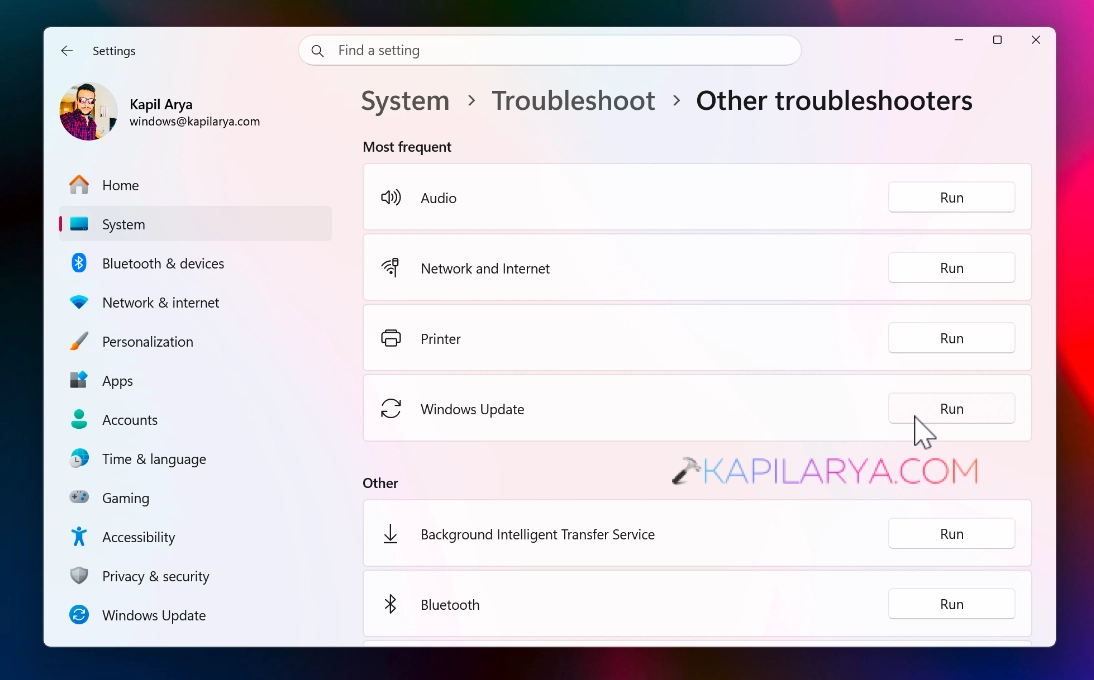
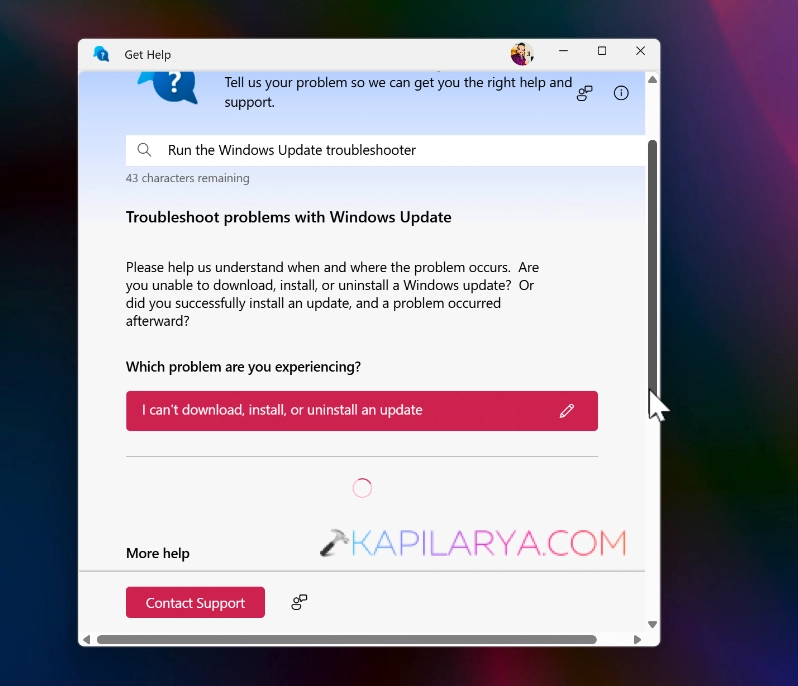
4. This would launch the troubleshooter with the help of Get Help app.
5. Follow the on screen instructions and complete the troubleshooting with the help of get help app.
Fix 2: Verify network access
The Windows Update feature heavily relies on network. So if the network is having issues on your system, it would also affect Windows Update. Ensuring the correct network access would help you troubleshoot issues with Windows Update as well. To verify network access, you can follow these steps:
1. Right click on the network icon present on the taskbar.
2. Then select Detect network problems.
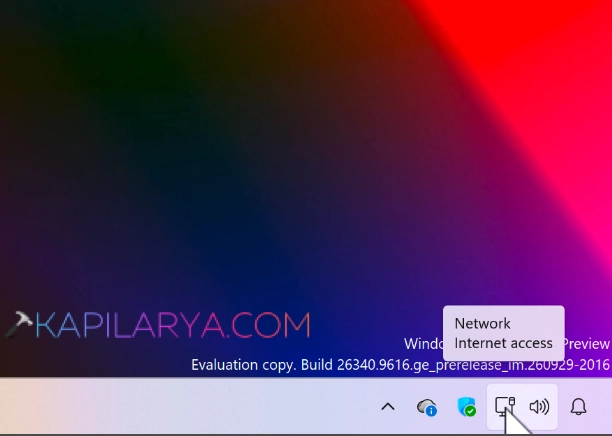
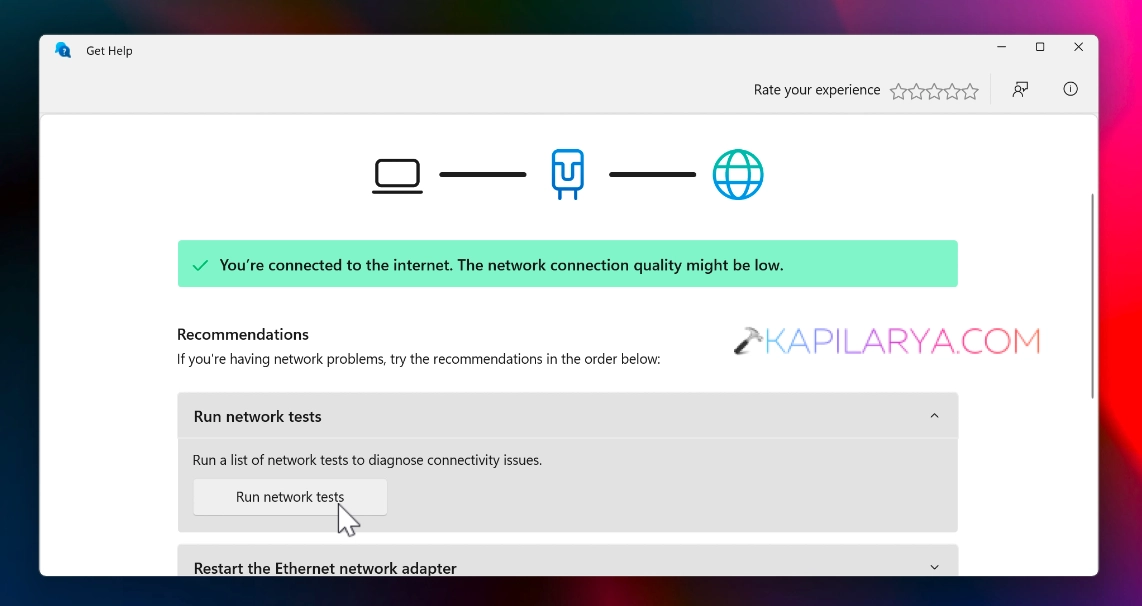
3. This would launch the Get Help app. You can follow the on screen options to complete the verification of network access.
Fix 3: Ensure you have administrative access
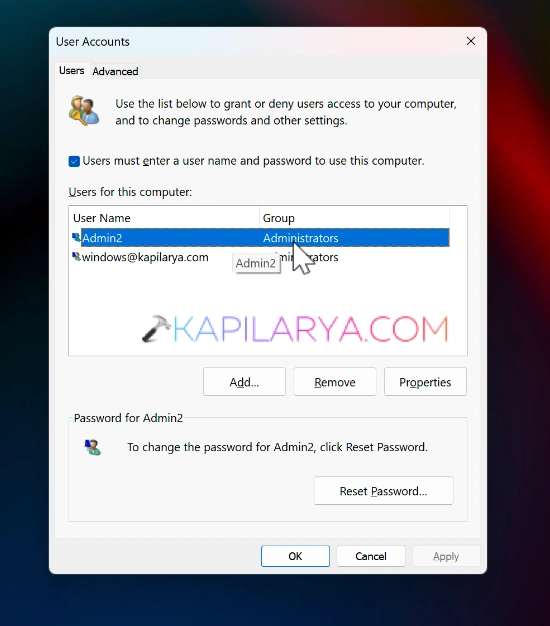
Some of the Windows Update you may install requires administrative privileges. If you are being on the user account, some updates may fail. To avoid this, you must sign into an administrative account present on the system. Or ask the administrator on your system to convert your standard user account to administrator account.
Once you have the administrative access, the updates may not fail because of the permissions issue.

Fix 4: Disconnect external devices
If you have external devices connected, you can temporary disconnect them while installing the updates. Some of the devices may interfere with update process and couldn’t let them complete. Without breaking the functionality of the device, you can safely remove the external devices to ensure updates are completed without any error.
Fix 5: Clear the Windows Update database cache
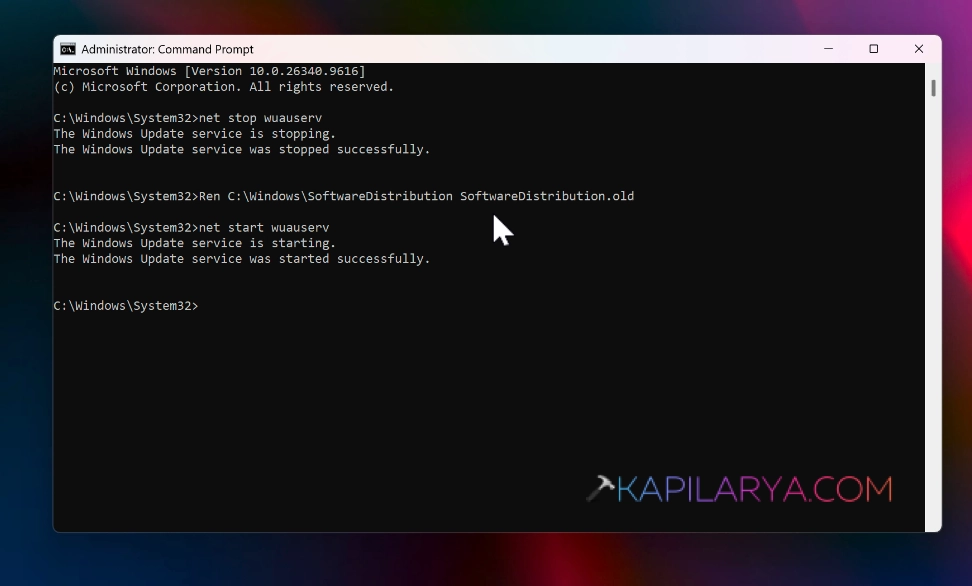
This could be one of the major root cause for the updates to be failing. You can follow the steps mentioned below to clear the Windows Update database cache:
1. Open the administrative Command Prompt.
2. Type the following command to stop Windows Update service:
net stop wuauserv
3. Then execute the next command to rename SoftwareDistribution folder:
Ren C:\Windows\SoftwareDistribution SoftwareDistribution.old
4. Finally, execute this command to restart back the Windows Update service:
net start wuauserv
Fix 6: Update drivers
Third-party drivers you may have installed on the device may interfere with updates. To ensure the updates are installed smoothly, you can update the third-party drivers.
Open the Device Manager and simply right click on these drivers and select Update driver.
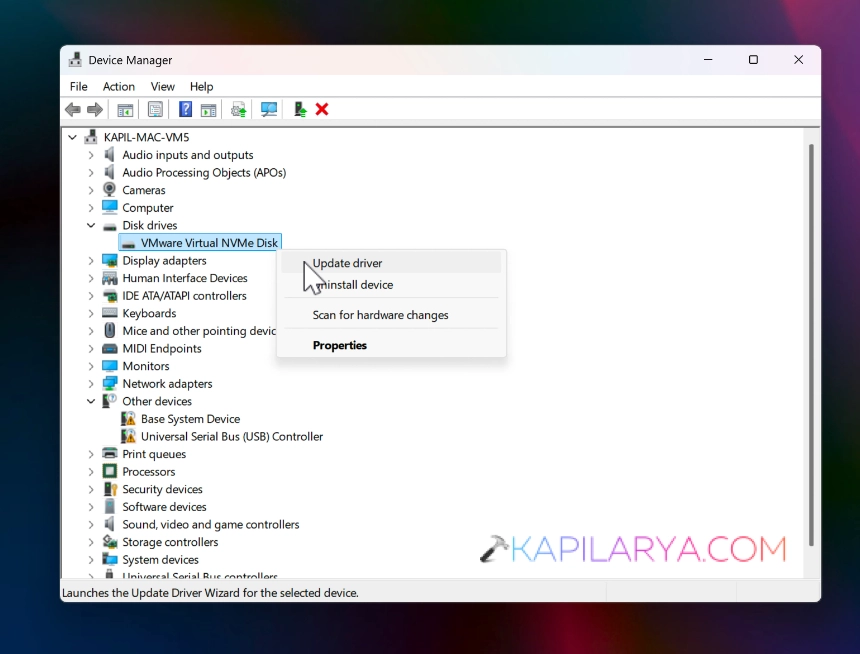
If there are some incompatible drivers, you must remove them to avoid the conflict.
Fix 7: Clear up disk space
Sometimes Windows Update may also fail because of lack of free disk space or the storage issues. There must be a plenty of free space available on the Windows installation so that updates can smoothly install.
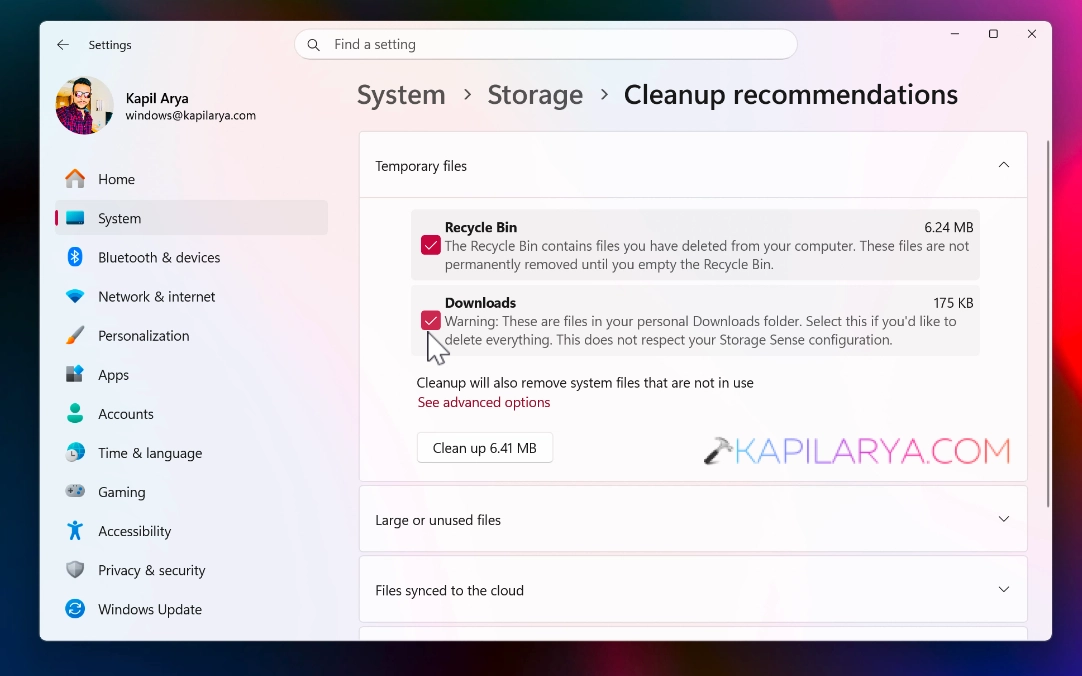
You can claim some free space by going to Settings app > System > Storage > Cleanup recommendations.
Here, you can choose the unwanted data which you can remove and gain some free space.
Fix 8: Verify time settings
Windows Update may also fail if your system is having incorrect time settings. The correct time settings are required so that your system can synchronize with the Windows Update server.
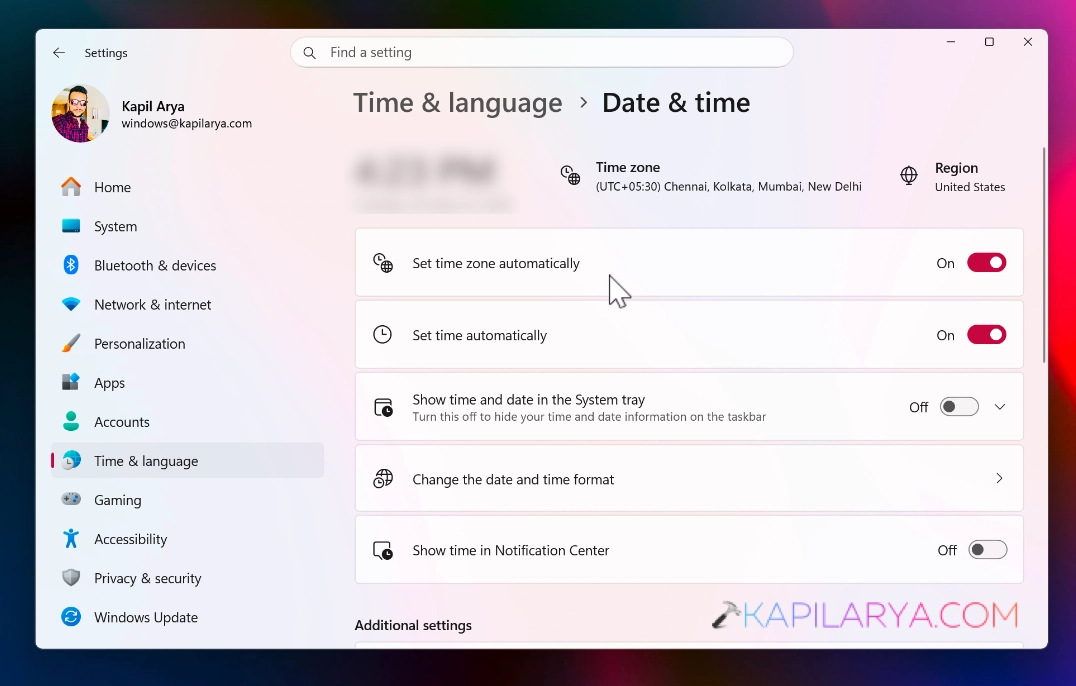
Open the Settings app and go to the Time & language > Date & time and ensure that you have allowed to set the time and time zone automatically.
Video guide
To get live illustration of above shared methods, you can refer this video fix:
That’s it!