While setting up Windows 11, users are required to create an account. This administrator account allows them to set up their system and install apps to use. If you add an account (Microsoft account or local account) on your system, then it will be a standard account by default. There are different account types you can use – Guest, Standard and Administrator. In this post, learn how to change user account type in Windows 11 through different methods.
Now, let’s have a look at different methods to perform this task!
Page Contents
How to change user account type in Windows 11
Method 1: Change User Account Type through Settings
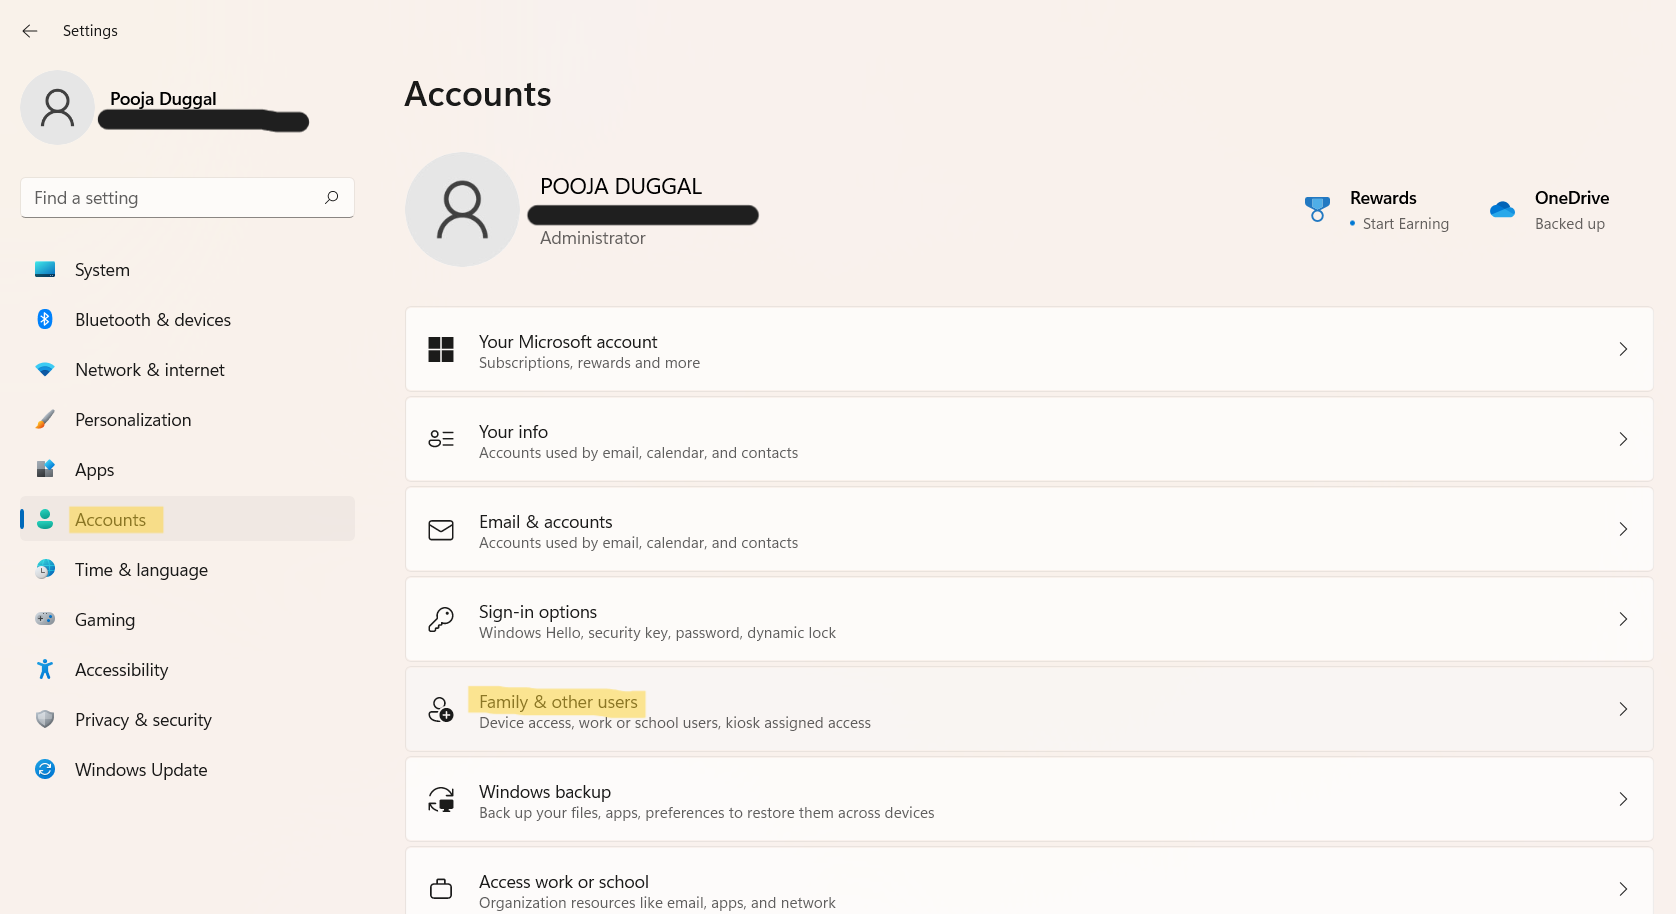
1. Firstly, open Settings and go to the Accounts tab.
2. After that, click on the Family & other users option.
3. Under Other users, click on the account that you like to change the user account type of. For example, DEMO here. Once selected, click on Change account type.

4. Now, choose the user account type you like and press OK.

5. Once done, close Settings.
Method 2: Change User Account Type through Control Panel
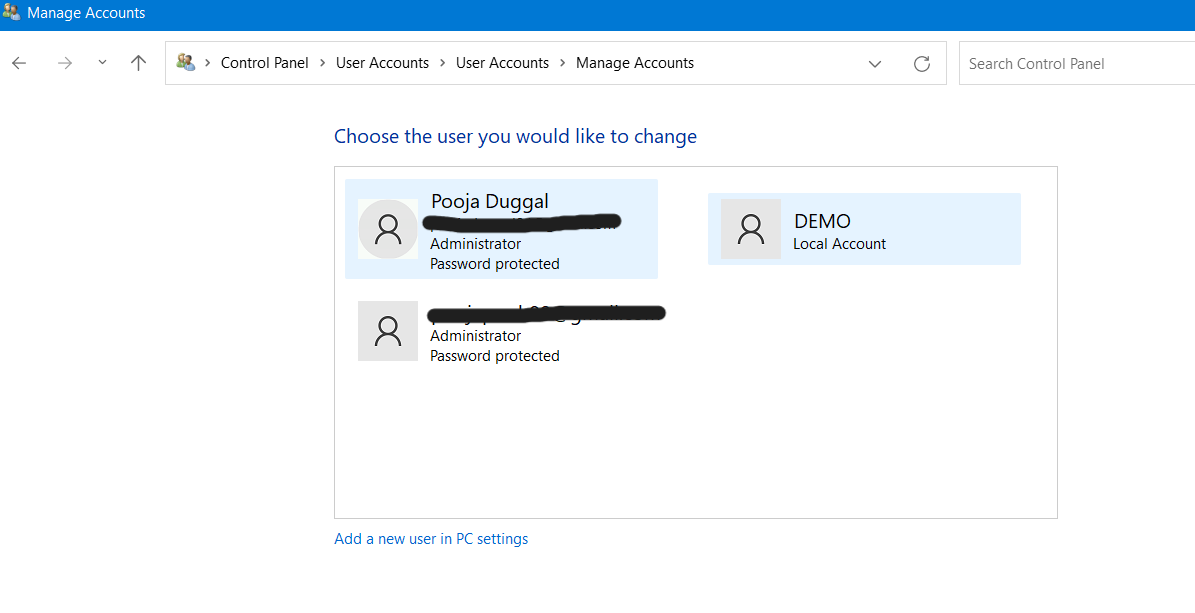
1. In the first place, open Control Panel and select User Accounts.

2. After that, select User Accounts again.

3. Now, click on the Manage another account option.

4. Select the account you like to change the user account type of.
5. Next, click on the Change the account type option.

6. Select the user account type and then, click on Change Account Type.

7. Once done, close Control Panel.
Method 3: Change User Account Type through Netplwiz
1. Open Windows Search and type netplwiz to open the User Accounts window.

2. After that, tick the box present next to Users must enter a user name and password to use this computer if not already.
3. Now, choose the account that you like to change the user account type of. Once selected, click on Properties.

4. Under the Group Membership tab, select the user account type. Once done, press OK.

Method 4: Change User Account Type through Command Prompt
1. Open Command Prompt as administrator.
2. a) To change the account type to Guest, enter the following command and press Enter after replacing the user name:
net localgroup guests “DEMO” /add
Note: Here, replace DEMO with the actual user name.

b) To change the account type to Standard, enter the following command and press Enter after replacing the user name:
net localgroup users “DEMO” /add
Note: Here, replace DEMO with the actual user name.

c) To change the account type to Administrator, enter the following command and press Enter after replacing the user name:
net localgroup administrators “DEMO” /add
Note: Here, replace DEMO with the actual user name.

3. Once done, close Command Prompt.
So, that’s how to change user account type in Windows 11 through different methods.