If your Windows 11 CPU is stuck at 100%, your computer might become slow or unresponsive. In some cases, you might notice that your system heats up frequently, and the cooling fans keep running even when you are not performing demanding tasks. This may happen when you have too many startup apps, outdated drivers, corrupted system files, malware, or problematic background programs.
You can try the following methods to fix this weird problem:
Page Contents
How to Fix Windows 11 CPU Stuck at 100%
Method 1: Identify and Close High CPU Usage Processes
We can start troubleshooting by identifying which application or process is consuming your CPU’s resources. Follow these steps:
1. Press Ctrl + Shift + Esc to open Task Manager. Then, select the Processes tab.
2. Next, click the CPU column to sort the processes by CPU usage. There, you can check which application is consuming the most resources.
3. If it is an unnecessary application, right-click it and select End task.
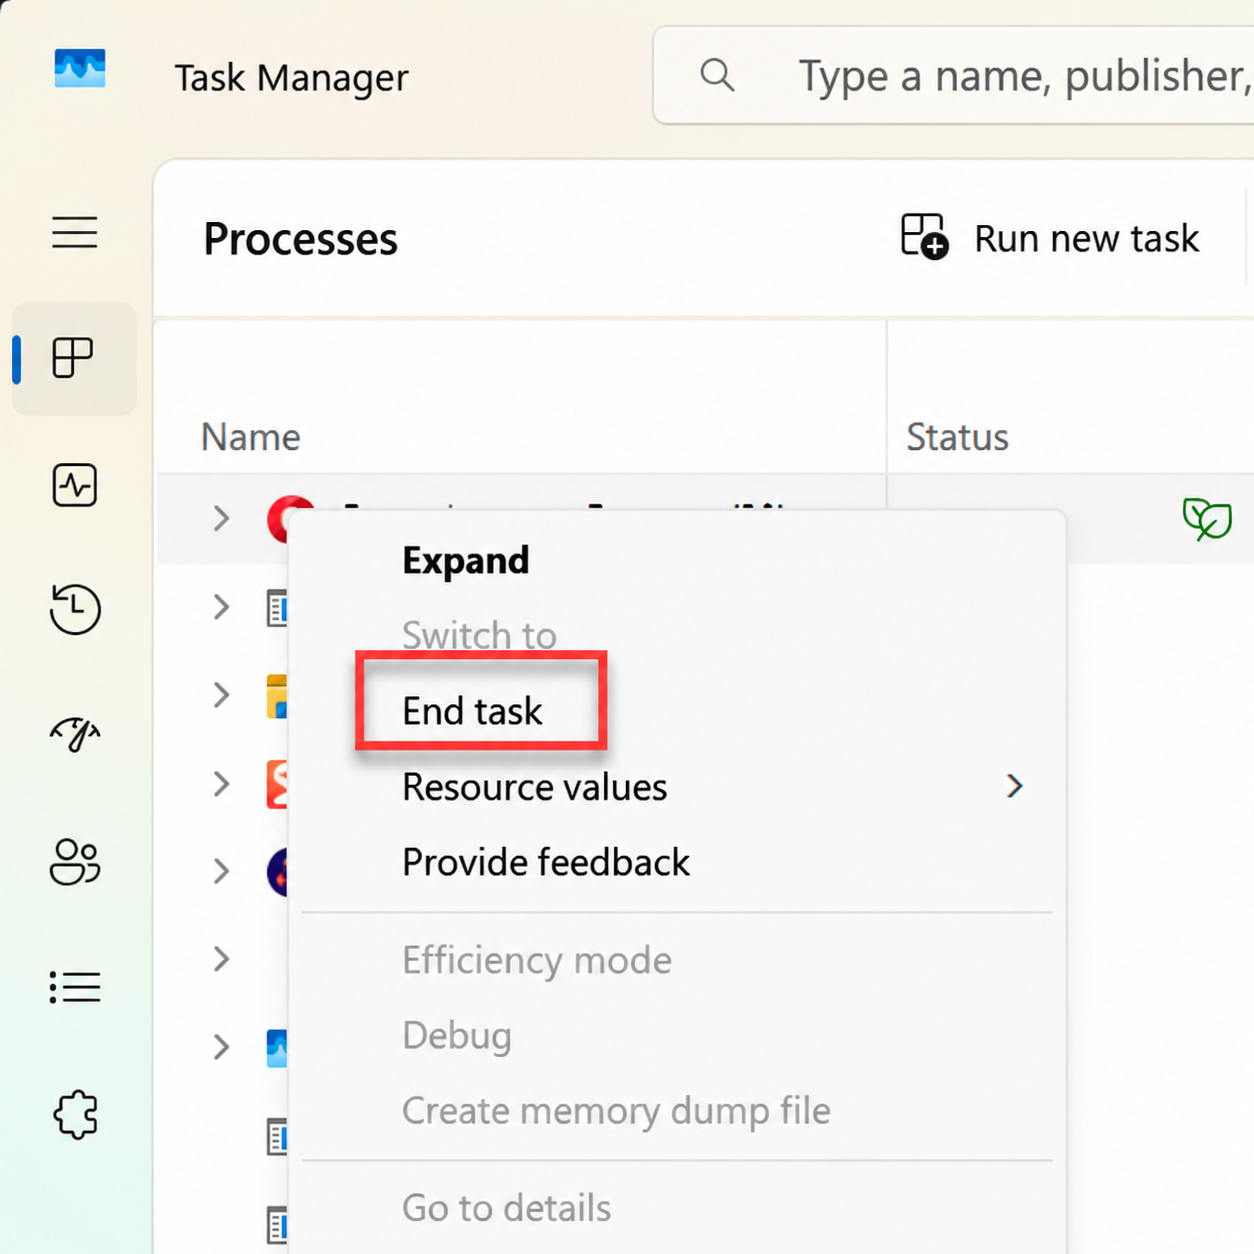
Once you do this, CPU usage will decrease. If the issue is not rectified yet, follow the below mentioned methods.
Method 2: Disable Unnecessary Startup Apps
Some apps automatically launch when Windows starts and they may continue running in the background. If we disable these startup applications, we can reduce CPU usage at startup.
1. Press Ctrl + Shift + Esc to open Task Manager. Select Startup apps from the left sidebar.
2. Review the list of applications enabled at startup.
3. If you see any application you do not need, then right click on that application and select Disable.
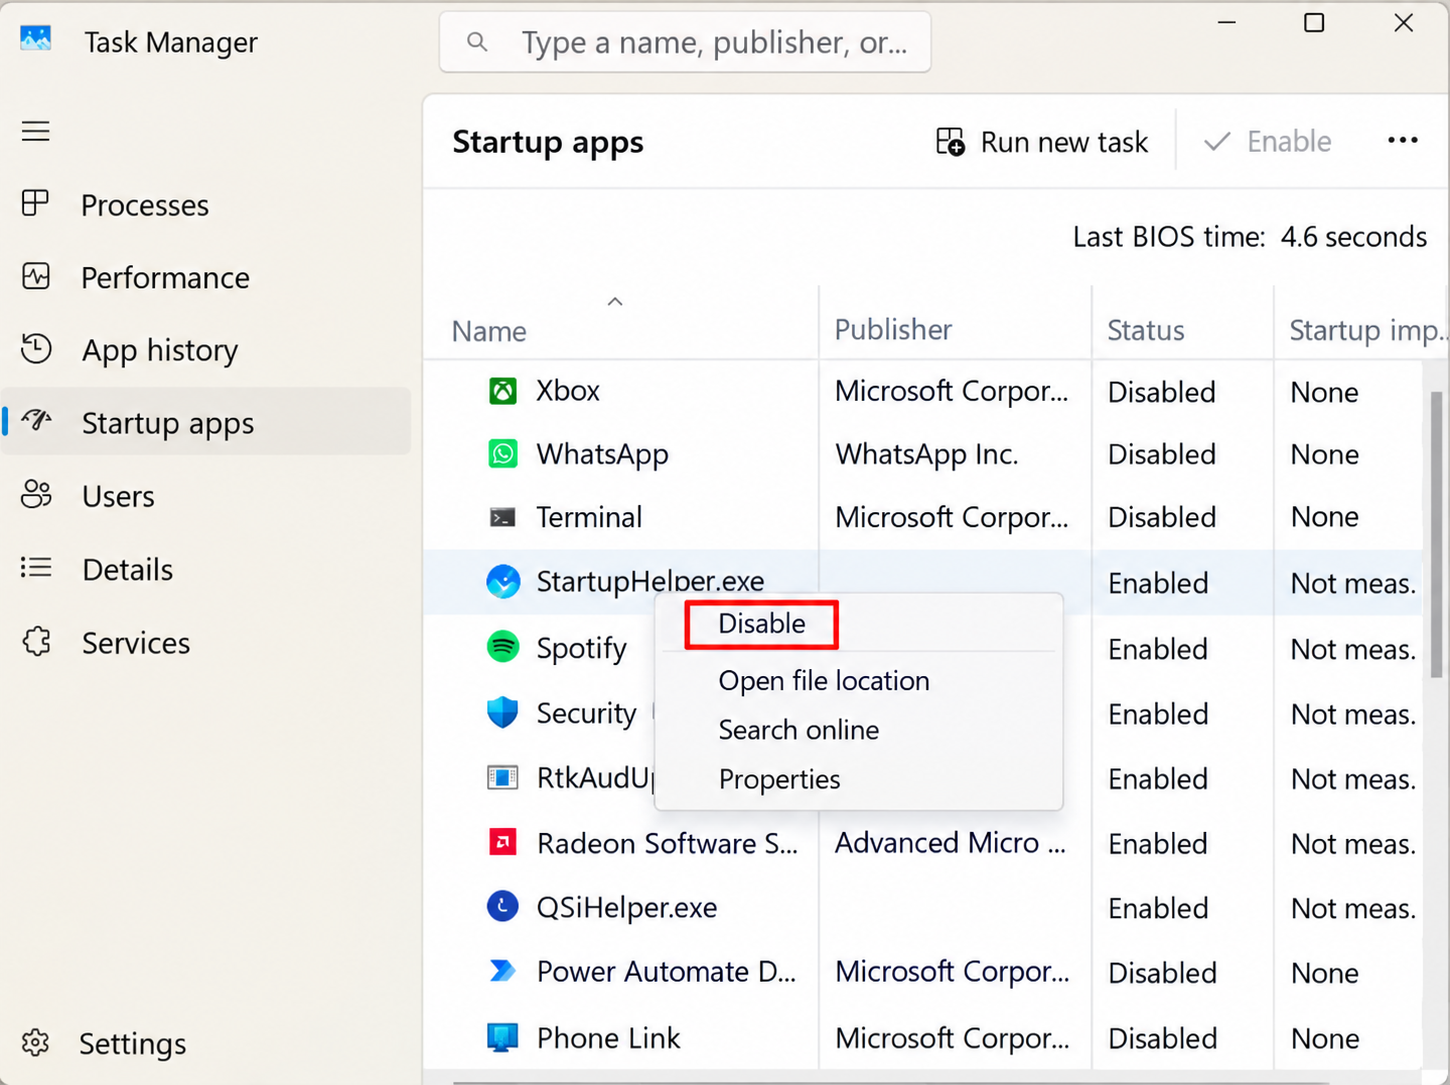
4. Repeat this for other unnecessary applications.
Once done, restart your computer.
Method 3: Scan Windows 11 for Malware
You can run a full scan using Windows Security to check for threats like malware etc. They can consume CPU resources a lot.
1. Open Settings. Then, select Privacy & security > Windows Security.
2. Click Virus & threat protection.
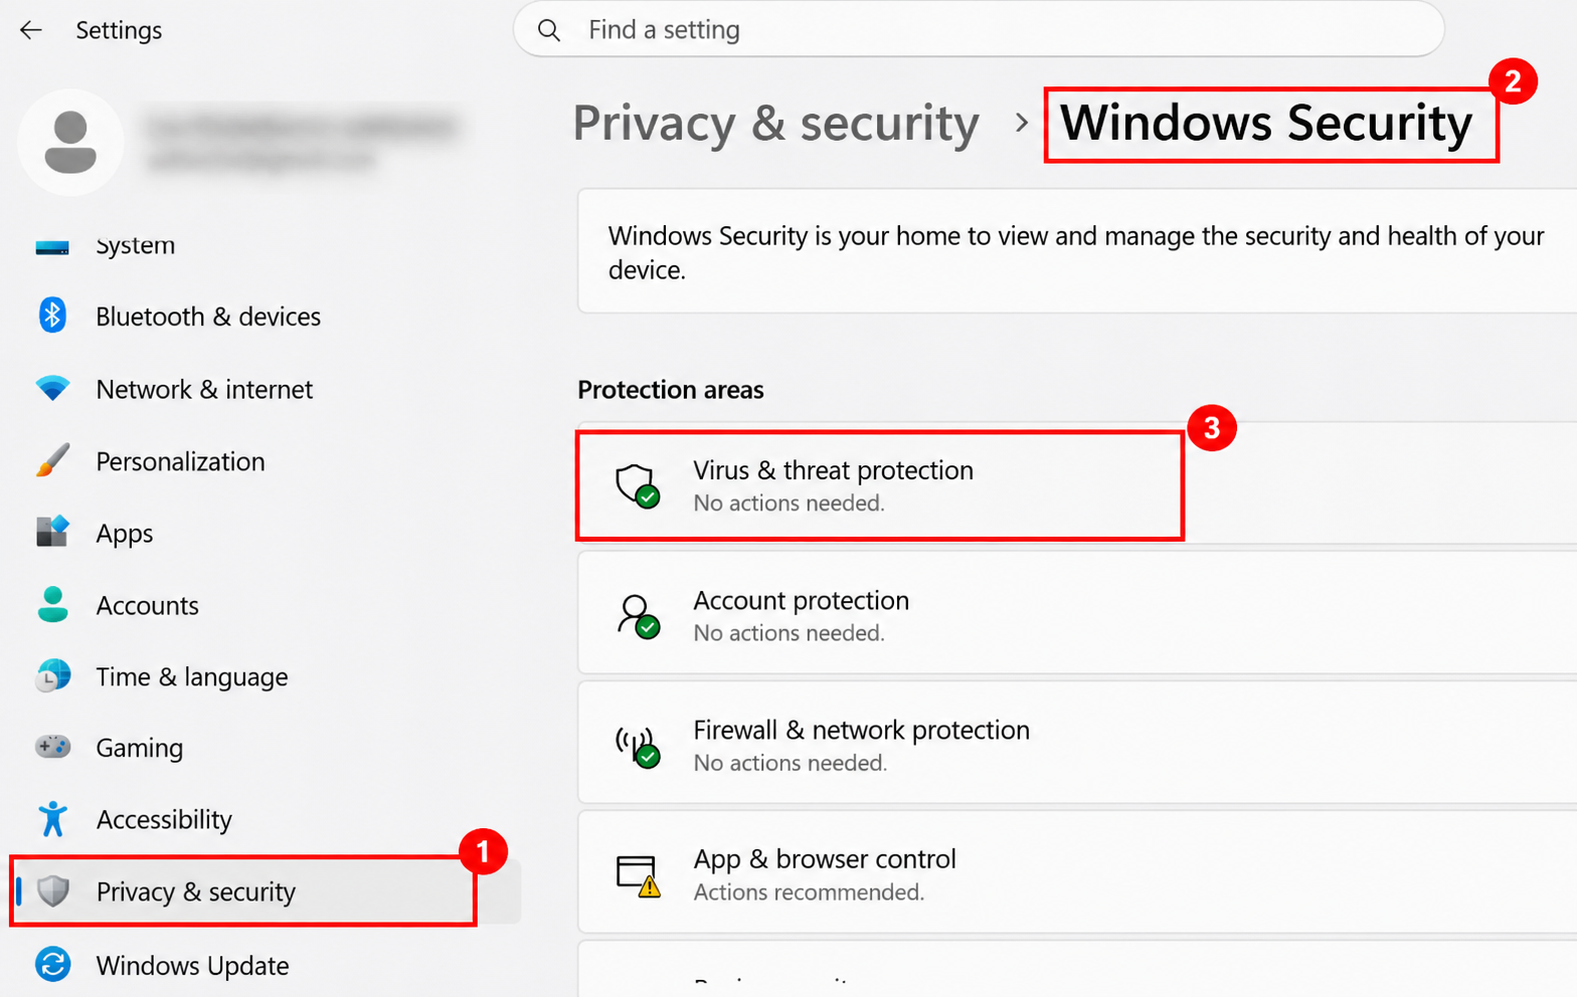
3. Under Current threats, select Scan options.
4. Then select Full scan and click on Scan now.
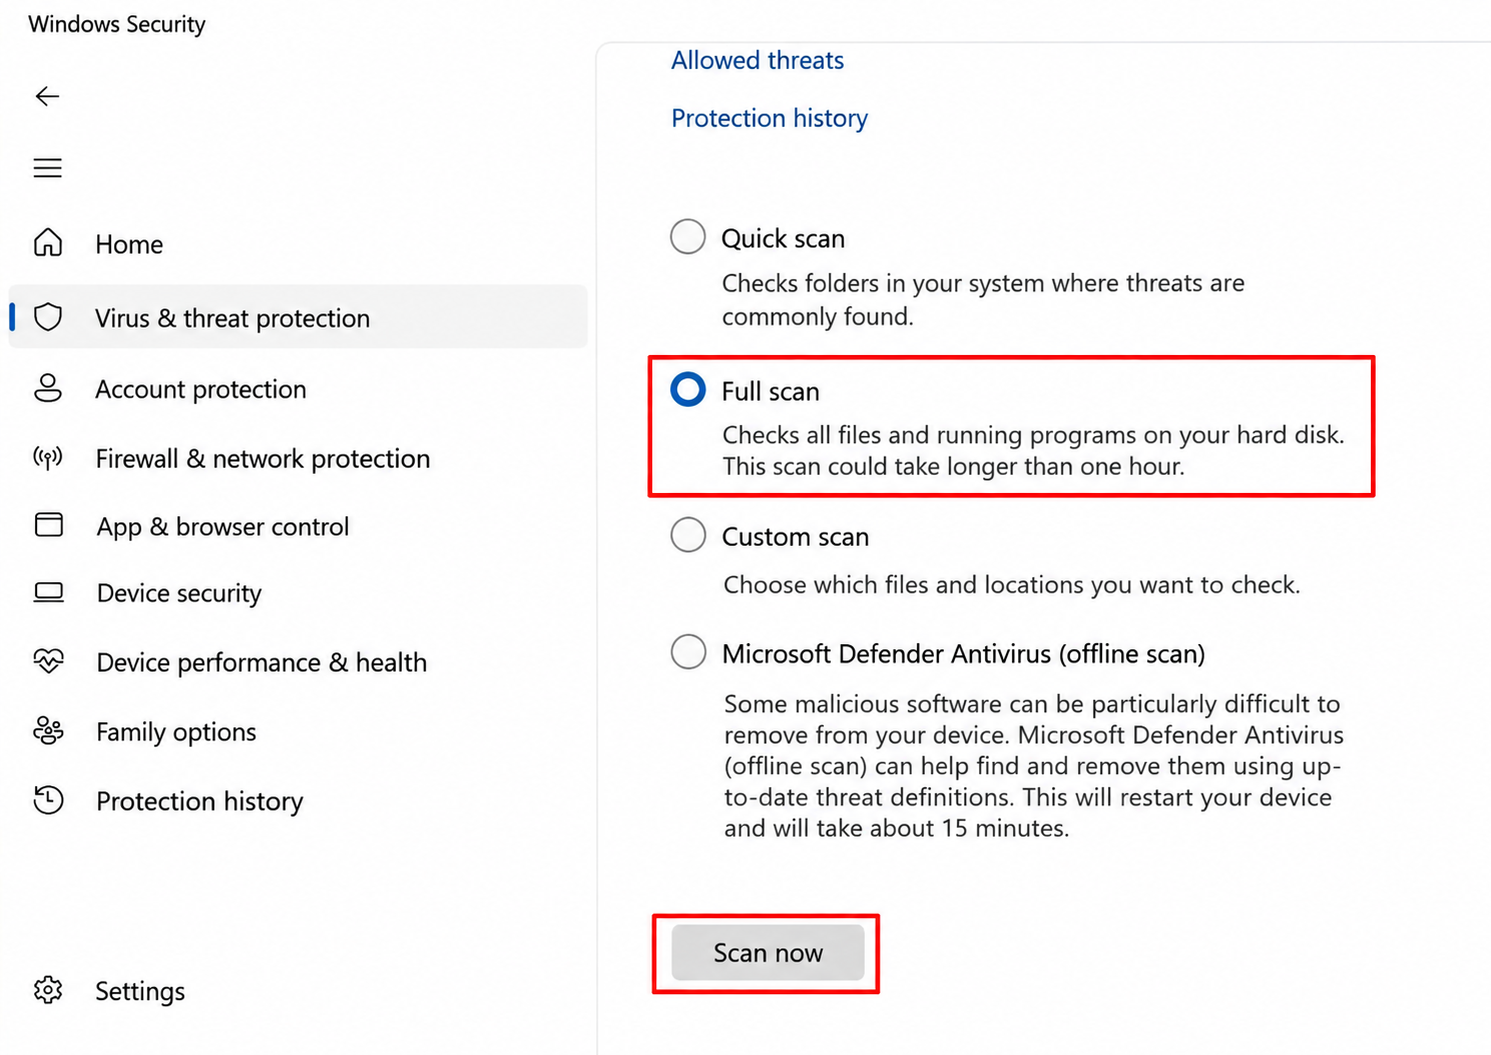
Wait for Windows Security to complete the scan. Then, follow the recommended actions if any threats are detected.
Method 4: Repair Windows 11 System Files
Corrupted or missing Windows system files can sometimes cause unexpected system behaviour, including performance problems. You can use the Deployment Image Servicing and Management (DISM) tool and System File Checker (SFC) to repair these files.
1. Press Win + X and select Terminal in Admin mode. Click yes in User Account Control.
2. Enter the following command and press Enter: DISM.exe /Online /Cleanup-image /Restorehealth
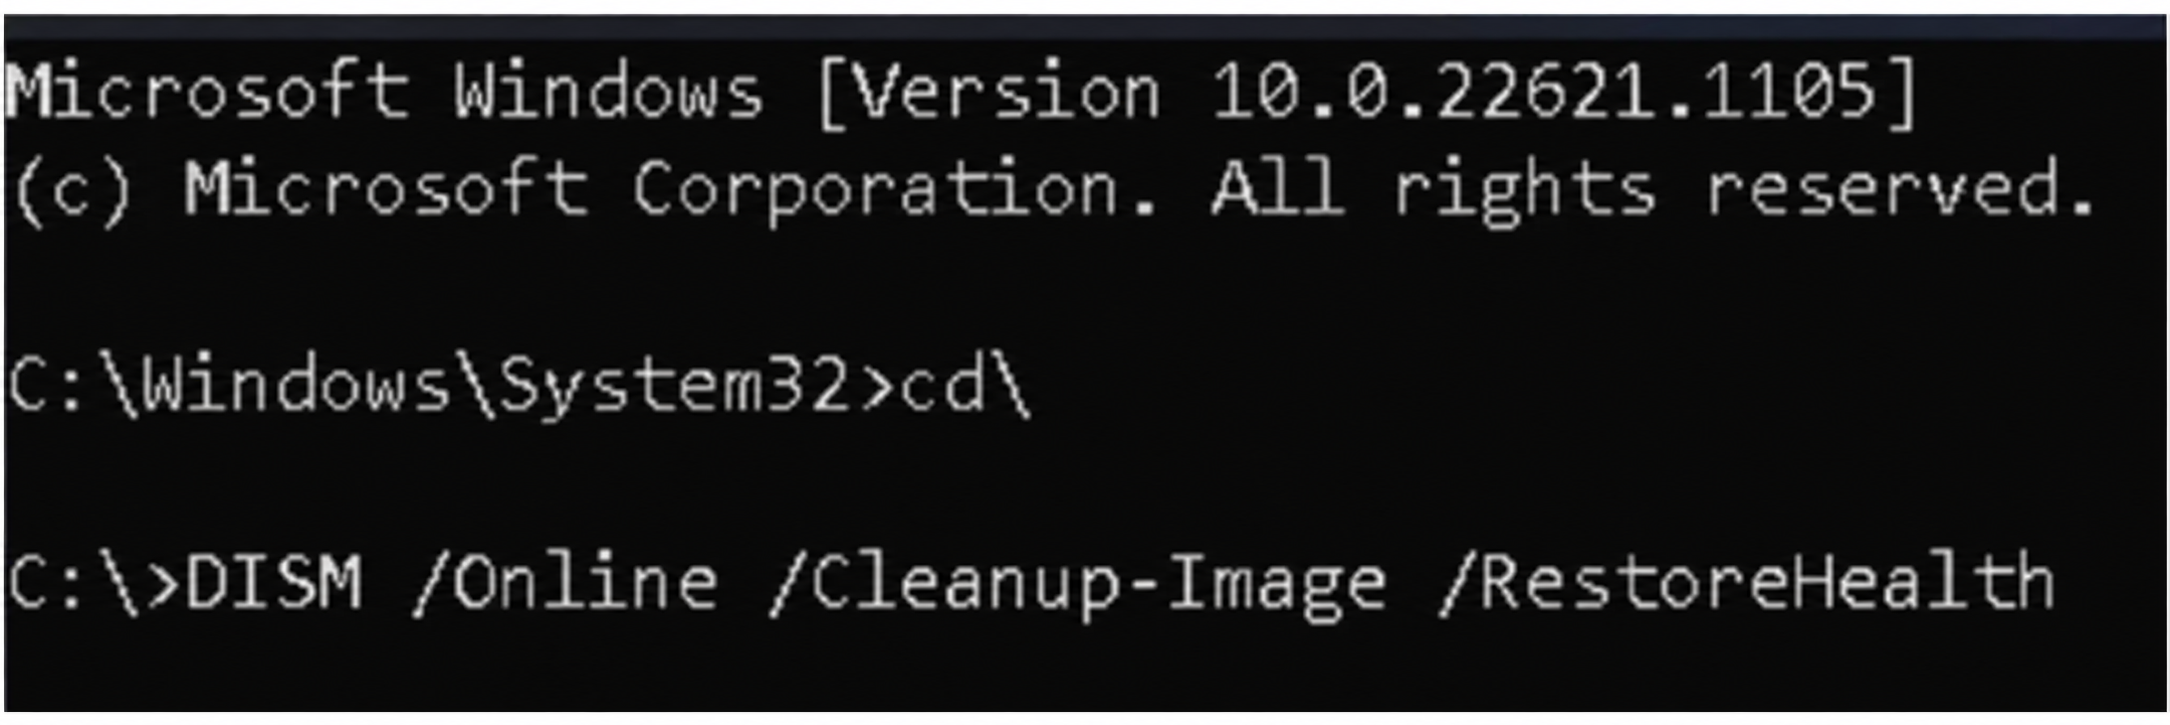 3. Once that operation completes, enter this command:
sfc /scannow
Now, restart your computer. These commands check and repair the Windows component store and protected system files.
Method 5: Perform Clean Boot
When your CPU usage remains at 100%, a third-party application or background service may be causing a conflict. Performing a clean boot starts Windows with essential drivers and startup programs, helping you remove the problematic software/app.
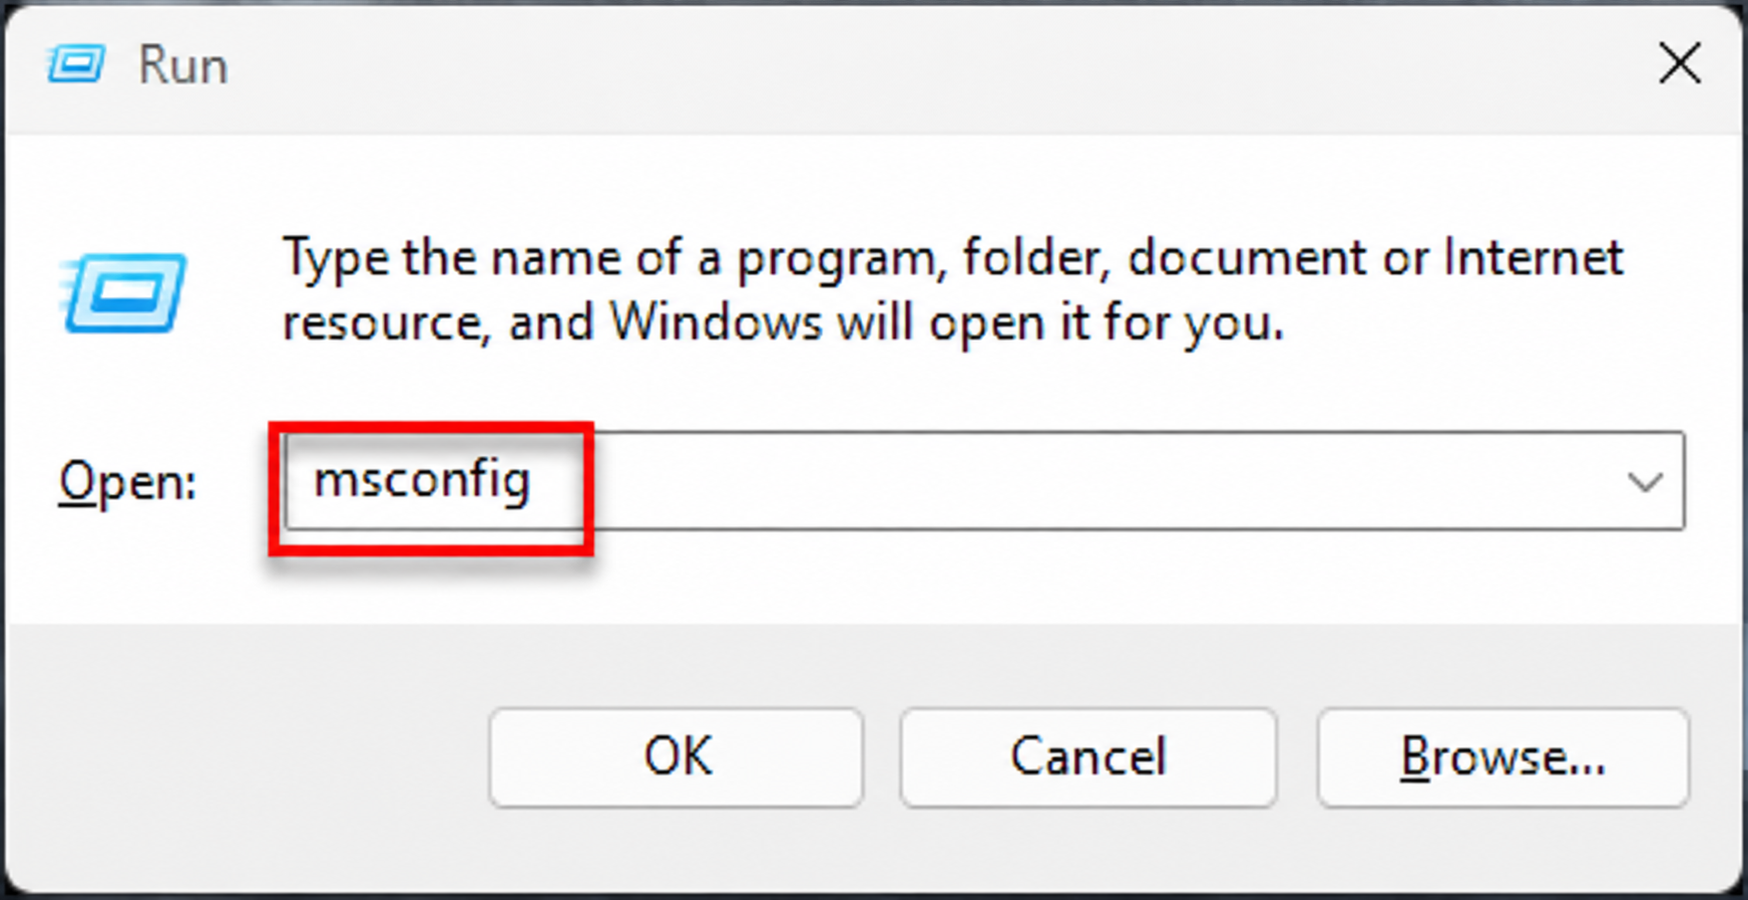
1. Press Win + R to open the Run dialog box. Type msconfig and press Enter.
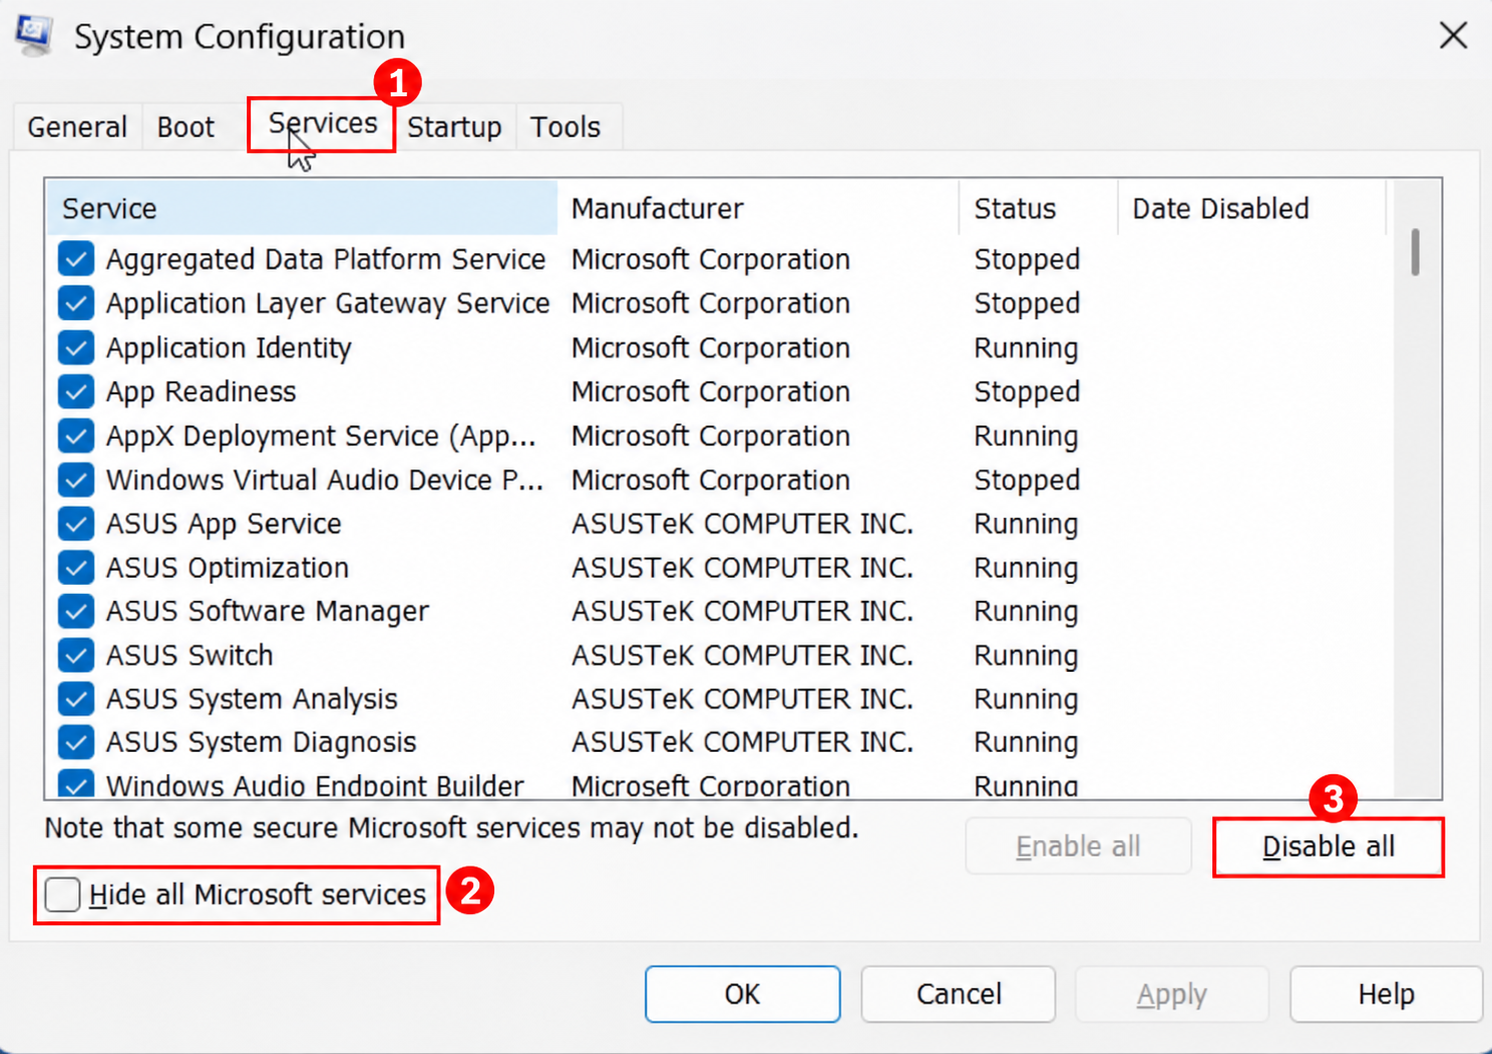
2. Now, select the Services tab. There, check on Hide all Microsoft services.
3. Click Disable all.
4. Then, select the Startup tab and click Open Task Manager.
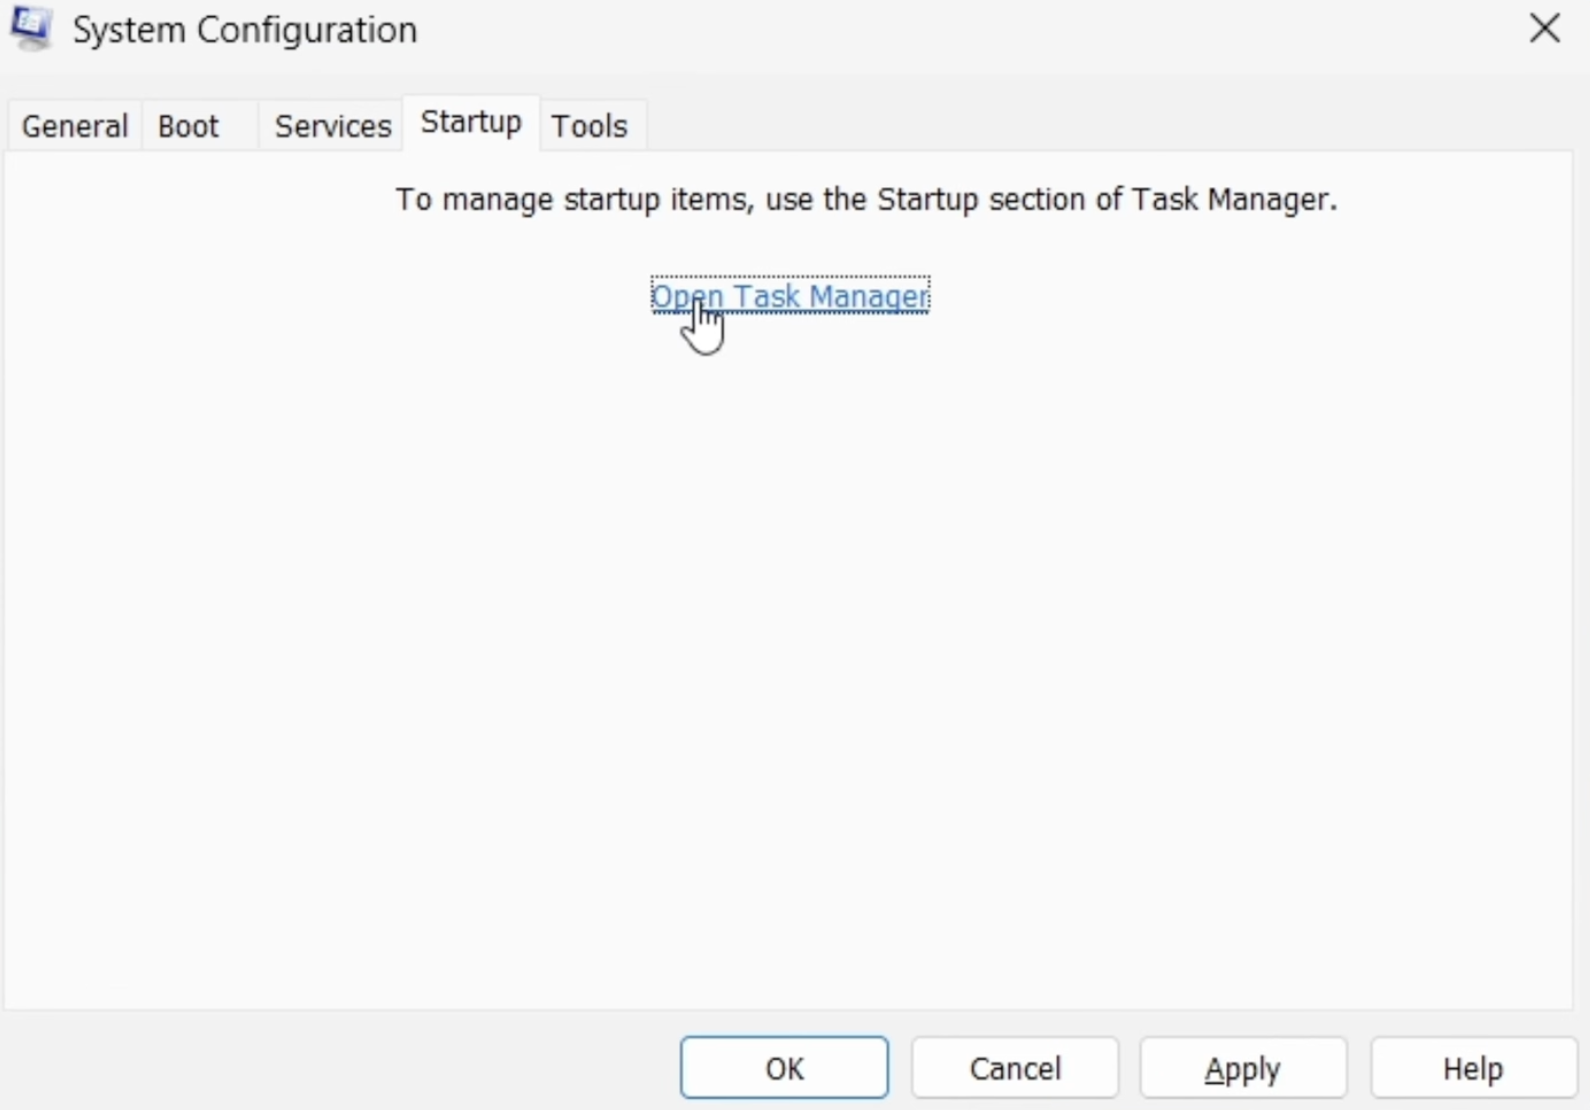
5. Here, you must disable the enabled startup applications. Then, Close Task Manager and click OK in the System Configuration window.
Once you restart your computer, the problem would have disappeared.

That’s it!