
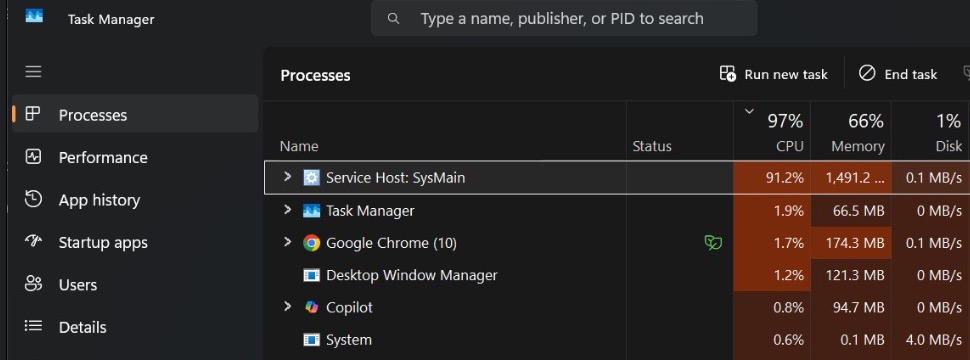
If you’re on Windows 11 and you discovered that SysMain service causing high CPU & memory usage, this guide is for you. Because of this, you PC may become slow, laggy, or unresponsive without any absolute reason. This seems to be a common problem with SysMain service on many systems. However, SysMain was designed to improve performance of system but it can sometimes have the opposite effect and may make system lagging.
Page Contents
What Is SysMain In Windows 11?
SysMain, previously known as Superfetch, is a built-in Windows service maintains and improves system performance over the time. This can help programs open faster.
However, on some systems, SysMain may consume excessive resources, leading to high CPU usage and increased memory consumption. This overall creates a system lagging issue.
Solved: SysMain High CPU & Memory Usage In Windows 11
Solution 1: Disable SysMain Using Command Prompt
As soon as you discovered issues with SysMain, one of the quickest ways to resolve is to stop the service.
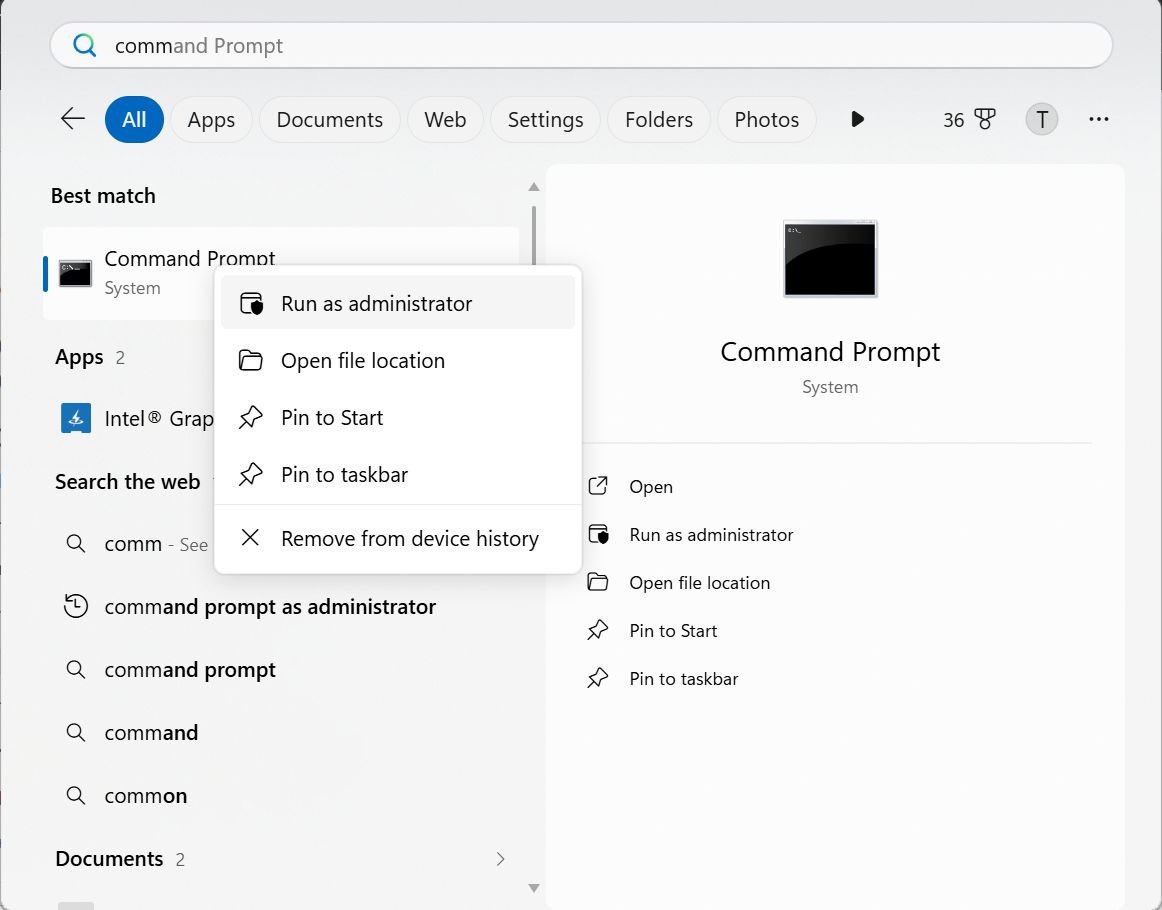
1. Press Windows + S and search for Command Prompt.
2. Right-click Command Prompt and select Run as administrator.
3. Type the following command and press Enter:
sc stop "SysMain" & sc config "SysMain" start=disabled
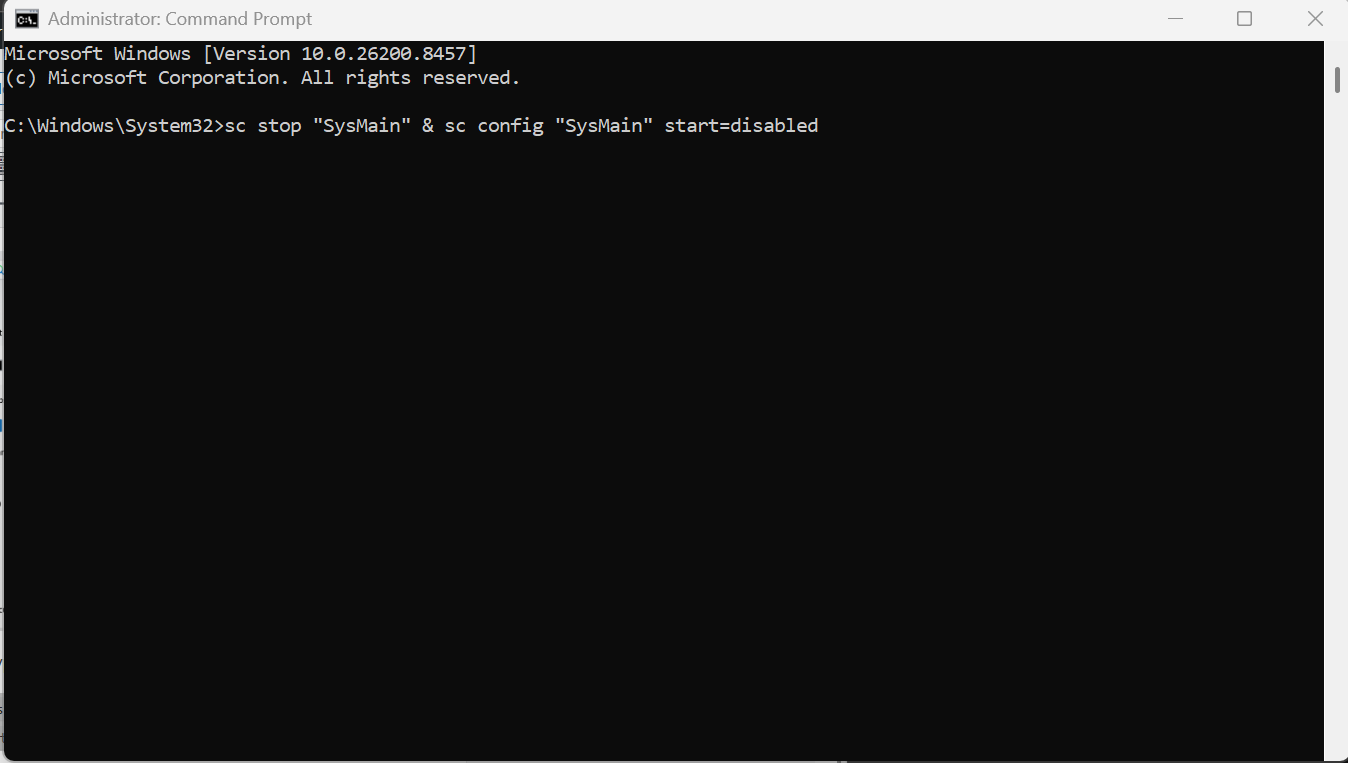
4. Restart your computer.
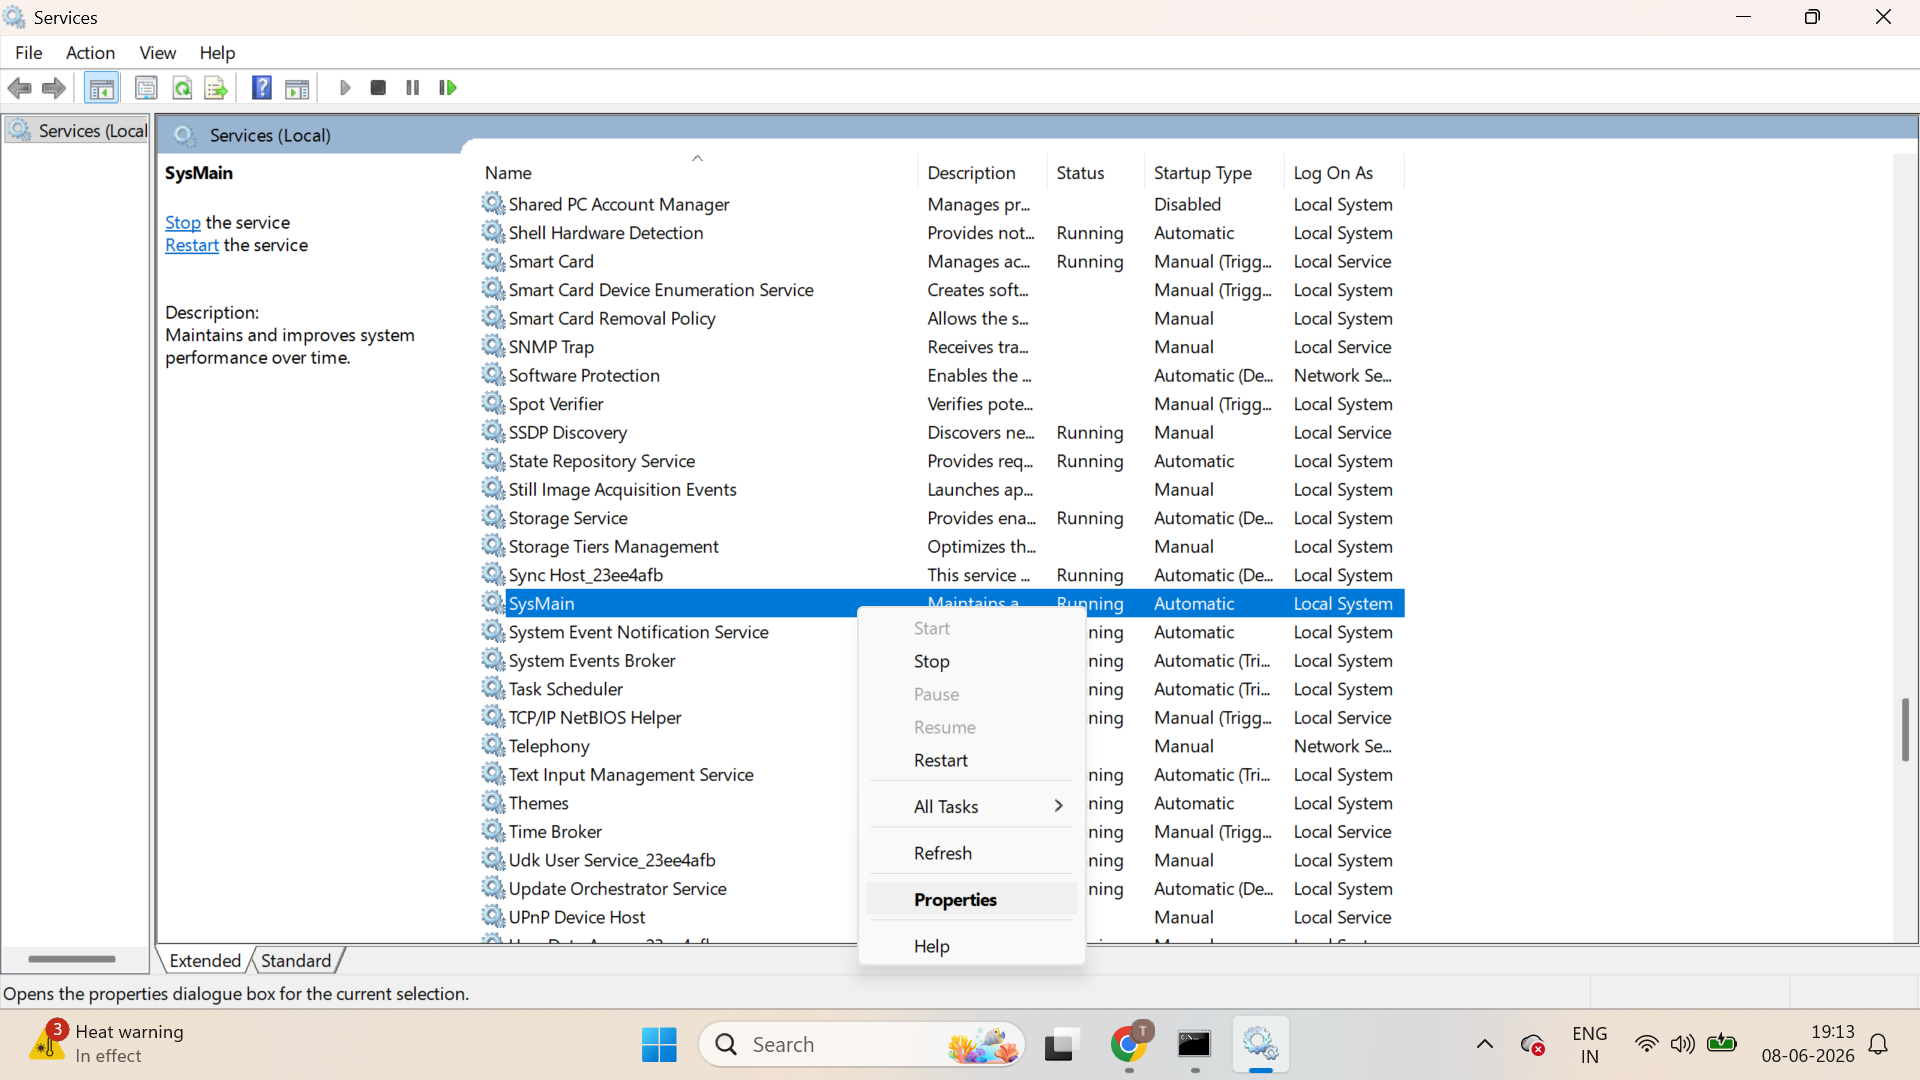
Solution 2: Turn Off SysMain from Services
You can also disable the service through Windows Services.
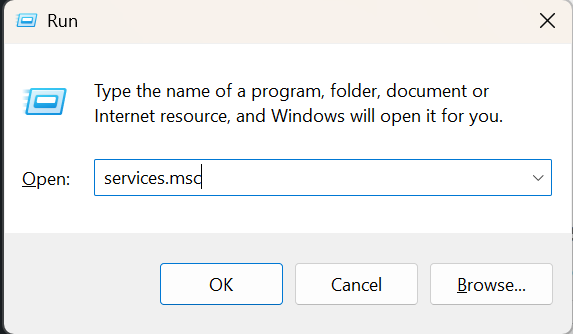
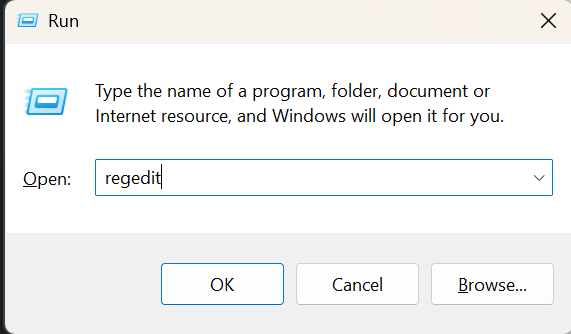
1. Press Windows + R to open Run.
2. Type services.msc and click OK.
3. Locate SysMain in the list.
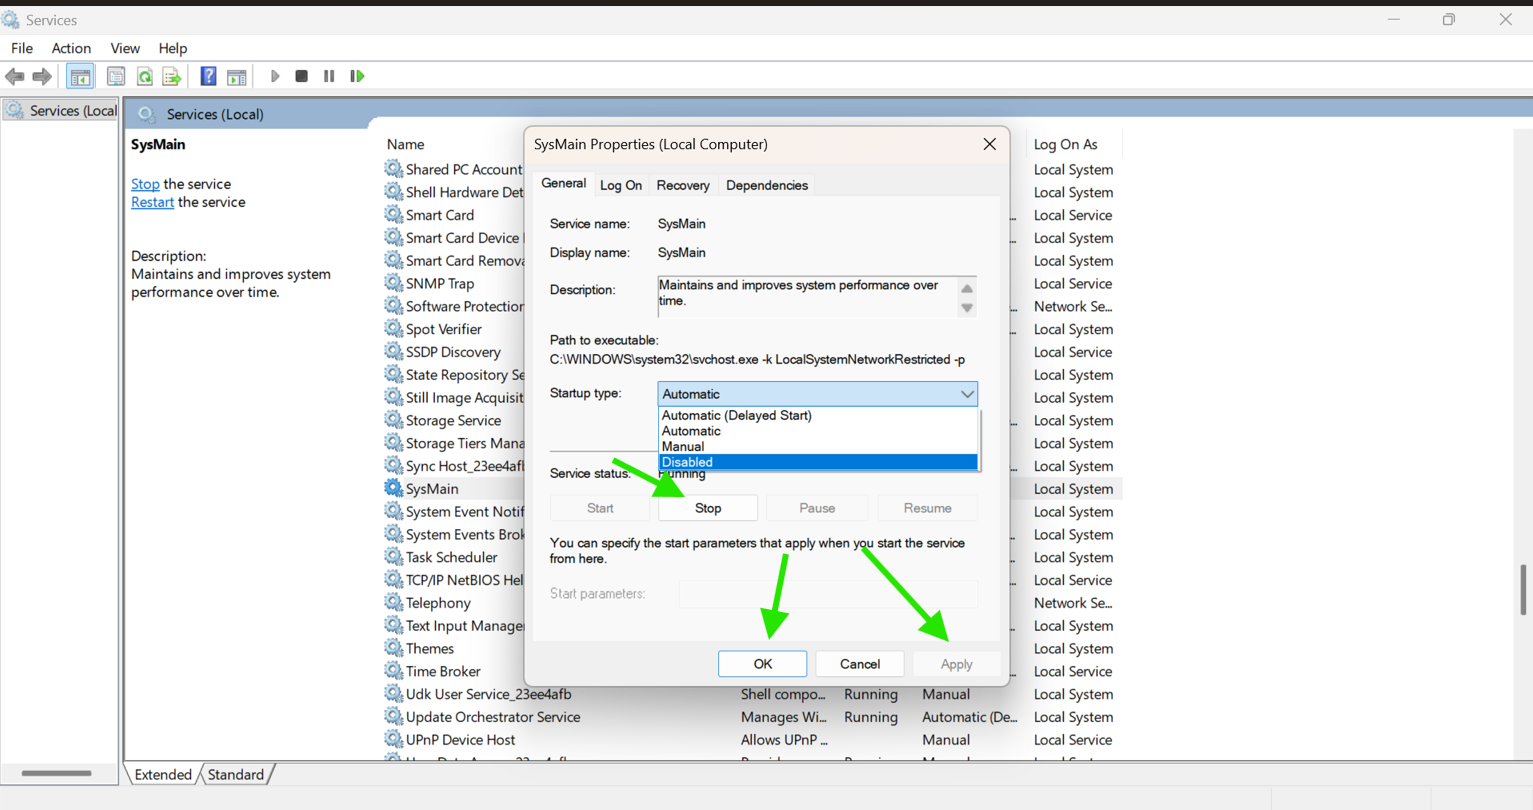
4. Right-click it and select Properties.
5. Set Startup type to Disabled.
6. Click Stop under Service Status.
7. Select Apply and then OK.
8. Restart your PC.
Fix 3: Disable SysMain Via Registry Editor
If the issue continues and SysMain enables itself, disable it using the Registry Editor.
1. Press Windows + R, type regedit, and press Enter.
2. Navigate to:
HKEY_LOCAL_MACHINE\SYSTEM\CurrentControlSet\Services\SysMain
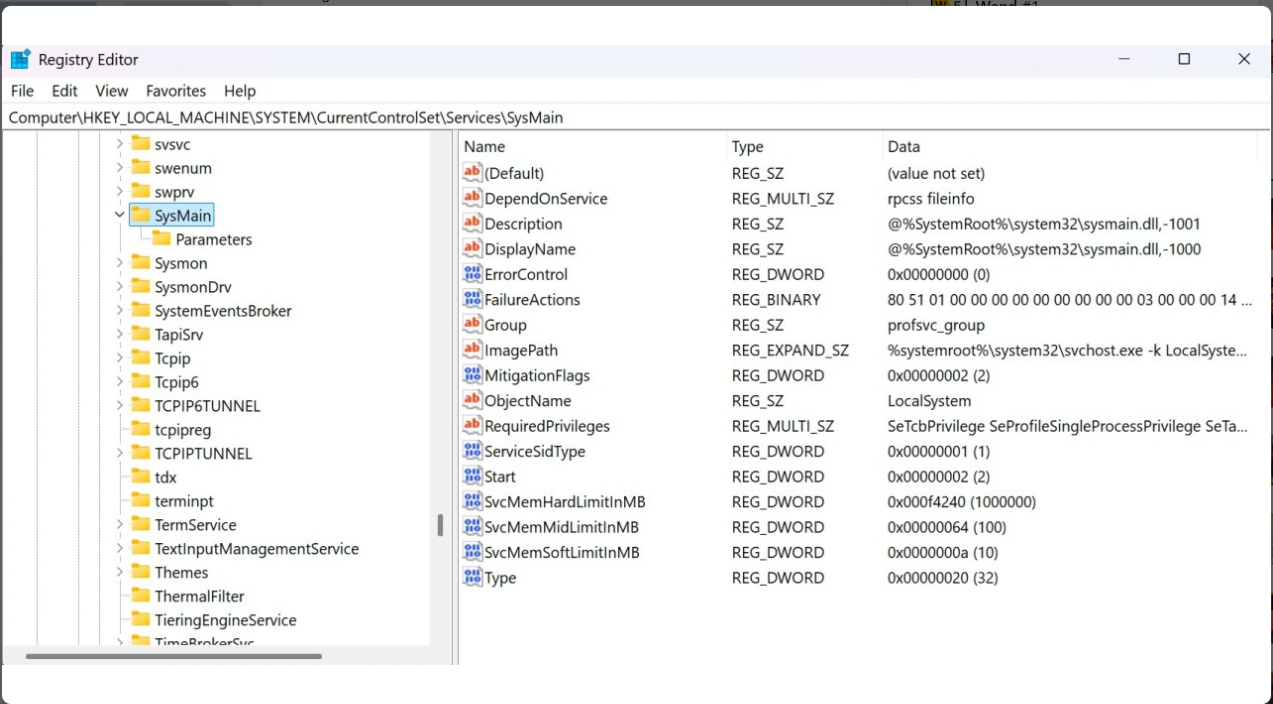
3. Double click on Start.
4. Change the Value data to 4.
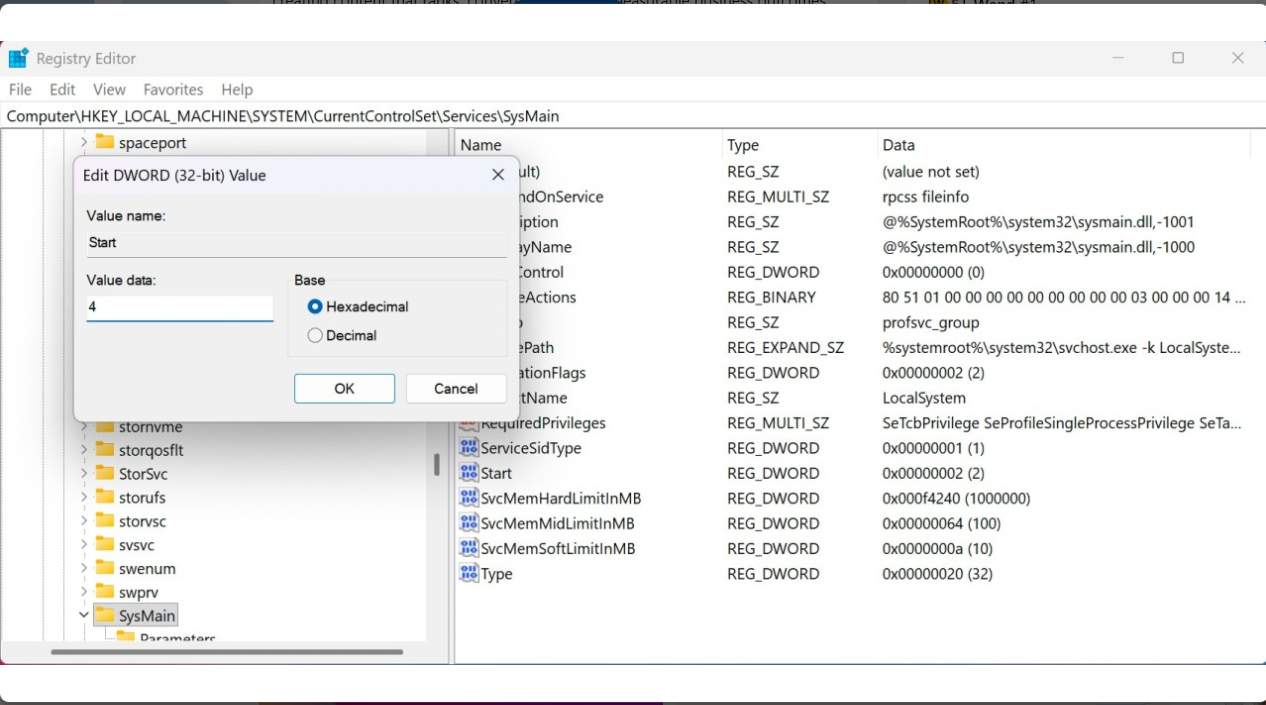
5. Click OK and close Registry Editor, restart your computer.
SysMain is not a mandatory Windows 11 service to maintain system performance. However, if it causes high CPU or memory usage, disabling it can improve system performance.
You can try out the solutions above, and see if they helps.
Comment below if you have any more questions!


![SecurityHealthSystray.exe High CPU / Disk / Memory Usage [Fixes]](https://www.kapilarya.com/assets/Windows-Defender-768x669.png)

