The Voice Activation feature in Windows 11 helps you to work with apps using your voice. The apps can respond to your spoken keywords while using the Voice Activation feature. For all the individual apps, they should have their own permission before they start listening your spoken keywords. In this guide, we will see how you can disable Voice Activation when with device is locked in Windows 11.
Page Contents
Disable Voice Activation when device is locked in Windows 11
Well, you can use following different methods to disable Voice Activation in Windows 11, when your devices in locked state.
Method 1: Using Settings app
1. Right click on the Start button and select Settings.
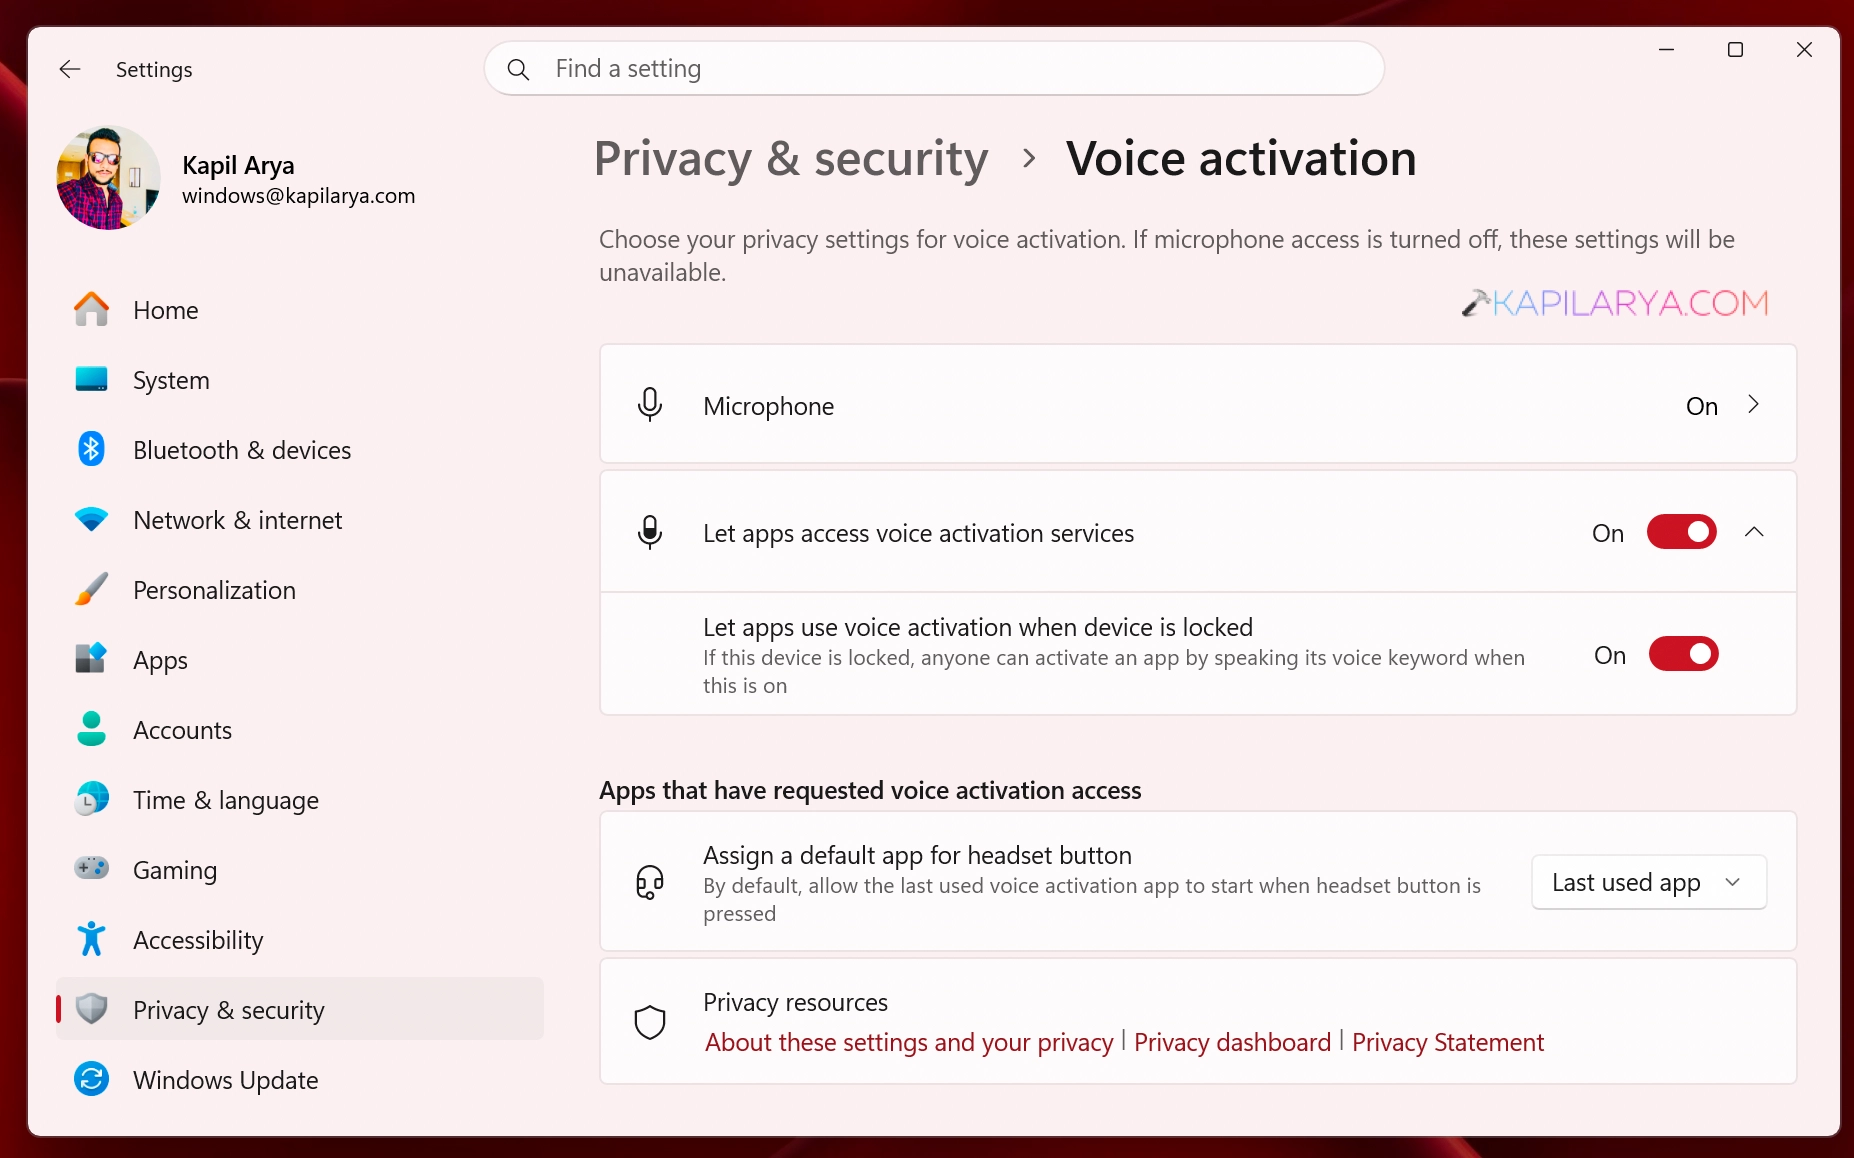
2. In the Settings app, go to Privacy & security > Voice activation.
3. When you are on the Voice activation page, expand Let apps access voice activation services.
4. Then you can turn off the Let apps use voice activation when device is locked option.
Method 2: Using Registry
1. Right click on the start button and select Run.
2. In Run, type regedit and click OK.
3. In the registry editor window, navigate here:
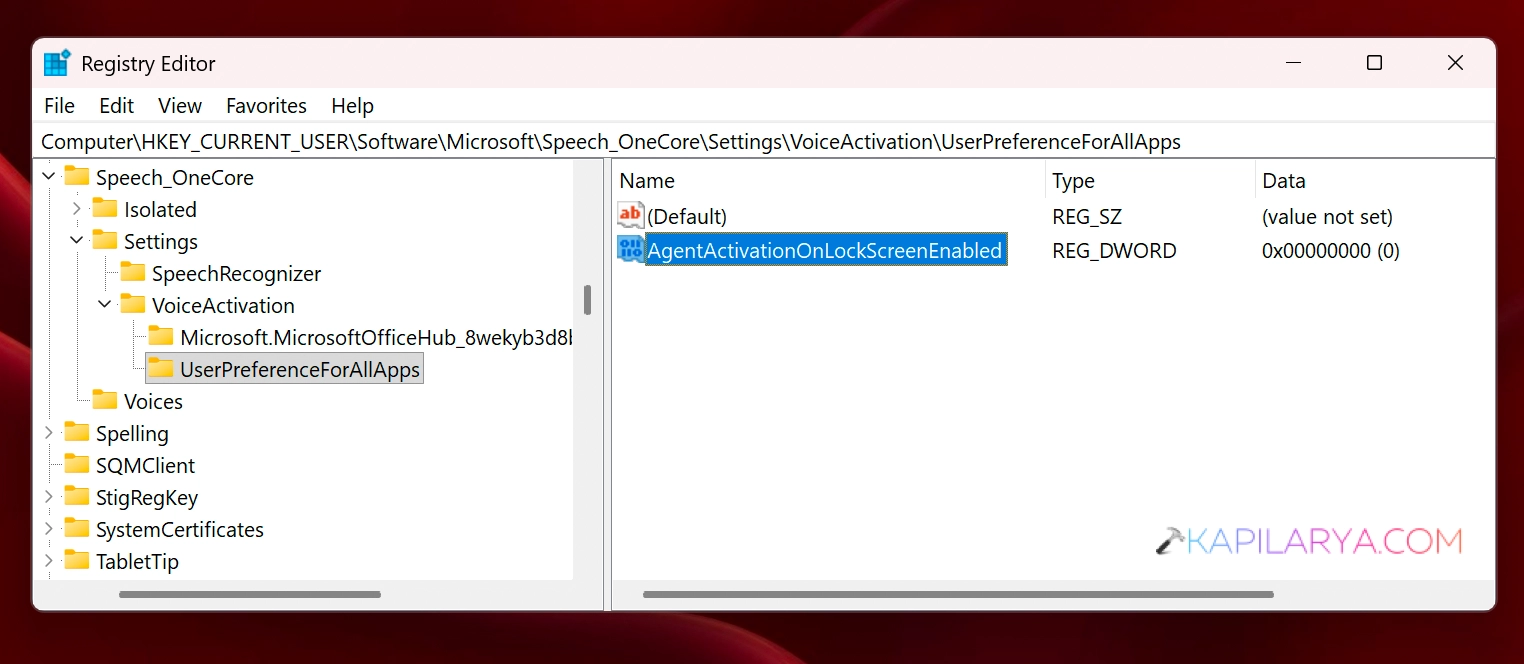
HKEY_CURRENT_USER\Software\Microsoft\Speech_OneCore\Settings\VoiceActivation\UserPreferenceForAllApps
4. In the corresponding right pane, create a new registry DWORD named AgentActivationOnLockScreenEnabled.
5. Set the value data for this newly created DWORD as 0.
Method 3: Using Group Policy
Note: Group Policy Editor is not available in basic Windows 11 Home edition. It is available for other editions such as Pro, Education, Enterprise.
1. Right click on the Start button and select Run.
2. In Run, type gpedit.msc and click OK.
3. In the Group Policy Editor window, navigate here:
Computer Configuration > Administrative Templates > Windows Components > App Privacy
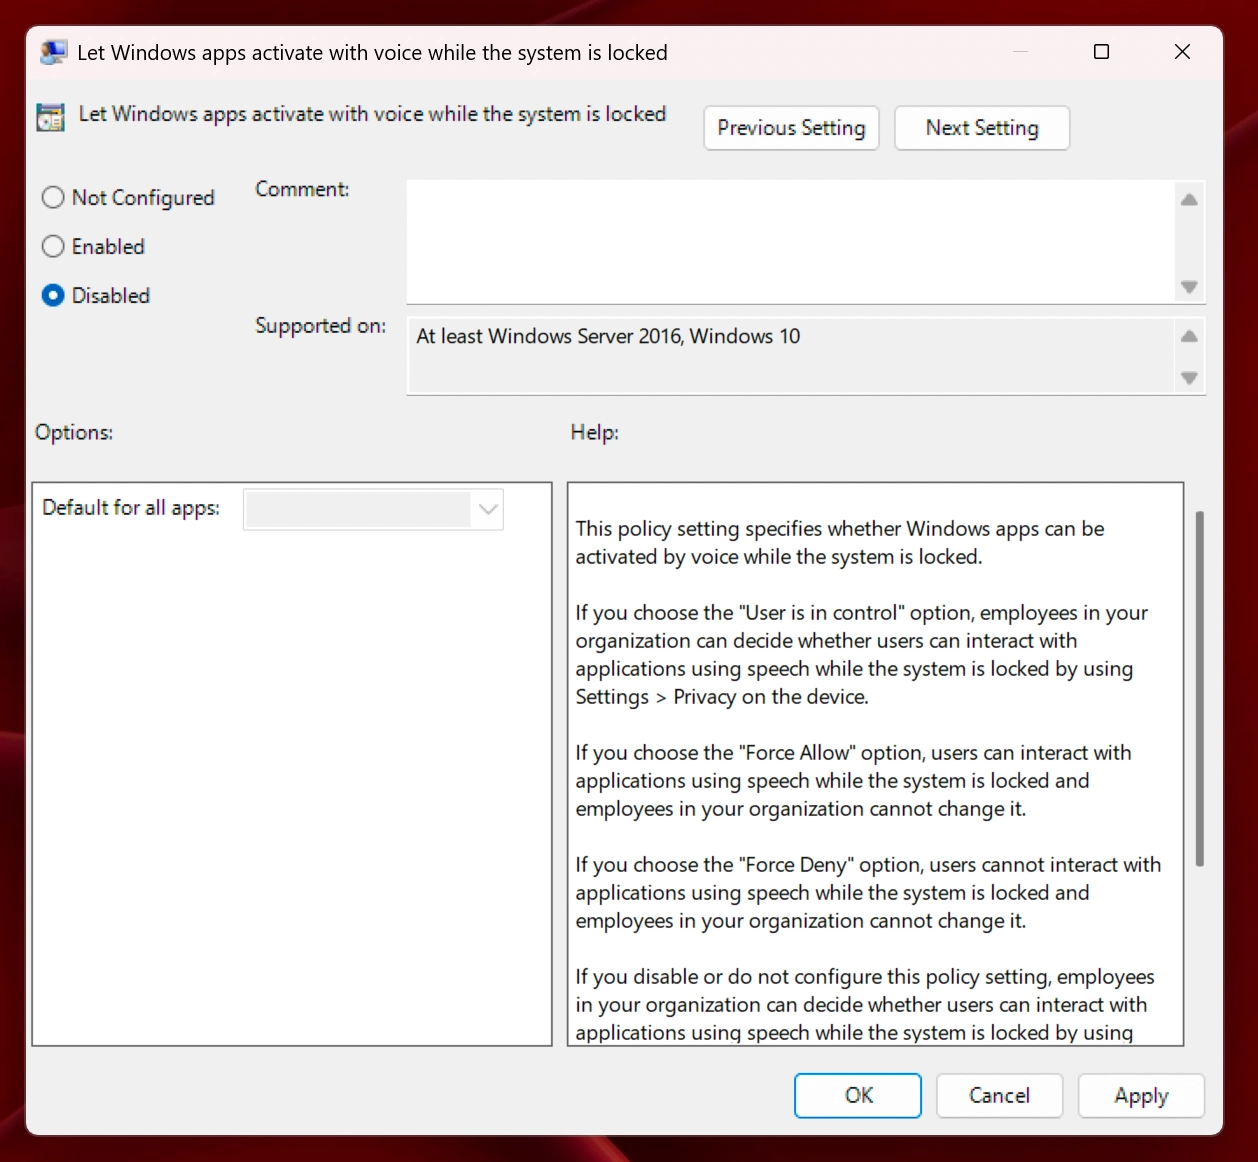
4. In the right pane of App Privacy folder, locate the policy setting named Let Windows apps activate with voice while the system is locked. Simply double click on this policy setting to modify its status.
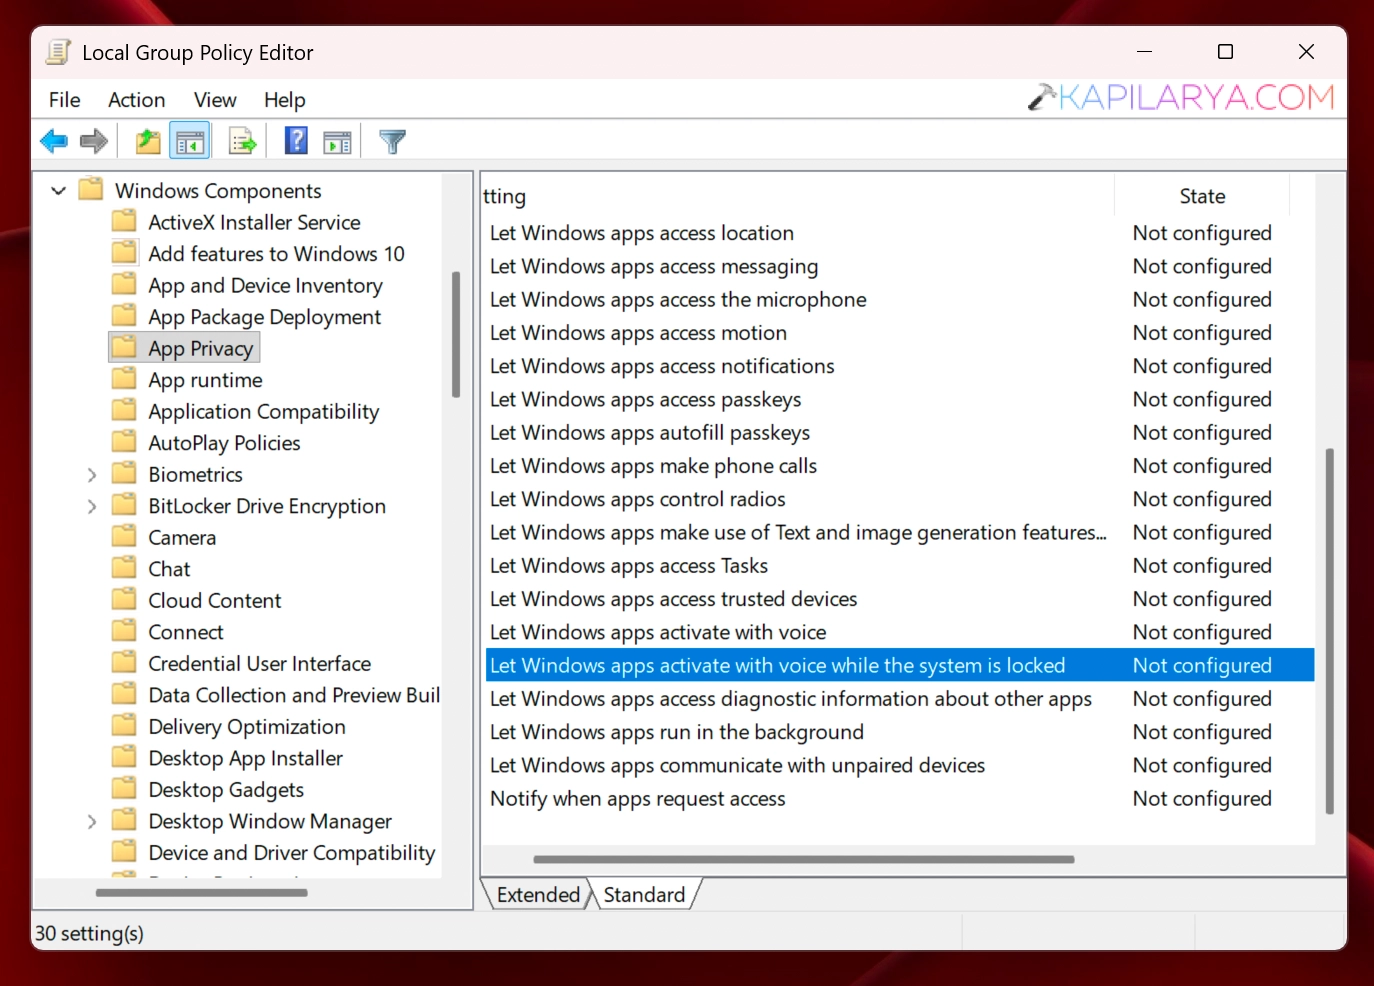
5. You can now set it to Disabled and click Apply, followed by OK.
6. Close the Group Policy Editor and restart your system to make the changes effective.
That’s it!