If you’re looking for how to delay the Windows 11 26H2 update, you can configure Windows Update to target version 25H2 instead of turning off updates completely.
As a result, you can stay on your current version while continuing to receive security and quality updates, as long as it remains supported.
Here’s how you can do it.
Page Contents
Check Your Current Windows Edition and Version
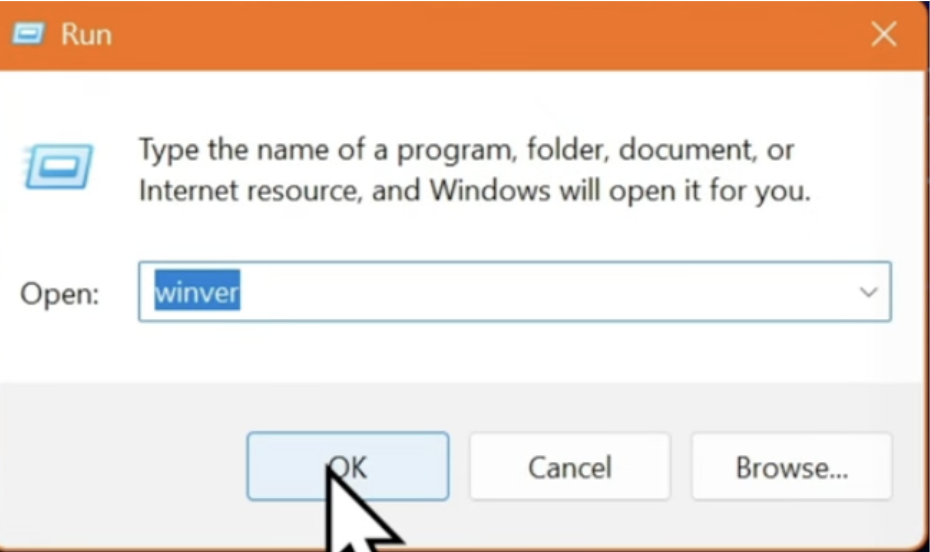
1. To begin, press Windows + R to open the Run dialog box.
2. Next, type winver and press “OK”.
3. After running the command, a window will appear showing the Windows edition and version your PC is currently running.
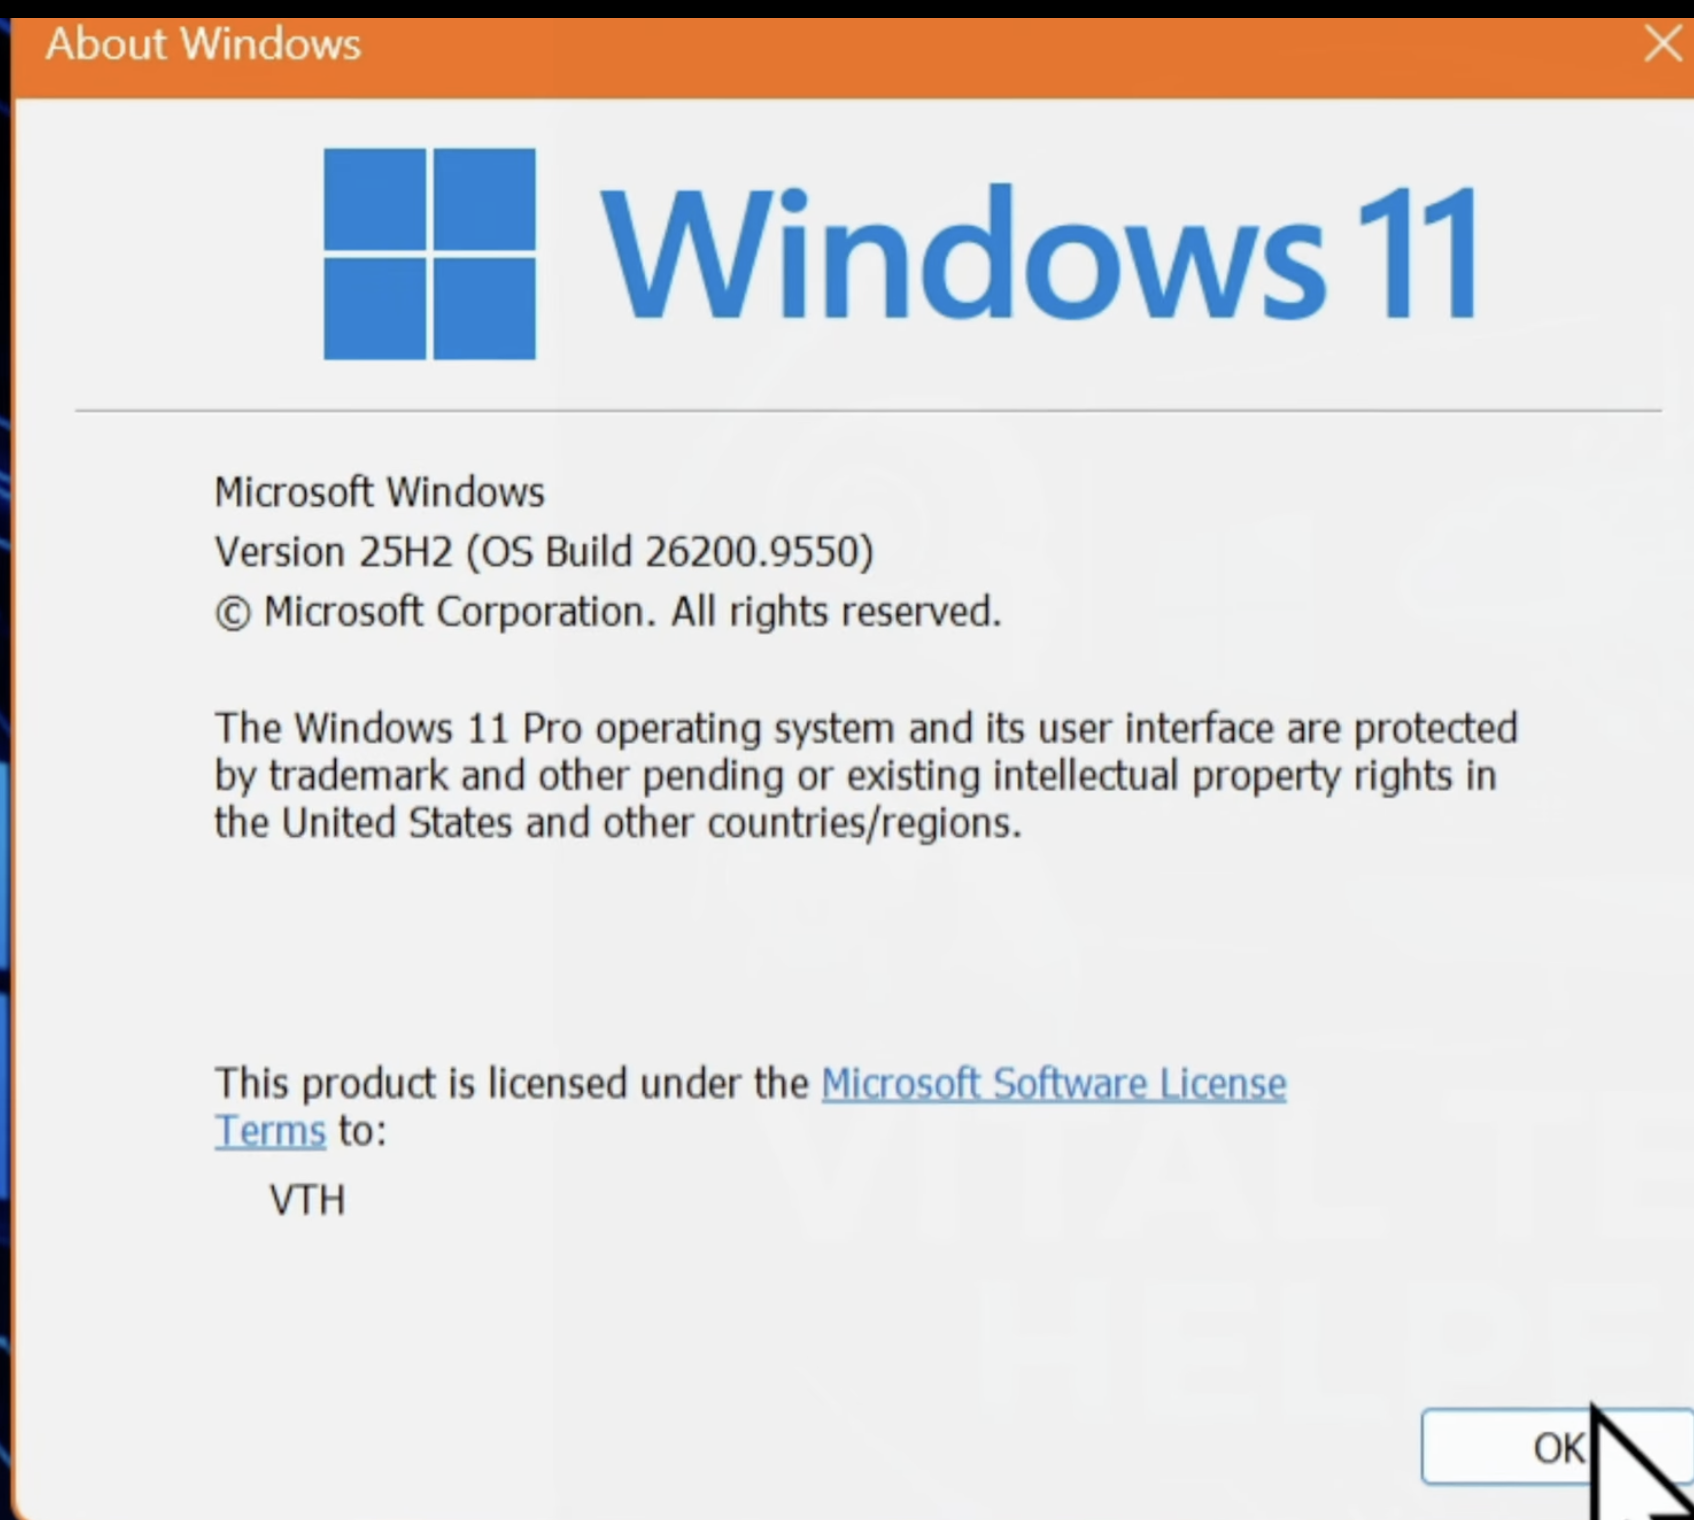
First, check your Windows edition to determine which of the following methods you can use:
- Use the Group Policy method explained in Method 1 if your PC runs Windows 11 Pro, Enterprise, or Education.
- Use the Registry Editor method explained in Method 2 if your PC runs Windows 11 Home. This method works with all editions.
Method 1: Delay Windows 11 26H2 Update Using Group Policy
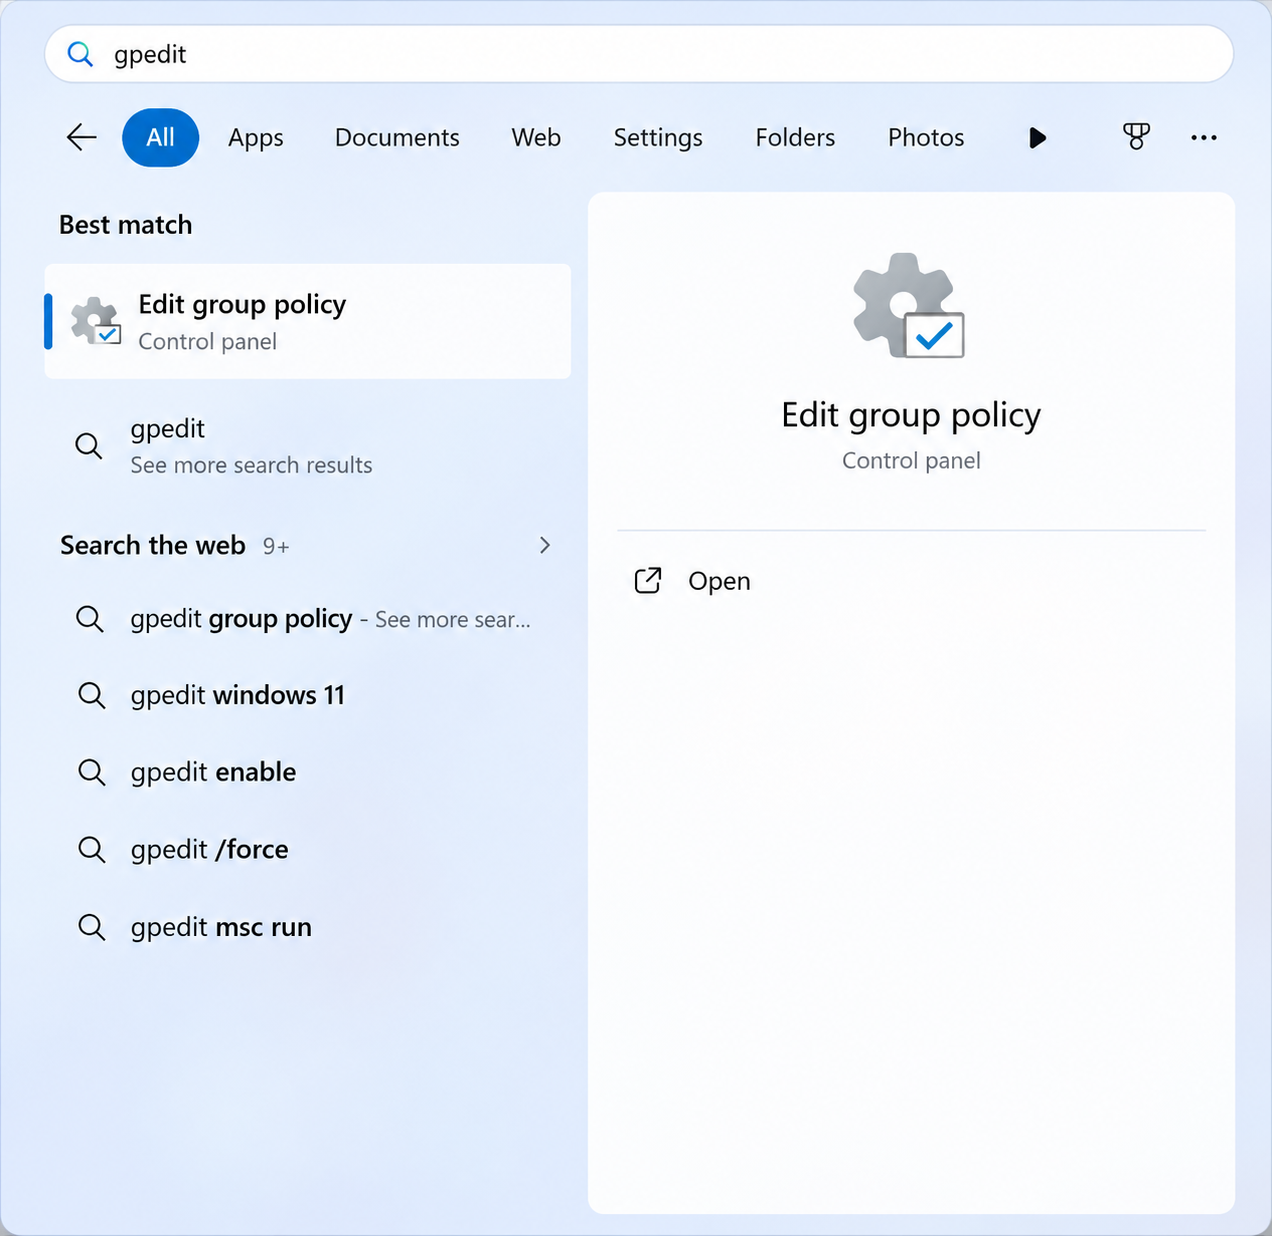
1. Open the Start menu and type gpedit.
2. Then, from the search results, select Edit group policy to open the Local Group Policy Editor.
3. In the Group Policy Editor, navigate to the following location:
Computer Configuration > Administrative Templates > Windows Components > Windows Update > Manage updates offered from Windows Update > Select the target feature update version
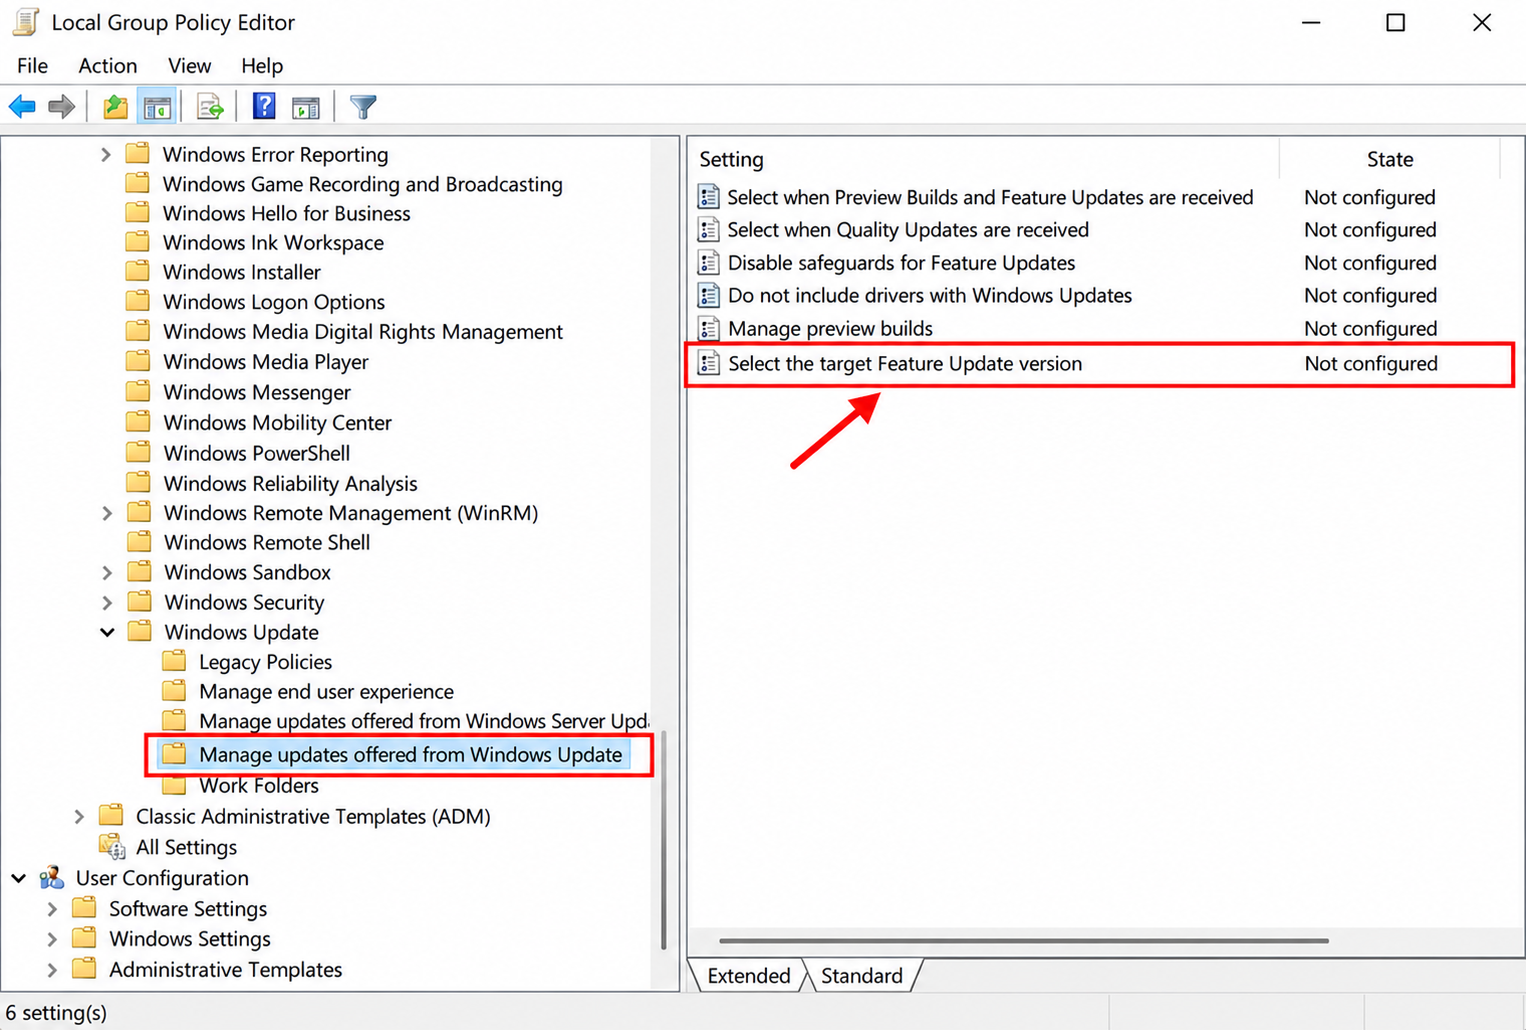
4. Once you’ve opened the policy, select Enabled.
5. Then, in the product version field, enter “Windows 11” under “Which product version would you like to receive feature updates for?”
6. Next, under Target Version for Feature Updates, enter “25H2.”
7. Afterward, click Apply and then click OK.
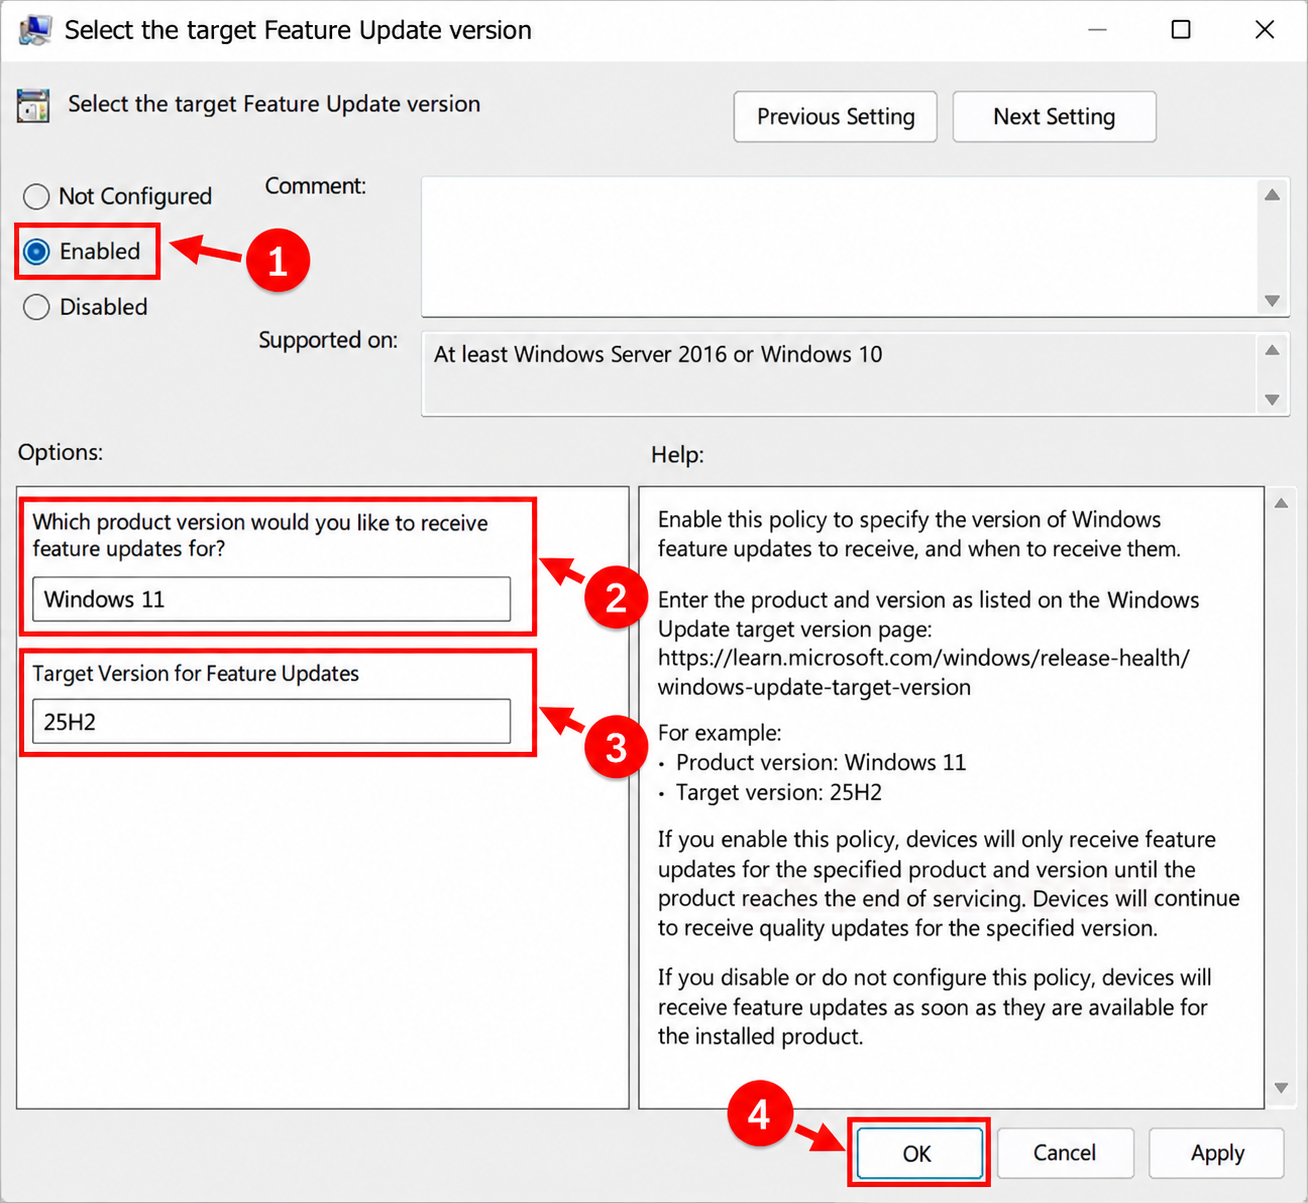
Finally, close the Group Policy Editor and restart your PC.
Once you’ve applied the settings and restarted your PC, Windows Update will target Windows 11 version 25H2 instead of offering a newer feature update.
Additionally, you’ll continue to receive regular security and quality updates for this version while it remains supported.
Method 2: Delay Windows 11 26H2 Update Using Registry Editor
If you’re looking for how to delay the Windows 11 26H2 update on a Windows 11 Home PC, you can configure the target-version settings through Registry Editor instead. This is because Windows 11 Home does not include the Local Group Policy Editor by default.
Note:Editing the registry incorrectly can cause Windows problems. Before proceeding, back up the registry key you’ll be changing and follow the steps carefully.
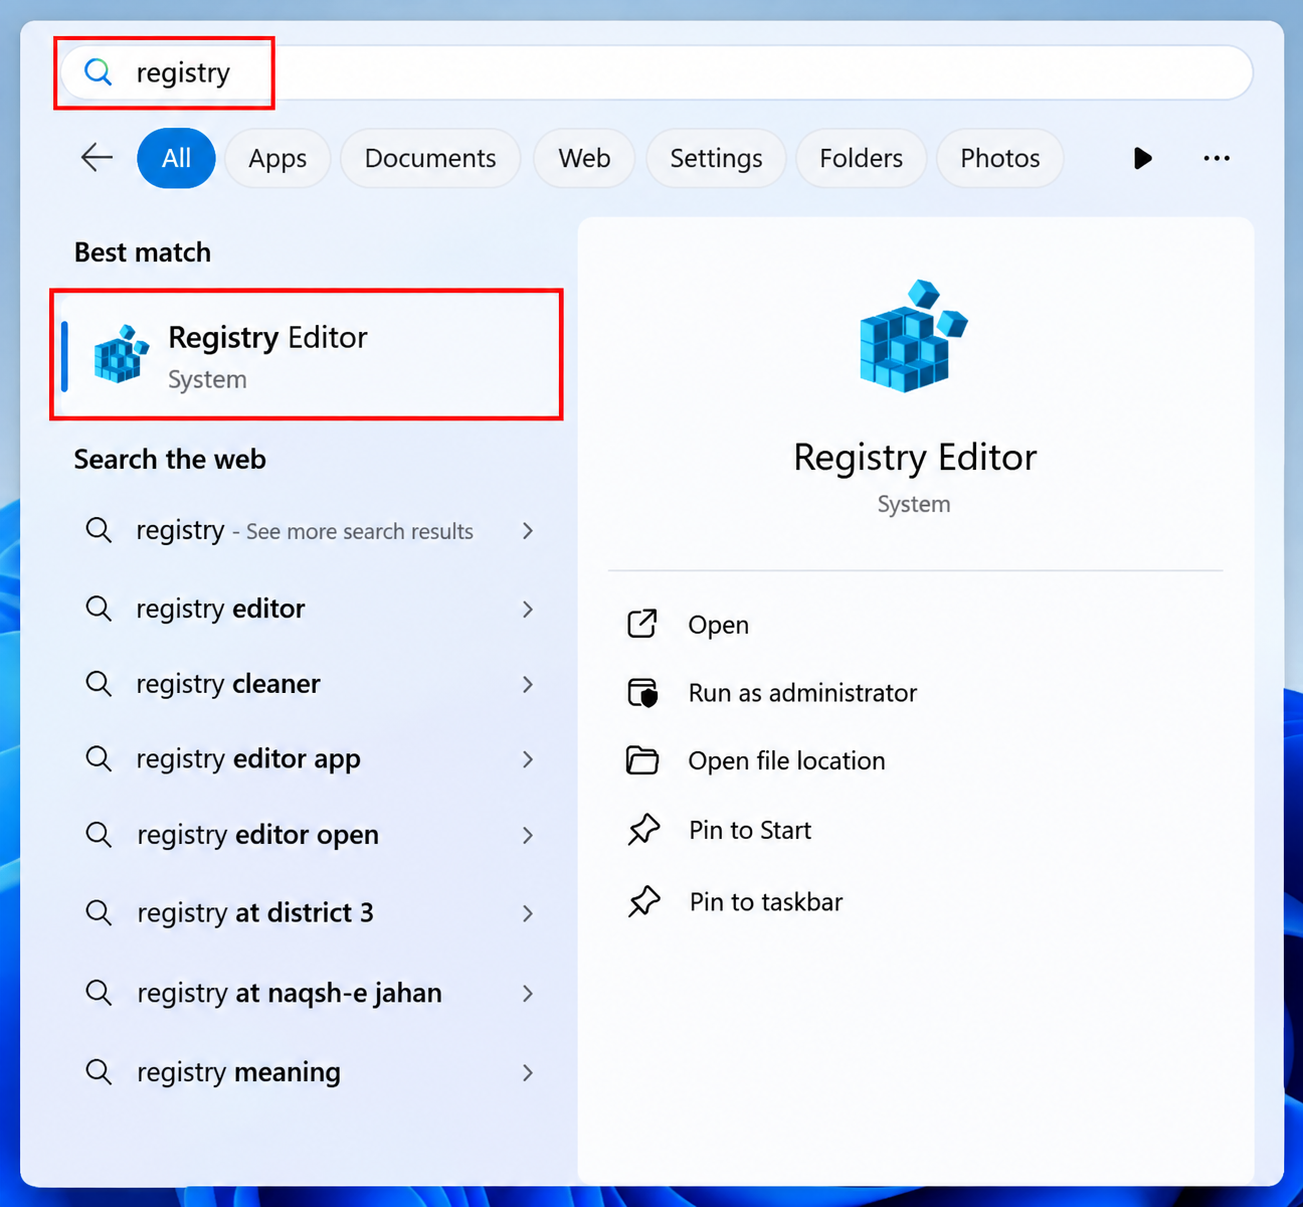
1. To get started, open the Start menu and type “registry”.
2. Select Registry Editor from the search results.
3. If User Account Control appears, click Yes.
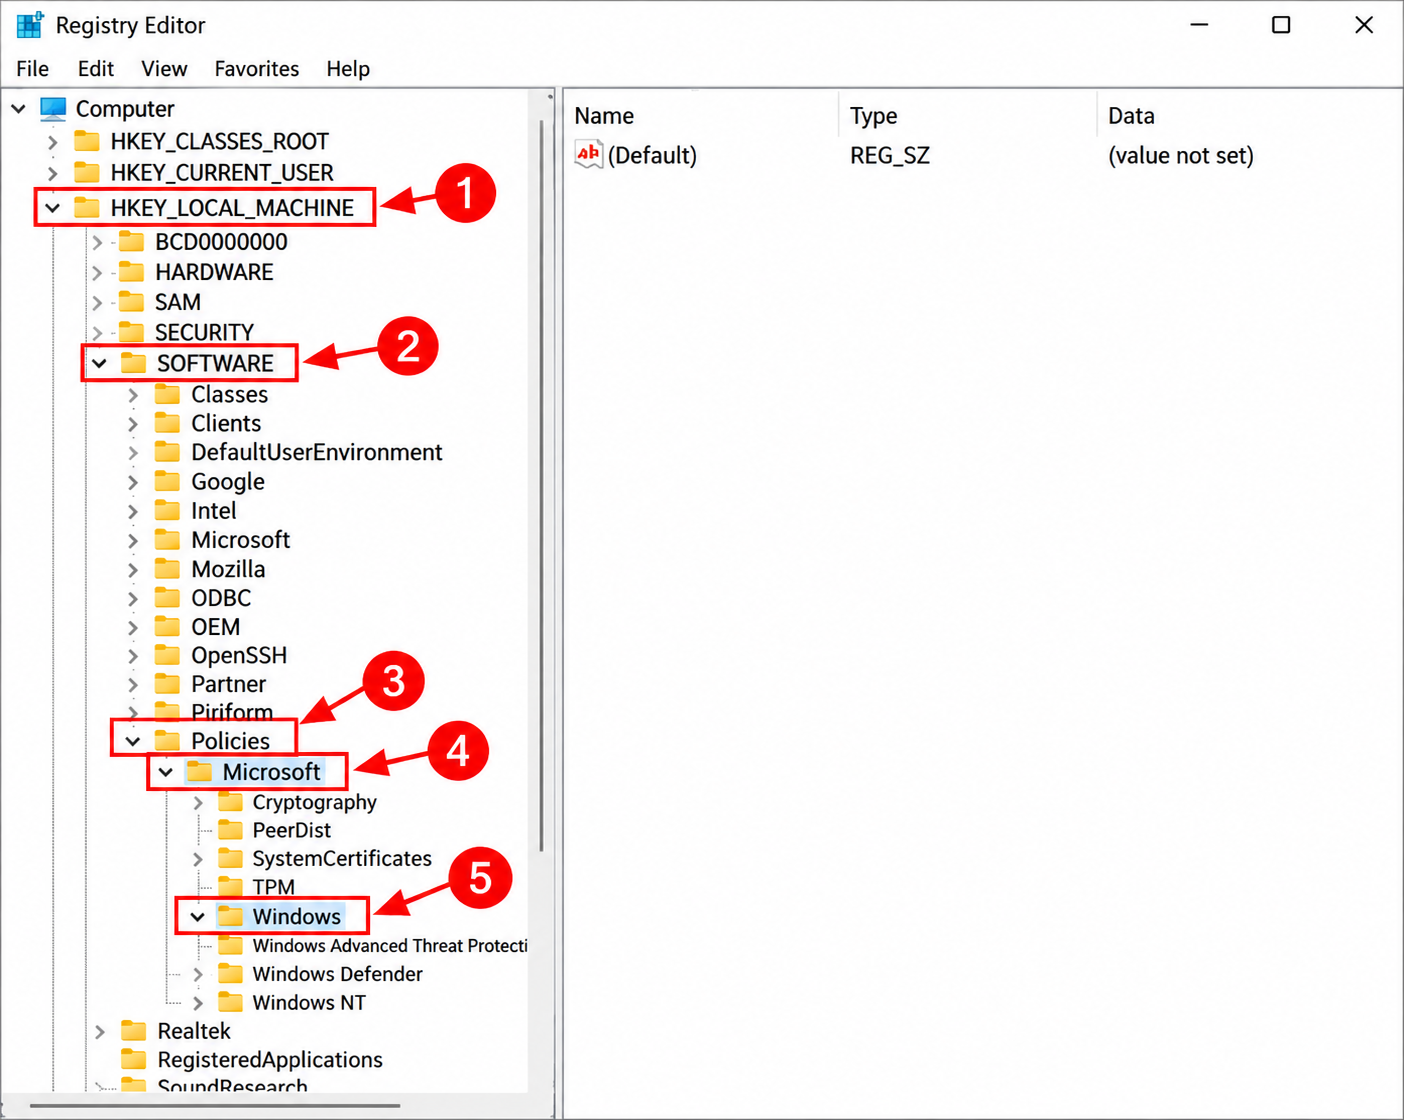
4. Once the Registry Editor opens, navigate to the following location:
HKEY_LOCAL_MACHINE\SOFTWARE\Policies\Microsoft\Windows
5. Look for a key named “WindowsUpdate.”
6. If the WindowsUpdate key already exists, select it. Otherwise, right-click the Windows key, select New > Key, and name the new key “WindowsUpdate.”
7. After selecting the key, add the three required values below.
Add the ProductVersion value
- Right-click an empty area in the right pane and select New > String Value.
- Name the value “ProductVersion.”
- Then, double-click the value and enter Windows 11 under Value data.
- Once you’ve entered the value data, click OK.
Set the TargetReleaseVersion value
- Similarly, right-click an empty area in the right pane and select New > DWORD (32-bit) Value.
- Name the value “TargetReleaseVersion.”
- After opening the value, set Value data to 1.
- Once you’ve entered the value data, click OK.
Specify the TargetReleaseVersionInfo value
- Right-click an empty area in the right pane and select New > String Value.
- Name the value “TargetReleaseVersionInfo.”
- Finally, double-click the value and enter 25H2 under Value data.
- Once you’ve entered the value data, click OK.
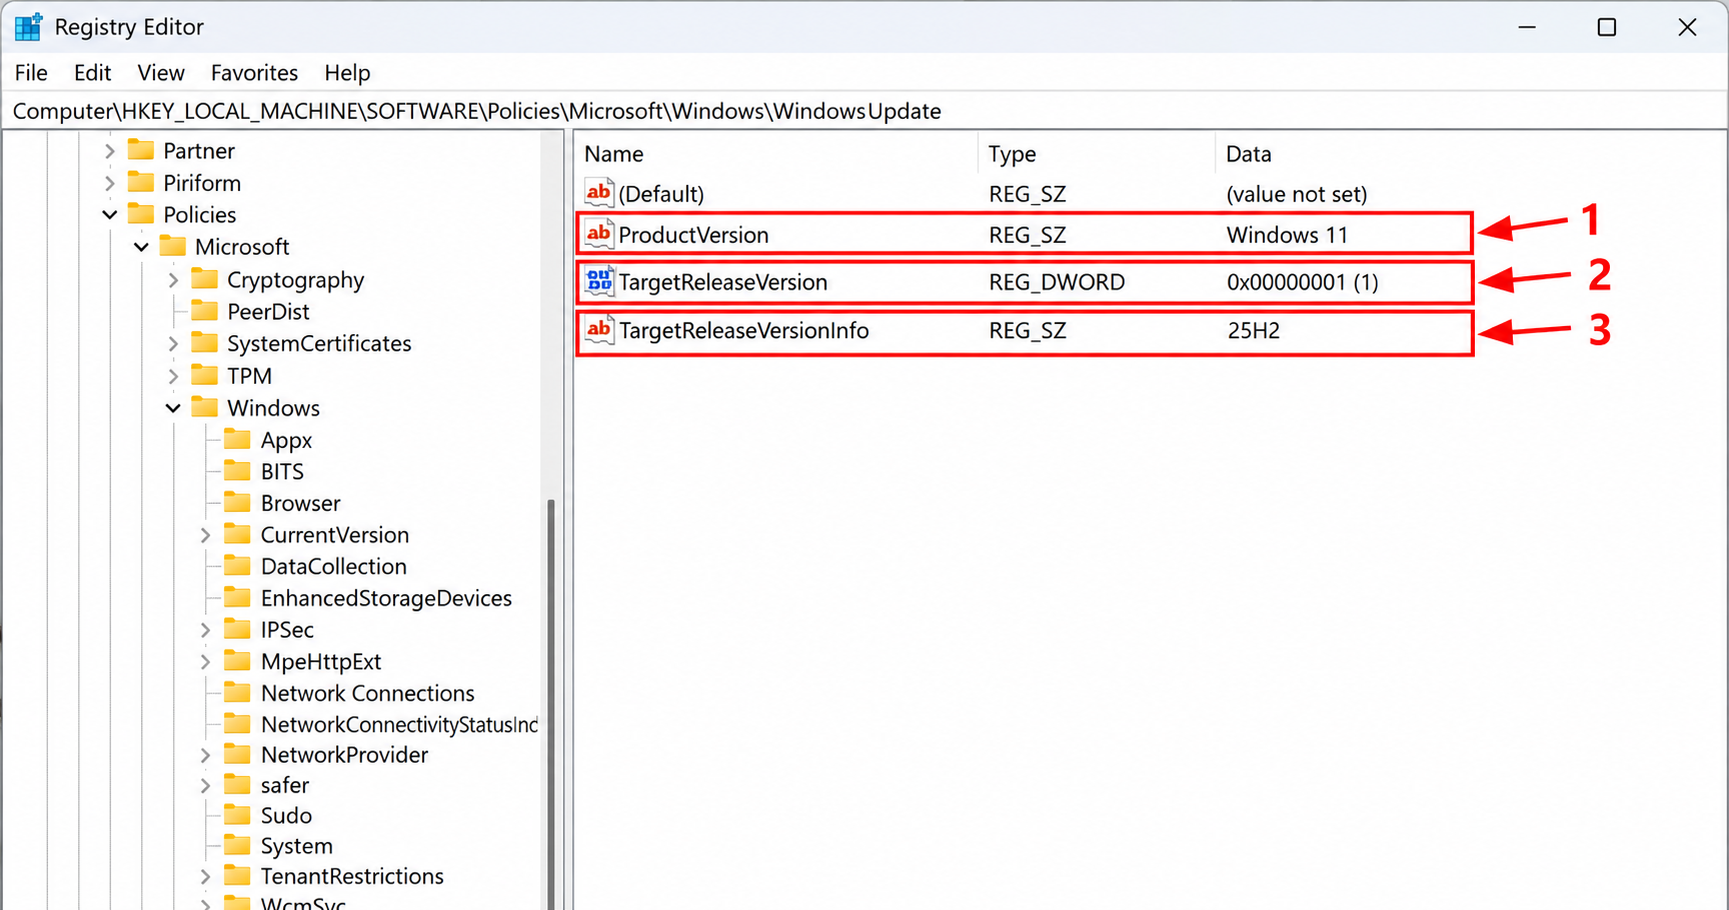
8. Finally, close the Registry editor and restart your PC.
As a result, Windows Update will target version 25H2 instead of upgrading your PC to version 26H2.
Note:This method keeps your PC on Windows 11 version 25H2 only while the version remains supported. You’ll need to change the settings when you’re ready to upgrade.
That’s it!