You open your PC for a meeting. Or to watch a video. Or just for finishing some work. Suddenly, Windows 11 refuses to connect to Wi-Fi. In some cases, root cause can be because your network has disappeared. There could be multiple reasons why you can’t connect to Wi-Fi in Windows 11.

But there is nothing to worry about. You can follow the methods below to get this resolved.
Page Contents
Fix: Can’t Connect To Wi-Fi In Windows 11
Method 1: Restart WLAN AutoConfig Service
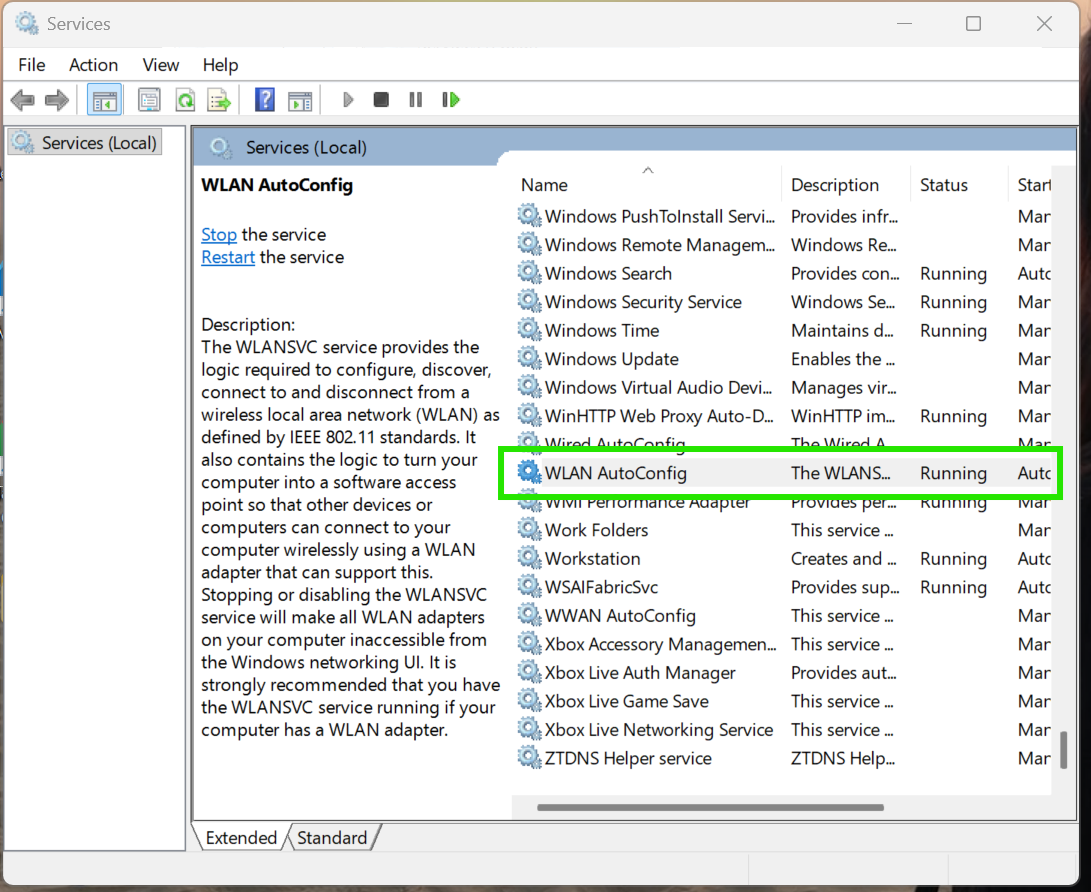
If the Wi-Fi network does not appear on your screen, this means the WLAN AutoConfig service may be disabled. Here are the steps to restart your service:
Step 1: Press the Windows key + R.
Step 2: Type services.msc, then press Enter.
Step 3: Find WLAN AutoConfig and double-click it.
Step 4: Set Startup type to Automatic.
Step 5: Click on Start if the service stops.
Step 6: Select Apply and then OK.
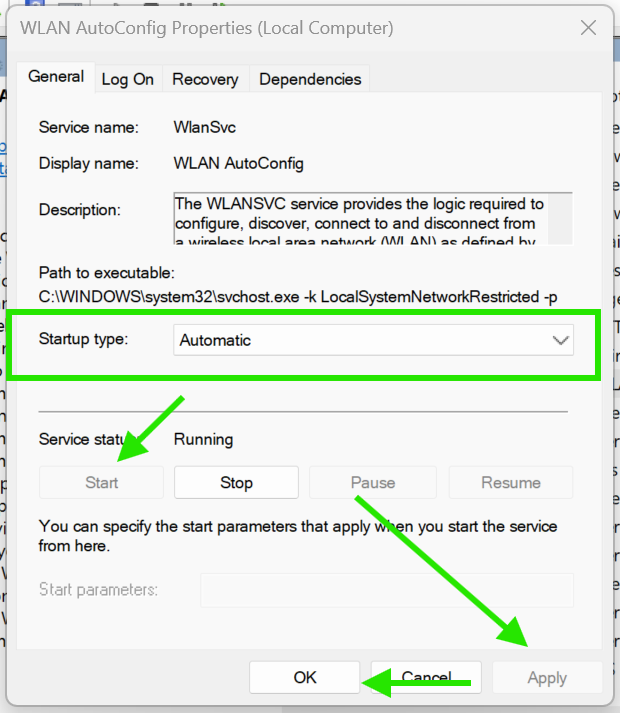
Check now if Wi-Fi appears again to connect to Wi-Fi in Windows 11.
Method 2: Forget And Reconnect To The Wi-Fi Network
A corrupt saved password or network profile can stop Windows from connecting. Follow the steps to remove and reconnect to Wi-Fi:
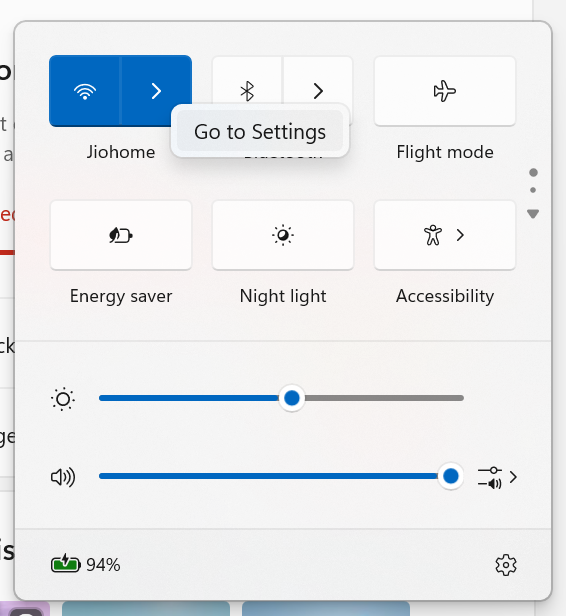
Step 1: Press Start Button + A to open Quick Settings.
Step 2: Click on the arrow next to the Wi-Fi icon.

Step 3: Right-click your network, select Go to Settings > Manage Known Networks, then select Forget.
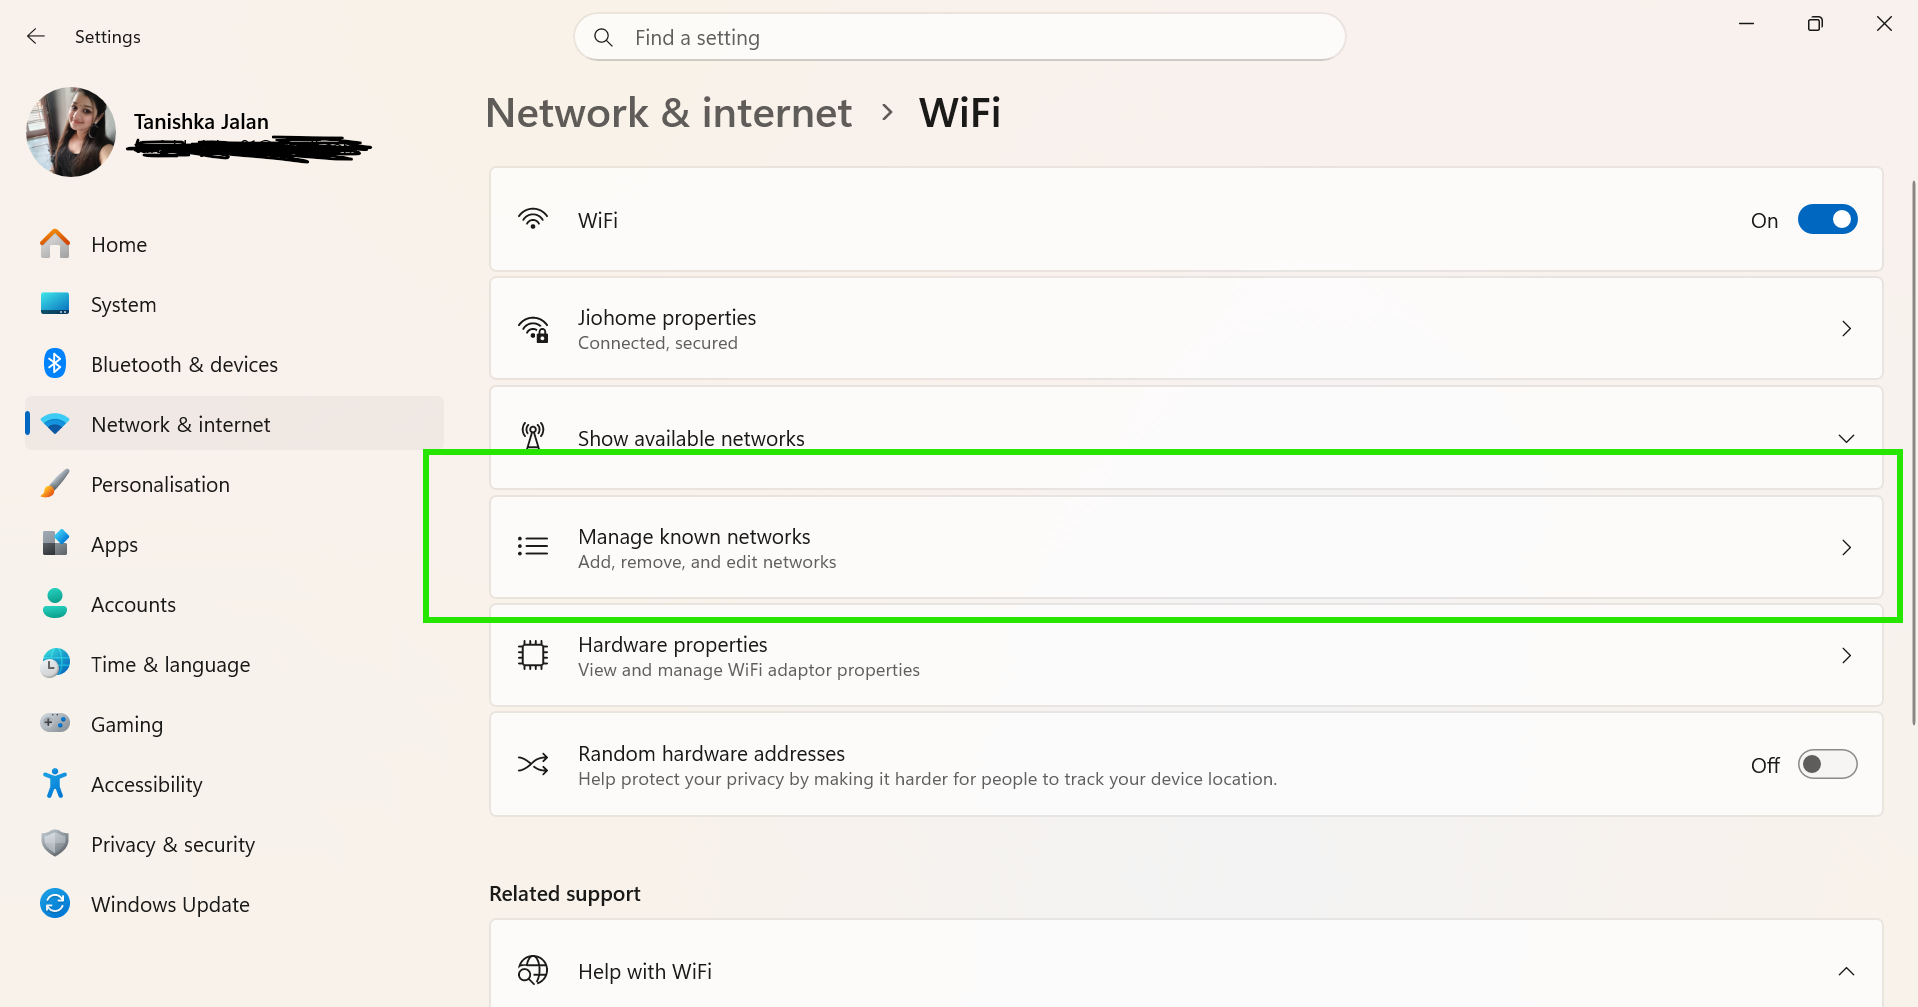

Step 4: Try connecting to the network again.
Step 5: Enter the Wi-Fi password.
And there you go. This simple trick fixes the connection error instantly.
Method 3: Run Windows Network Troubleshooter
Windows 11 includes a built-in tool. It automatically detects internet problems. So, here are the steps to run the troubleshooter:
Step 1: Open Settings by pressing Start Button + I.
Step 2: Go to System > Troubleshoot > Other troubleshooters.
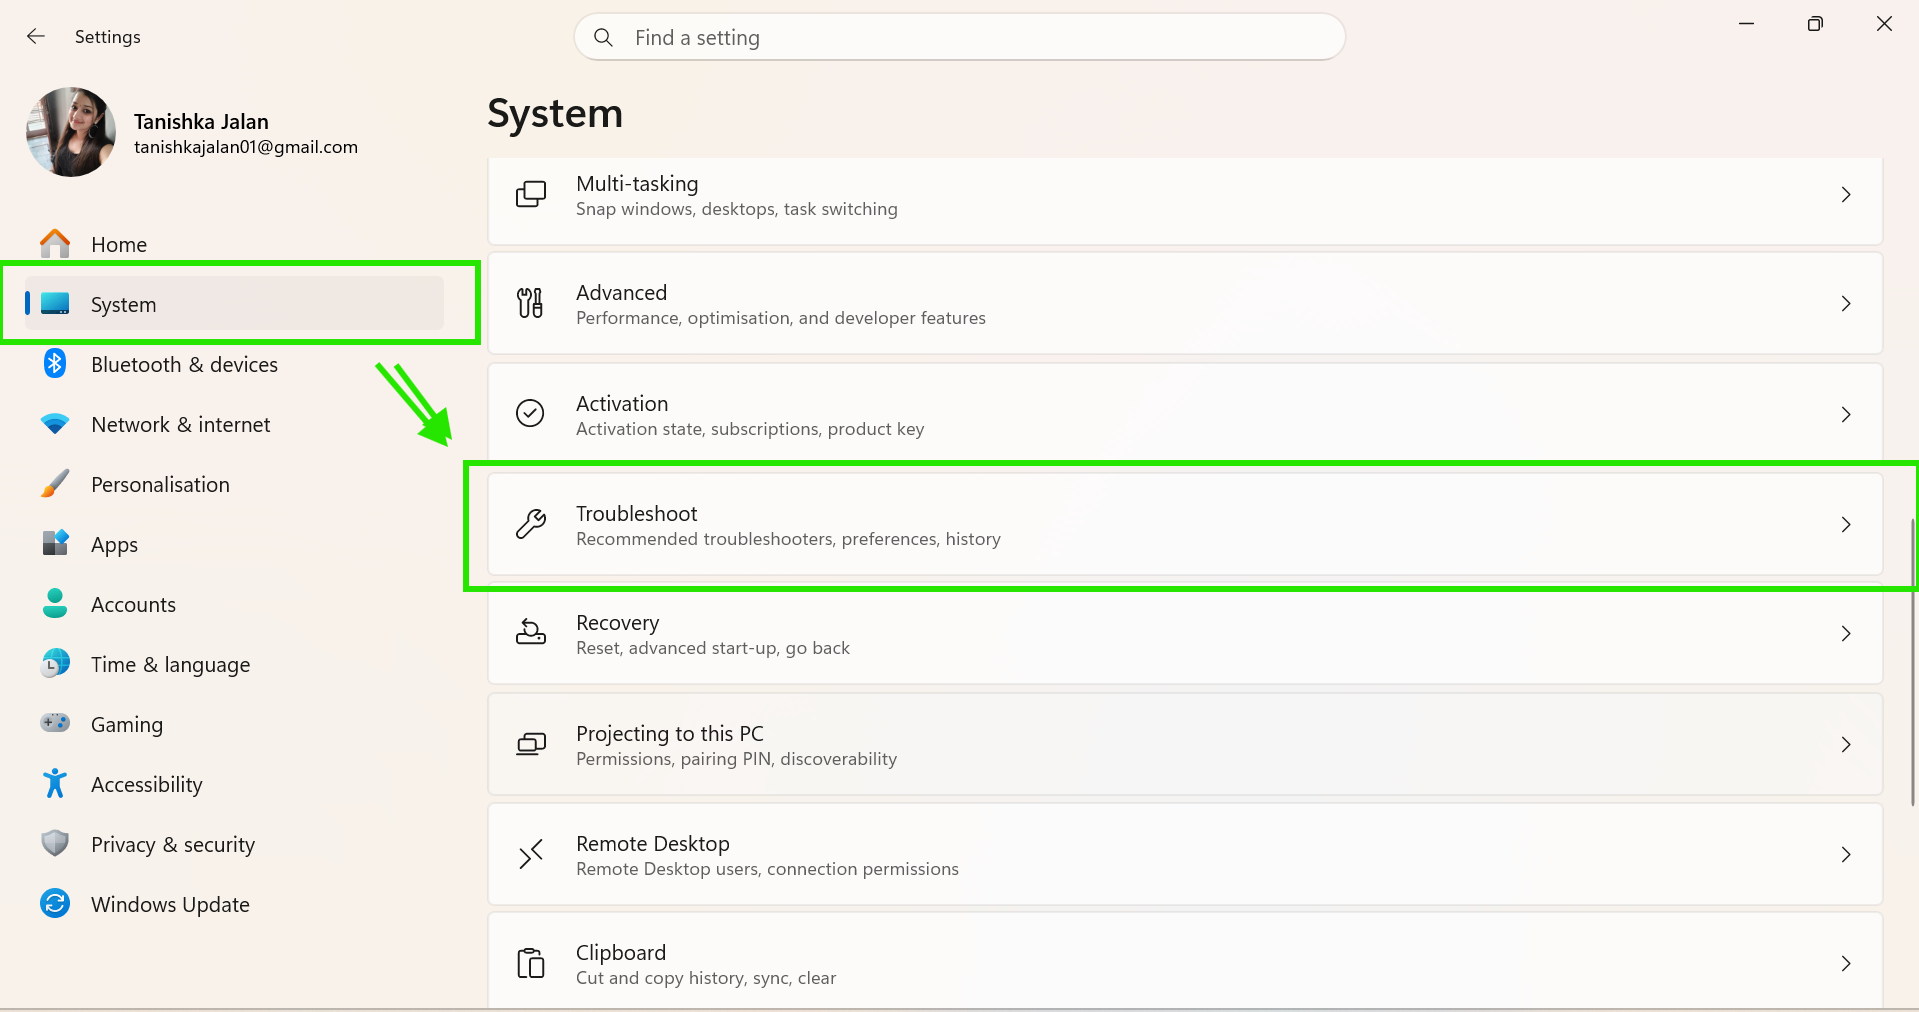
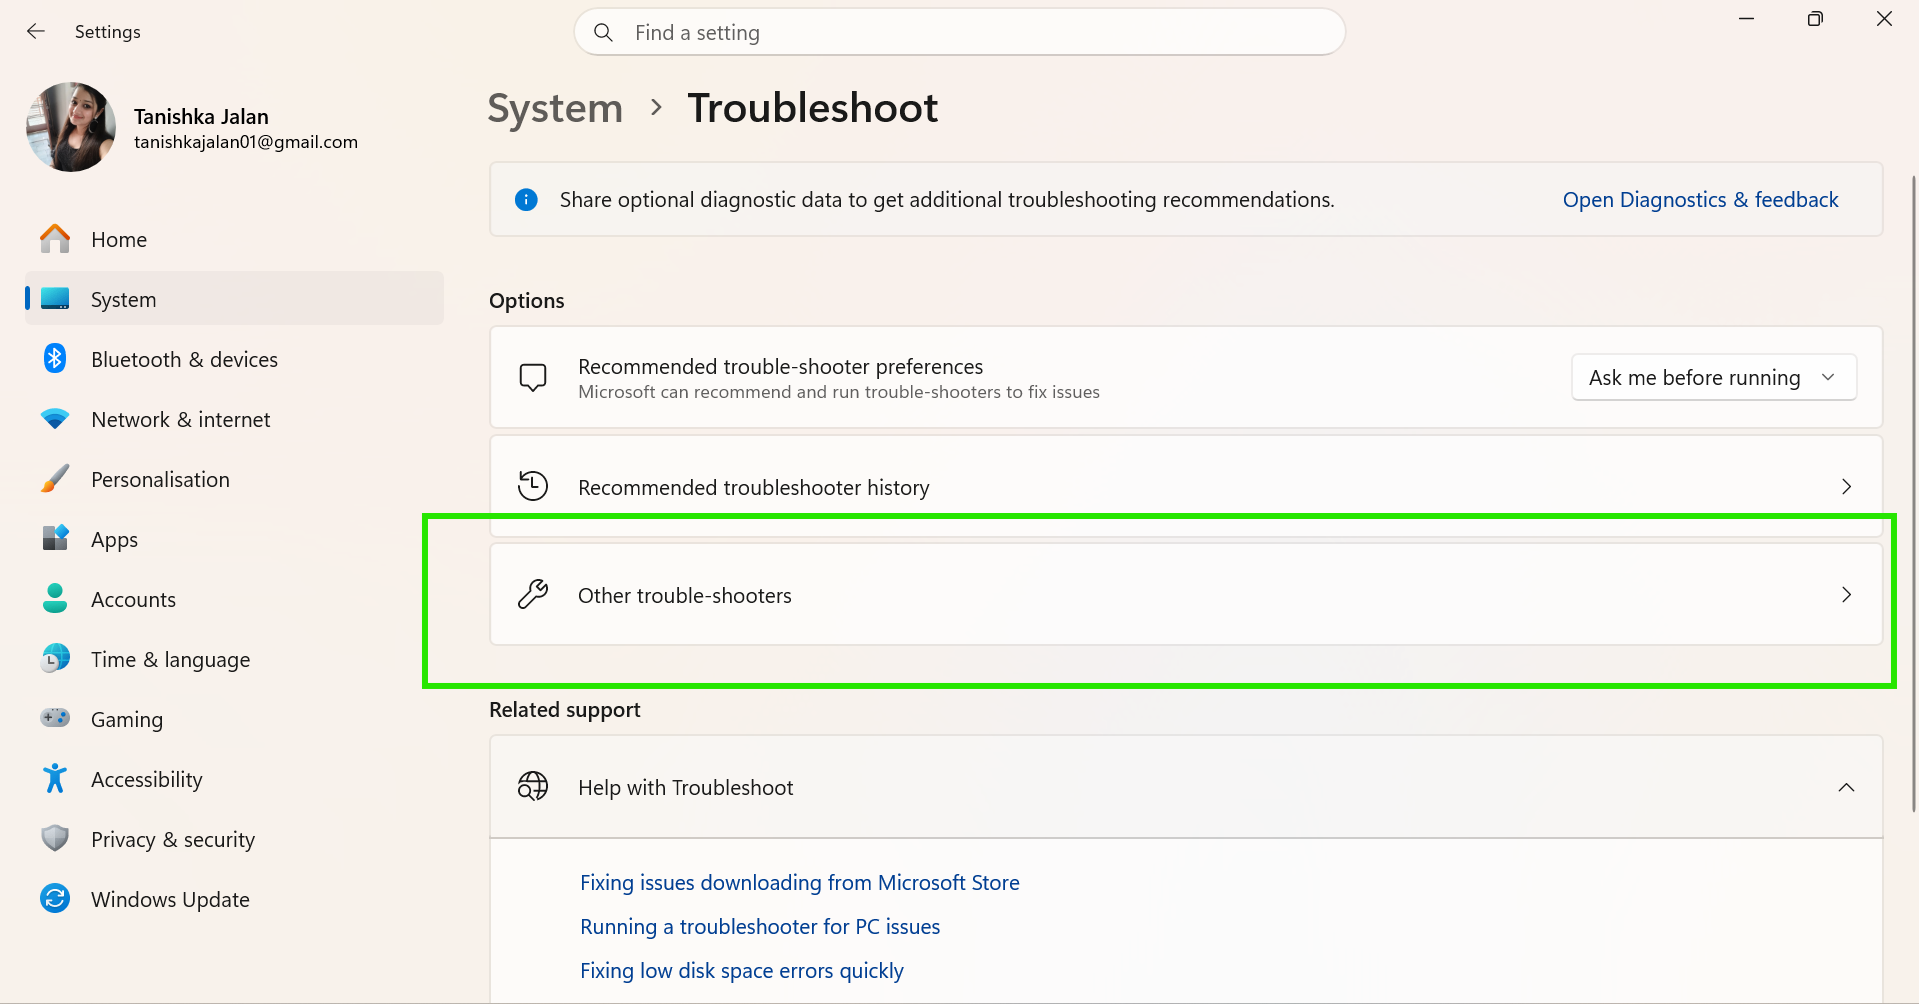
Step 3: Find Network and Internet.
Step 4: Click Run.

Now apply the fixes recommended by Windows.
Method 4: Reset Your Network Settings
If your Wi-Fi isn’t connecting or refuses to work on all networks, reset the network settings. Here is how you can reset the network:
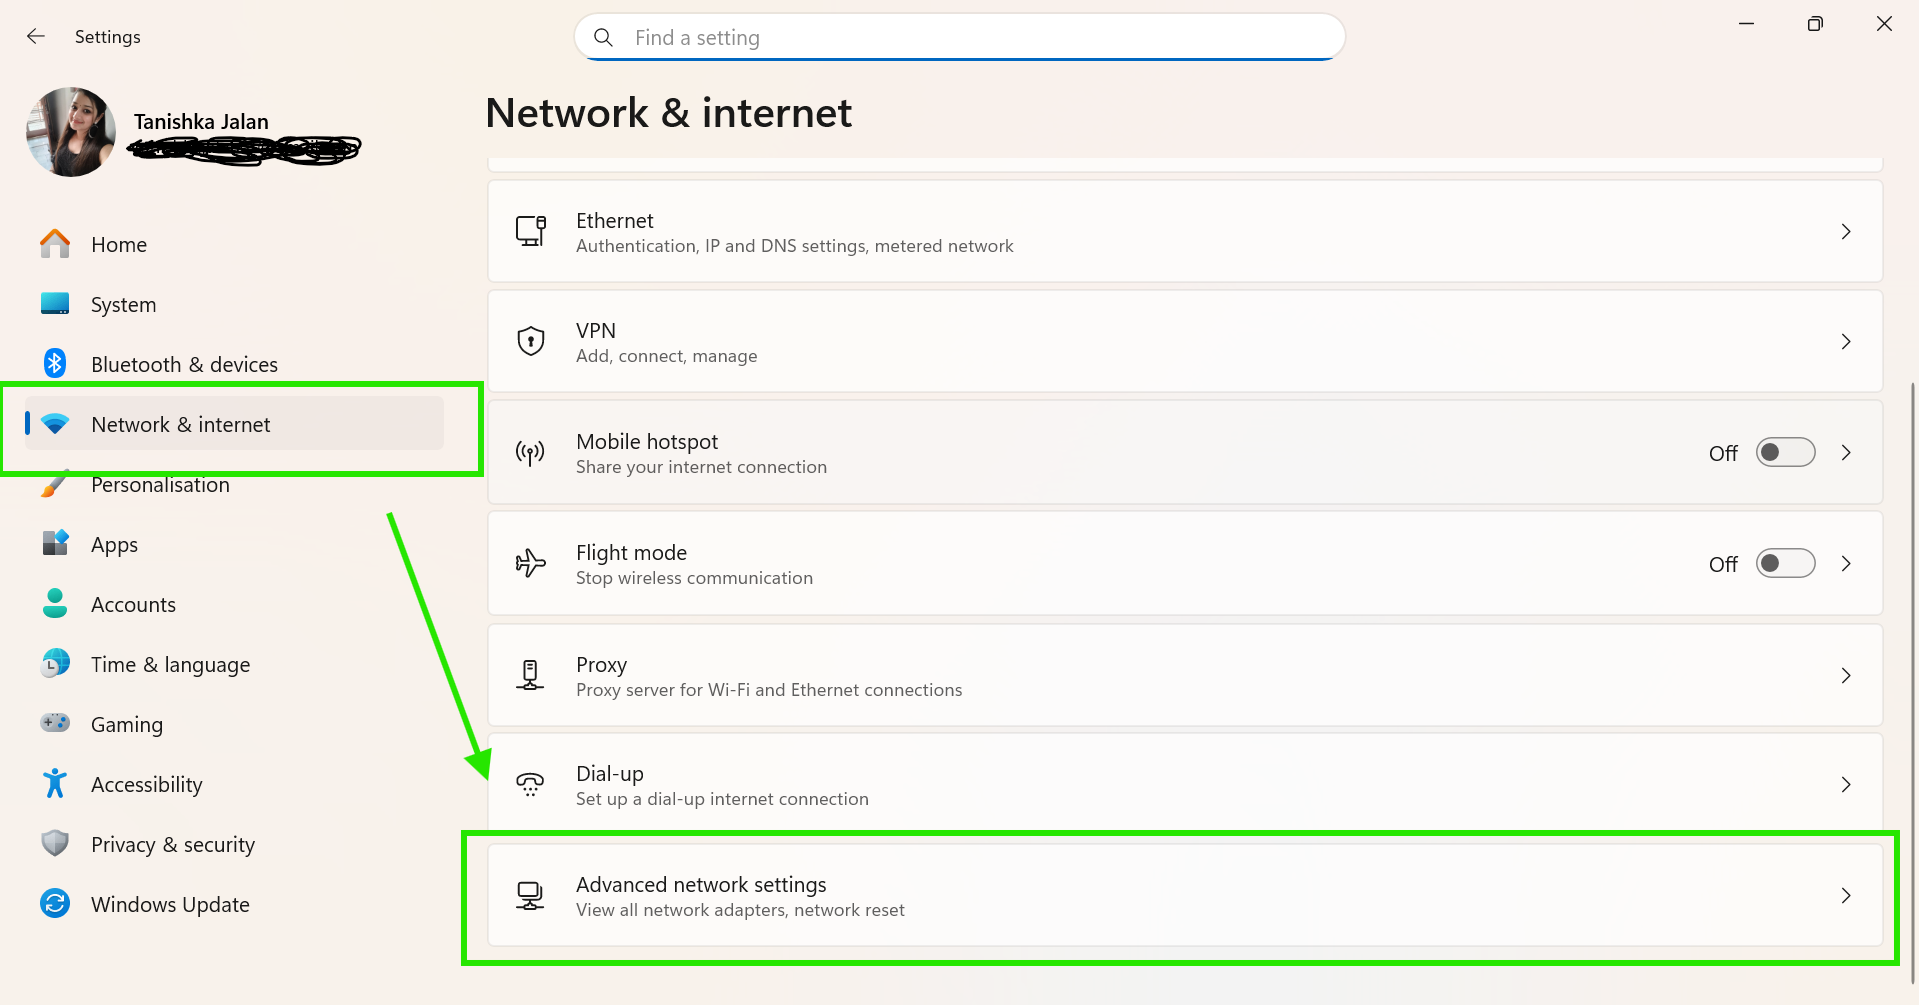
Step 1: Open Settings.
Step 2: Go to Network & Internet> Advanced network settings.
Step 3: Click Network reset and select Reset now.

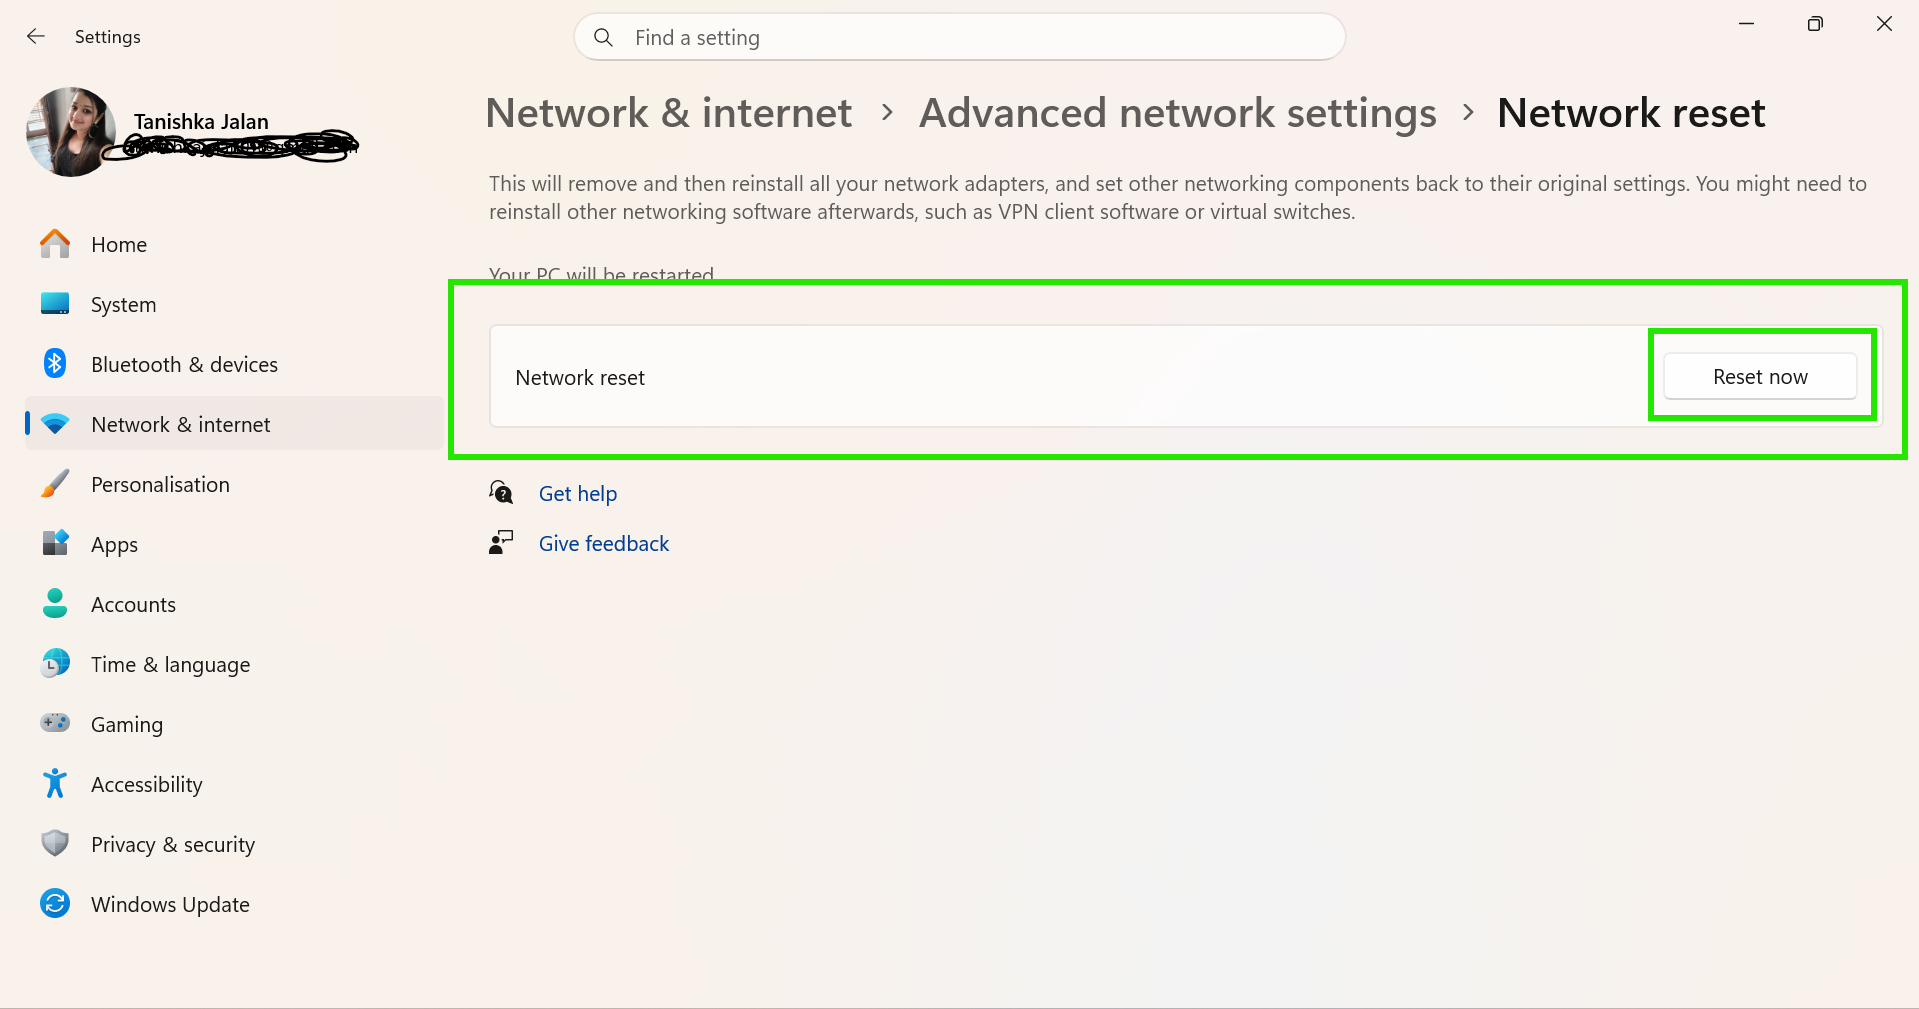
Step 5: Restart your computer.
Method 5: Reinstall the WiFi Driver
An outdated or broken WiFi driver can cause connection problems after Windows updates. Reinstall the wireless driver:
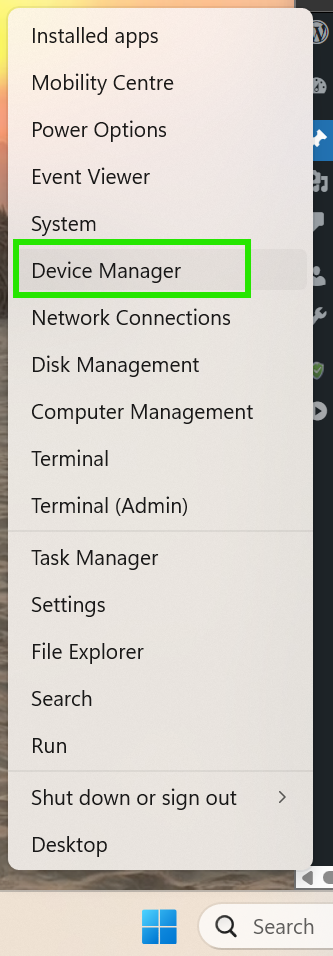
Step 1: Right-click the Start button.
Step 2: Open Device Manager.
Step 3: Expand Network adapters.
Step 4: Right-click your WiFi adapter.
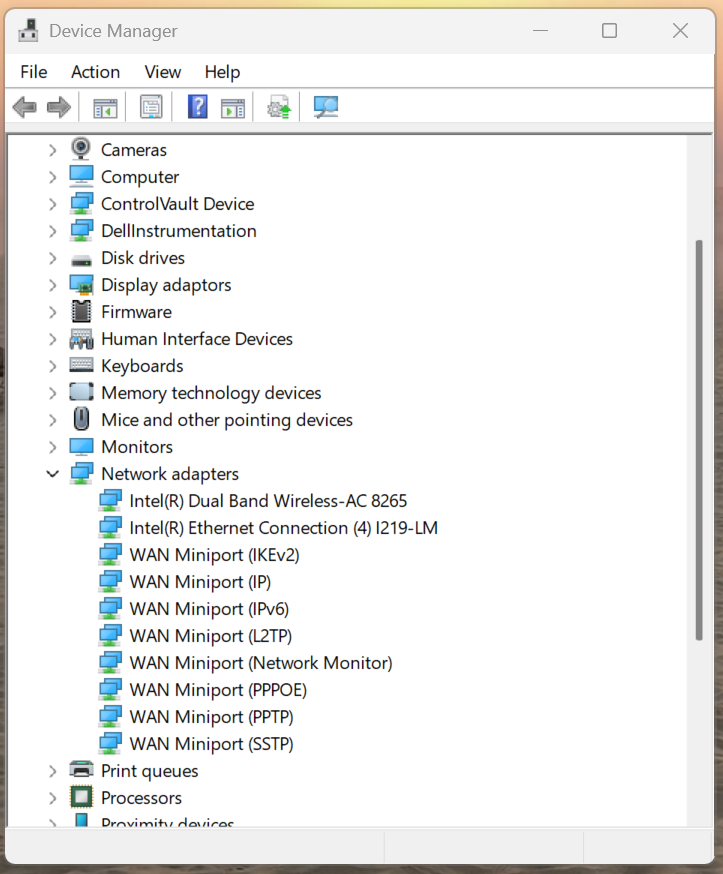
Step 5: Uninstall the device.
Step 6: Restart your PC.
So, there you go.
Hope these methods helps you.