If you encounter the “Operation did not complete successfully because the file contains a virus or potentially unwanted software” error when you try to open a file or an application, your antivirus probably thinks it’s a potential threat and blocks it.
It’s possible the file is actually a threat, but there’s also a chance that your antivirus is giving a false positive, blocking your access to the file even if it’s completely safe. If you want to independently verify whether the file is genuinely malicious, run a full system scan with a dedicated anti-malware engine like ‘MalwareFox‘ before taking further action. Even if you’re 100% sure the file is completely safe and you trust the source, you can go ahead and follow these methods to bypass the error in Windows 11/10 and access the file.
Page Contents
Fix: Operation did not complete successfully because the file contains a virus
Method 1: Run a Virus Scan
1. Type “Windows Security” in the Windows Search and select the best match result.

2. Move to the “Virus & threat protection” section and click “Scan options”.

3. Select the “Full scan” option and click “Scan now“.

4. If Windows Security detects any threat, make sure to quarantine or delete the threat.
Method 2: Repair the File Explorer
1. Type “Command Prompt” in the Windows Search and click “Run as administrator“.
2. In the Command Prompt window, type the following commands one after the other and press Enter after each command:
sfc /SCANFILE=c:\windows\explorer.exe
sfc /SCANFILE=C:\Windows\SysWow64\explorer.exe

3. After executing the above commands, restart your PC.
Method 3: Turn Off Third-party Antivirus Program
If you have a third-party antivirus program installed on your device, it might block certain services and apps from running properly. You can try disabling the antivirus program and see if it solves the ‘Operation did not complete successfully’ error message.
1. Right-click on the taskbar and select “Task Manager“.
2. Go to the “Startup apps” tab and find your antivirus program from the list.
3. Then, disable the antivirus program from launching at the startup.

Method 4: Disable Windows Defender
1. Search the Start menu for the “Windows Security” app and then, launch the app from the result.
2. In the Windows Security app, move to the “Virus & threat protection” tab.
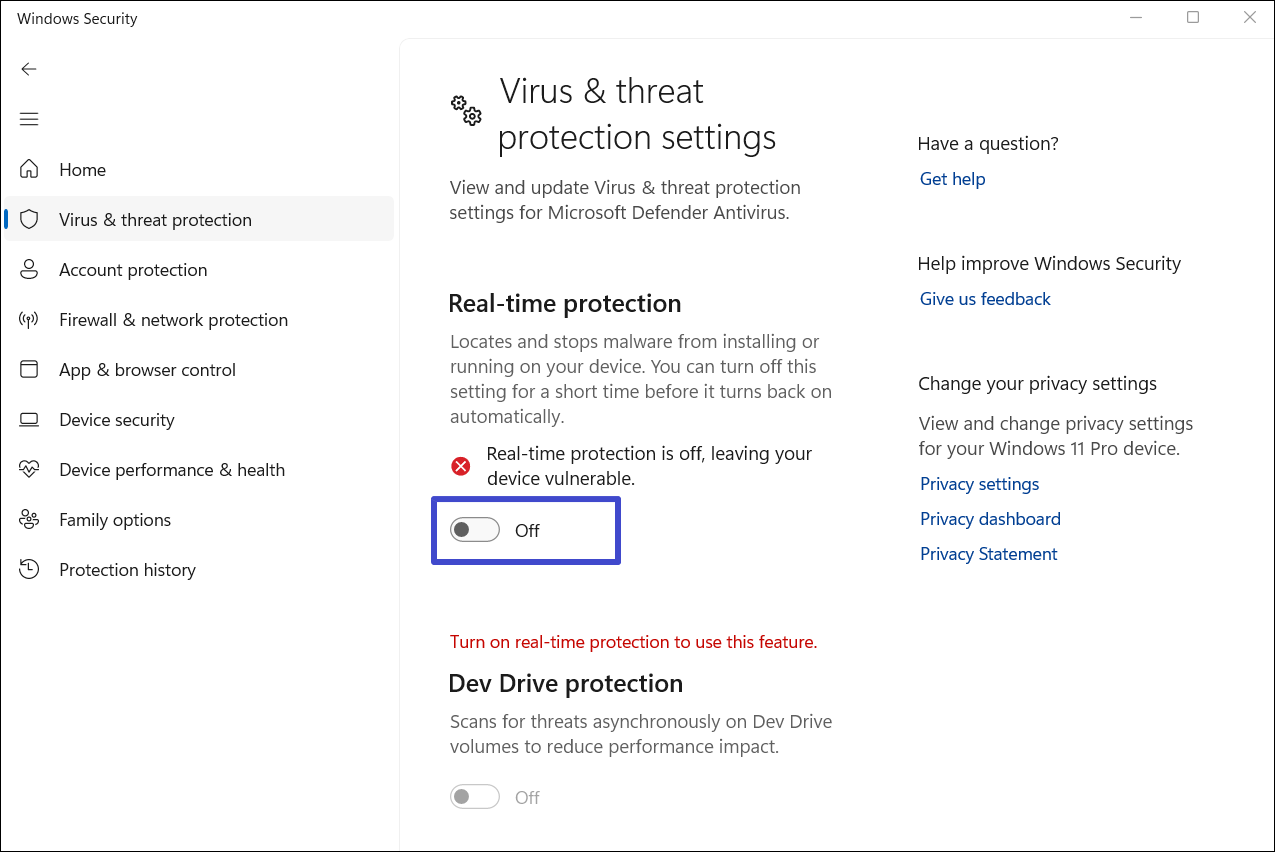
3. Click the “Manage Settings” option under the Virus & threat protection settings.

4. Turn off the “Real-time protection” toggle to disable the Windows Security app.
Method 5: Add the File or Folder to the Exclusions List
If you trust the file and its source, you can just add the file or the entire folder that contains the file to Windows Security’s exclusion list.
1. Open the Windows Security app.
2. Switch to the “Virus & threat protection” tab and click “Manage settings“.
3. Scroll down to the bottom of the page and click “Add or remove exclusions“.

4. Click the “Add an exclusion” button and select “File” or “Folder” depending on what you want to exclude from the scan.

5. Navigate to the file or folder you want to exclude and select it. Then, click the “Select Folder” or “Open“.

Once you add the file or folder to the exclusion list, you’ll be able to open it without an error.
Method 6: Run the Disk Cleanup Utility
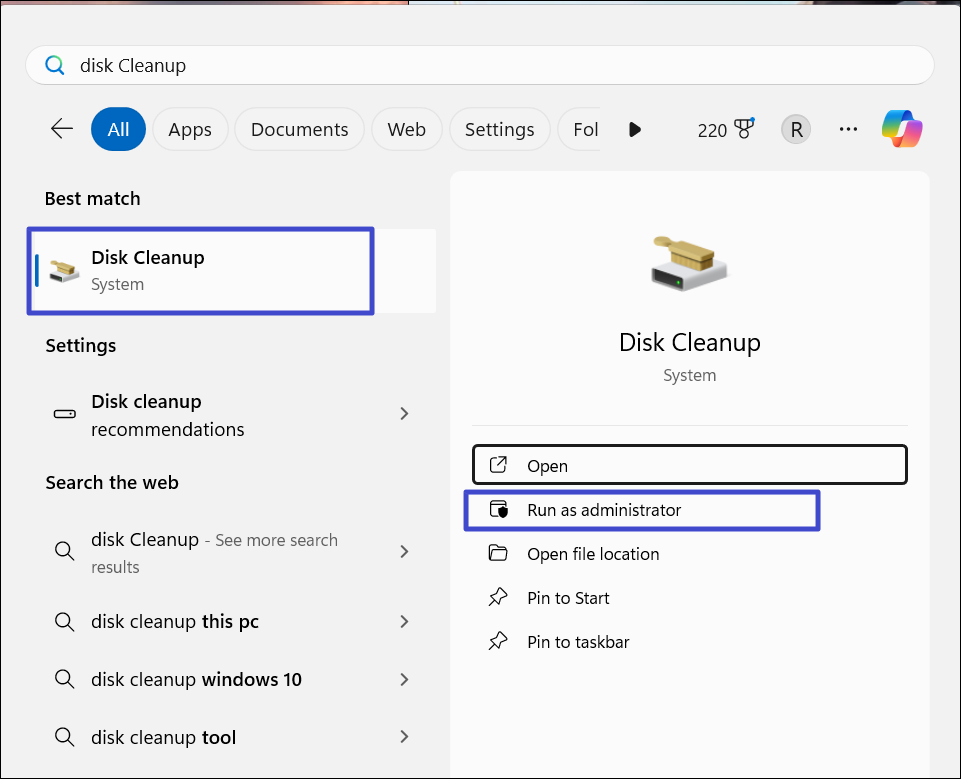
1. Type “Disk Cleanup” in the Windows Search and click on the first result.
2. Select the system drive where Windows is installed (it’s usually C:) and click “OK‘.

3. Once the Disk Cleanup utility opens, you’ll see a list of files you can delete.
4. Make sure “Temporary Internet Files” and “Temporary Files” are checked. You can also choose to select other unnecessary files such as “Thumbnails” or “DirectX Shader Cache” for deletion.
5. Once you’ve selected the files you want to remove, click “OK“.

6. When the confirmation dialog pops up, click “Delete Files“.

7. After the cleanup, check if the ‘Operation did not complete successfully’ error is fixed.
Method 7: Fix Windows Backup
1. Open the Run dialog box with Windows + R. Type “Control” and click “OK“.
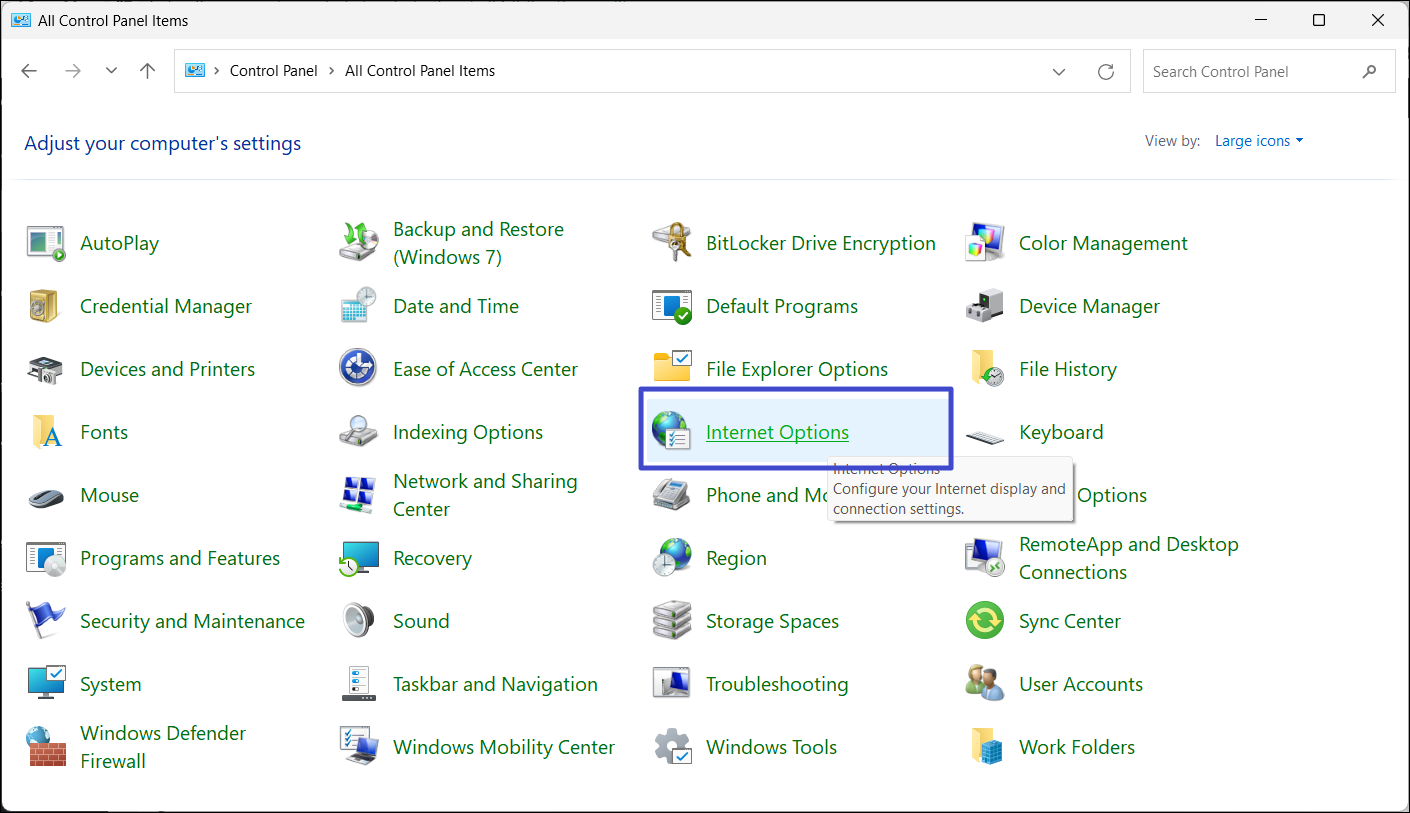
2. Change the control settings view to Large icons and click “Internet Options“.
3. In the Internet Options window, switch to the General tab and click the “Delete…” under the Browsing history section.
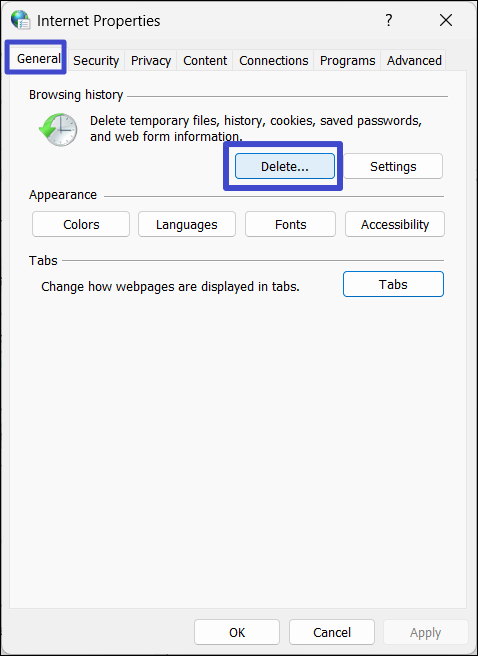
4. Uncheck the “Preserve Favorites website data” option.
5. After that check the “Temporary Internet files and website files, Cookies and website data, History, “and “Download History” options.
6. Click the “Delete” button to remove the selected files.

7. Then, restart your PC.
That’s it.