Hyper–V is a feature you can use in Windows 11 to run virtual machines. These virtual machines can run in parallel with the host operating system. The virtual systems are usable same as the physical installation but they work in an isolated environment. The technology called as Hypervisor is being used between virtual machine and the host operating system to provide physical hardware resources virtually. We have already seen how to enable Hyper–V in Windows 11. Now In this guide we will see how to disable Hyper–V windows 11.
Page Contents
How to disable Hyper-V in Windows 11
Method 1: Disable Hyper-V via Settings
This is the easiest method to disable Hyper–V in Windows 11.
1. Open the Settings app.
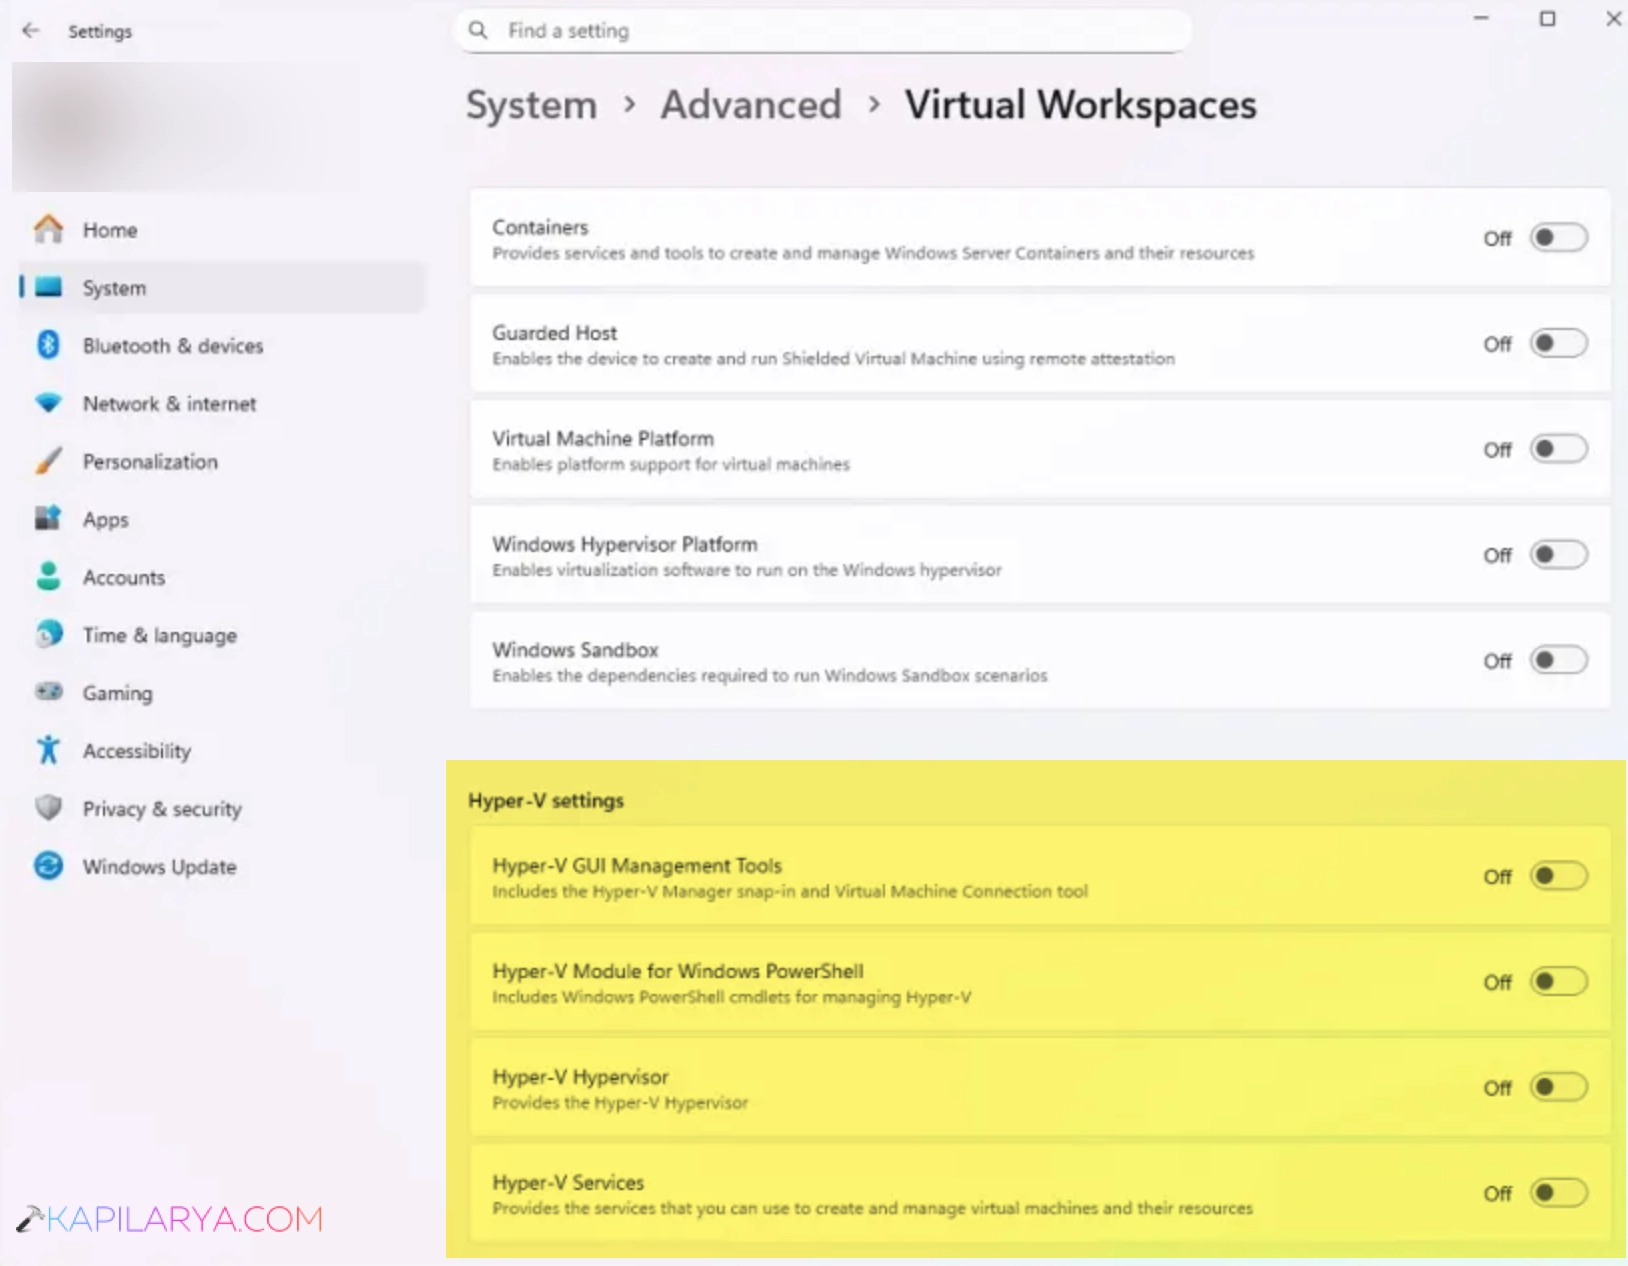
2. Then go to System > Advanced > Virtual workspaces.
3. On the Virtual workspaces page, scroll down and locate Hyper–V settings. Turn off all the options there to disable Hyper–V.
Method 2: Disable Hyper–V with Command Prompt
Using this method, you can disable Hyper–V in Windows 11 using a single command. It’s really efficient and effective command to turn off Hyper–V, just in case if you want.
1. Click on the search icon present on the taskbar.
2. In the search bar, type CMD and from search results, choose Command Prompt and then click Run as administrator.
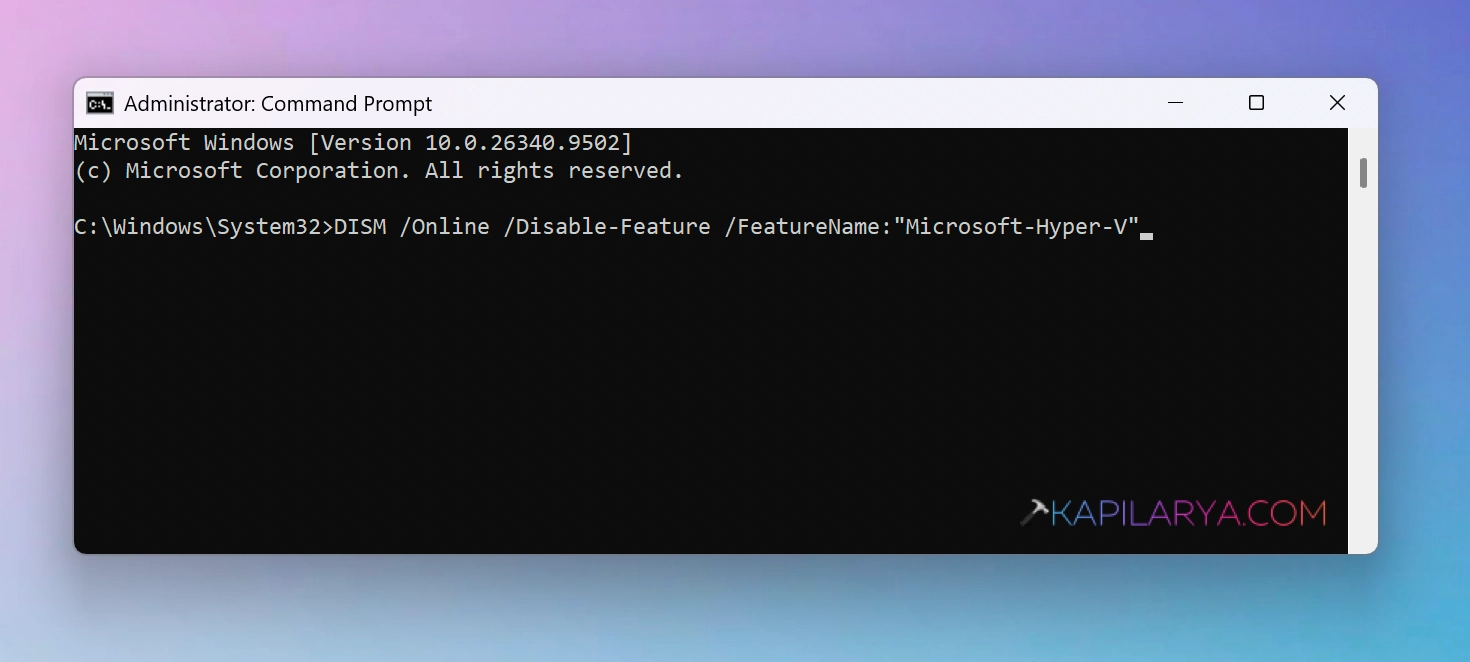
3. Once the administrative Command Prompt is there, paste the following command and press the Enter key:
DISM /Online /Disable-Feature /FeatureName:"Microsoft-Hyper-V"
Method 3: Disable Hyper–V using Windows features
This is one of the most reliable method to disable Hyper–V. It is an optional feature I would say and it can be easily enabled or disabled on demand.
1. Click on the search icon present on the taskbar.
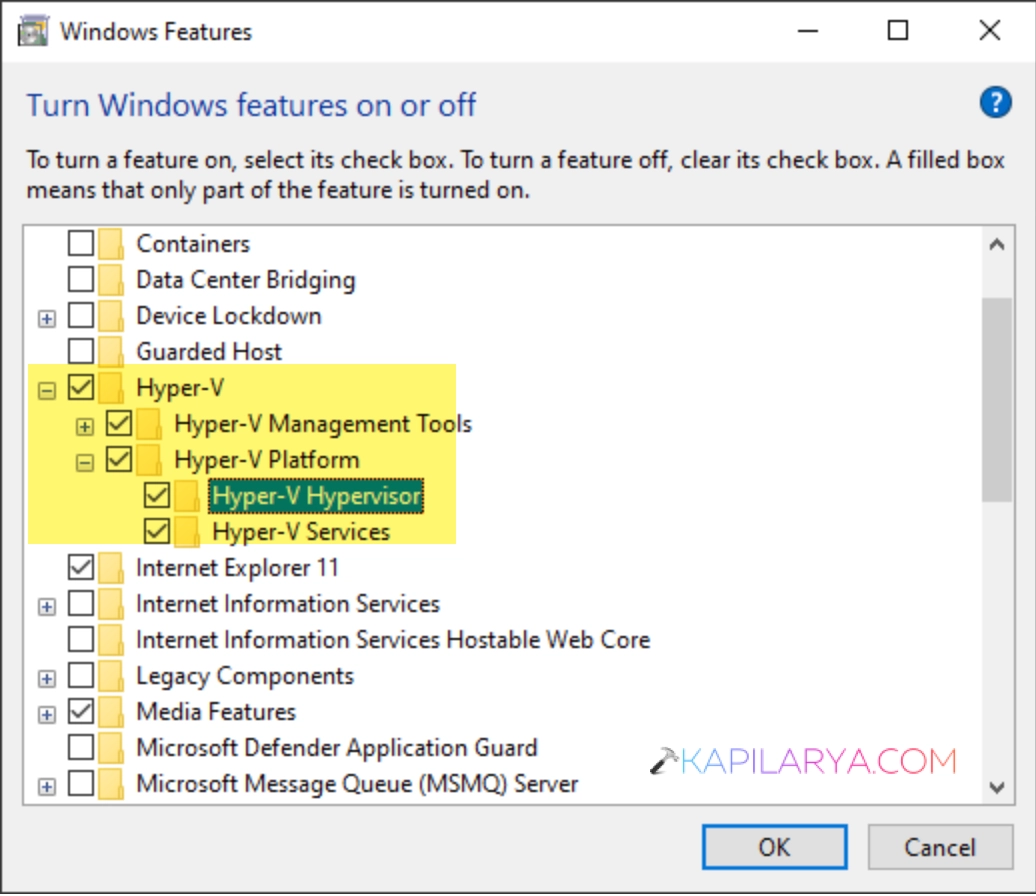
2. In the search bar, type turn Windows features on or off and take pick the same from search results.
3. In turn Windows features on or off, scroll down and locate Hyper-V and Hyper-V Platform. Uncheck both of these options.
4. Click OK. You may need to restart the system to make changes effective.
That’s it!