Capability Access Manager Service, also known as camsvc, manages app access to features such as your camera, microphone, location, and screen capture in Windows 11. It usually runs in the background without hindering the system resources. But sometimes, you may see high CPU or disk usage from this service in Task Manager. This guide walks you through processes to fix it.
Page Contents
How to Fix Capability Access Manager Service High CPU Usage in Windows 11usage
Fix 1: Identify Capability Access Manager Service and Check Its Activity
First of all, you must confirm that Capability Access Manager Service is responsible for the high CPU usage. To do so, you must confirm, whether an app is repeatedly accessing your camera, microphone, or location.
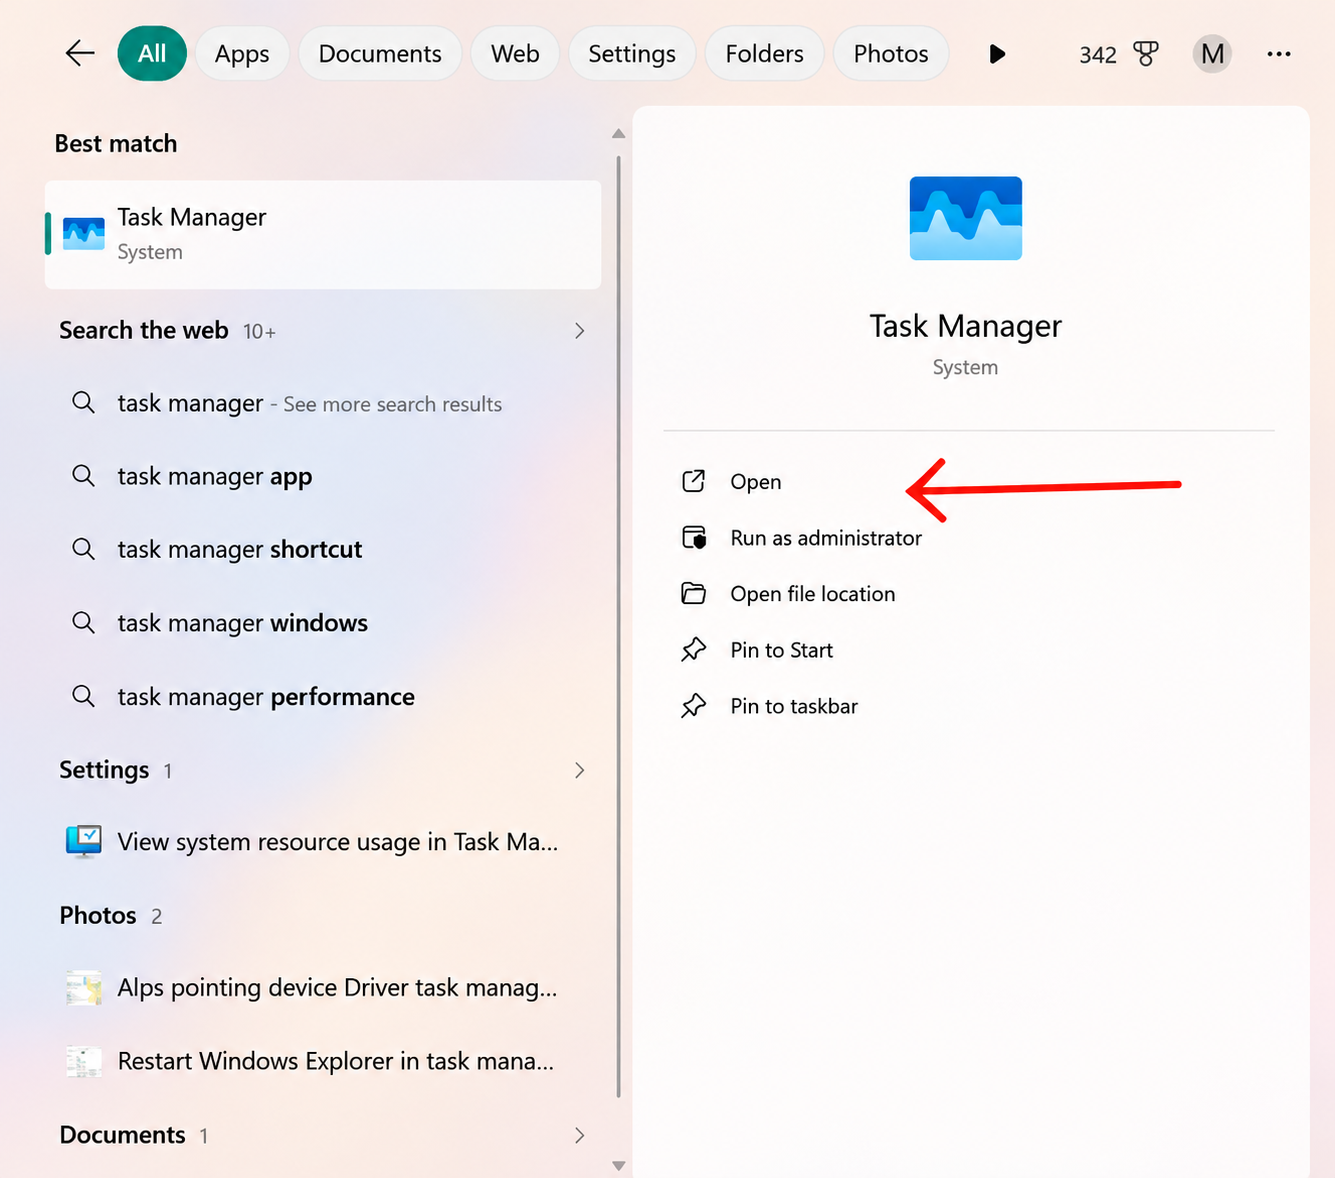
1. Open Task Manager.
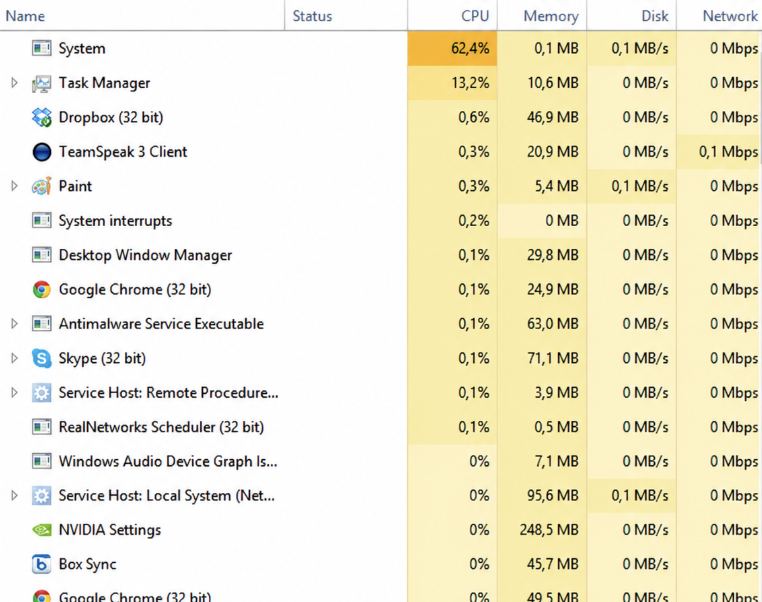
2. On the Processes tab, select the CPU column to sort processes by CPU usage.
3. Open the Services tab. Then, find camsvc and note its PID. Once done, right-click on it and select “Go to details” to see the svchost.exe it runs in.
4. Then, look at the taskbar next to the clock for a microphone, camera or location icon. If you hover your mouse over it, you can see which app is using it.
5. Finally, open Settings > Privacy & security > Microphone and check Recent activity. Do the same process for Camera and Location. If any of them uses the app, you can use the fixes mentioned below to resolve the problem.
Fix 2: Restart Capability Access Manager Service
Sometimes, Capability Access Manager Service may become stuck after Windows wakes from sleep or installs an update.
1. Press Win + R, type services.msc, and press Enter.
2. Find Capability Access Manager Service in the list. Right-click it and select Restart. If the service is not running, select Start.
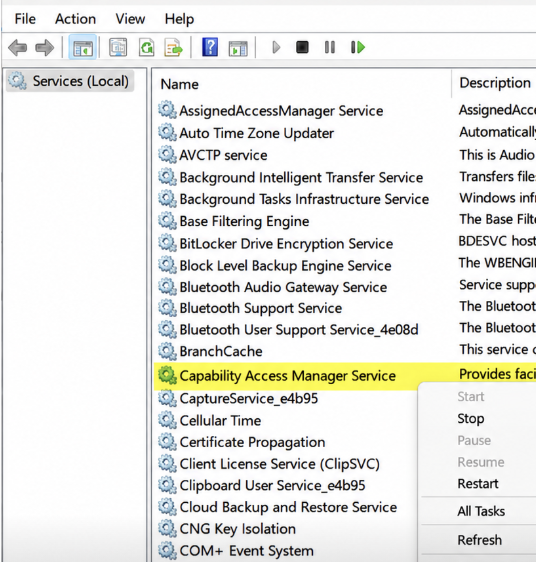
3. Open Task Manager and monitor its CPU usage for a few minutes.
If the service continues using high CPU, proceed try fix 3.
Fix 3: Stop Apps That Repeatedly Access Your Camera, Microphone, or Location
Some applications may repeatedly request access to your camera, microphone, or location, even when you are not actively using them. You must identify and restrict such applications.
1. Press Win + I to open Settings.
2. Go to Privacy & security.
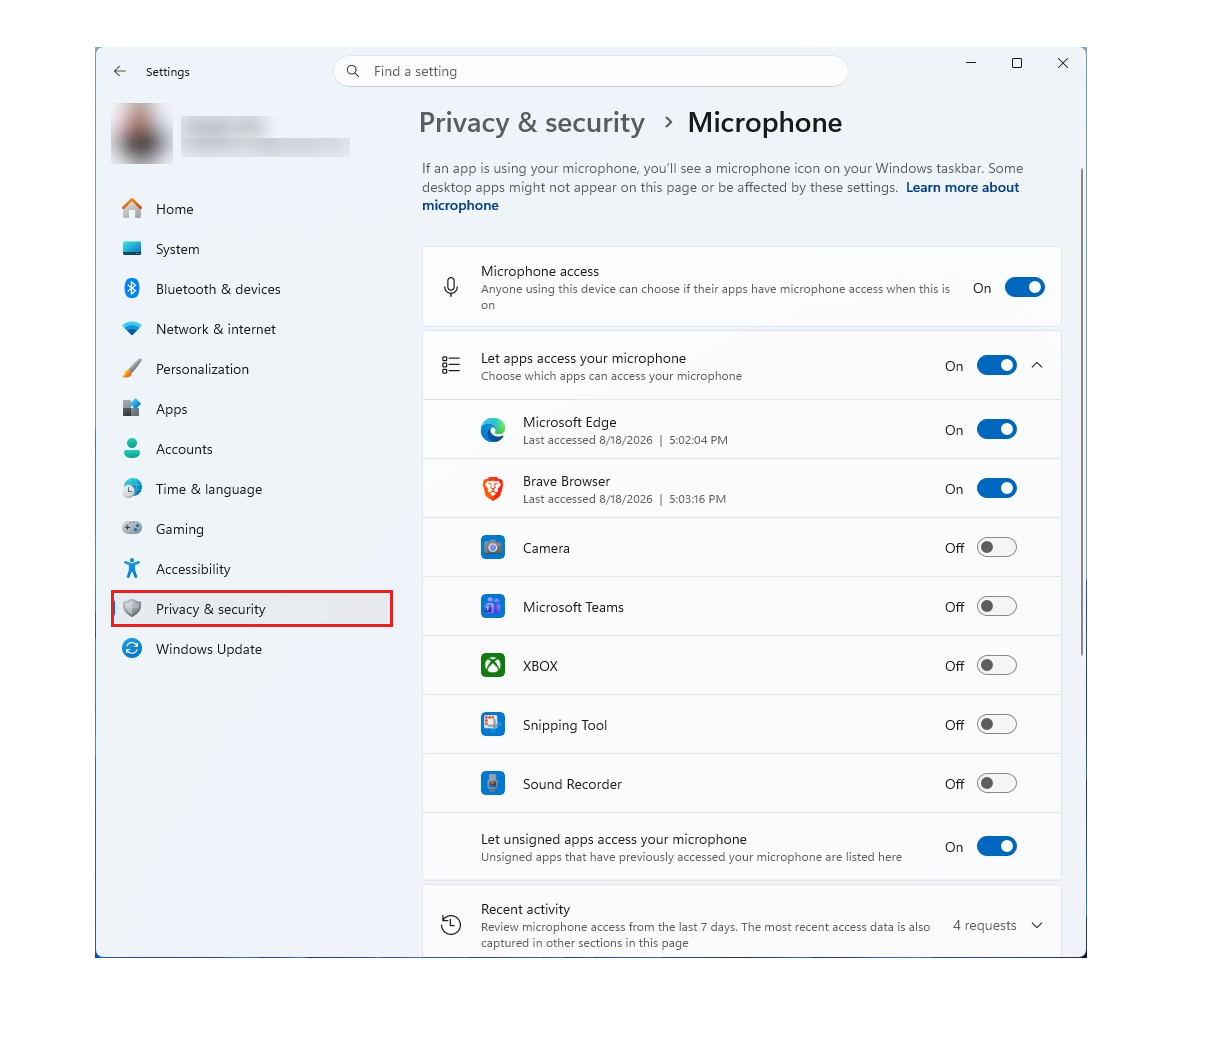
3. Select Location and check the Recent activity section. Do the same checks for Microphone and Camera.
4. See if any application repeatedly accesses these features.
5. If you do not need any of the application to use that feature, turn off its access permission.
6. If you still need the permission, you can update the application or close it when you are not using it.
7. Once you make the changes, restart Capability Access Manager Service using the steps in Fix 2 and monitor its CPU usage. It should now be resolved.
Fix 4: Install the Latest Windows 11 Update
If you haven’t installed the June 2026 Windows update (KB5095093), install the latest Windows 11 update to fix this issue.
1. Press Win + R, type winver, and press Enter.
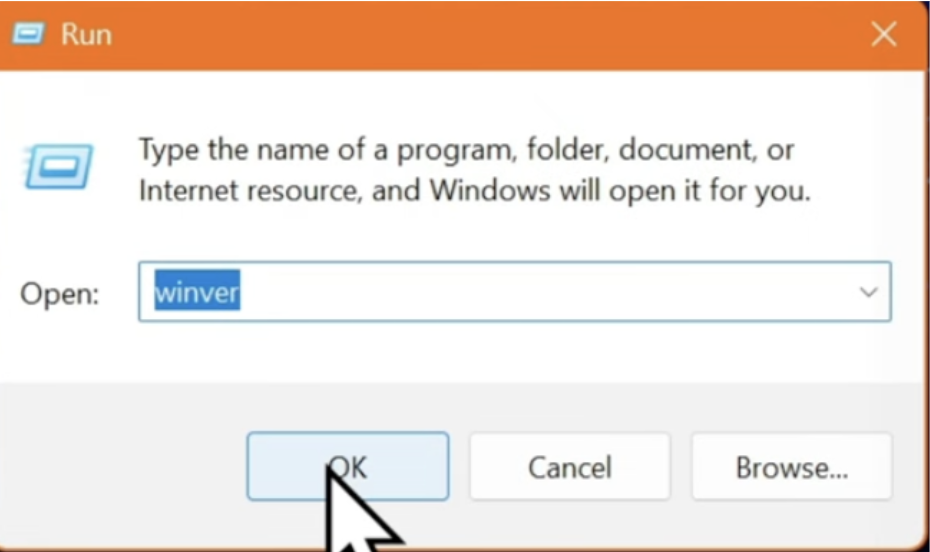
2. Check your Windows version and OS build number. For Windows 11 24H2 and 25H2, the relevant fixed builds are 26100.8737 and 26200.8737, respectively.
3. If your build is older, press Win + I to open Settings.
4. Select Windows Update. Click Check for updates. Then, download and install the available updates.
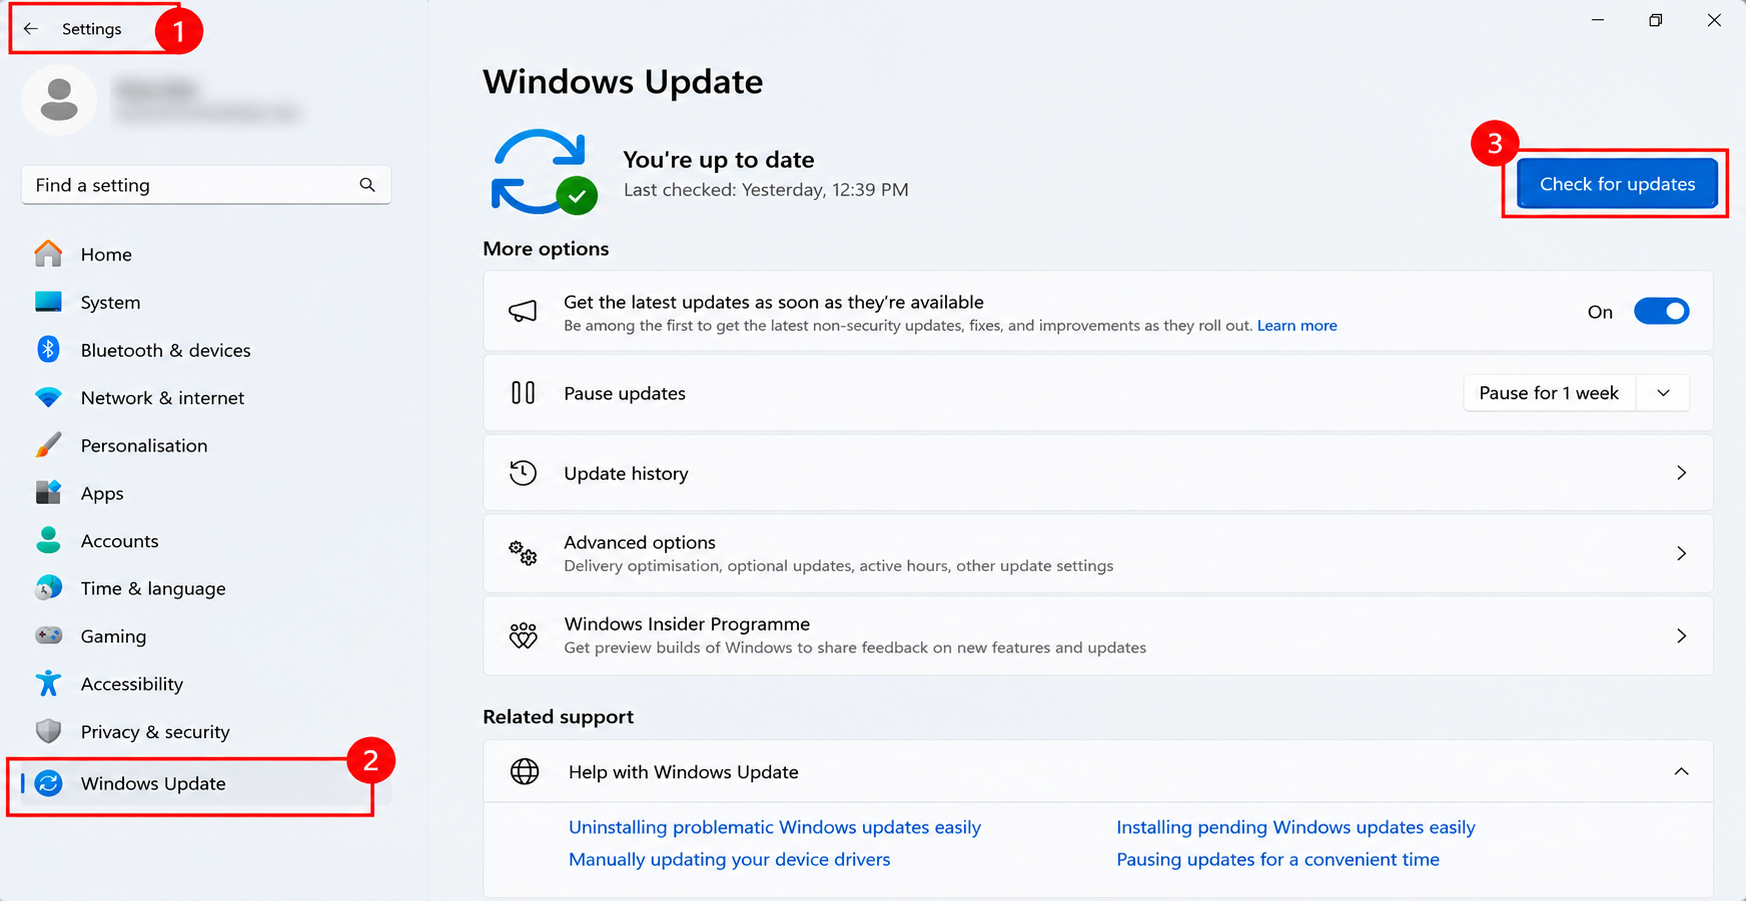
Restart your computer once this is done.
After restarting, open Task Manager and check whether Capability Access Manager Service continues using high CPU.
If the problem persists, check the database file size using the next fix.
Fix 5: Check the Size of the CapabilityAccessManager.db-wal File
The CapabilityAccessManager.db-wal file stores pending database changes made by the capability access manager service. If it becomes too large, it can use a lot of disk space.
1. Open open prompt from start menu and click on Run as Administrator.

2. Run this command:
robocopy "C:\ProgramData\Microsoft\Windows\CapabilityAccessManager" "%TEMP%\CAMCheck" /L /B /R:0 /W:0 /BYTES /NP
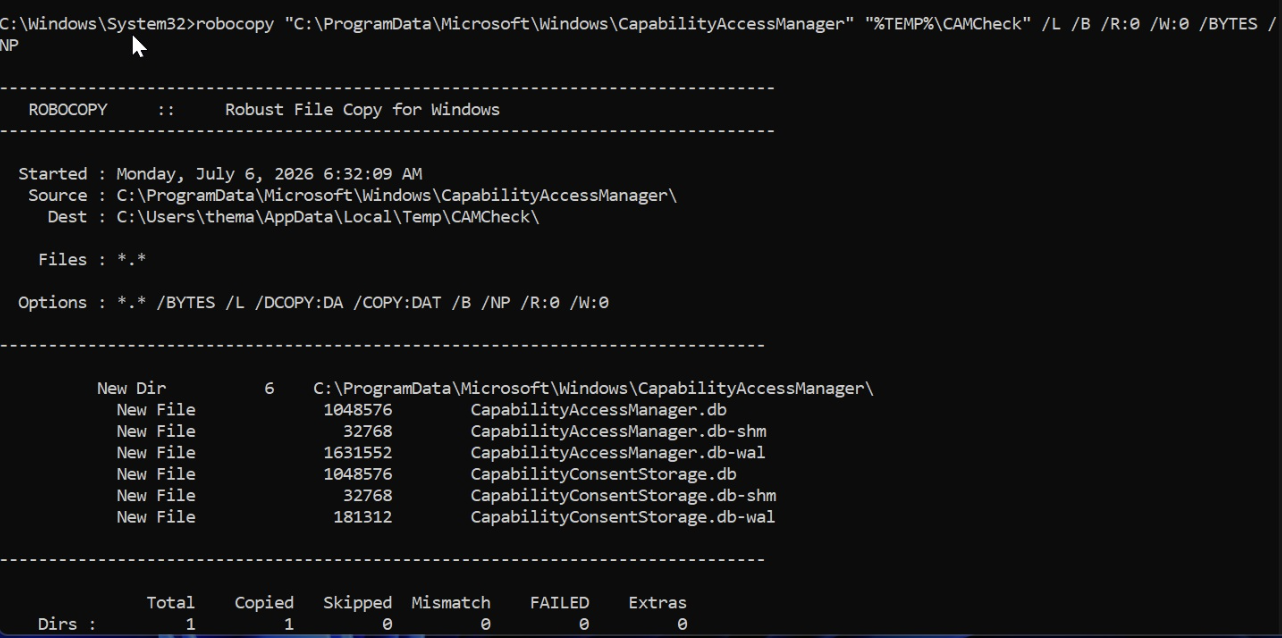
3. Look for CapabilityAccessManager.db-wal in the output. Note its size in bytes.
Do the same process after ten minutes and compare the values values side by side.
If the MB difference is less, then file is relatively small. The high CPU usage may have another cause.
If the difference is in terms of sevaral GB, the database log is growing excessively. You must update your windows.
Fix 6: Rename the Oversized Database File in Safe Mode
You must use this method only if the CapabilityAccessManager.db-wal file is extremely large and Windows Update cannot install the relevant fix because your system drive is running out of space.
1. First, try freeing up space using Disk Cleanup or Storage Sense. Make sure to not delete the database file.
2. Then, open Start, type cmd, right-click Command Prompt, and select Run as administrator.
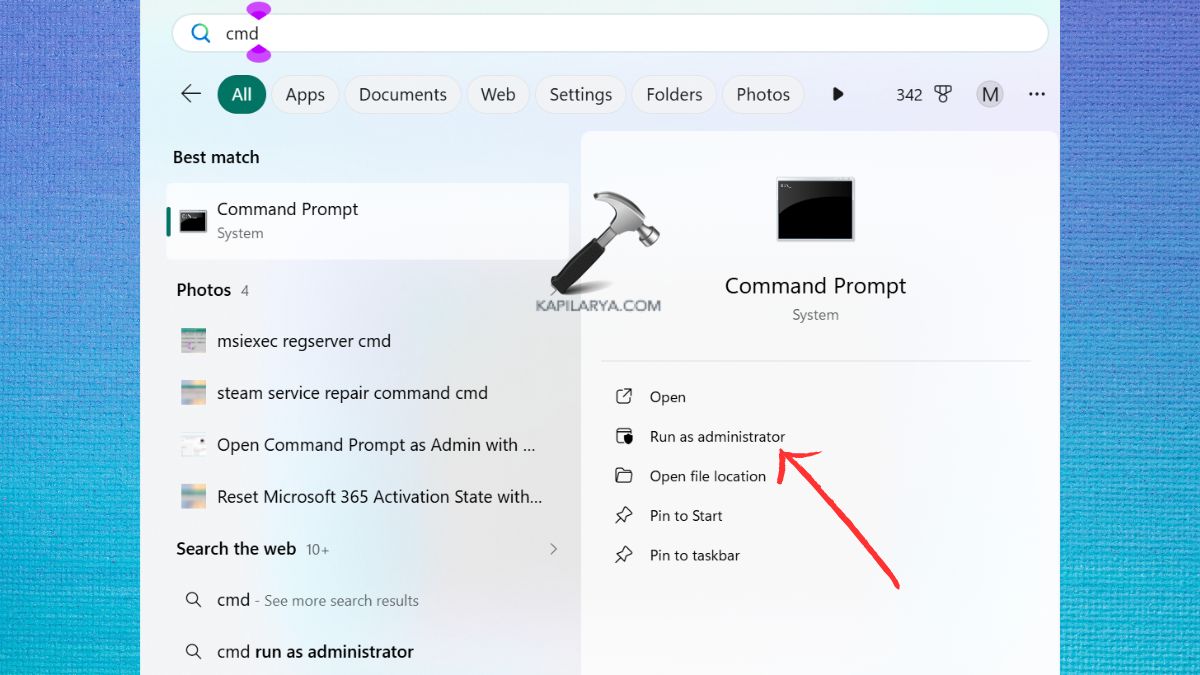
3. Run the following command: net stop camsvc. It stops Capability Access Manager Service.
4. Then, Rename the database log by using the command:
ren "C:\ProgramData\Microsoft\Windows\CapabilityAccessManager\CapabilityAccessManager.db-wal" CapabilityAccessManager.db-wal.old
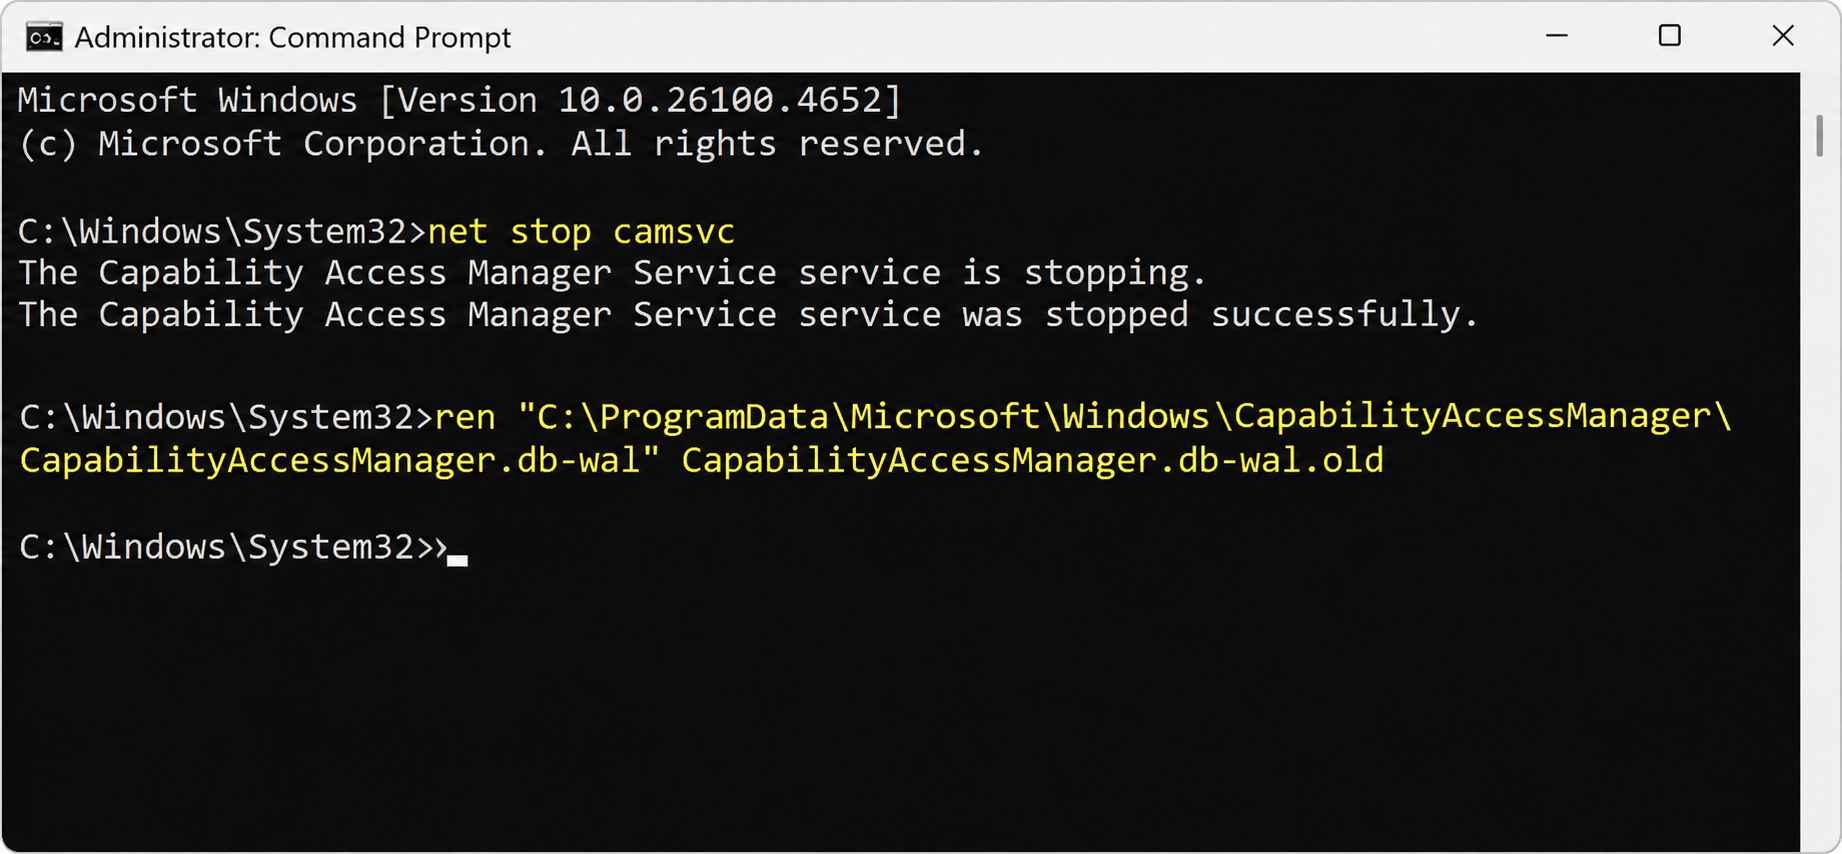
5. Once done, restart Windows normally. Then, check whether Wi-Fi, the camera, microphone, and Snipping Tool work correctly.
6. Now, install the latest Windows update as mentioned in Fix 4.
Fix 7: Repair Windows System Files Using DISM and SFC
If Capability Access Manager Service continues using high CPU even after installing updates, use DISM and System File Checker tools to check and repair Windows components.
1. Right-click Start and select Terminal (Admin). Select Yes if User Account Control asks for permission.
2. Run the following DISM command: DISM.exe /Online /Cleanup-Image /RestoreHealth
3. This process may take several minutes, so wait for the process to complete.
4. Once done, type this command: sfc /scannow
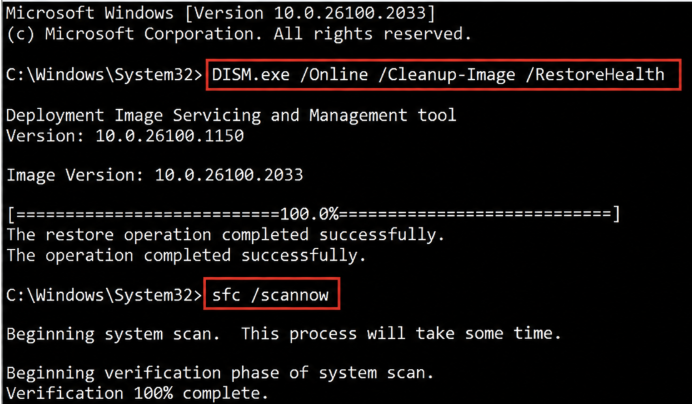
5. Wait until System File Checker completes the verification.
Then, review the result it gave and restart your computer.
Fix 8: Perform a Clean Boot to Identify Conflicting Programs
Sometimes, certain third-party apps like audio tools, virtual camera software, screen recorders, and location utilities, may interfere with Windows services.
In that case, a clean boot starts Windows with essential Microsoft services and a reduced set of startup applications.
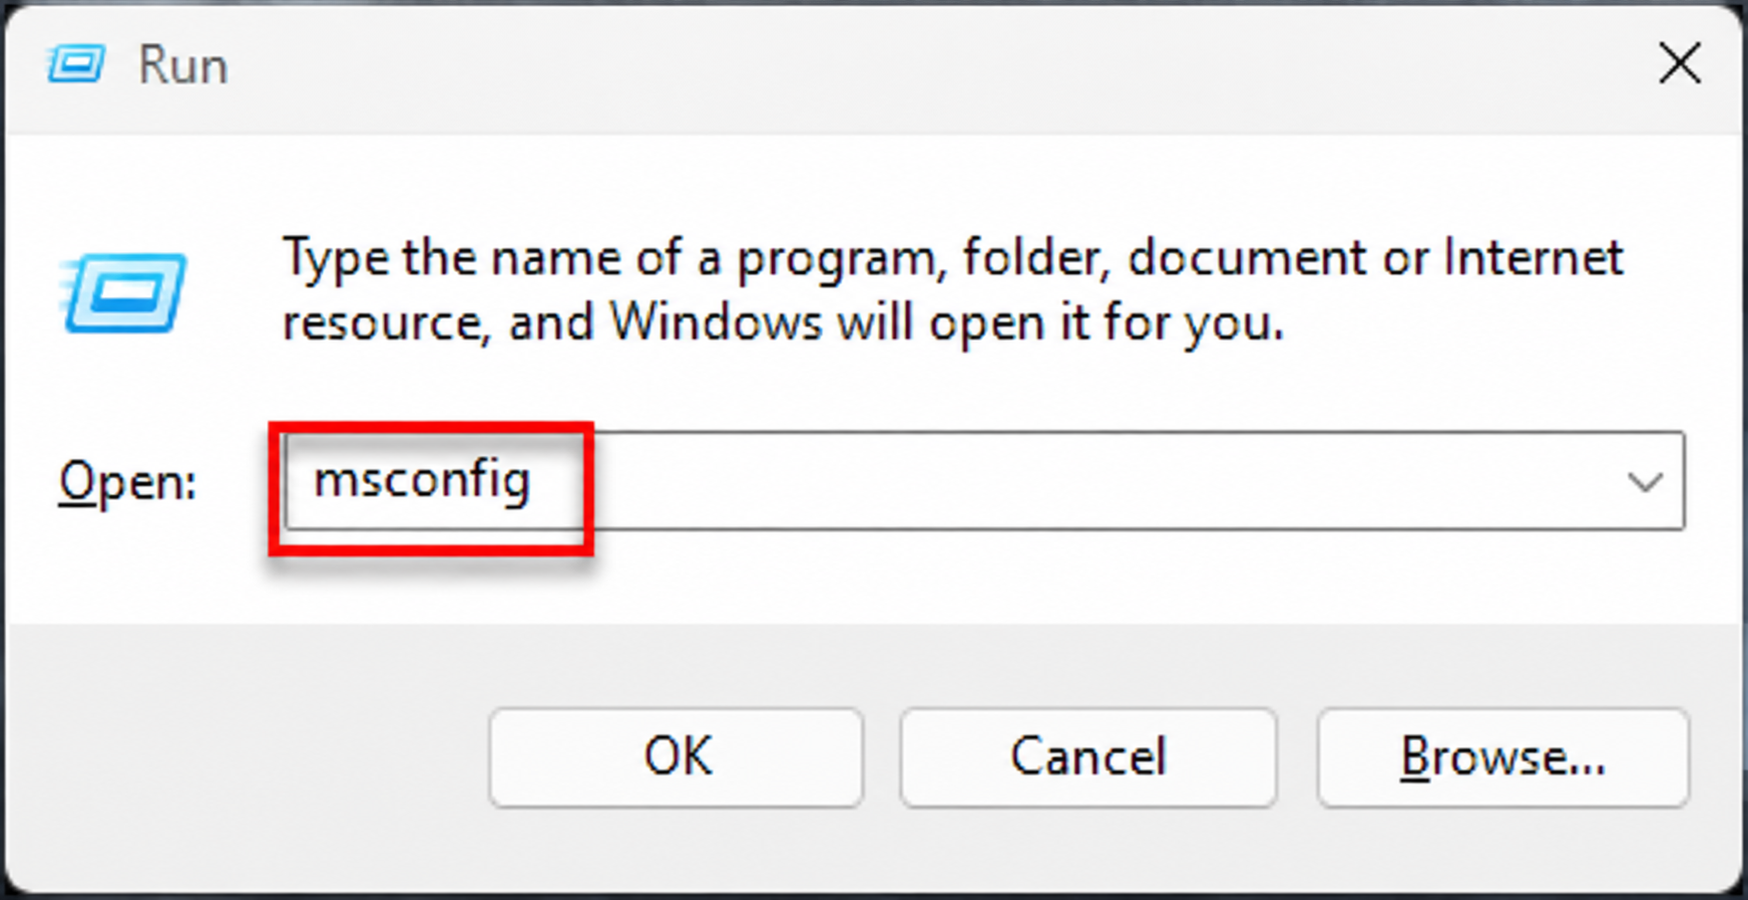
1. Press Win + R, type msconfig, and press Enter.
2. In System Configuration, open the Services tab.
3. Select Hide all Microsoft services.
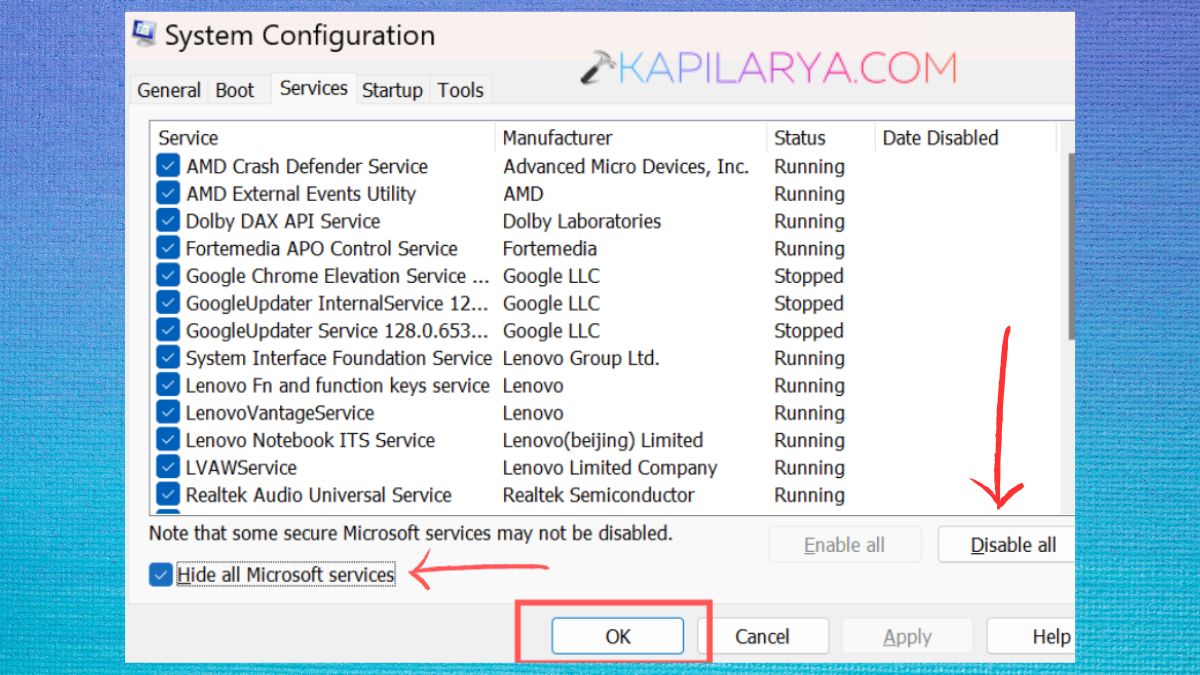
4. Click Disable all and then select Apply.
5. Then, open the Startup tab and select Open Task Manager.
6. In Task Manager, open Startup apps. Select each enabled startup application and click Disable.

7. Close Task Manager and return to System Configuration.
Select OK and restart your computer.
Fix 9: Check the svchost.exe File and Scan for Malware
Capability Access Manager Service runs inside a Service Host process named svchost.exe. Malware can sometimes use the same filename to disguise itself.
1. Press Ctrl + Shift + Esc to open Task Manager.
2. Select the Services tab.
3. Find camsvc, right-click it, and select Go to details.
4. Right-click the highlighted svchost.exe process.
5. Select Open file location. Check whether File Explorer opens the following folder:
C:\Windows\System32
6. If the file is located elsewhere, run a full scan using Microsoft Defender.
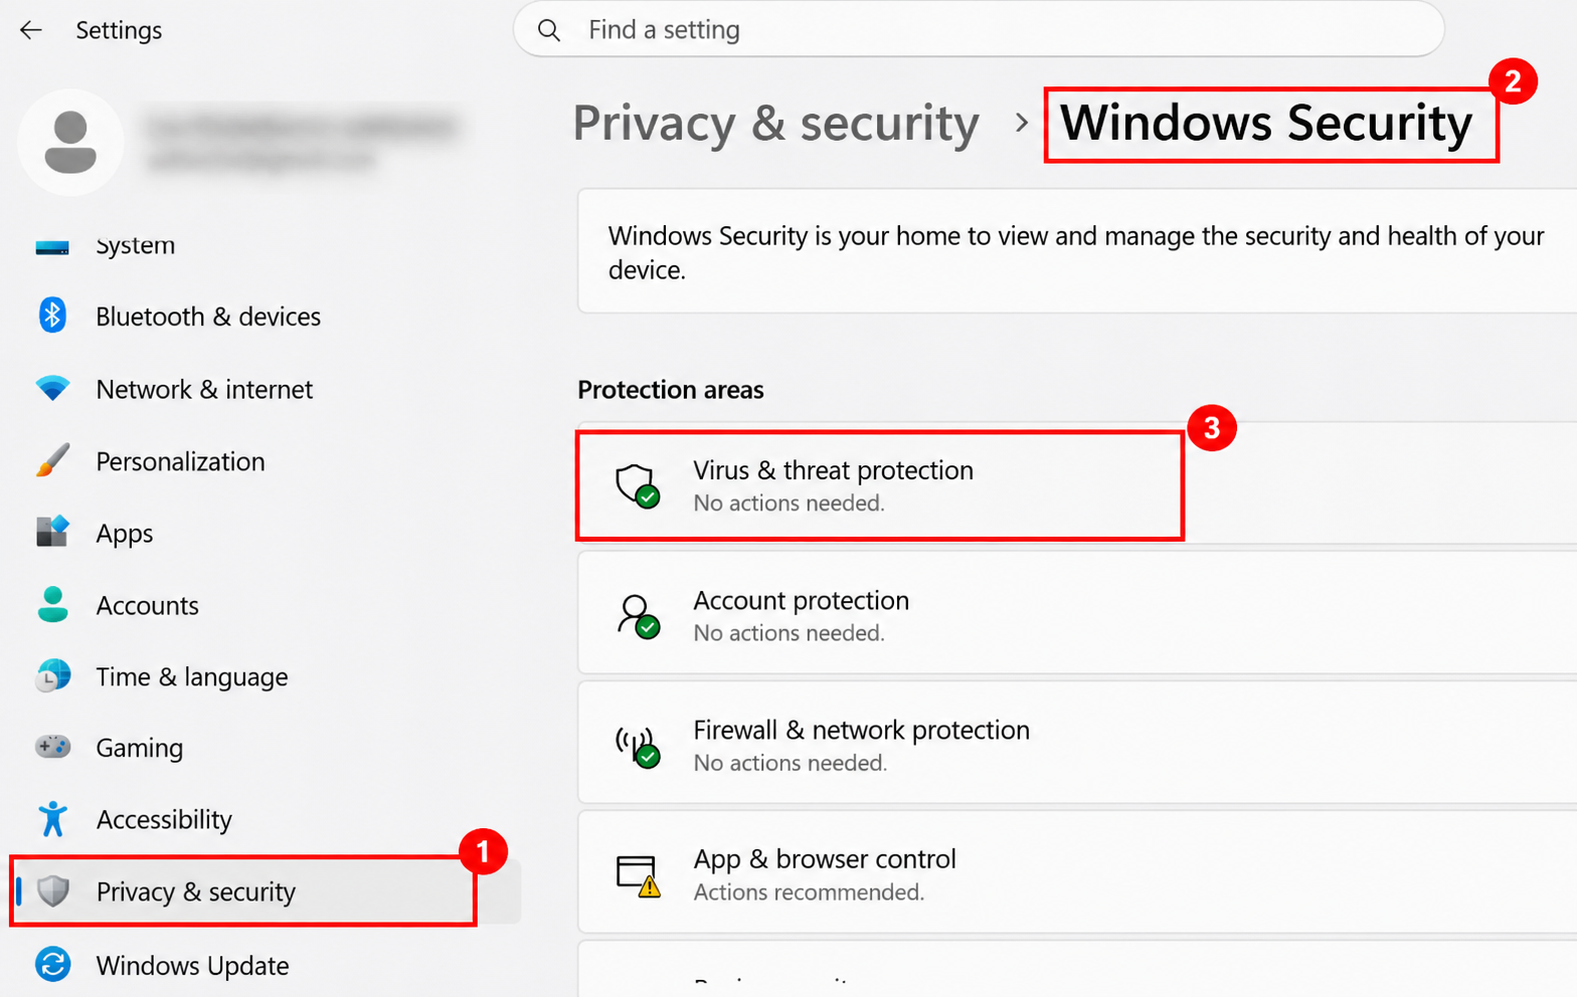
Open Settings > Privacy & security > Windows Security. > Virus & threat protection.
7. Click Scan options. Select Full scan and click Scan now.
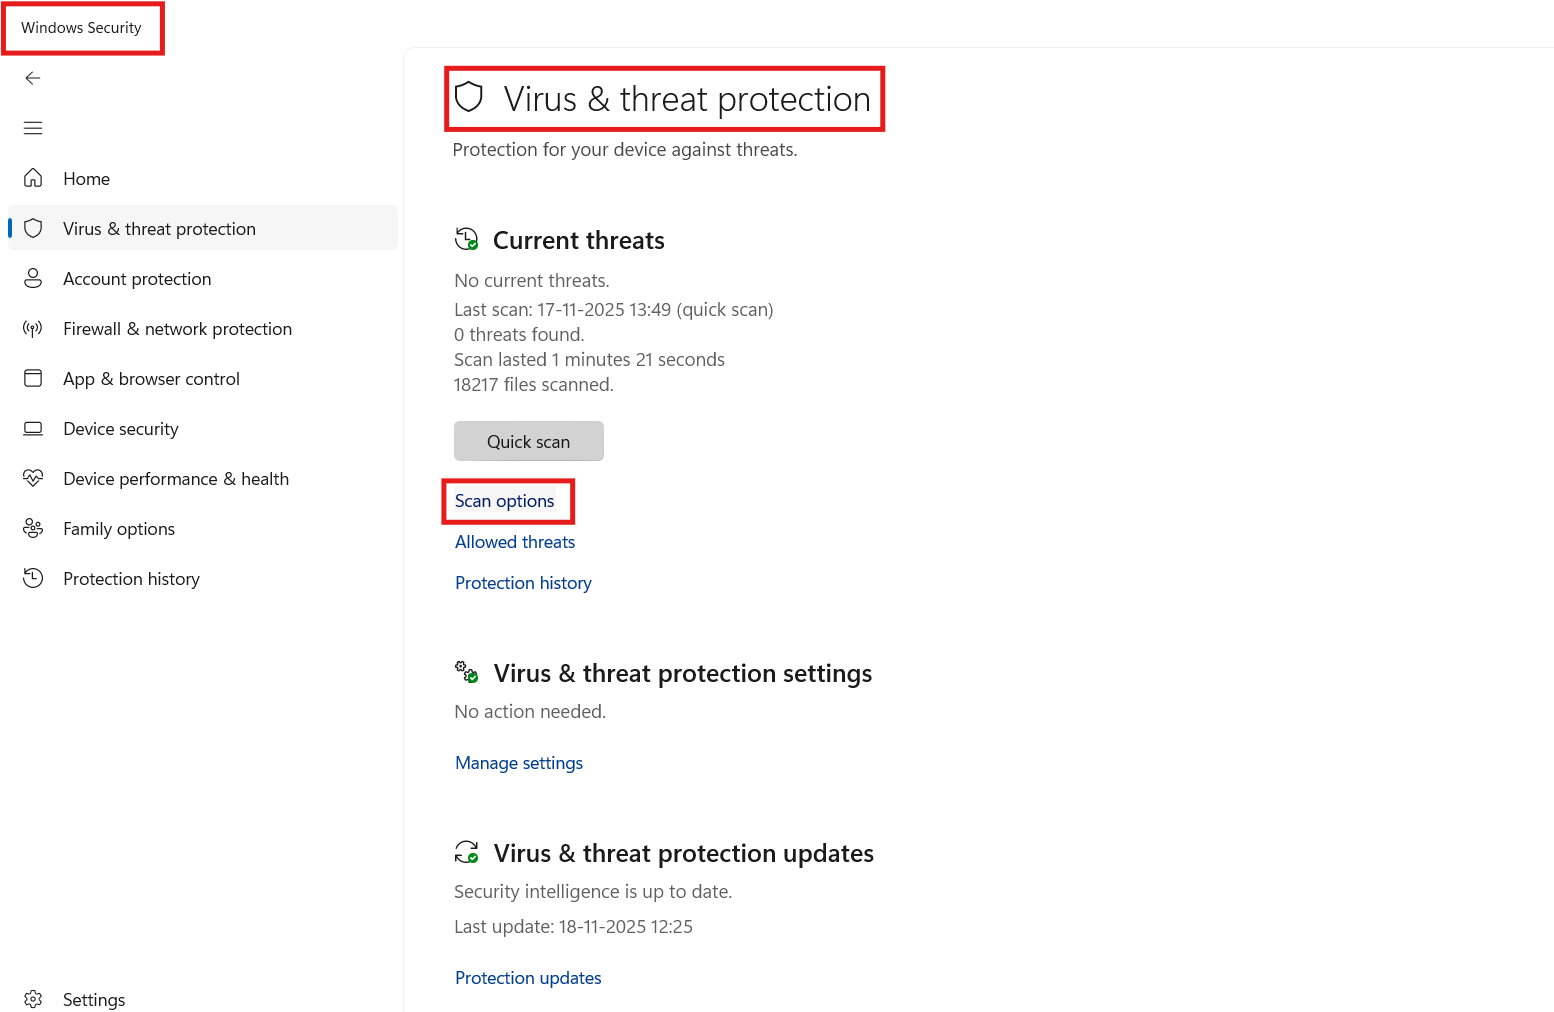
8. Microsoft Defender completes the scan and follow the recommendations it gives.
Once the scan is complete, restart your PC. Your problem would be now rectified.
That’s it!