Over time, your computer fills with unnecessary files like temporary data, cache, downloads, deleted files, and more. These junk files can eat away at your disk space, causing slowdowns and problems. In this guide, we’ll show you how to use Windows 11 built-in feature called Storage Sense to free up disk space automatically.
Page Contents
Use Storage Sense on Windows 11 to Free up Disk Space Automatically
Enable Storage Sense in Windows 11
To run Storage Sense automatically on your Windows 11 PC, start by enabling it. Here’s how:
1. Open the Windows Settings app.
2. Go to the “System” tab and select “Storage“.

2. Under the Storage management section, turn on the “Storage Sense” toggle.

Once enabled, the Storage Sense will run automatically with the default settings.
Configure Storage Sense in Windows 11
To control when Storage Sense runs and how it frees up space on your computer, follow these steps to configure its settings.
1. In the Windows Settings, head to “System” > “Storage”.
2. Under Storage management, click on the “Storage Sense” tile to open its settings.

3. To automatically clean up temporary and app files, keep the option enabled under the ‘Cleanup of temporary files’ section.
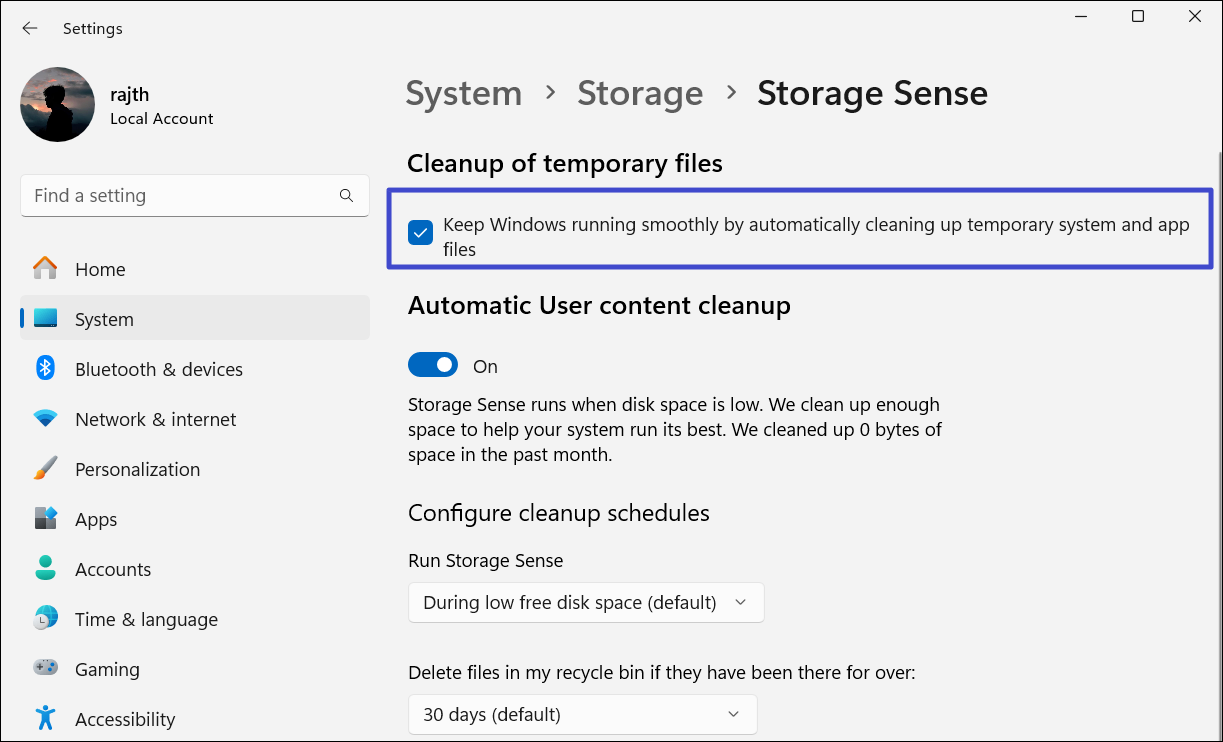
4. To schedule your auto cleanup, first, enable the toggle under “Automatic User content cleanup“.

5. Use the “Run Storage Sense” drop-down menu to specify when the Storage Sense should run – Every day, Every week, Every month, or During low free disk space (default).

6. In the “Delete files in my recycle bin…” setting, choose how long files should remain in your Recycle Bin before they are permanently deleted. Note: Only files in the Recycle Bin that are older than the specified number of days will be deleted.

7. Finally, Use the “Delete files in my Downloads folder…” drop-down menu to choose how many days files can remain unopened before being automatically deleted.

Once you complete these steps, Storage Sense will automatically free up space on your drive when it’s running low, based on your settings.
If you’re running out of space now, click the “Run Storage Sense now” button to clean up your drive and free up space instantly.

That’s it.