The laptop sound not working in Windows 11 is a problem users face after updating their Windows 11 system, installing or removing drivers, software conflicts, or accidental changes in settings. This issue can make it impossible to hear laptop sound, which will make online meetings, conferences, and calls difficult, and having no sound while gaming or watching movies will make you feel like a spectator watching someone else’s game.
In this guide, you’ll learn 13 effective solutions to fix laptop sound not working in Windows 11, along with all the troubleshooting steps.
Page Contents
Fix: Laptop sound not working in Windows 11
Make sure that audio output devices and sound settings are set correctly; only reinstall the driver if necessary, and proceed to advanced troubleshooting if, after that, the problem persists. In most cases, one of these fixes will successfully restore your laptop’s audio functionality.
Fix 1: Confirm the Correct Audio Output Device Is Selected
Most commonly, Windows 11 might automatically switch to a different audio device, particularly when it detects Bluetooth devices or external monitors.
1. Hit Windows + I to open Settings. Select System > Sound.

2. In Output, find the available Audio devices. Select laptop speakers. Tap the device you wish to use.
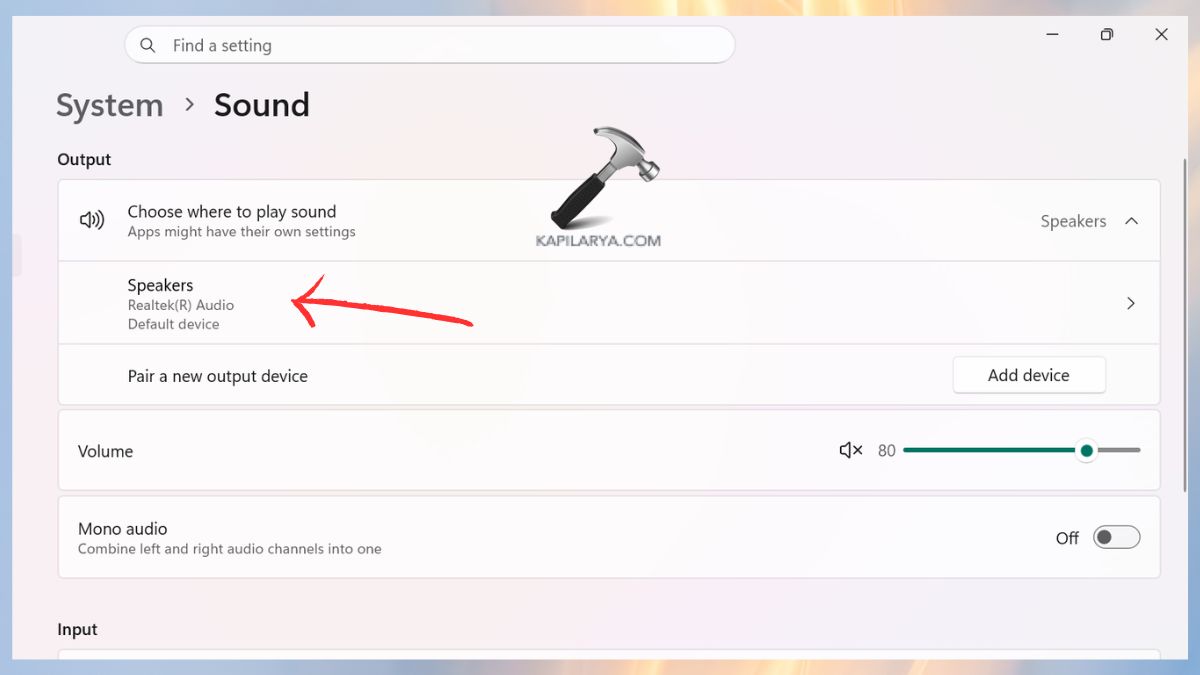
3. Test audio playback.
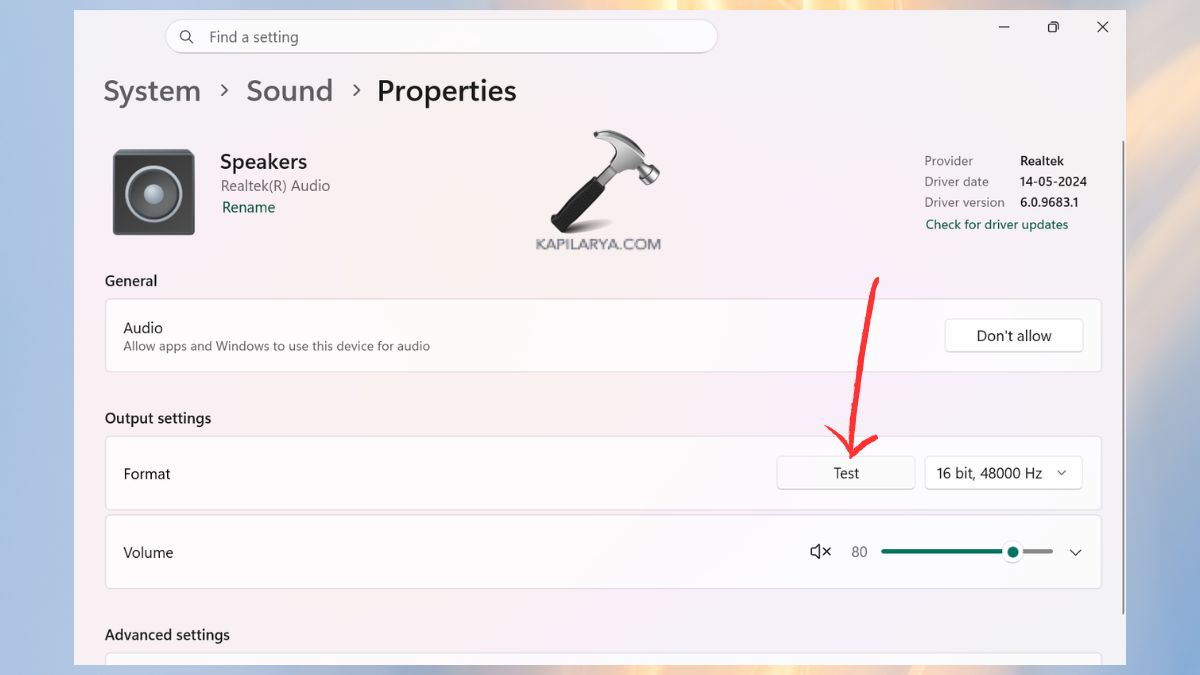
If it was not the correct device, the sound should begin to play right away.
Fix 2: Run the Built-In Audio Repair Tool
Windows 11 comes with built-in troubleshooter software, which will automatically identify and correct common sound problems.
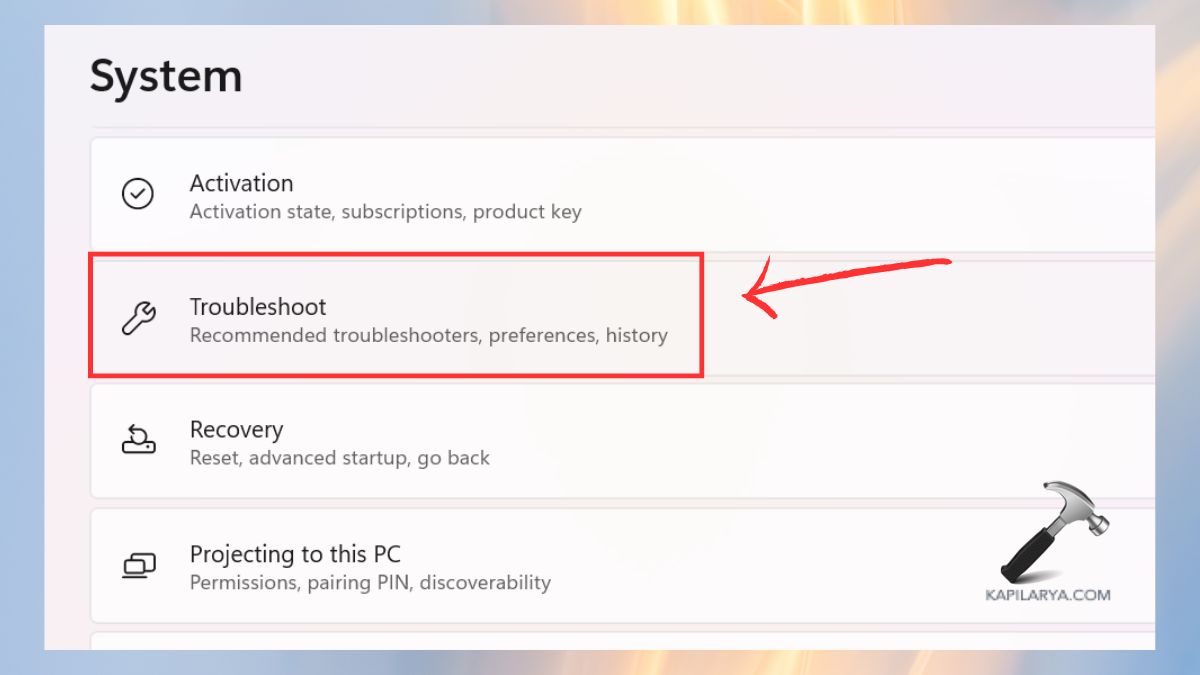
1. Open Settings. Click on System > Troubleshoot.
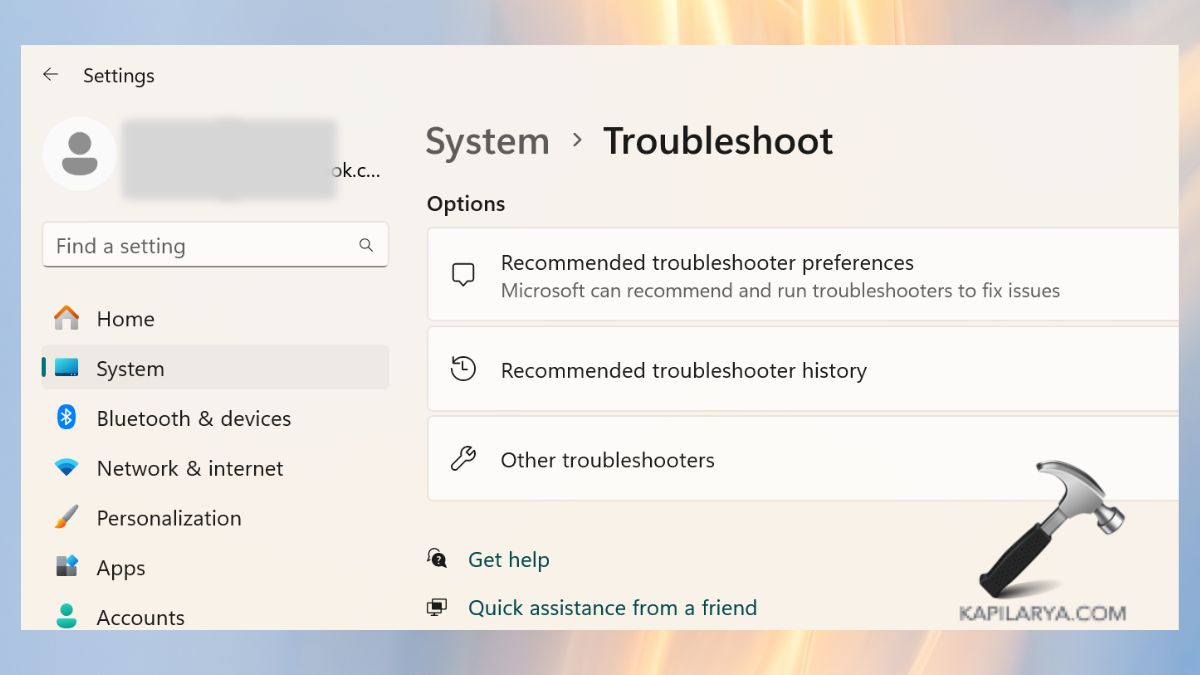
2. Click Other troubleshooters.
3. There, find Audio and tap on Run.
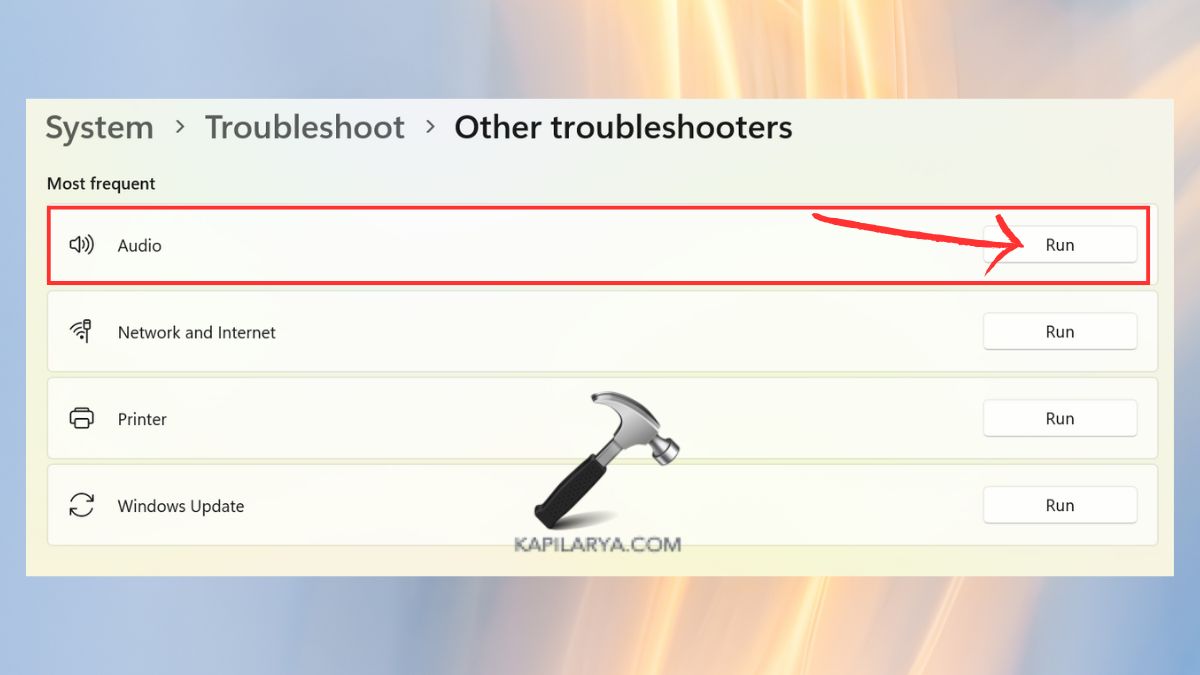
Accept the suggestions on the computer screen. Implement any recommended solutions. Missing configurations and Audio Service problems can be fixed automatically with this tool.
Fix 3: Restart Essential Windows Audio Services
Audio services are used to process sounds throughout the operating system.
1. Hold the Windows key and press R. Type this command in and press Enter.
services.msc
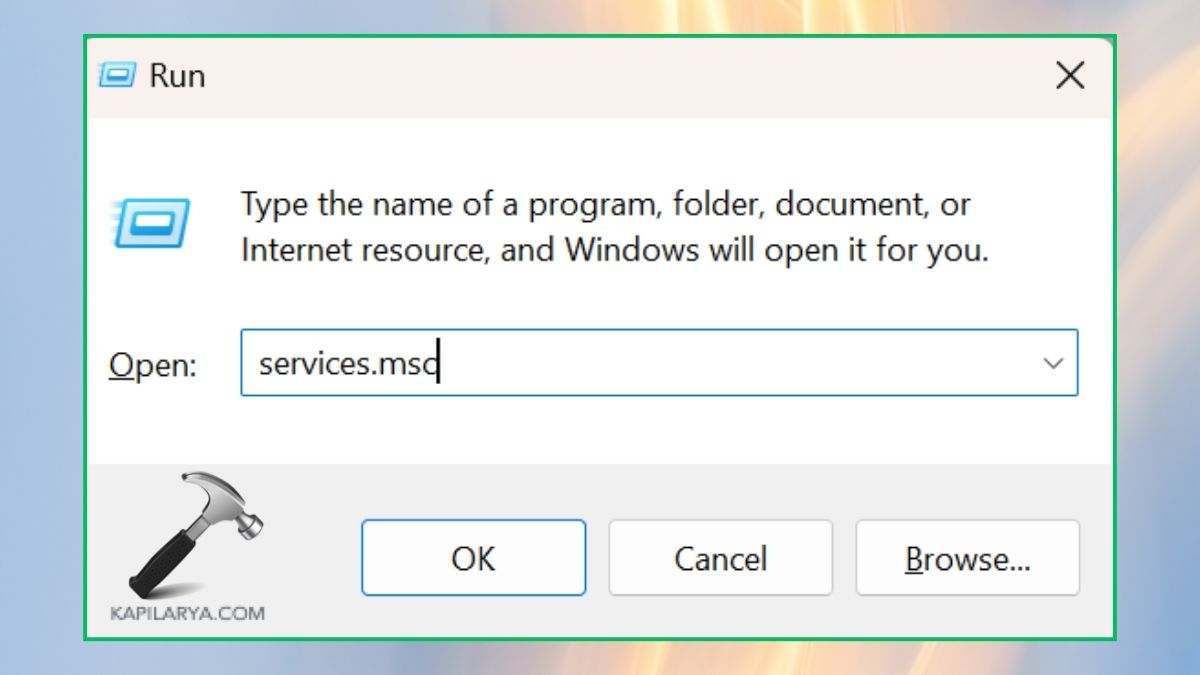
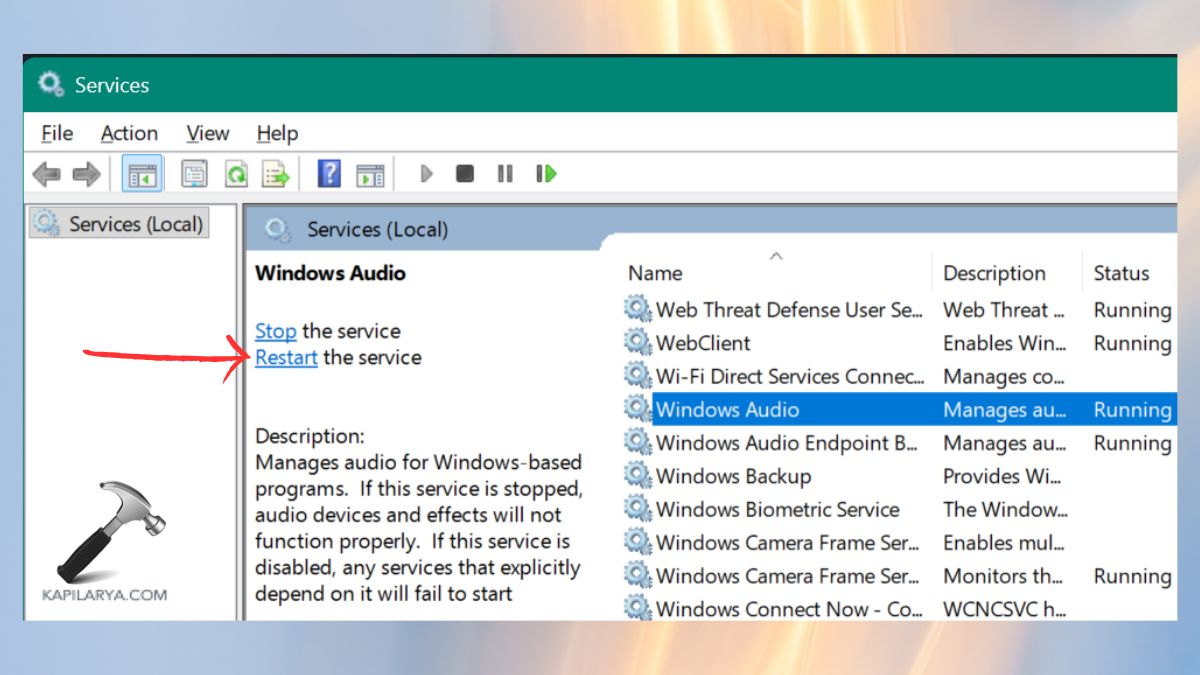
2. Locate these services:-
- Windows Audio Endpoint Builder
- Windows Audio
3. Right-click each service. Select Restart.
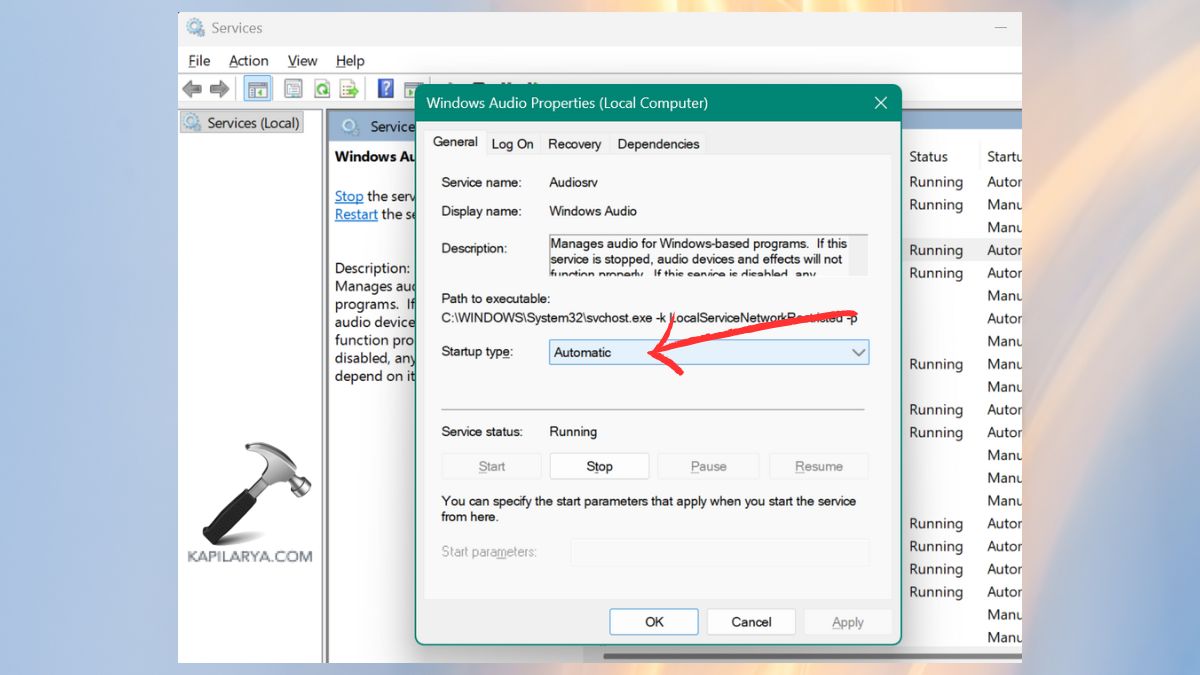
4. Make sure that the Startup Type is Automatic. Restart the services and see if there is audio returned.
Fix 4: Install the Latest Windows 11 Updates
Microsoft often publishes security bugs and compatibility fixes.
1. Open Settings. Select Windows Update.
2. Click Check for updates. Install any available installs that need updates.
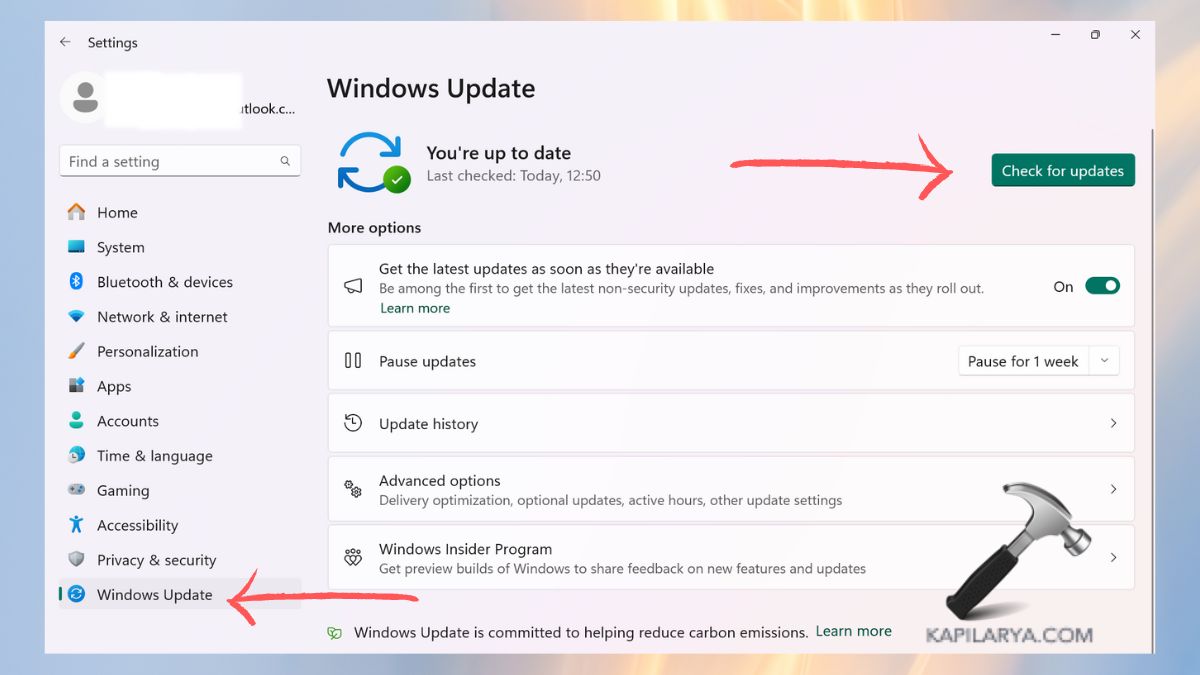
Restart your laptop. After performing pending system updates, many users are able to fix audio problems.
Fix 5: Reinstall the Audio Driver Completely
If your speakers are not recognised, the problem may be due to a corrupted audio driver that prevents Windows from working with the audio device.
1. Press Windows + X. Access the Device Manager.
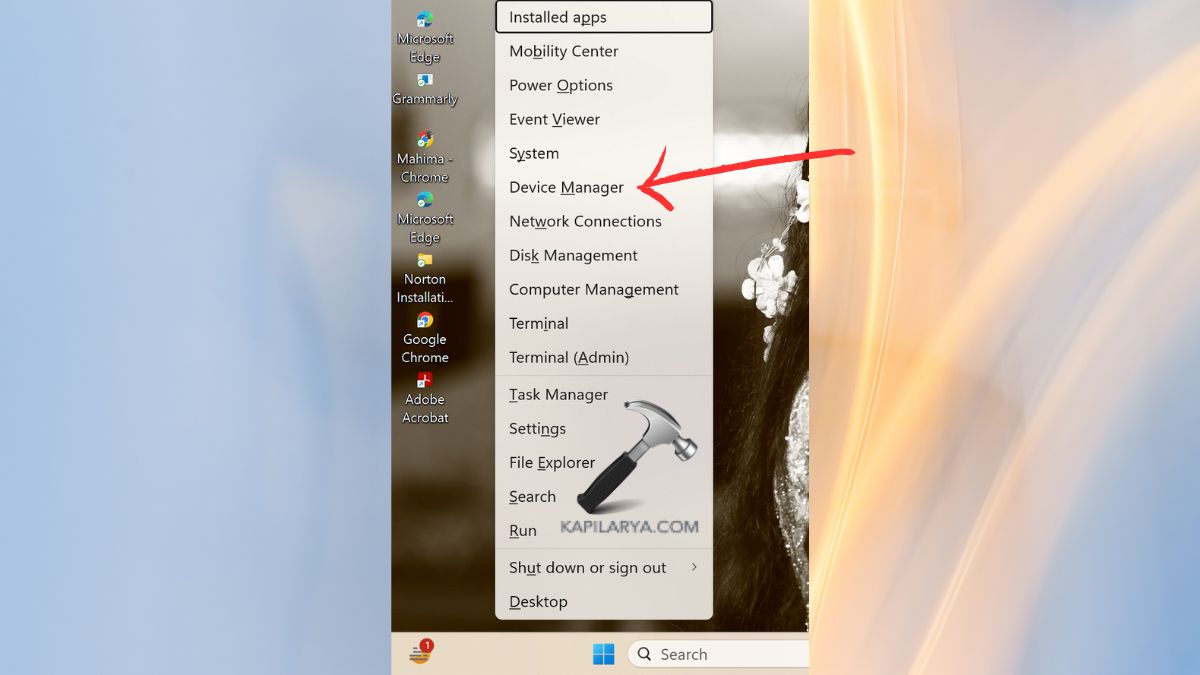
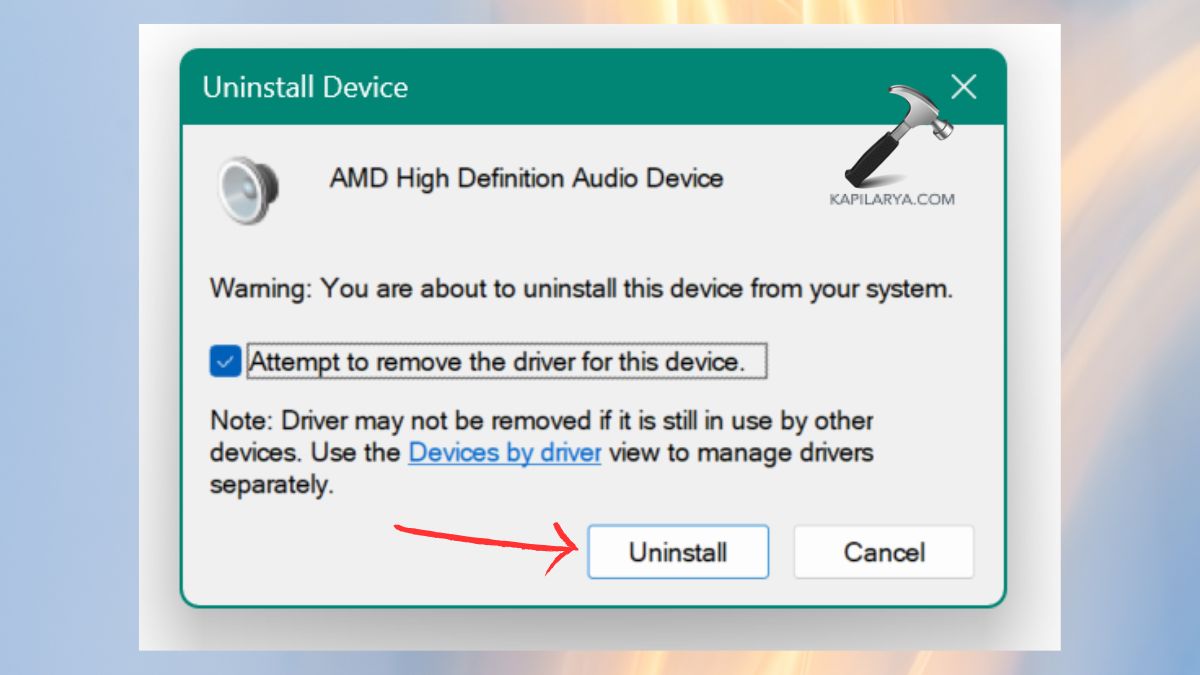
2. Expand Sound, video and game controllers. Right-click on your Audio device. Select Uninstall device.

3. Confirm removal. Then, restart the laptop. The necessary audio driver will be automatically installed at boot time.
Fix 6: Update or Revert the Sound Driver
Upgrades to a driver might lead to compatibility problems.
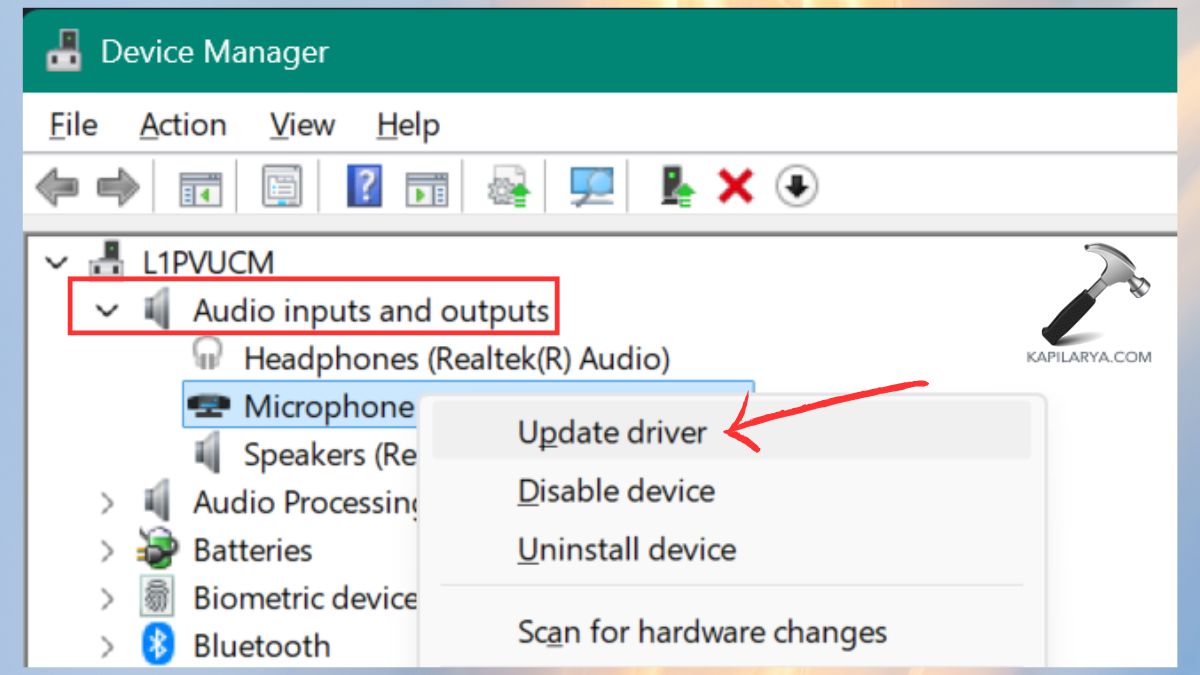
1. Open Device Manager.

2. Right-click the audio driver. Select Update driver. Drivers are automatically selected by clicking on Search.
3. Double-click to open driver Properties.

4. Click on the Driver tab. Click on Roll Back Driver, if available.

Restart the system. If the issue has cropped up since the latest update, rolling back may be helpful.
Fix 7: Verify Speaker Volume and Sound Settings
Sometimes it might be a problem with how loud it is.
1. Right-click on the speaker icon. Click on the Volume Mixer icon.
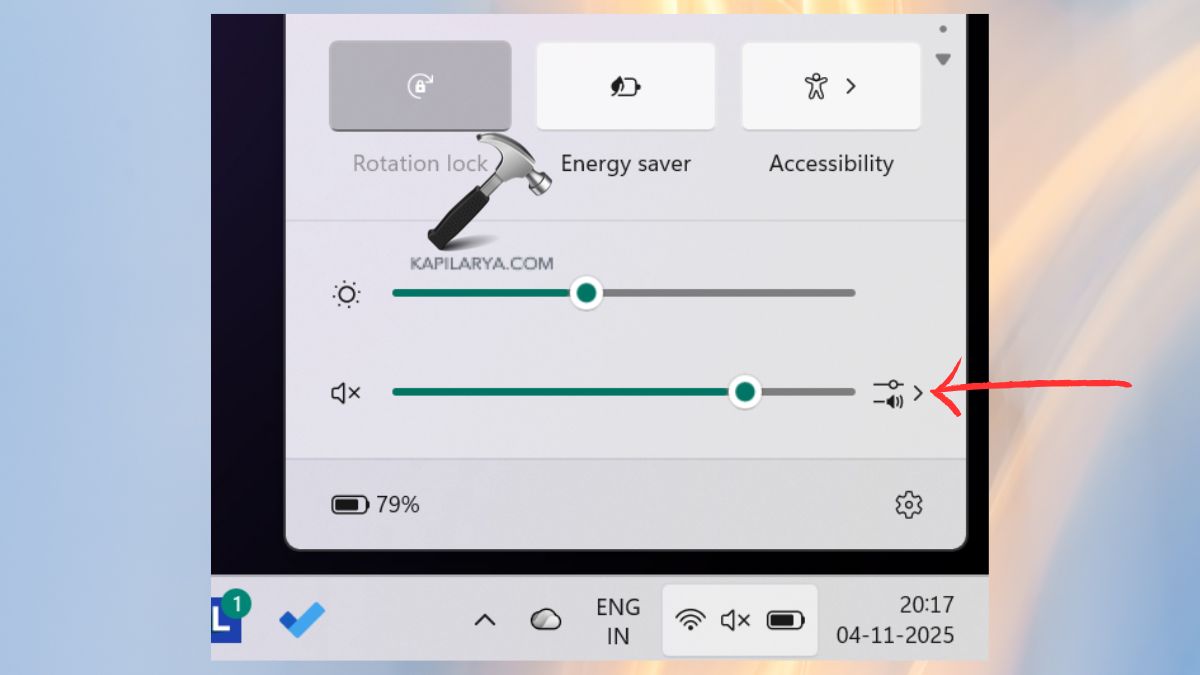
2. Note that volume is not muted, application volume is turned up, and speaker volume is higher than 0.

Test audio again. See if there are any shortcuts to muting keys on the keyboard that have been set by accident.
Fix 8: Modify the Default Audio Format
We recommend that you submit audio files that are widely supported, playing without any problems.
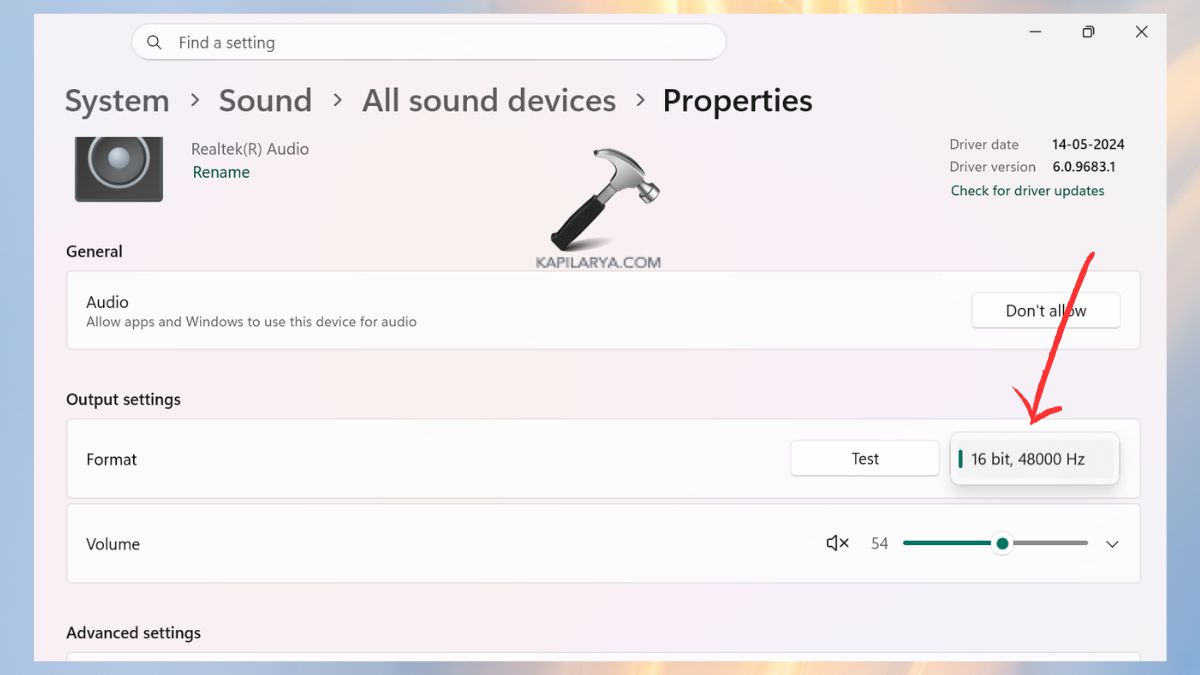
1. Open Settings > Sound. Please choose the sound output device.
2. In the Advanced section, go to “All sound devices”.

3. Select the Output device. In the Output Settings, select the Format from the drop-down menu. Click Apply and OK. Try different formats until the audio data is working normally.
Fix 9: Turn Off Audio Enhancements
Audio enhancement may sometimes be an issue in playback.
1. Open Settings > Sound.
2. Choose your speaker device. Locate Audio Enhancements. Tap on Off.
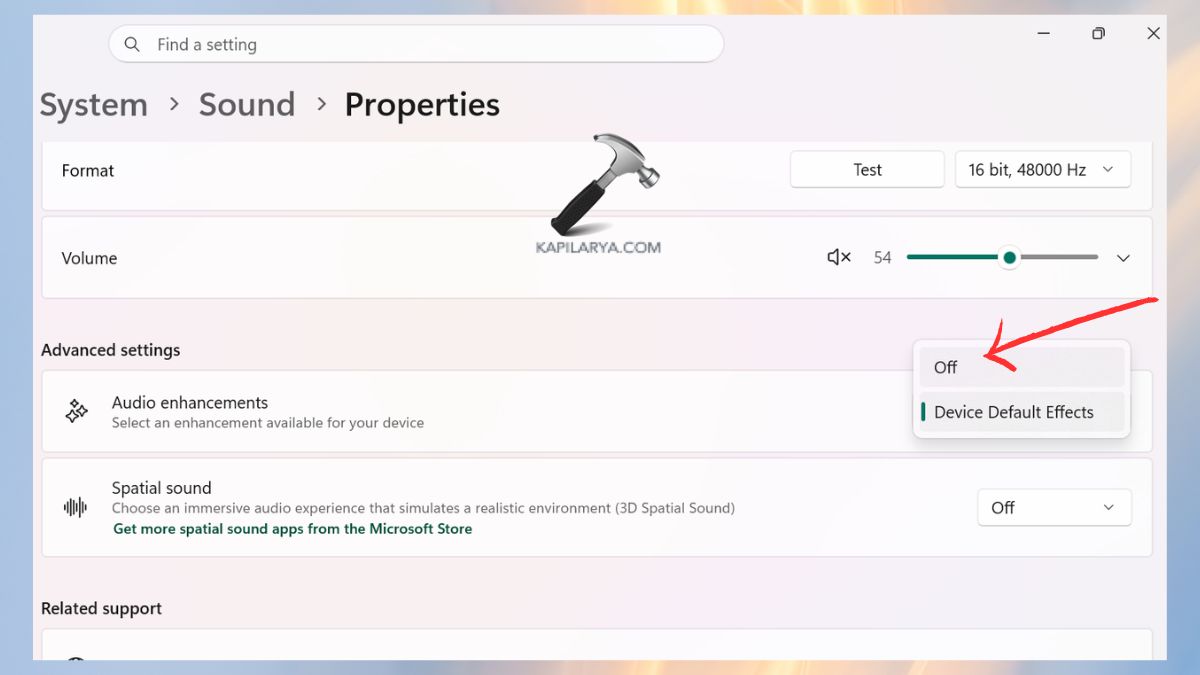
Restart audio playback. The enhancements are usually disabled to fix distorted or missing sound.
Fix 10: Review Advanced Speaker Configuration Settings
Wrong speaker configurations will NOT play audio.
1. Open the Run dialog box with Win+R, and type this:
mmsys.cpl
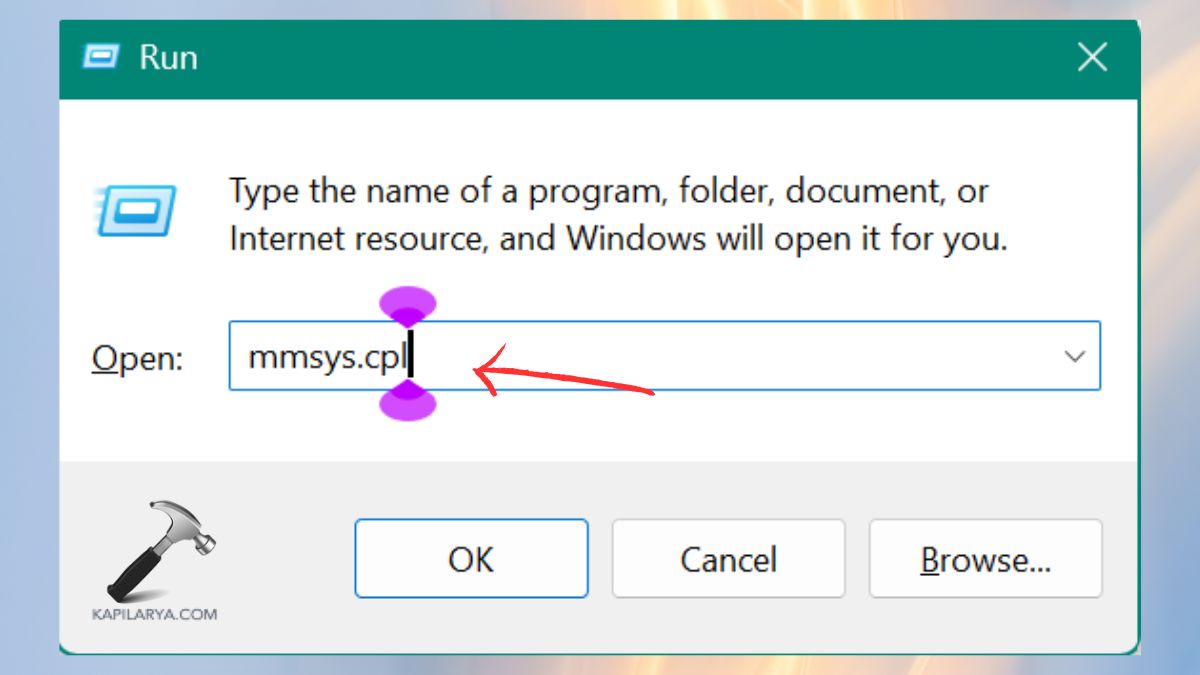
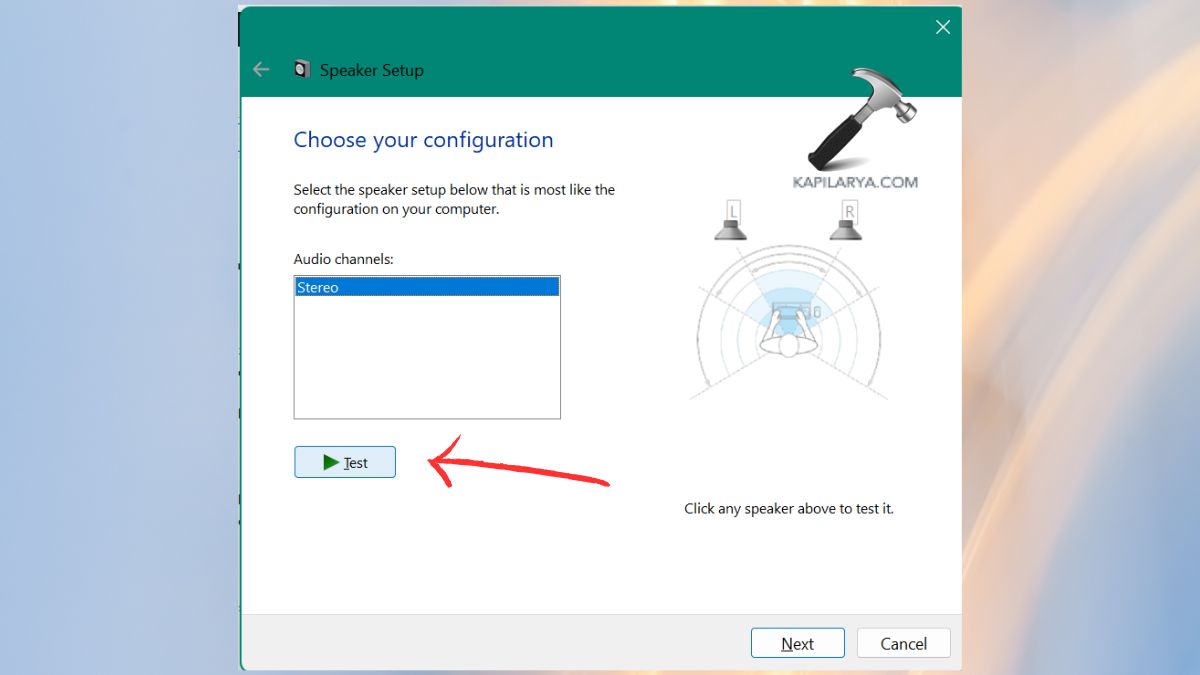
2. Choose your speakers or headphones. Click Configure.
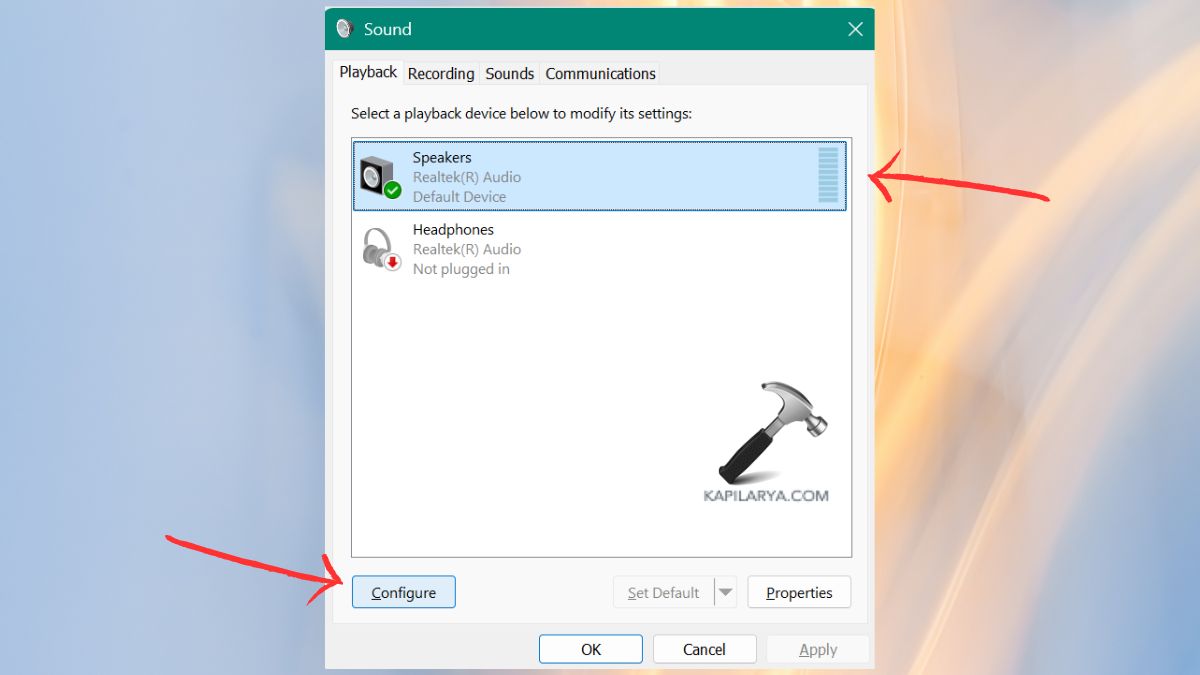
3. Select Speakers Setup and Test. Finish up the configuration wizard. This guarantees that Windows provides the audio appropriately to the speakers.
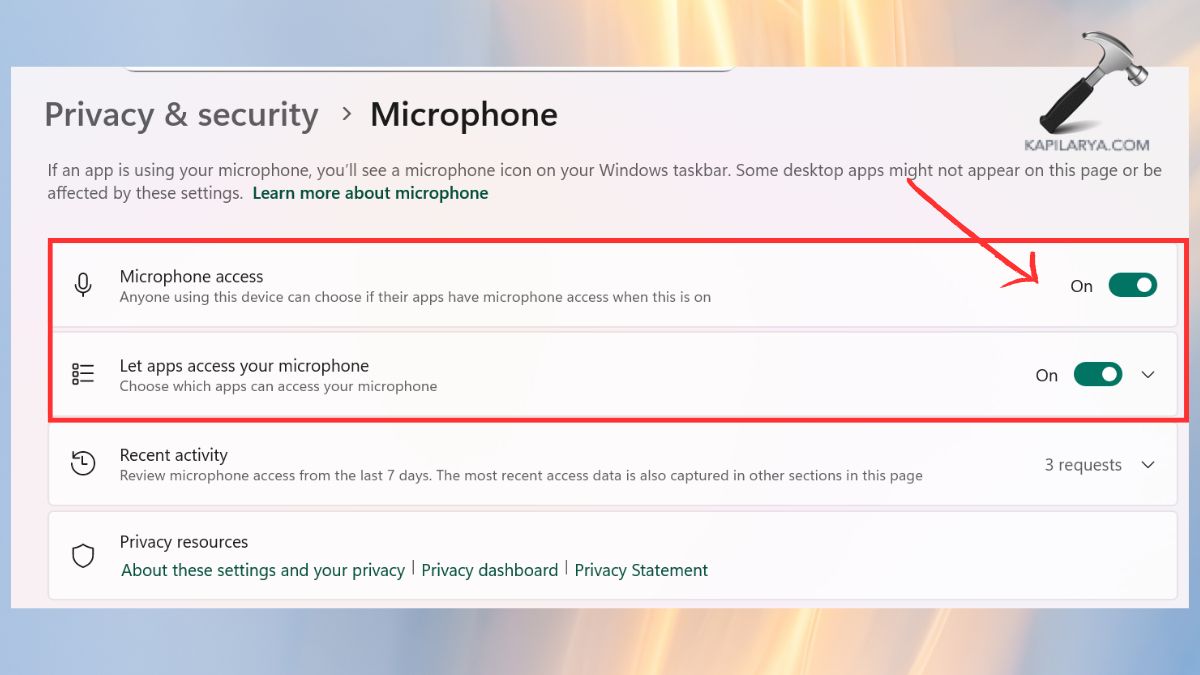
Fix 11: Check Microphone Permissions and Privacy Settings
If neither the microphone nor the audio function is involved, then privacy settings may be.
1. Open Settings. Select Privacy & Security. Click Microphone.
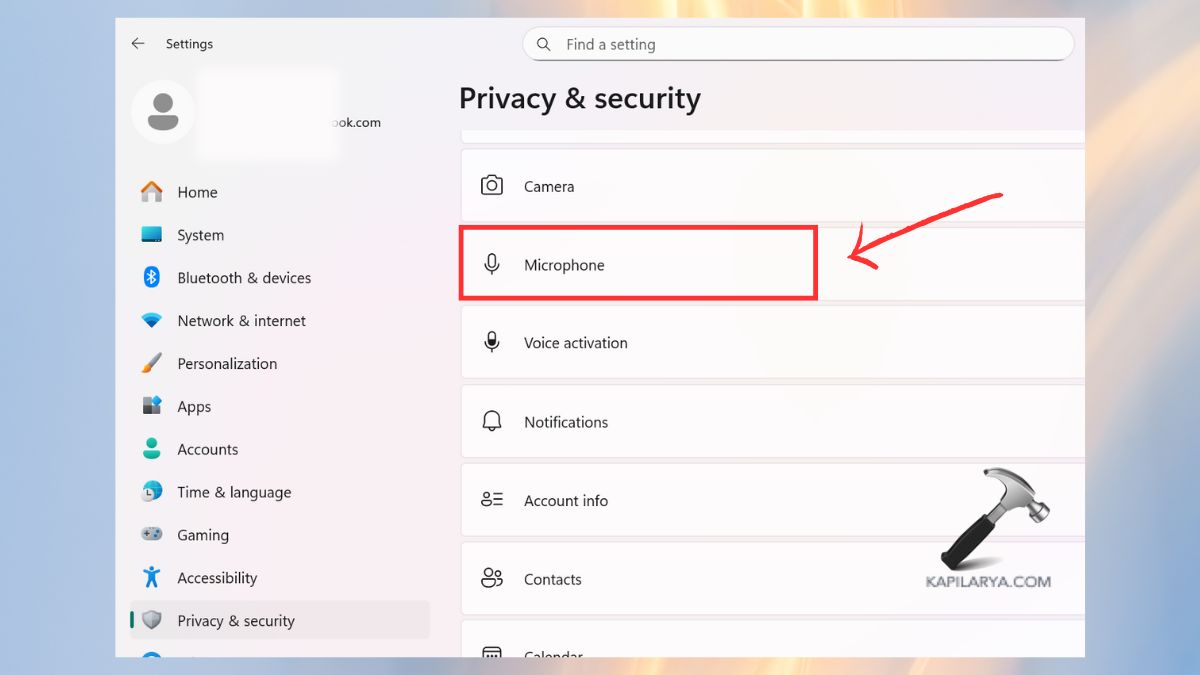
2. Enable: Microphone access and let apps access your microphone. Check the permissions for the affected applications. This fix is particularly useful for communication applications.