Windows audio acceleration is basically a feature that offloads sound processing tasks from your Windows 11 computer’s CPU to your audio hardware. This would basically improve the efficiency and reduce latency during playback, recording, intensive task like gaming or audio production. In order to enable Windows audio hardware acceleration, the audio driver must support it. If your audio driver supports this feature, you can enable or disable it using this guide.
If you are on Windows 11 build 29576.1000 or later, you will be able to locate a dedicated option to enable or disable audio hardware acceleration in Windows 11 settings app.
Page Contents
Enable audio hardware acceleration in Windows 11
Method 1: Using Settings app
1. Right click on the Start button and select Settings.
2. In the Settings app, you have to navigate to System then Sound > select all sound devices. After this, you can select your dedicated audio input or output device.
3. Now under Advanced settings, you should be able to locate the option Hardware Acceleration. You can simply turn it on to enable audio hardware acceleration on your device. Toggling the option to off will disable this feature.

Method 2: Via audio device properties
1. Open the Control Panel and go to Sound section.
2. Then you have to select your dedicated input or output audio device.
3. Right click on it and select Properties and then go to Advanced tab.
4. Here you can check the option Allow hardware acceleration of audio with this device to enable feature.
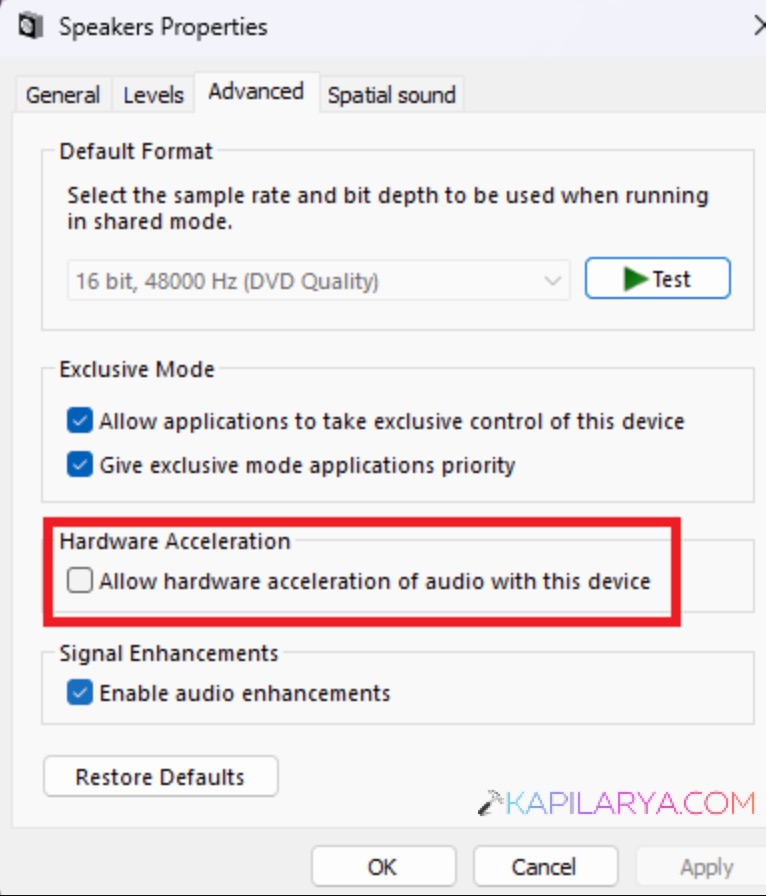
5. Finally click on the OK button to save and apply the settings.
Method 3: Via registry
1. Right click on the Start button and select Run.
2. In Run window, type regedit and click OK or press the enter key.
3. In the Registry Editor window, go to following registry location:
HKEY_LOCAL_MACHINE\SYSTEM\CurrentControlSet\Control\Class\{4d36e96c-e325-11ce-bfc1-08002be10318}\0000
4. In the corresponding right pane, you should be able to locate the registry DWORD named DisableHWAcceleration.
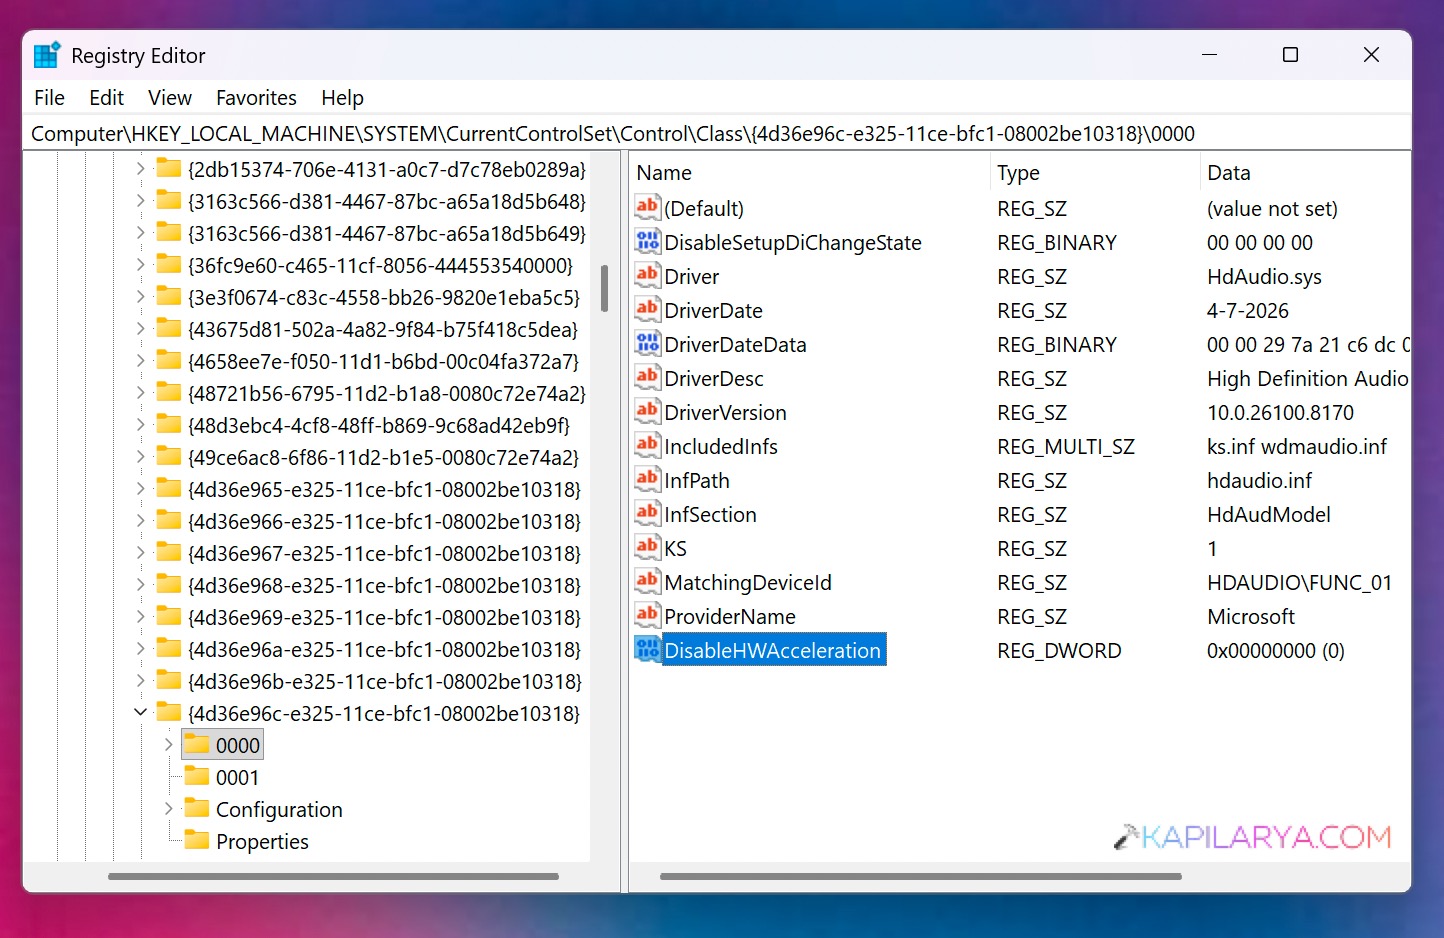
5. Double click on it and set its Value data to 0 in order to enable the audio hardware acceleration. While, if you set it to 1, it would disable the audio hardware acceleration.
6. Close the Registry Editor and return to your work.
That’s it!