Want to know how to clear computer cache in Windows 11 as well? Cache files are temporary files that are created by Windows and applications to help load content more quickly. These files enhance performance but can cause slow performance over time, storage issues, application errors and even issues with Windows updates.
When your Windows 11 PC becomes slow, apps behave strangely, and you are running out of storage space, deleting the cache can help improve performance. Luckily, Windows 11 has a handful of inbuilt methods to safely delete various types of caches.
This guide will help you discover 9 effective ways to delete computer cache in Windows 11, and take you through each step to ensure you are optimizing your PC without discarding your vital files.
Page Contents
Quick Comparison: Which Cache Should You Clear?
Well, different types of cache serve different purposes. Here’s a quick overview to help you choose the right method:
| Cache Type | When to Clear | Benefits |
| Temporary Files | Low storage space | Frees up disk space |
| Browser Cache | Websites not loading properly | Improves browsing experience |
| DNS Cache | Website connection problems | Refreshes network records |
| Microsoft Store Cache | Store app errors | Fixes download and update issues |
| Windows Update Cache | Update installation failures | Resolves Windows Update problems |
| App Cache | Apps behaving unexpectedly | Improves app performance |
| Location Cache | Privacy concerns | Removes stored location history |
Common Mistakes to Avoid While Clearing Cache
Clearing the cache is usually safe, but there are some things you should avoid doing while clearing the cache:
- Don’t delete files from unknown system folders.
- Do not delete critical files while purging temporary files.
- Don’t interrupt Disk Cleanup while it’s running.
- Be sure to double-check items before deleting.
- It works best to restart your computer after a big clean-out of the cache.
These precautions will help to ensure a smooth and safe cleanup process.
Ways to clear computer cache in Windows 11
Knowing how to clear computer cache in Windows 11 can help improve system performance, recover valuable storage space, fix application issues, and troubleshoot Windows Update errors. For the best results, follow the ways listed below rather than waiting until your PC slows down.
#Way 1: Remove Temporary Files Using Windows Settings to clear computer cache in Windows 11
The easiest method to clear the computer cache in Windows 11 is by using the Windows 11 Storage settings.
1. Hit keys Windows + I for Settings. Click System in the left pane. Select Storage.
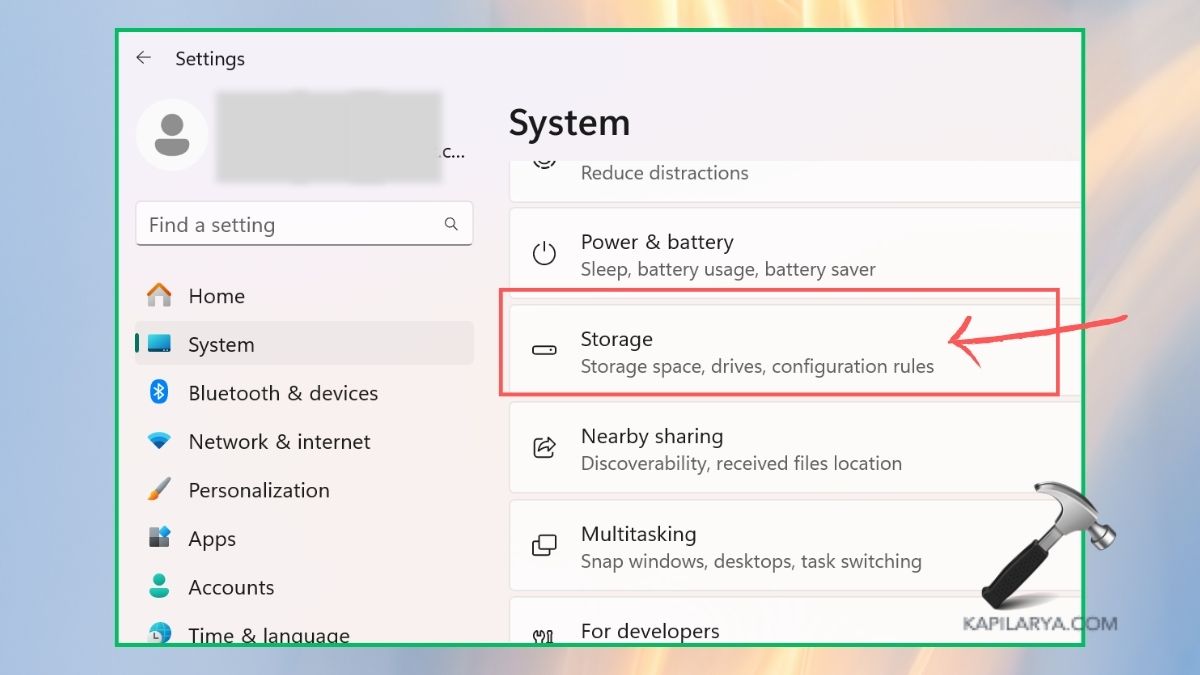
2. Click Temporary files. Windows will check for removable cache files. Click to select the objects that you wish to remove. Click Remove files. Confirm the action.

This process clears the temporary files, thumbnails, recycle bin contents and other unused cache files from the system.
#Way 2: Use Disk Cleanup for Deep Cache Removal
One of the best tools in Windows that is used to eliminate unnecessary cache files is called Disk Cleanup.
1. Press the keyboard keys Win+S. Type Disk Cleanup in the search box.

2. Open the utility. Choose the system drive (usually C:). Then, choose the categories you wish to clean, such as these –
- Temporary Internet Files
- Delivery Optimization Files
- Temporary Files
- Thumbnails
- DirectX Shader Cache
Click OK. To delete files, select “Clean up system files”.
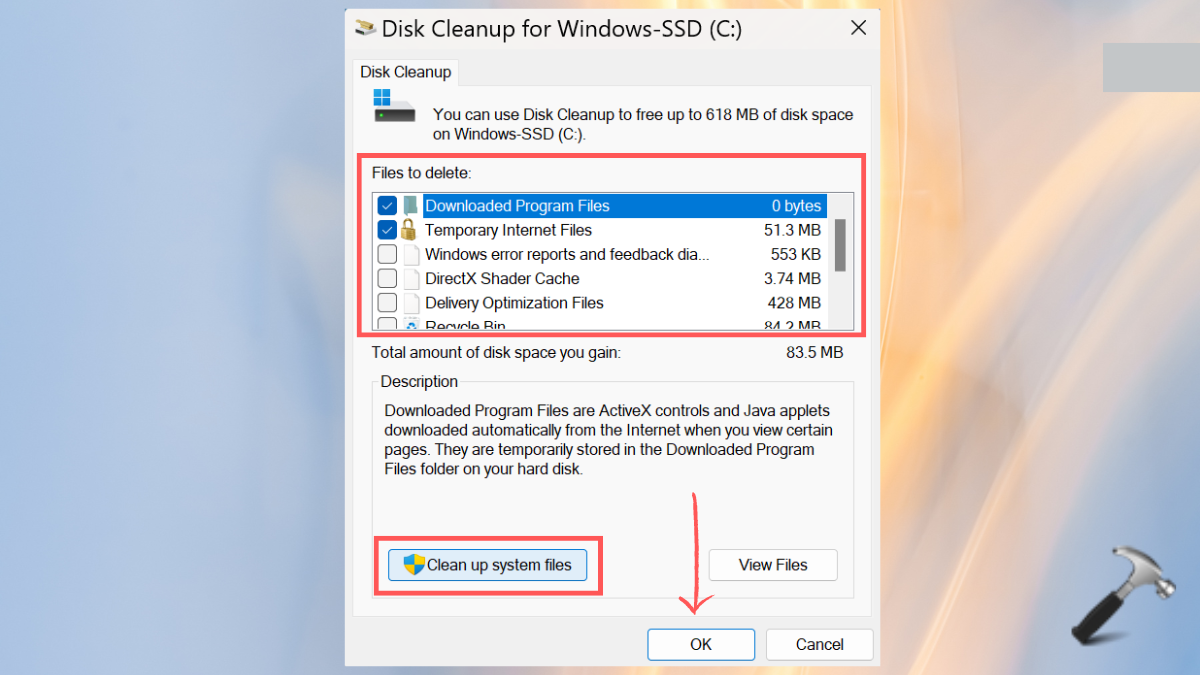
This may release a few GBs of storage depending on your system.
#Way 3: Enable Automatic Cache Cleanup with Storage Sense
Windows 11 can automatically remove the cache instead of manually removing the cache every few weeks.
1. Open Settings. Go to System > Storage.
2. Turn on Storage Sense.
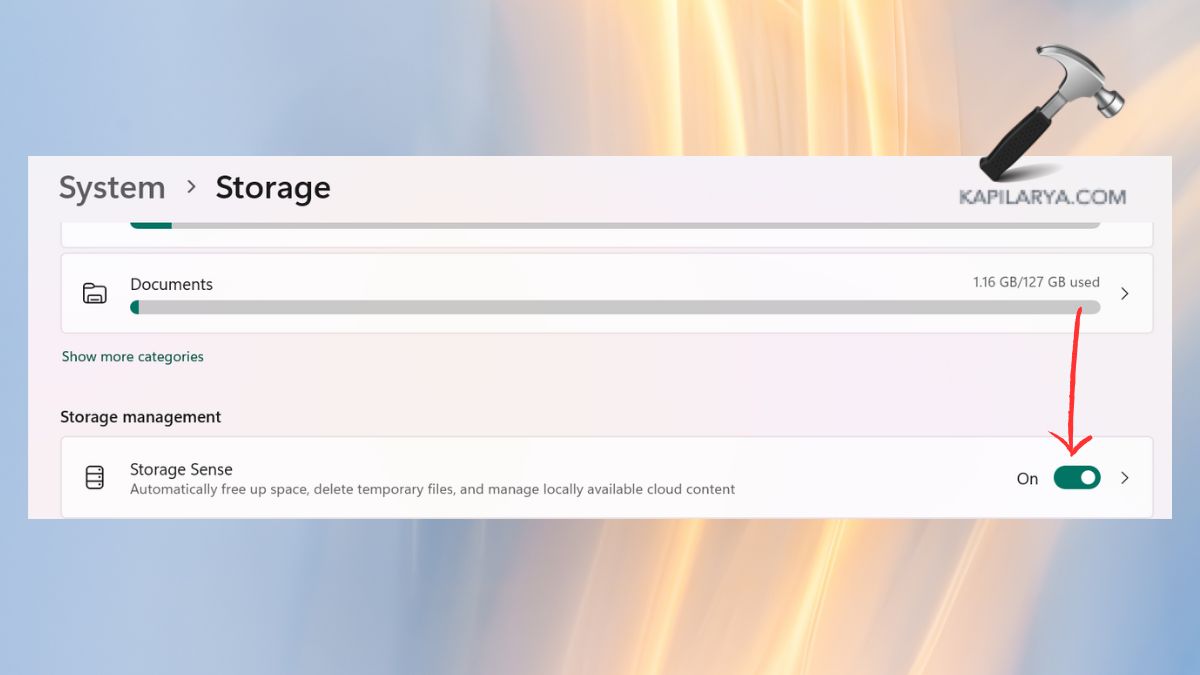
3. To adjust Storage Sense, click it. Choose:
- Cleanup frequency
- Automatic User Content cleanup
- Downloads folder cleanup (optional)
Save your settings. Storage Sense automatically eliminates unessential temporary files in the background on a regular basis.

#Way 4: Clear Microsoft Store Cache to clear computer cache in Windows 11
Clearing the Microsoft Store cache usually fixes issues with apps not downloading, updating or opening.
1. Press Windows + R, type this and press Enter.
wsreset.exe
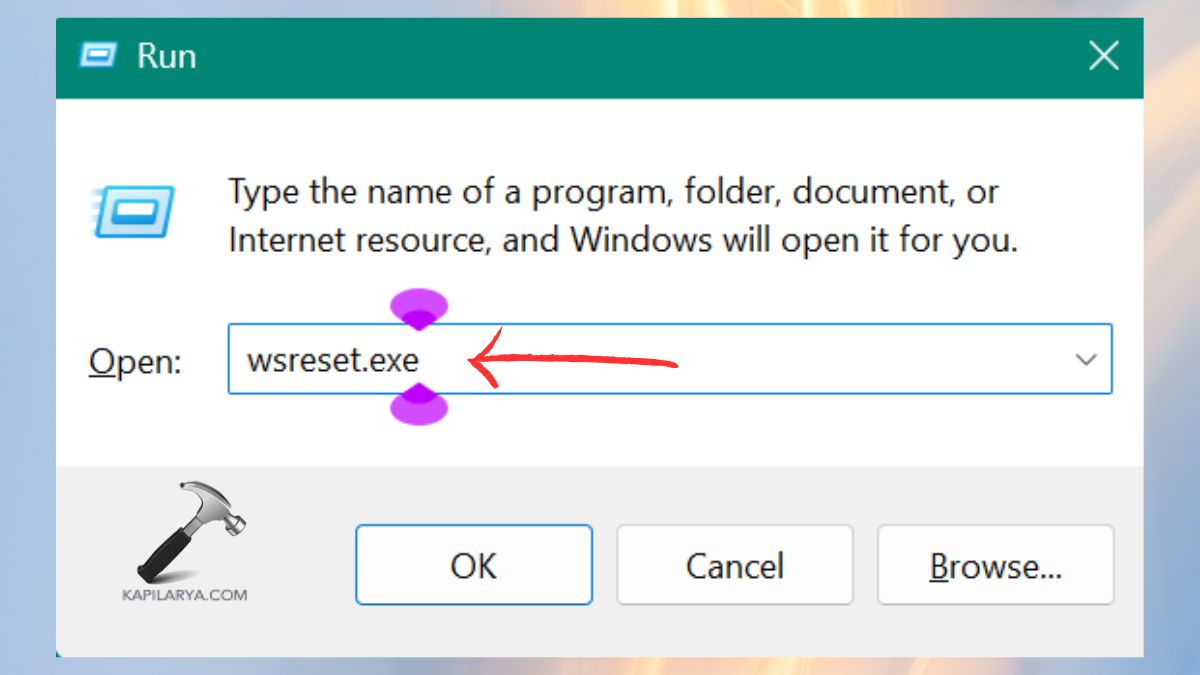
2. Hold off until the command has been executed. Microsoft Store will automatically reopen. This wipes the Store cache, but leaves behind apps you’ve installed.
#Way 5: Flush the DNS Cache
When you visit a website, the DNS information is stored in the Windows registry to load the website faster. However, if there are any website loading errors, it might be an outdated DNS cache.
1. Run Command Prompt as Administrator.

2. Enter the following command in the open window. Press Enter.
ipconfig /flushdns
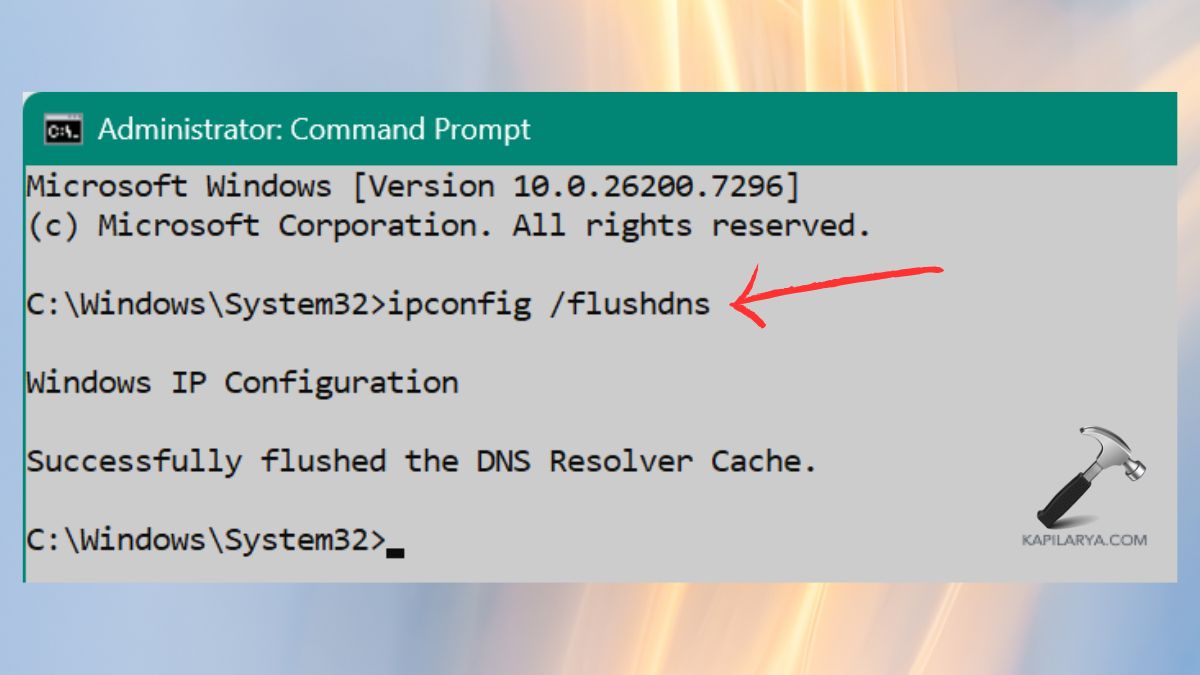
A message will be displayed saying the DNS Resolver Cache has been properly flushed. This is especially beneficial in the case of a website being unreachable or if the IP address changes and is not recognised.
#Way 6: Delete Browser Cache
Web browsers store the images, scripts and cookies in their cache to speed up browsing. It’s possible these files might cause website loading problems or show the wrong content over time.
1. Open your browser. Hold down Ctrl, Shift, and Delete.
2. Choose Cached images and files. Set the time period/range.
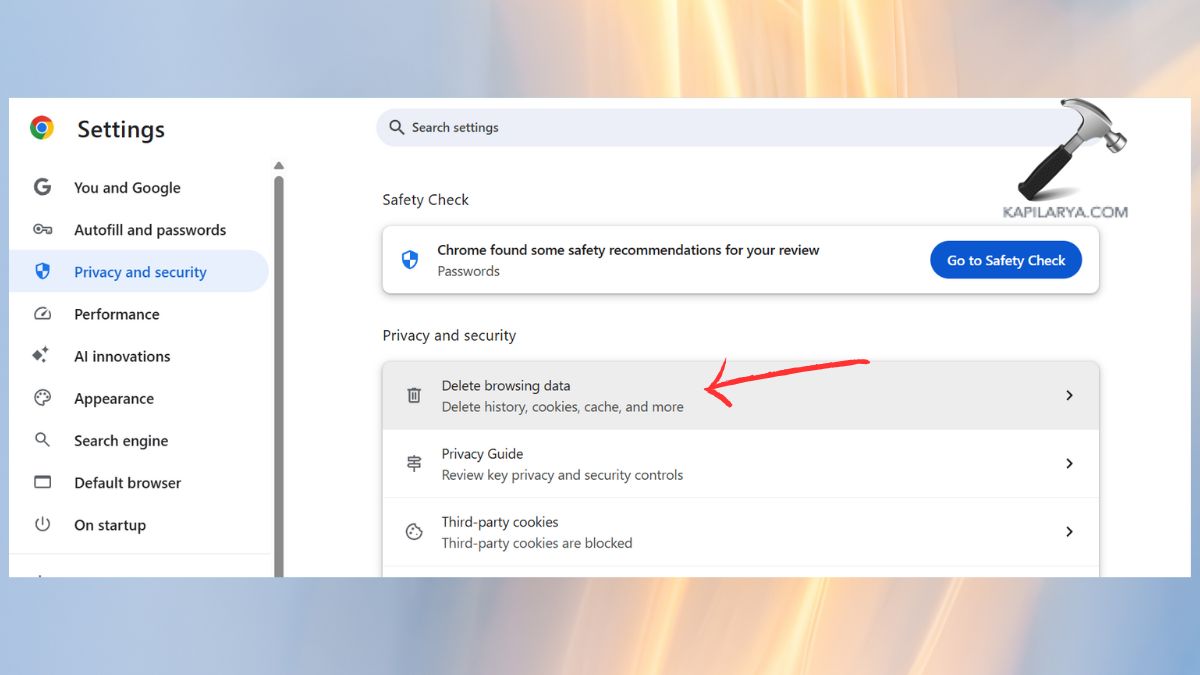
3. Click Clear Data.

This can be done in browsers like:
- Google Chrome
- Microsoft Edge
- Mozilla Firefox
- Opera
Also, discards browser cache issues with website formatting and login issues.
#Way 7: Remove App Cache Files to clear computer cache in Windows 11
There are some Windows applications that keep temporary cache separate, and they can accumulate large sizes over time.
1. Click on Windows + R. Type this. Press Enter.
%temp%
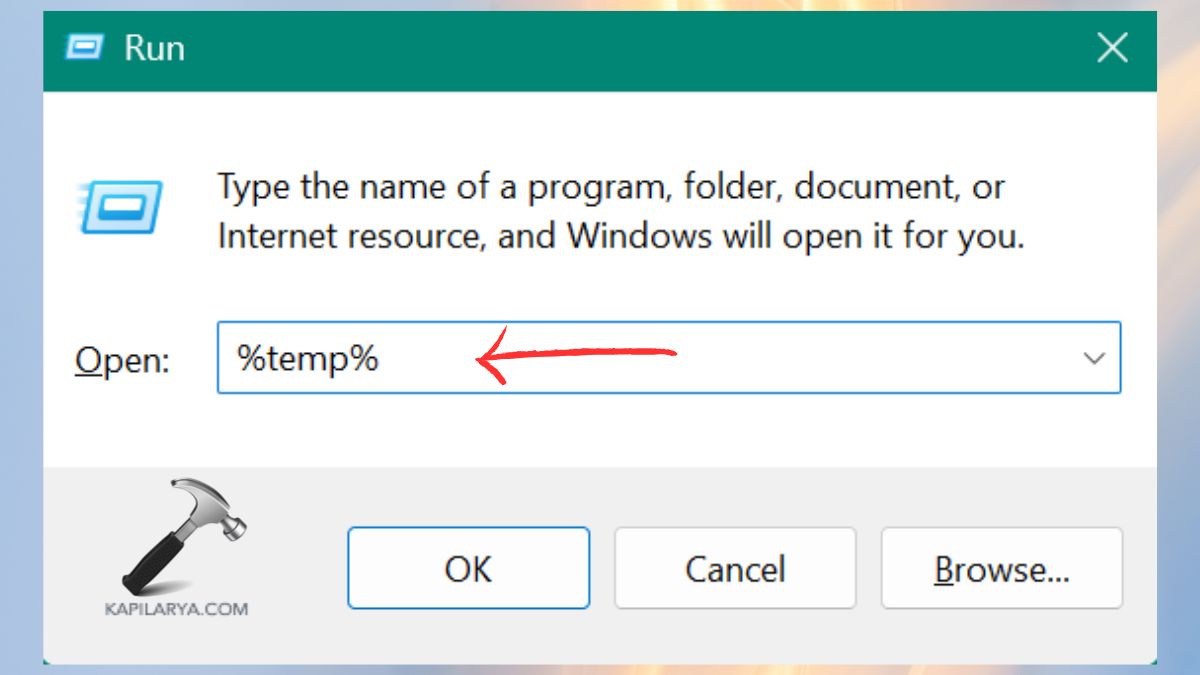
2. Select all files (Ctrl + A). Delete them. Ignore already opened files.

All the temporary data generated by installed applications is stored in these folders.
#Way 8: Delete Location History Cache
Windows has included a location history that it stores to enable location-based services. Clearing this cache is a good idea if you want to remove location data stored or you want more privacy.
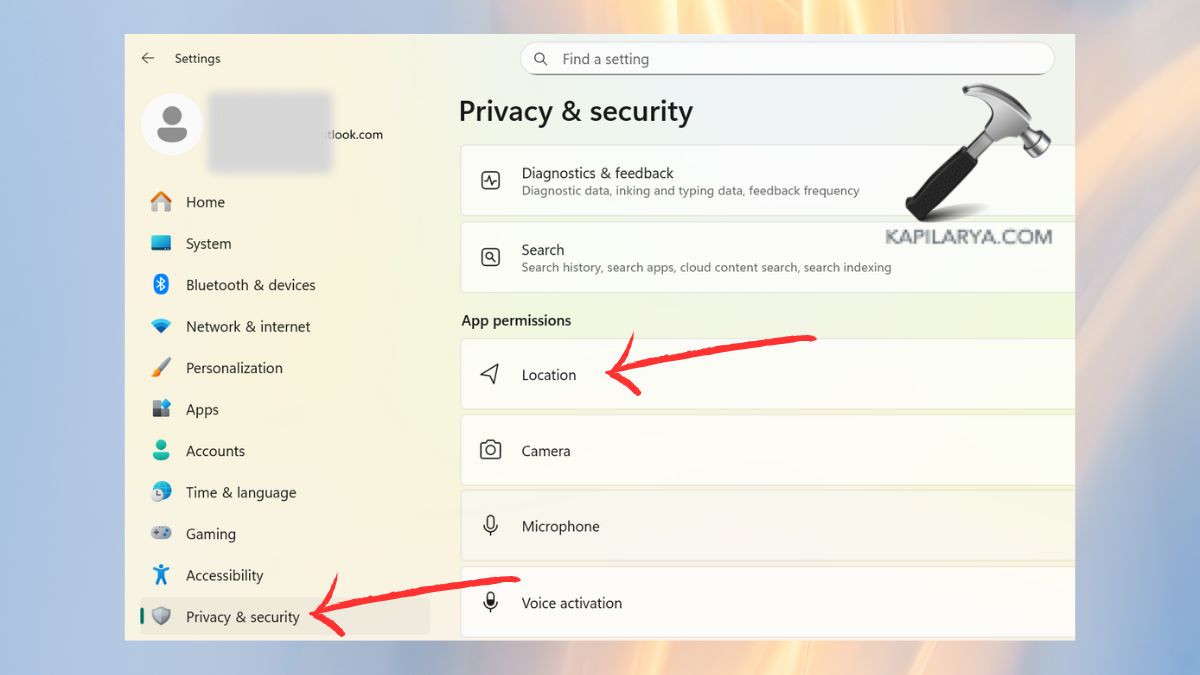
1. Open Settings. Select Privacy & Security. Click Location.
2. Find Location History. Click Clear.
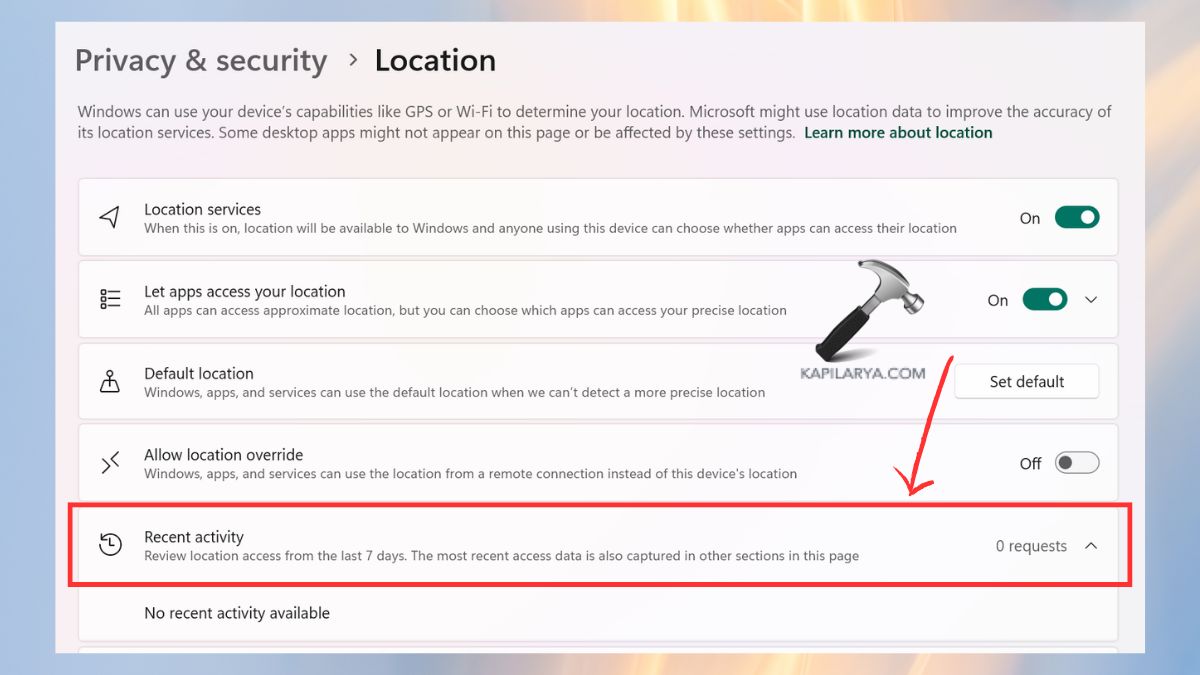
This deletes location history, yet it does not impact the GPS performance.
#Way 9: Clear Windows Update Cache
At times, the Windows Update cache file may get corrupted, and the updates may fail to be downloaded from the Internet or installed.
Deleting the Windows Update cache is often a solution to Windows Update problems.

Does Clearing Cache Delete Personal Files?
No. The only way to clear temporary data is by clearing the cache, but this will not remove any temporary data that Windows or installed applications create.
Unless you intentionally delete them, your documents, photos, videos, downloads, installed software and personal settings are not affected.