Earlier, we’ve seen Microsoft has separated Cortana and search in Windows 10 V1903, in following article:
Windows 10 V1903 Separates Search And Cortana
This means if you don’t prefer to use Cortana and of course you’ll still need search feature, you can easily disable Cortana using our guide. The newly introduced search is well integrated with new settings and features. When you click on search icon on the taskbar, you’ll be presented with top apps. The landing page in the search pane gives you list of your recent activities.
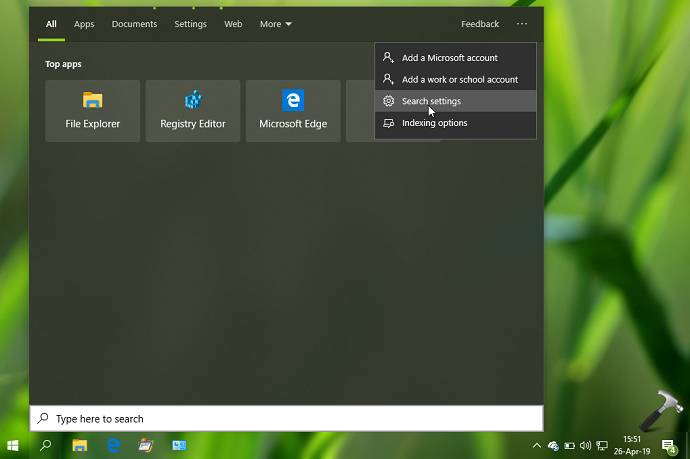
Well, while searching with this separately emerged search feature, you can control if you want to include search results from your personal emails, photos, documents and files. Provided you’ve already switched to Microsoft account, the search will include these cloud content results. If you wish to eliminate the search results from your personal data, you can turn off cloud content search using steps mentioned below.
How To Disable Cloud Content Search In Windows 10
FYI: These steps are illustrated on Windows 10 V1903. The options and text labels may vary with successive versions.
1. Right click Start Button or press  + X keys and select Settings.
2. In the Settings app, navigate to Search > Permissions & History.
3. Now in right pane of Permissions & History, under Cloud content search, for Microsoft account, turn Off the option. This will prevent search results from your personal data under Microsoft account. In case if you’re using your corporate account and want to eliminate its results in search data, turn Off Work or School account option as well.
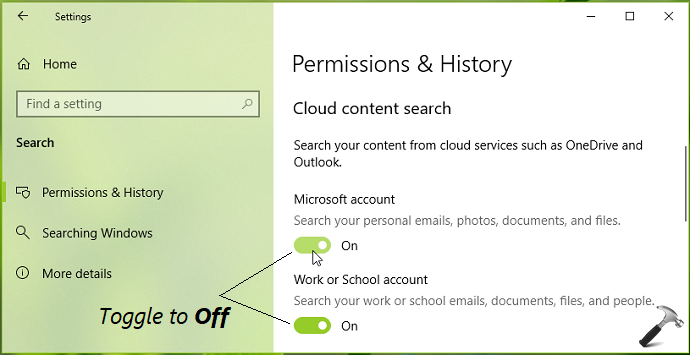
4. Your settings are saved and applied immediately. You can close Settings app and return to Desktop now, if you like.
To enable cloud content search again/later, simply turn On Microsoft account or Work or School account option.
That’s it!
Related: How To Disable Web Search For Cortana In Windows 10.