

Recently, Microsoft released Windows 10 V1903 aka May 2019 Update with many new features. One of those newly added features is the reserved storage ability in Windows 10.
Till now, in the absence of reserved storage, if users fills up the storage, some apps, features will not function as expected. This won’t be corrected unless users clears up the storage to provide room for apps and Windows features. With the implementation of reserved storage, Windows will set aside a considerable amount of storage space which it will use system functions. So in this case, if user’s storage is reaching limit, there will be no effect on Windows features and apps functioning and reserved storage feature will handle it automatically.
Reserved storage is influenced by two factors. First is the optional features, and second is installed languages. When you add new optional features, Windows will automatically increased reserved storage accordingly. You can uninstall optional features and this will reduce size of reserved storage. Same logic applies to installed languages and you can add/remove them to increase/decrease reserved storage capacity, respectively.
Page Contents
Reserved Storage Feature In Windows 10 V1903 Or Later
Checking Reserved Storage On System
To checkout reserved storage on your Windows 10, follow these steps:
1. Right click Start Button or press  + X keys and select Settings.
2. In the Settings app, navigate to System > Storage.
3. Now in right pane of Storage, click System & reserved, then you can see the Reserved storage on your system.
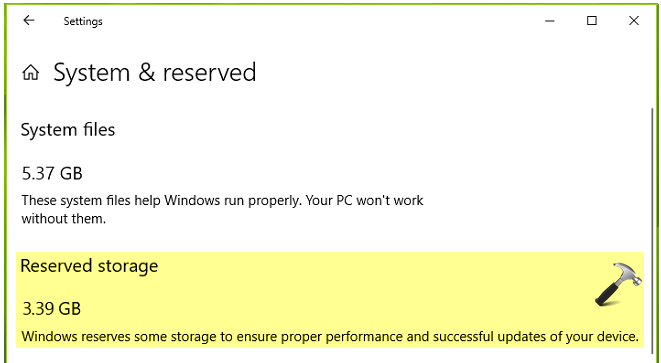
You can now close Settings and return to Desktop, if you like.
Enable Or Disable Reserved Storage In Windows 10
To enable or disable reserved storage feature, try these steps:
1. Open Registry Editor by running regedit command.
2. Go to HKEY_LOCAL_MACHINE\SOFTWARE\Microsoft\Windows\CurrentVersion\ReserveManager.
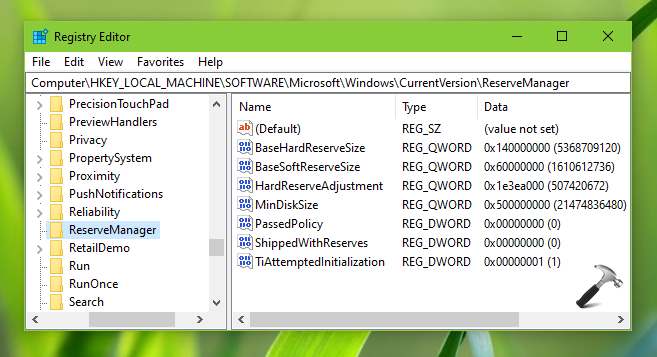
3. In right pane, double click on ShippedWithReserves registry DWORD to modify its Value data.
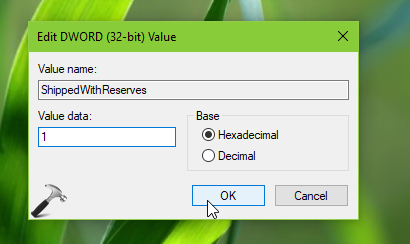
4. Set the Value data to 1 to enable reserved storage feature, or set 0 to disable it. Click OK. Close Registry Editor and reboot to make changes effective.
Hope you find the reserved storage feature useful!
![Add the Recovery Partition in Windows 11 [2026 Guide]](https://www.kapilarya.com/assets/Disk-768x494.jpg)




Hi, how to enable reserved storage feature on upgraded systems? seams that this registry tweak not working!
^^ Which version you’re on?