

On Windows 11 PC, users access a lot of files with File Explorer. While we browse through these files, some items will offer preview. This preview is known as thumbnail preview. It helps us in identifying the file that we are looking for easily without even opening it. It comes handy, especially in case of photos or image files.
For loading thumbnail preview quickly, Windows usually create a thumbnail cache. This cache comprises of database files, which offer information about thumbnails. This information is available for every user present on the system. Normally, the location of thumbnail cache is %LocalAppData%\Microsoft\Windows\Explorer.
Like font cache or icon cache, thumbnail cache could even get corrupted. When this issue comes up, you won’t be able to see the thumbnail preview of some files. In that case, it is better to clear and reset thumbnail cache.
In this post, learn how to clear and reset thumbnail cache in Windows 11 in different ways. Now, let’s get started without further ado!
Page Contents
Clear and Reset Thumbnail Cache in Windows 11
Method 1: Using the Settings App
1. Firstly, open the Settings app by pressing the Windows + I tabs together on your keyboard. After that, go to the System tab and then, select the Storage tab present on the right.
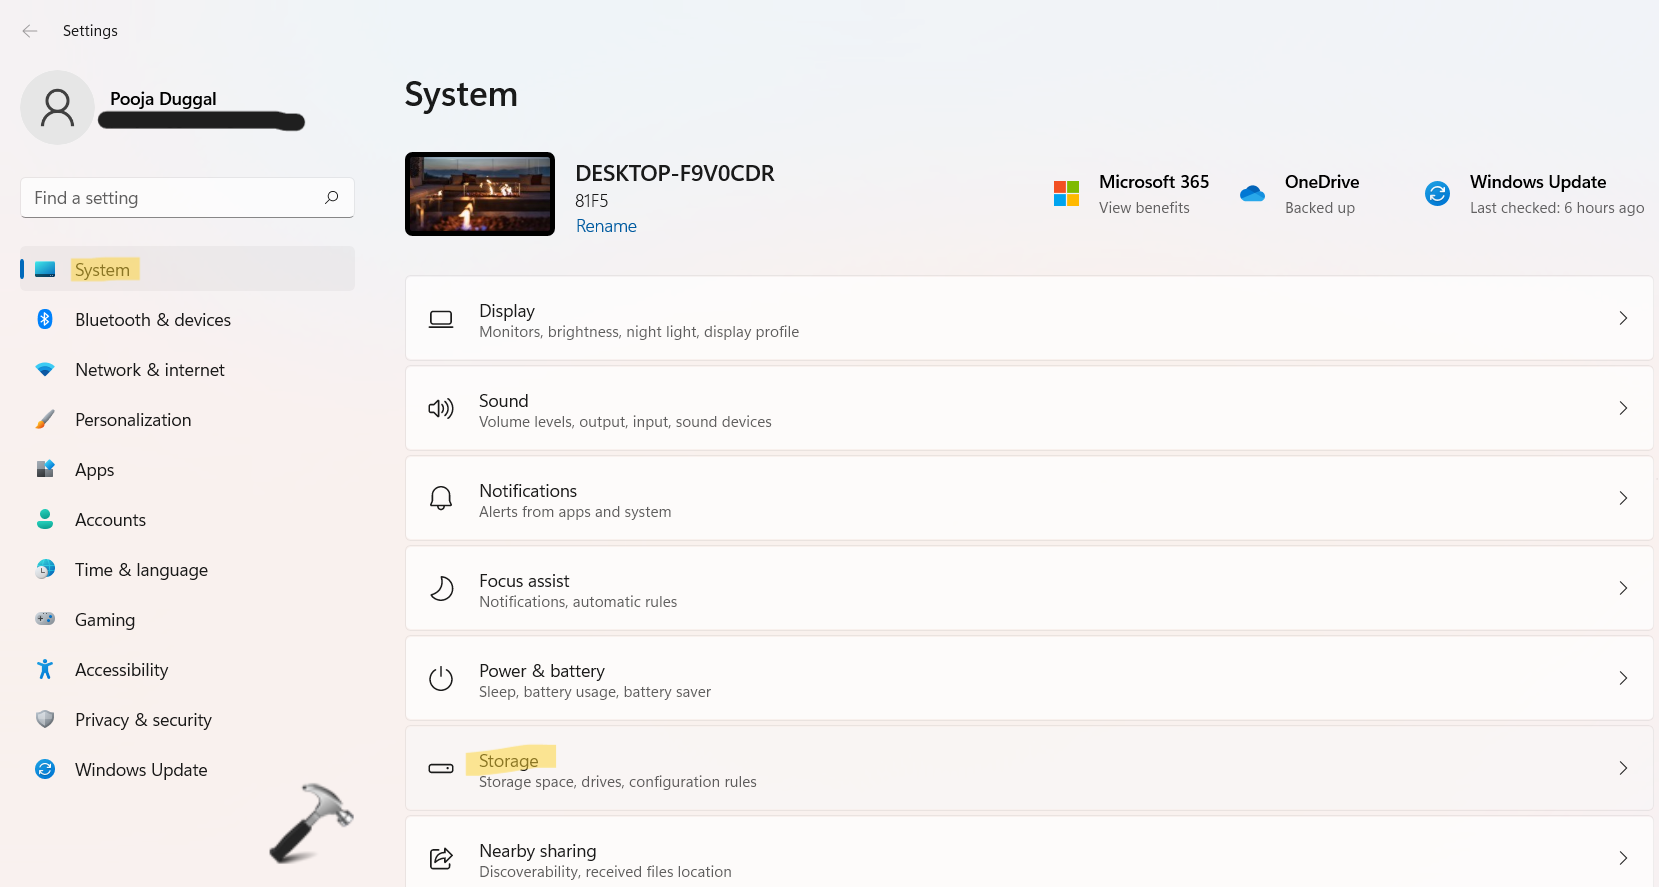
2. Once there, click on the Temporary files option.
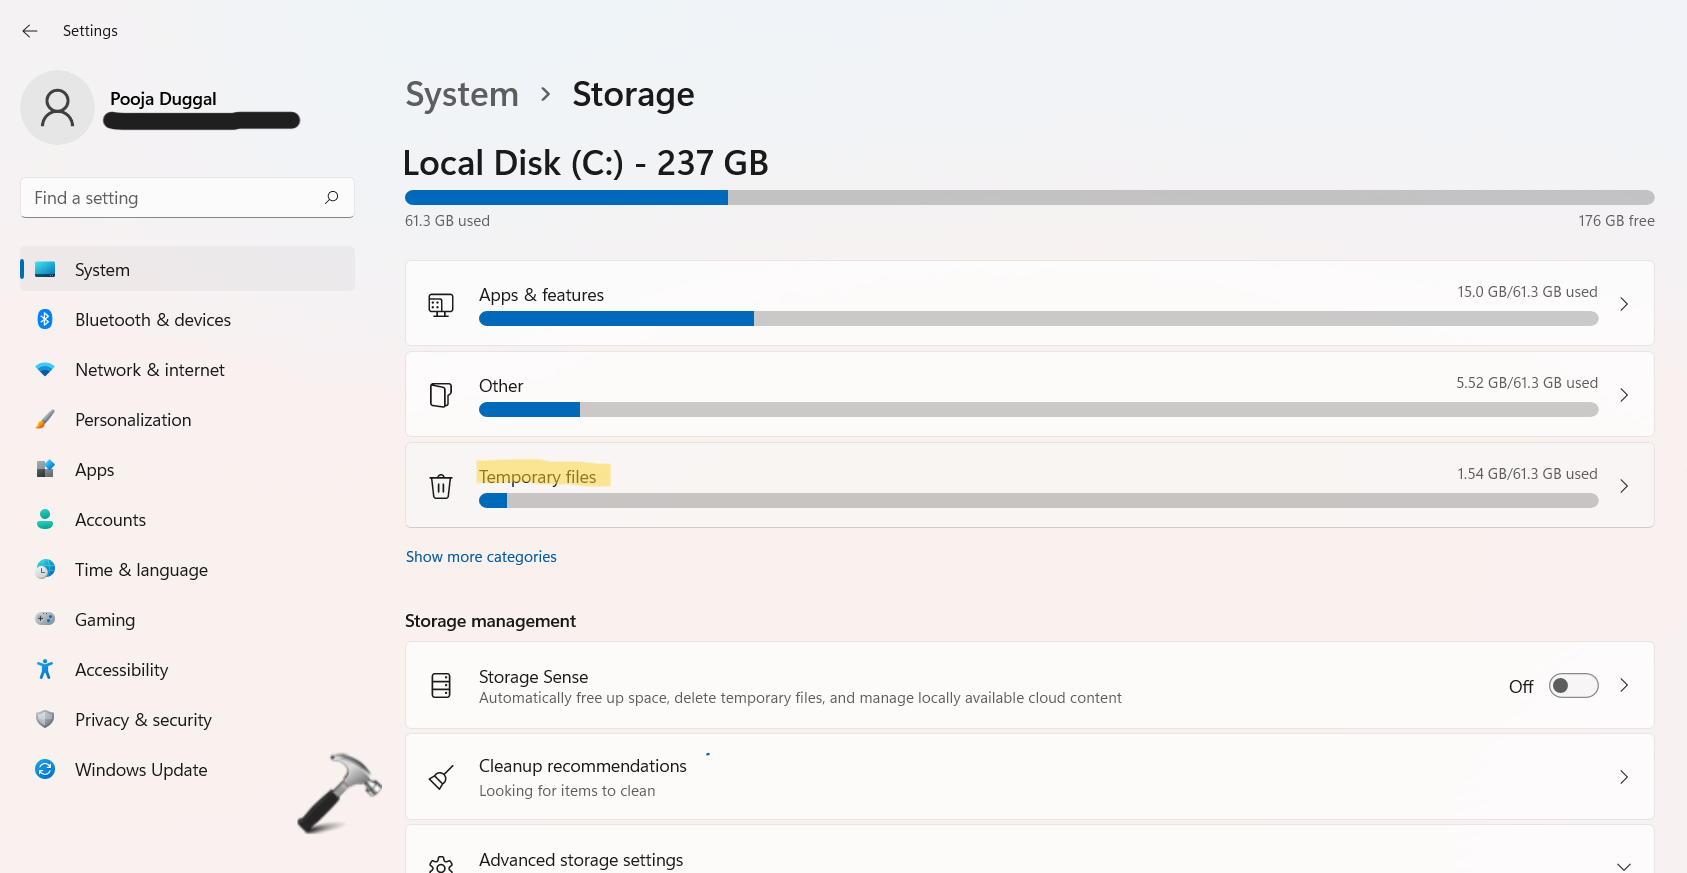
3. In the next window, check the box next to Thumbnails and click on the Remove files button.

4. Now, you have successfully cleaned and reset thumbnail cache in Windows 11.
Method 2: Using the Command Prompt
1. In the first place, open Windows Search and type Command Prompt. Next, click on Run as administrator to open the elevated Command Prompt.
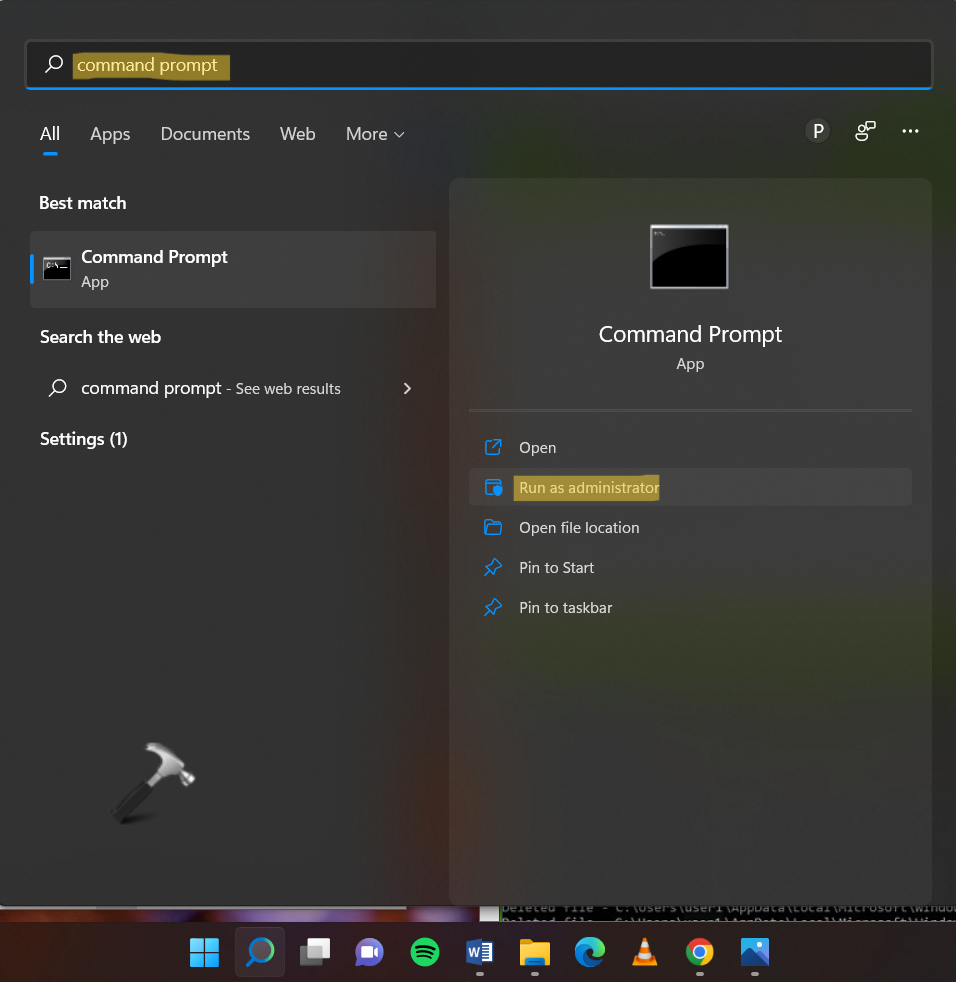
2. After that, type the following commands one by one and hit Enter after each command:
taskkill /f /im explorer.exe
del /f /s /q /a %LocalAppData%\Microsoft\Windows\Explorer\thumbcache_*.db
start explorer.exe

3. Once done, close Command Prompt and reboot your system.
So, this is how to clear and reset thumbnail cache in Windows 11.




Hi there :- recently I face a problem reg. Thamnail is not showing the pic. in Window11 _Ver 22H2_ although I follow the explanation above as well as other ways mentioned on the net.
As I’m planning to use MS PP 365 presentation of pic with music B/G I have about 545 pics to choose from. It is hard to go to every icon and 2X on it to open it, that’s why I need fast way to choose from .
Plz help
Still missing some image from not showing, got a few able to see.