

If you checked Task Manager and notice Microsoft Compatibility Telemetry using a lot of CPU, this article is for you. It can be annoying, especially when you’re not running any heavy apps. This Windows service collects diagnostic data to help Microsoft improve Windows. But having high CPU usage is not acceptable, as it may affect other programs and make your system relatively slower.
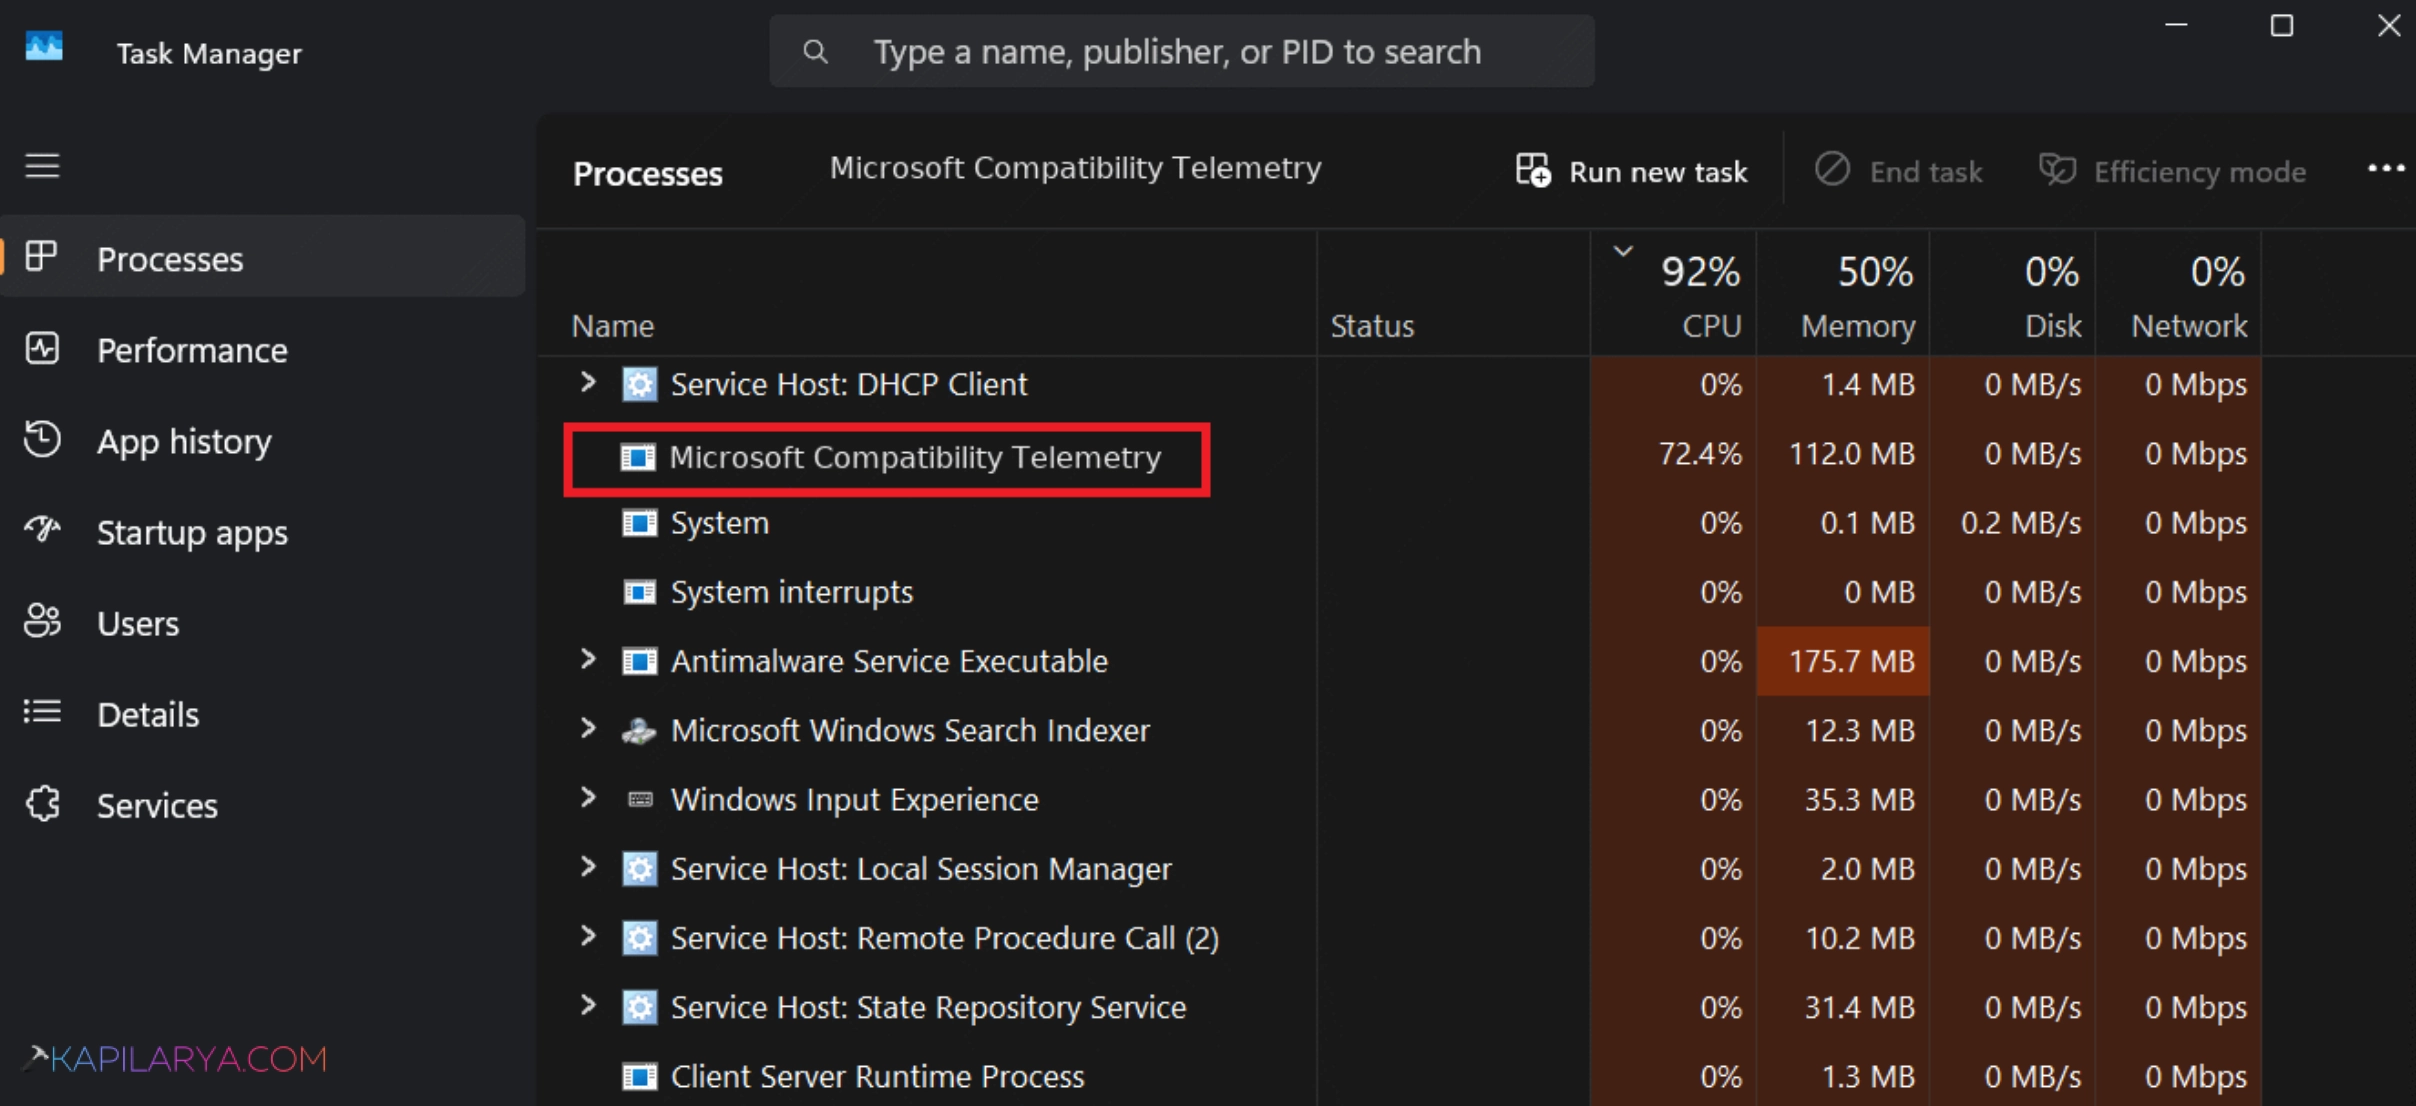
Sometimes, however, it can consume more CPU than expected. Fortunately, you can reduce its usage or disable it if needed.
Page Contents
Why Is Microsoft Compatibility Telemetry Using High CPU?
There is no single confirmed cause, but it usually happens because of:
- Corrupted system files
- A damaged
CompatTelRunner.exefile - Service conflicts
- Telemetry tasks running in the background
- Windows configuration issues
Solved: Microsoft Compatibility Telemetry Using High CPU
Below are the fixes that will help:
Fix 1: Restart The Telemetry service
A temporary service glitch can cause high CPU usage.
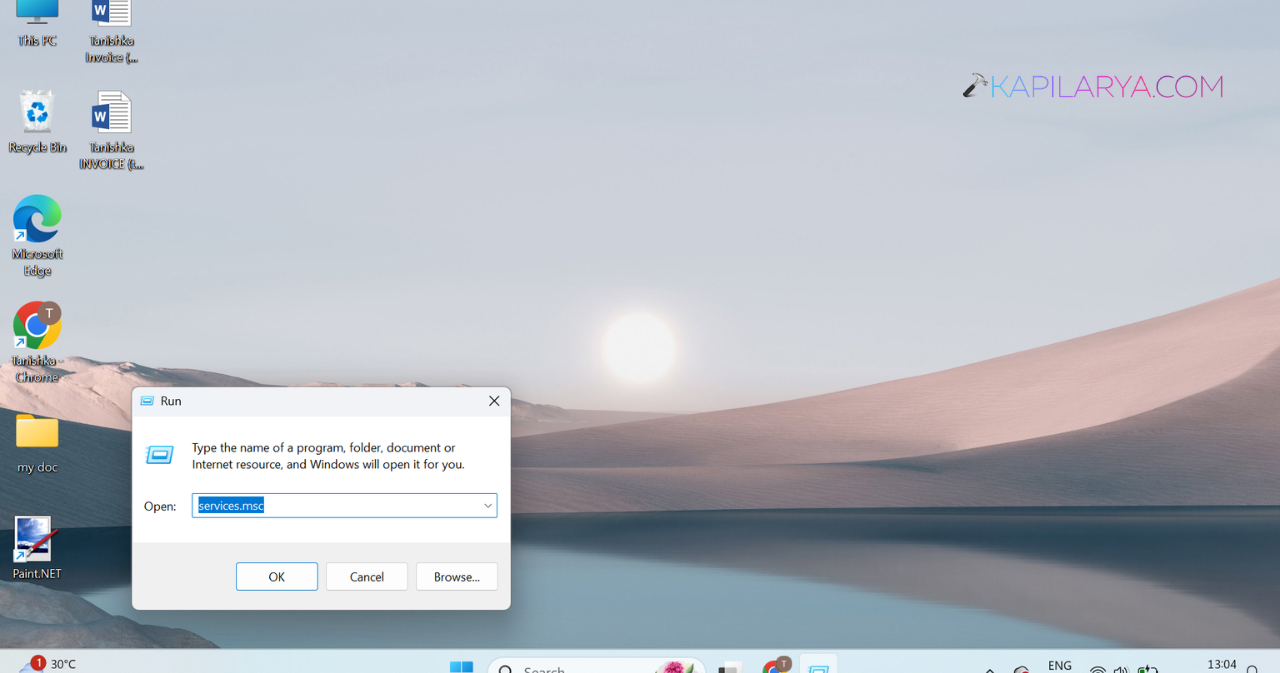
1. Press Win + R, type services.msc, and press Enter.
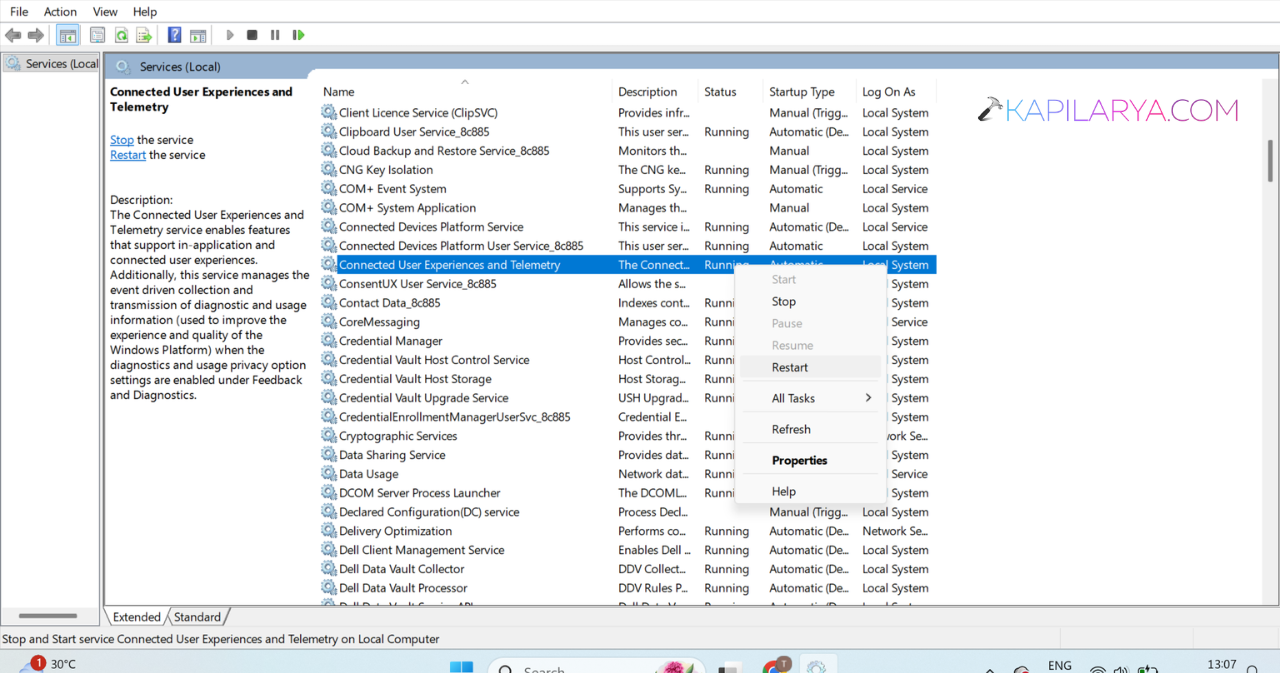
2. Find Connected User Experiences and Telemetry.
3. Right-click it and select Restart.
Fix 2: Reduce Diagnostic Data Collection
Windows lets you limit the amount of diagnostic information it sends to Microsoft.
1. Open Settings using Win + I.
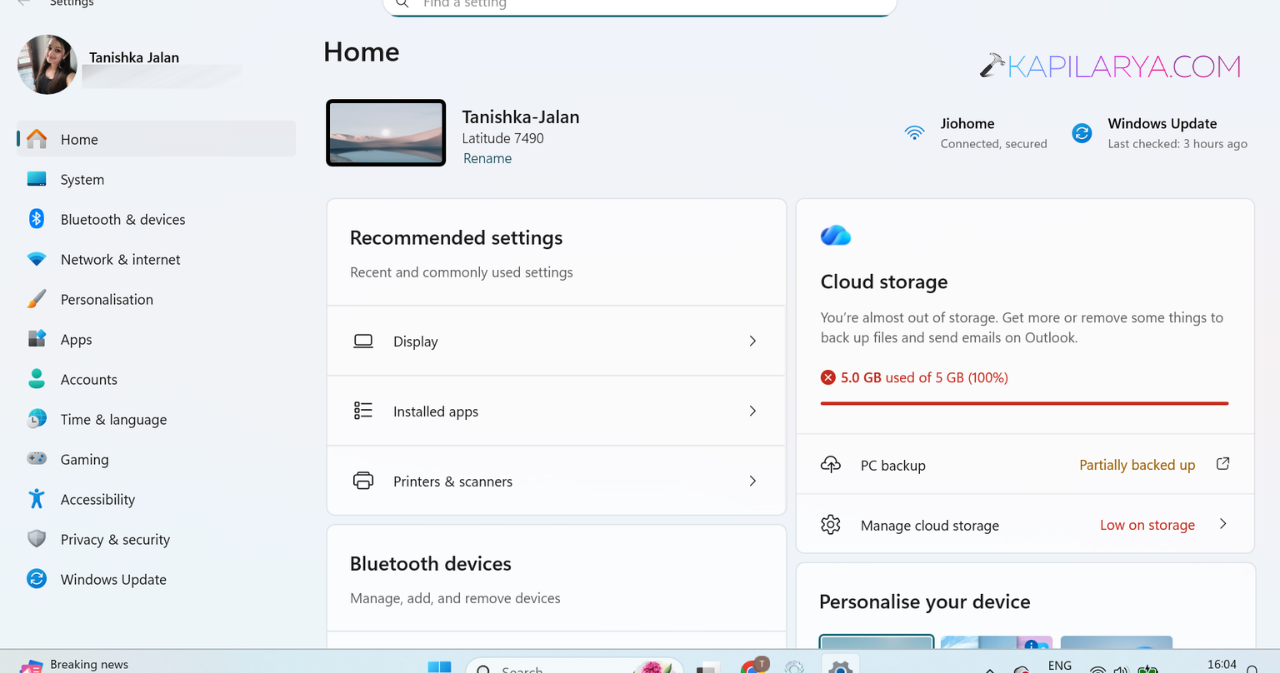
2. Go to Privacy & security > Diagnostics & feedback.
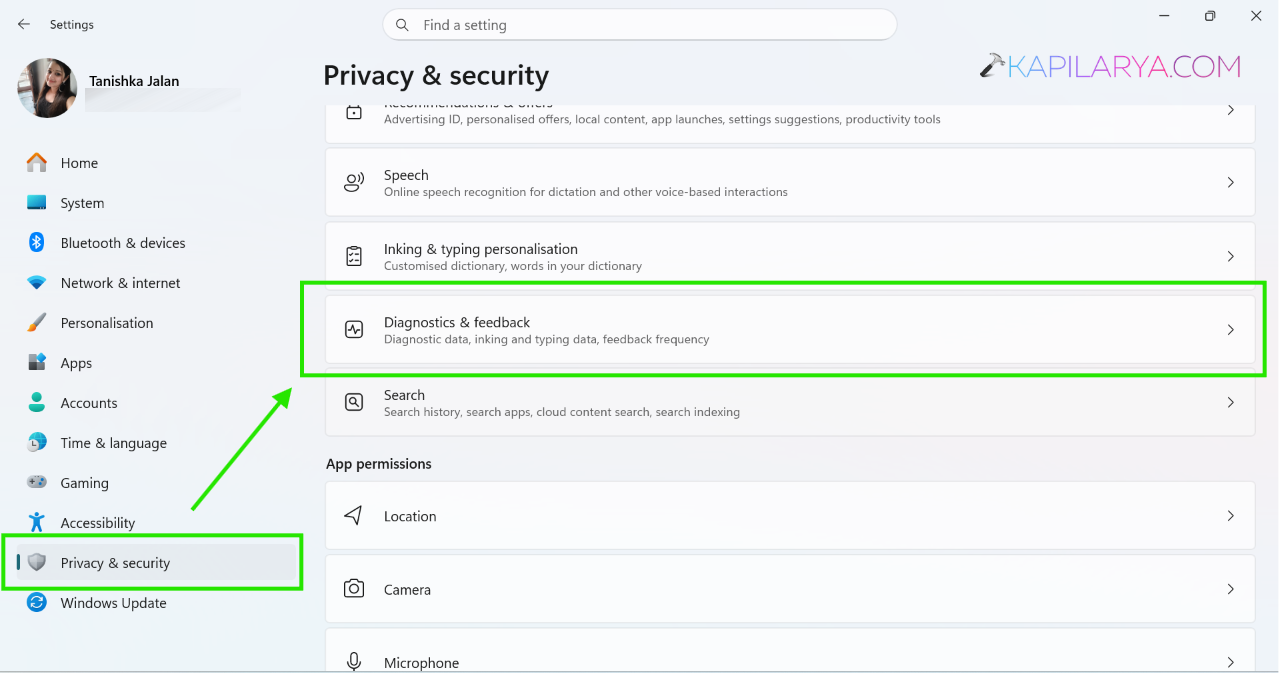
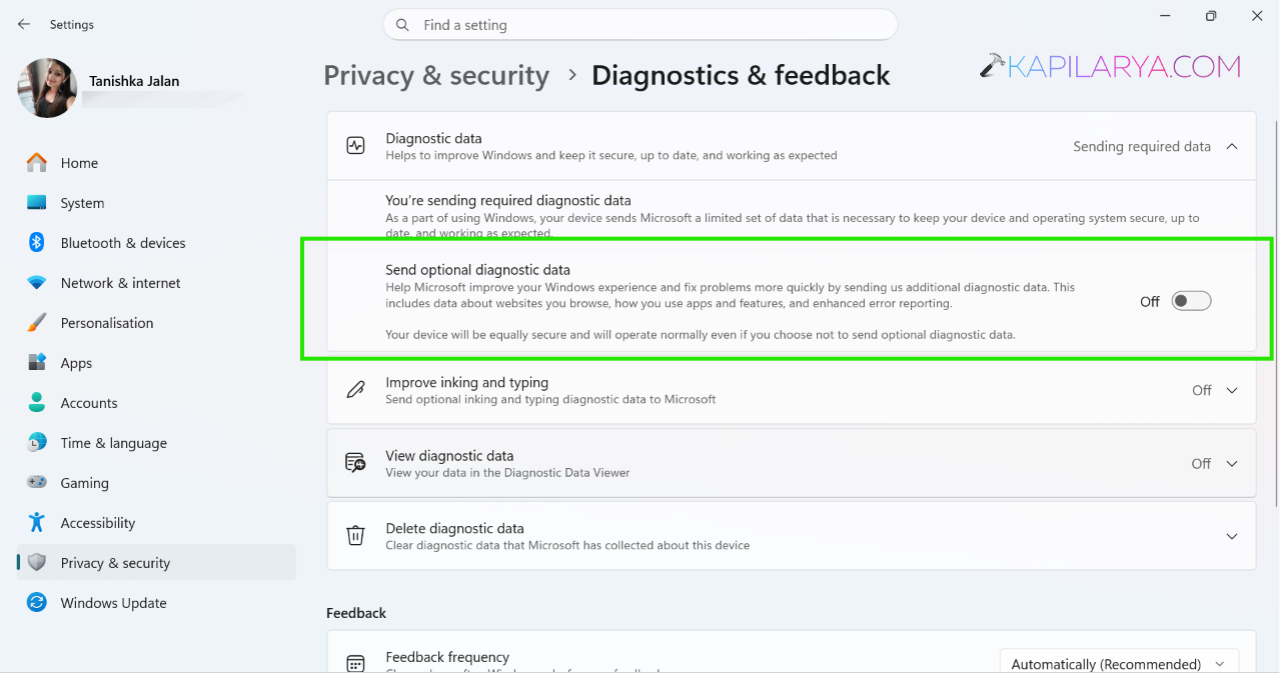
3. Turn off Send optional diagnostic data.
4. Open Tailored experiences and switch it off as well.
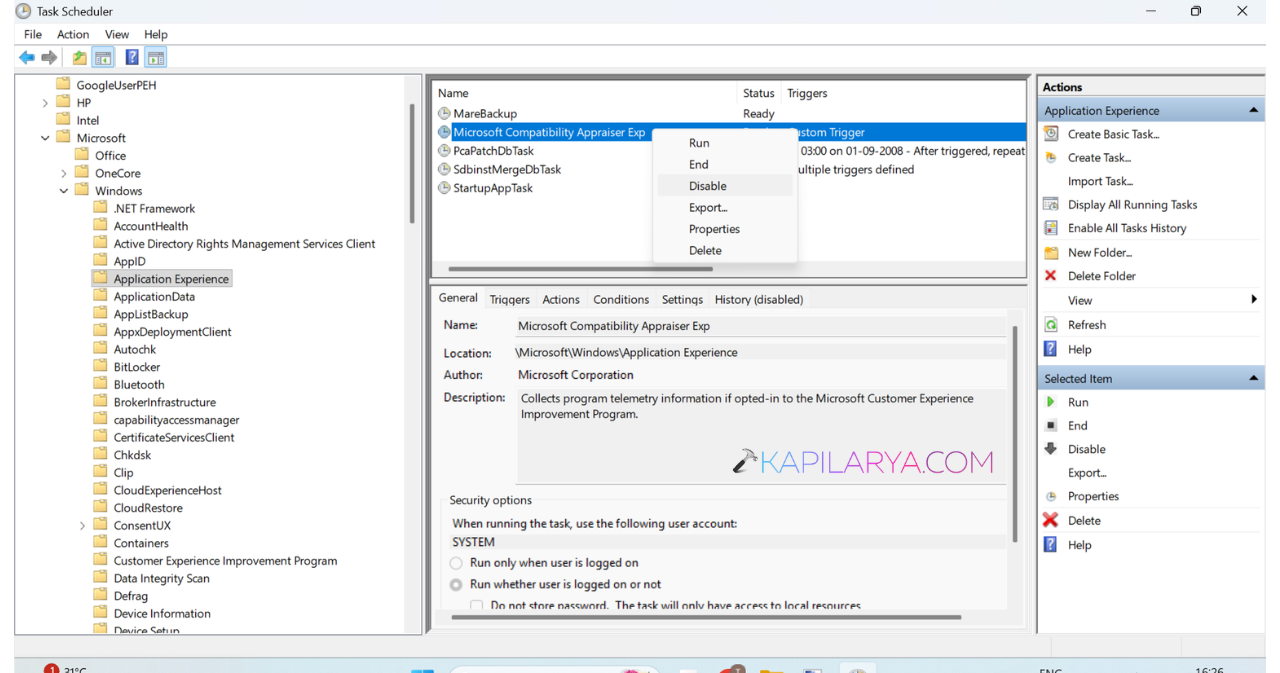
Fix 3: Disable The Compatibility Appraiser task
Stopping this scheduled task prevents telemetry from running automatically.
1. Open Task Scheduler.
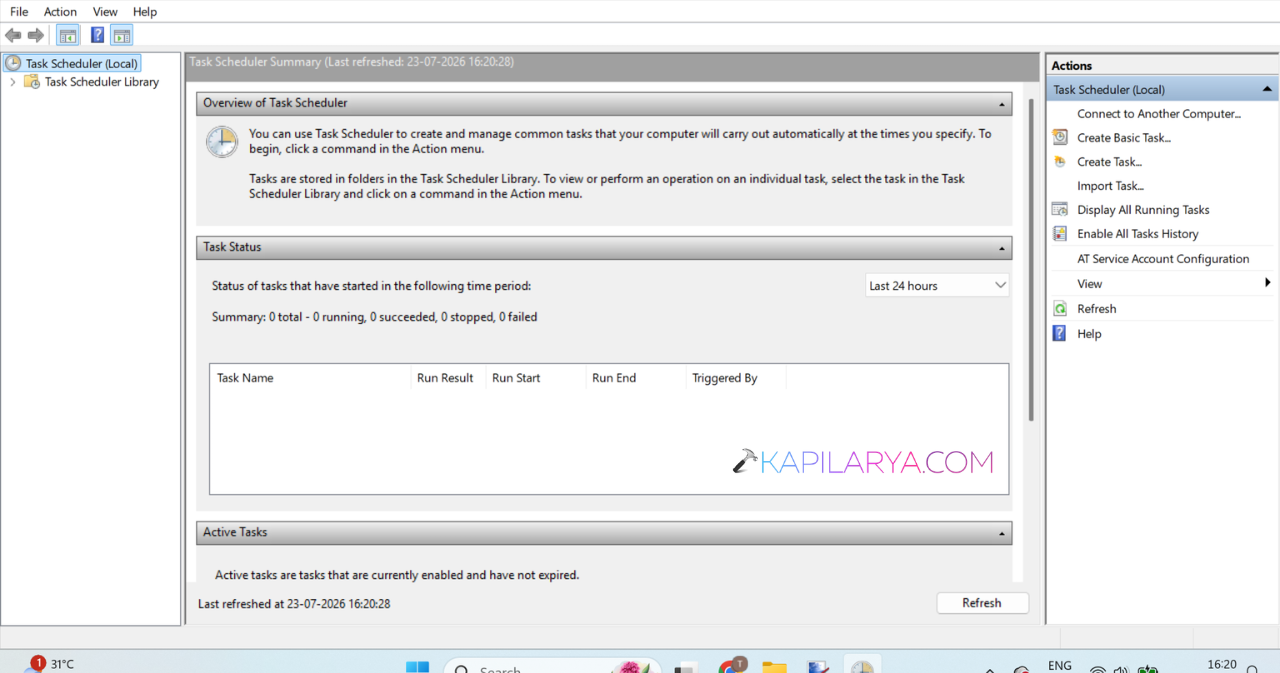
2. Go to Task Scheduler Library > Microsoft > Windows > Application Experience.
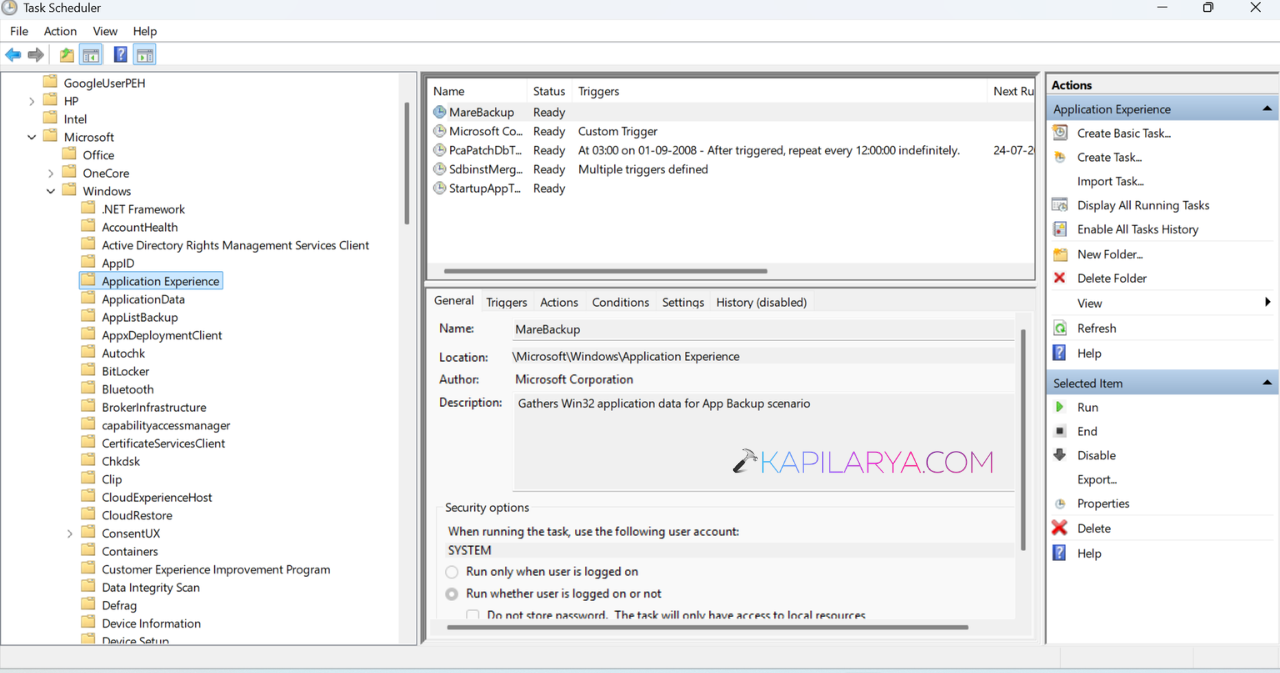
3. Right-click Microsoft Compatibility Appraiser.
4. Select Disable.
Fix 4: Run The DISM tool
DISM repairs the Windows system image and may fix telemetry-related problems.
1. Open Command Prompt as administrator.
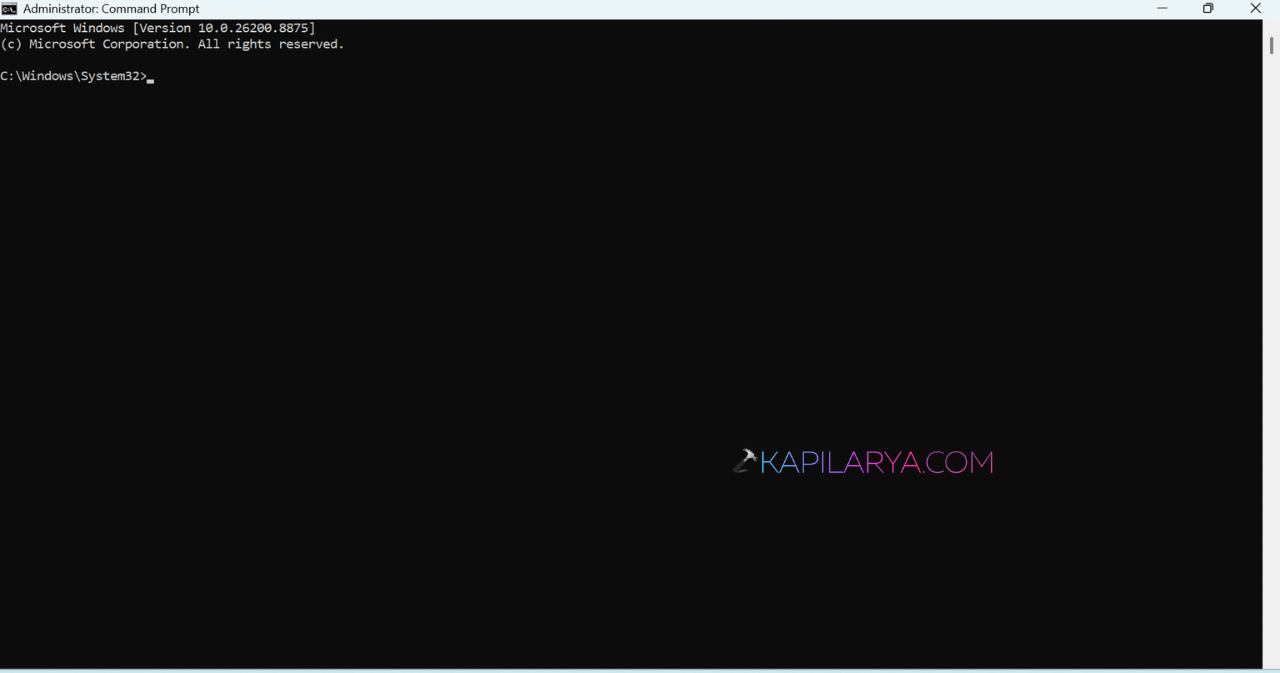
2. Run following command:
DISM /Online /Cleanup-Image /RestoreHealth
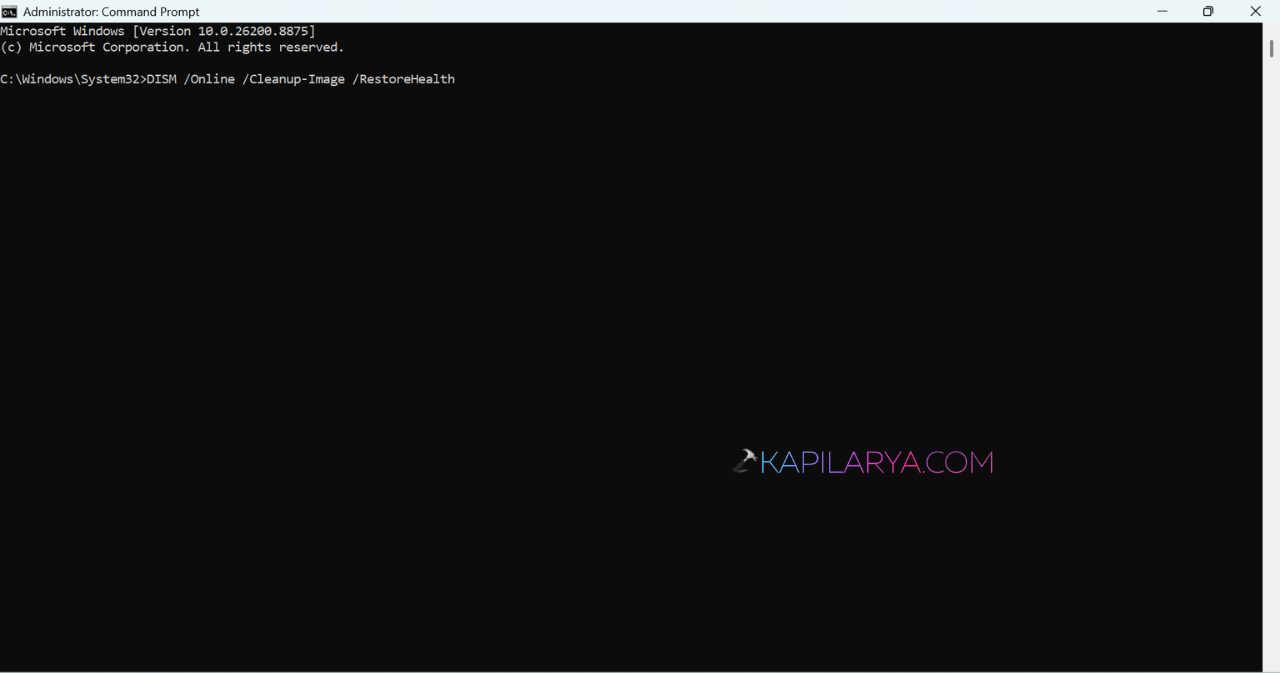
3. Wait for the scan to finish.
4. Restart your PC.
Fix 5: Replace The CompatTelRunner.exe File
If the telemetry file is corrupted, replacing it with a healthy copy from another Windows PC can help.
1. Open Command Prompt as administrator.
2. Run:
takeown /f C:\Windows\System32\CompatTelRunner.exe
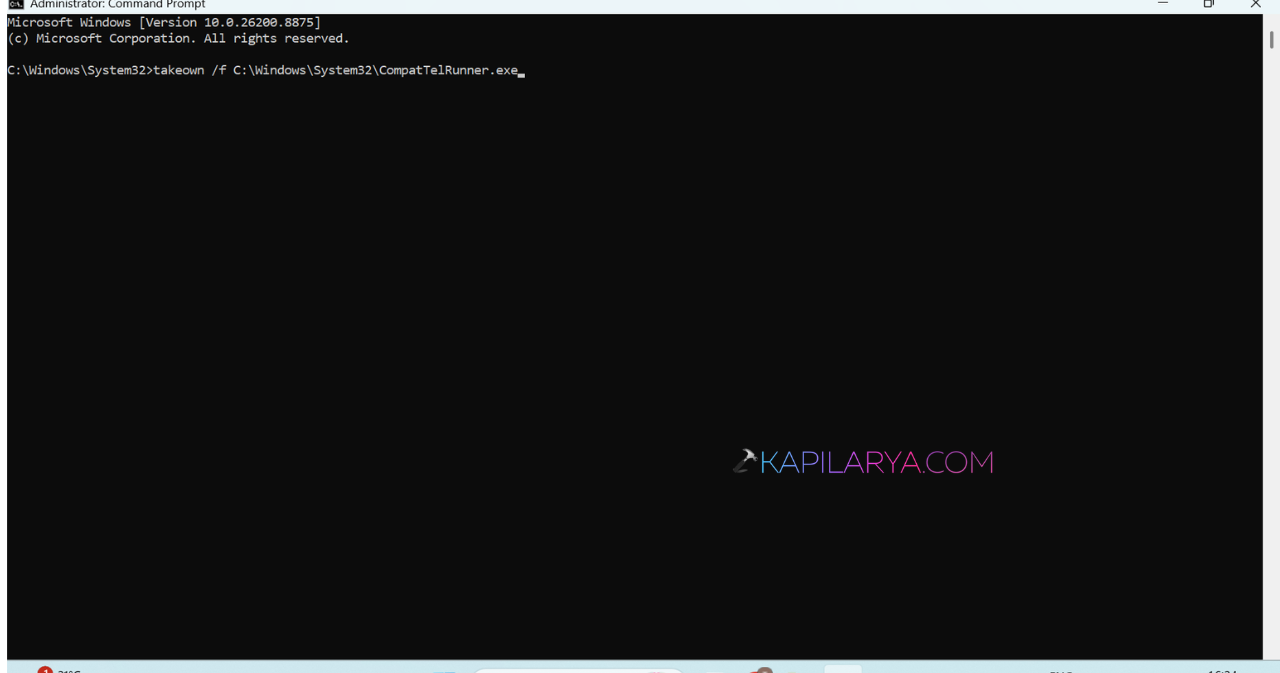
3. Replace the existing CompatTelRunner.exe with a working copy.
4. Restart your computer.
Fix 6: Disable Telemetry Using Group Policy
Windows Pro and Enterprise users can disable telemetry via Group Policy.
1. Run gpedit.msc to open Group Policy Editor.
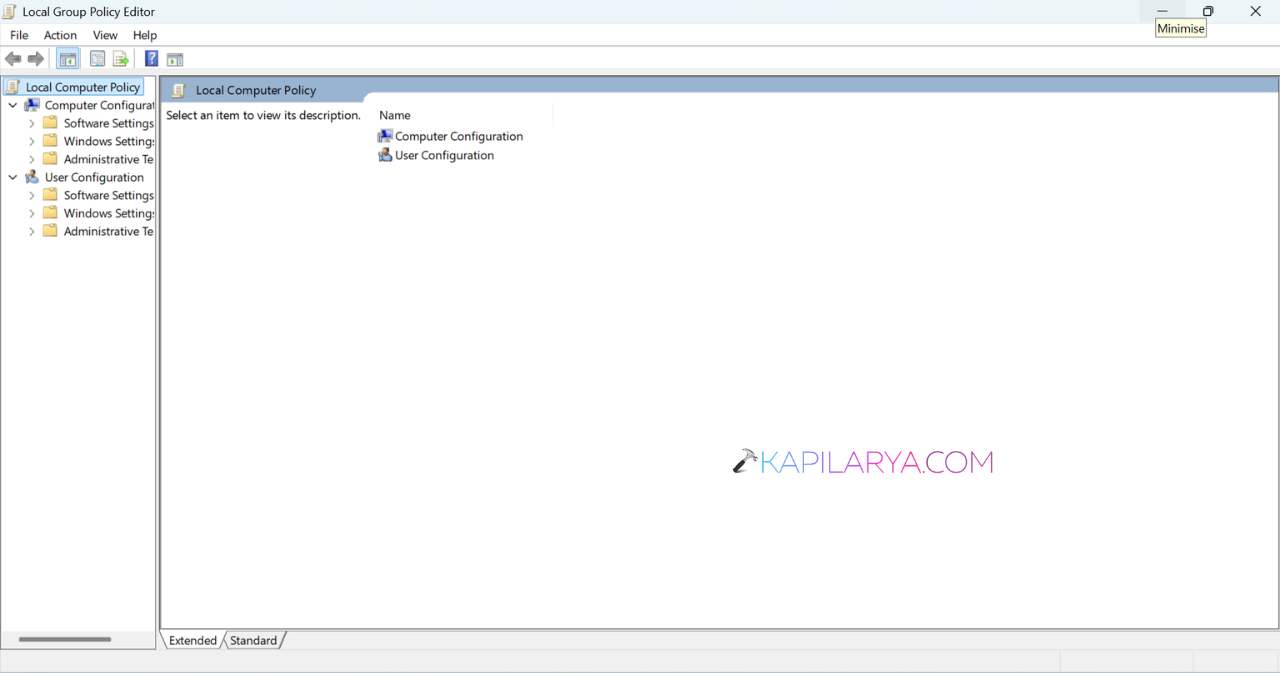
2. Go to Computer Configuration > Administrative Templates > Windows Components > Data Collection and Preview Builds.
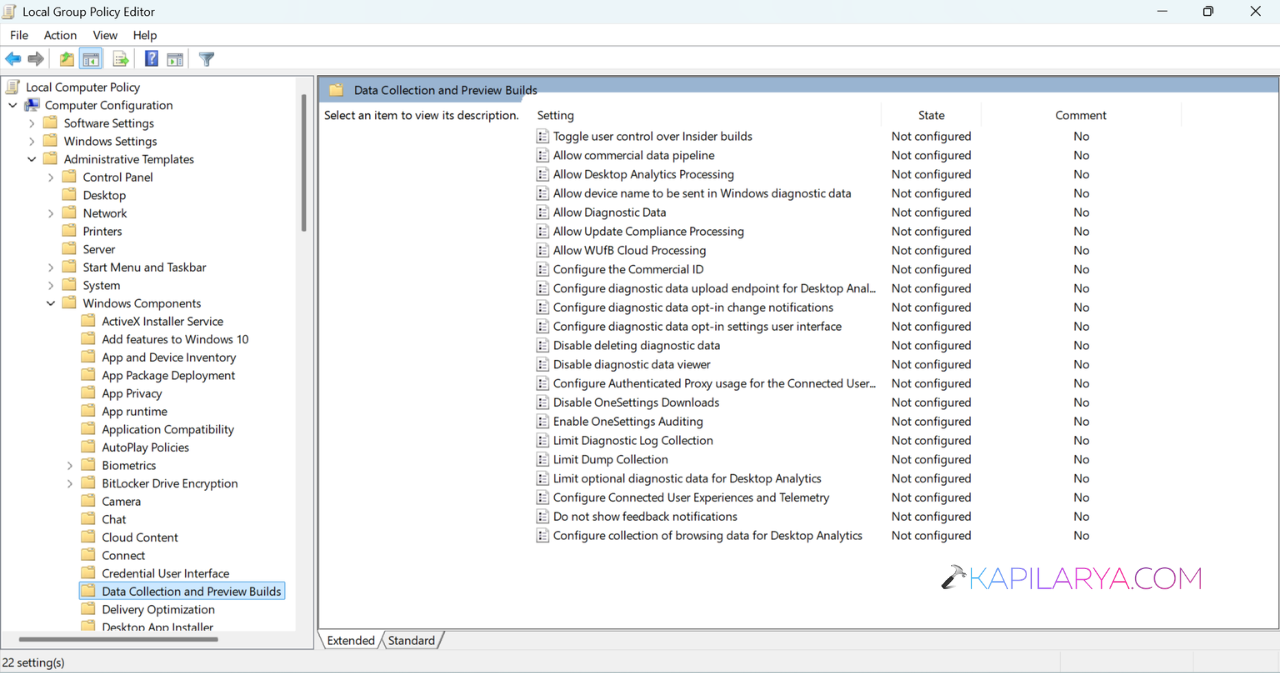
3. Open Allow Diagnostic Data (Windows 11).
4. Select Disabled.
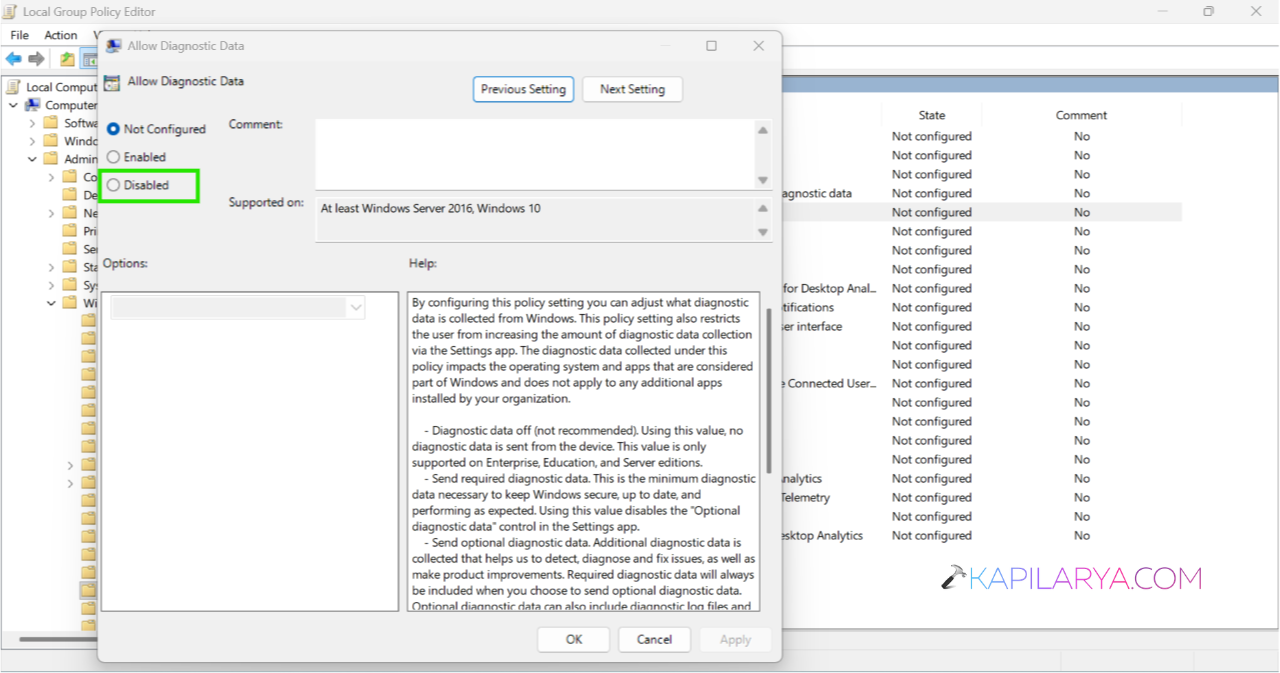
5. Click Apply and OK.
Fix 7: Disable Telemetry Using Registry Editor
If Group Policy isn’t available, you can make the changes through the Registry.
1. Open Registry Editor by running regedit command.
2. Go to:
HKEY_LOCAL_MACHINE\SOFTWARE\Policies\Microsoft\Windows\DataCollection
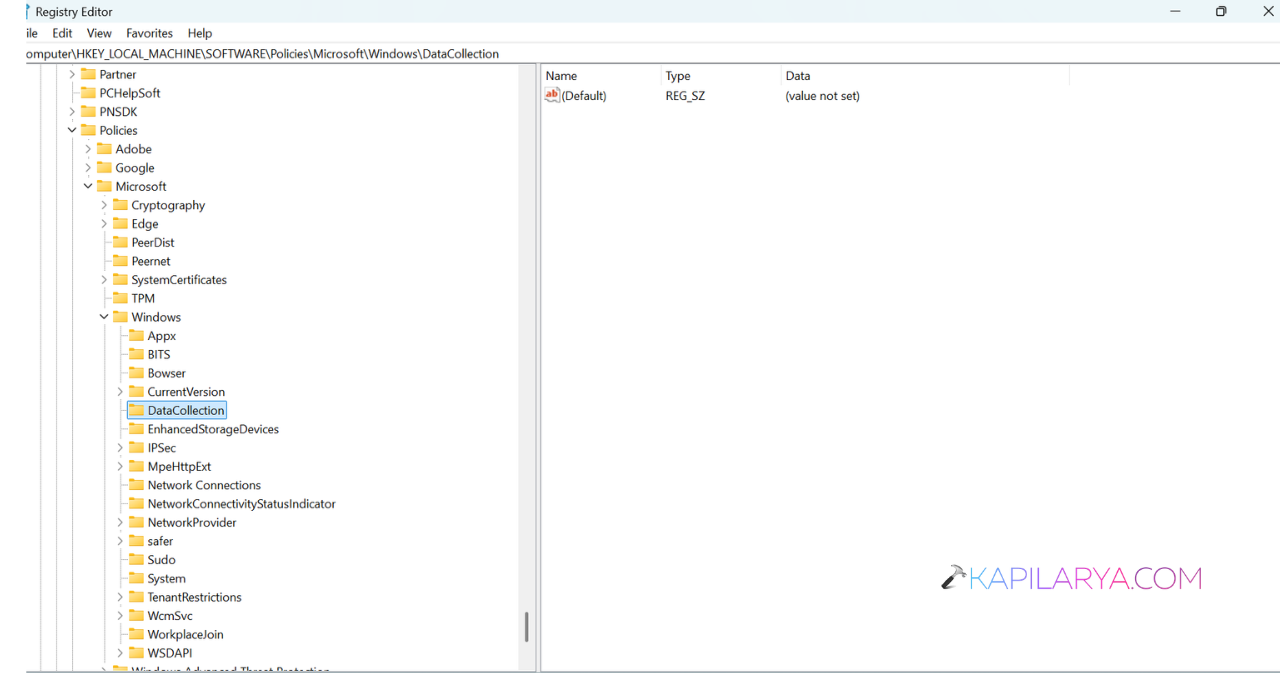
3. Create a new DWORD (32-bit) Value named AllowTelemetry.
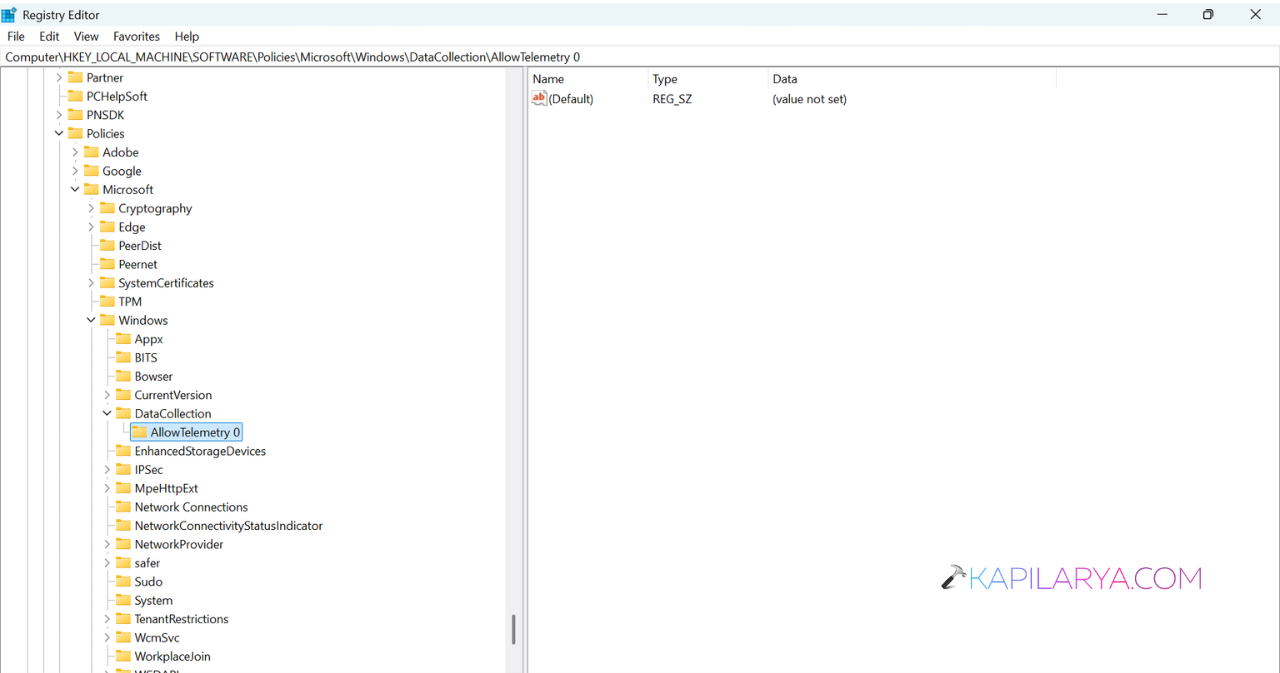
4. Set its value to 0.
5. Restart your PC.
That’s it!
![Solved: 100% CPU usage in Windows 11 [2026 Fix]](https://www.kapilarya.com/assets/Drivers-768x413.png)


![SecurityHealthSystray.exe High CPU / Disk / Memory Usage [Fixes]](https://www.kapilarya.com/assets/Windows-Defender-768x669.png)

