Windows Update error code 0x80070306 can prevent your Windows 11 system from downloading or installing the latest updates. Well, this error can appear when the installation fails repeatedly. In some cases, Windows simply shows a message stating that there are problems installing the updates. I
Luckily, you don’t have to reinstall or reset your Windows to fix it. Because in this guide below, we are going to guide you through several of the practical solutions to resolve Windows Update error 0x80070306. You should work on the easier options first, and then the harder to the harder options if the error persists.
Page Contents
Fix Windows Update error code 0x80070306
As a Windows user, it can be confusing to see Windows Update error code 0x80070306. This is particularly if the update fails multiple times. For multiple users, either of these can restore Windows Update to normal operation.
Fix 1: Use Windows Update Built-In Repair Option
From newer versions of Windows 11, settings has the option to fix problems using Windows Update. Hence, this is one of the simplest methods to try. The feature will install or fix Windows elements and keep your apps, files and settings.
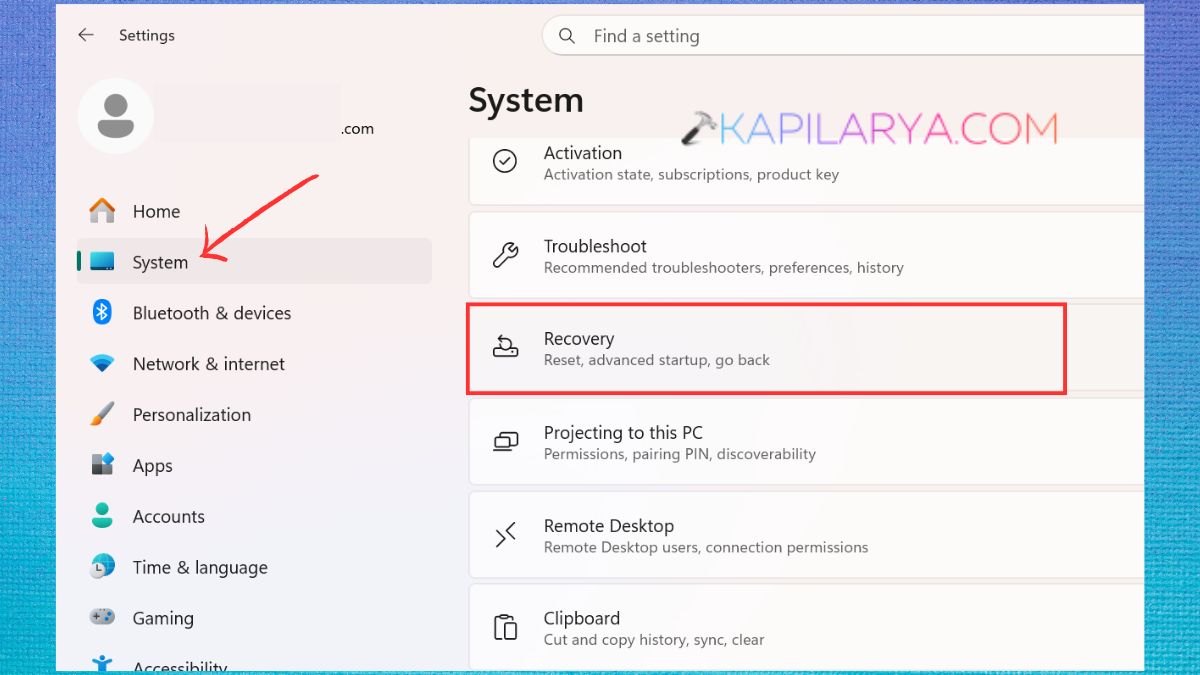
1. Open Settings by pressing Windows + I. Select System. Tap and open Recovery option.
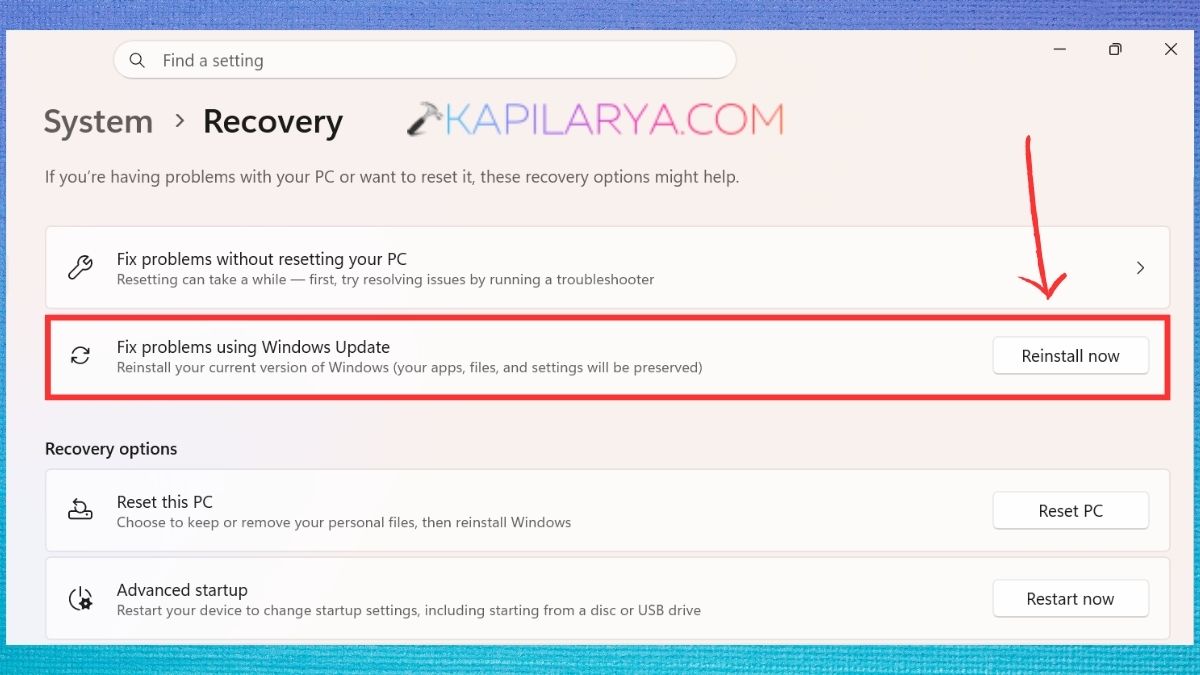
2. Check for “Fix problems using Windows Update“. If you can, click the “Reinstall now” button. Follow the instructions that are on the screen. Wait for the Windows repair to finish.
If asked, restart your computer.
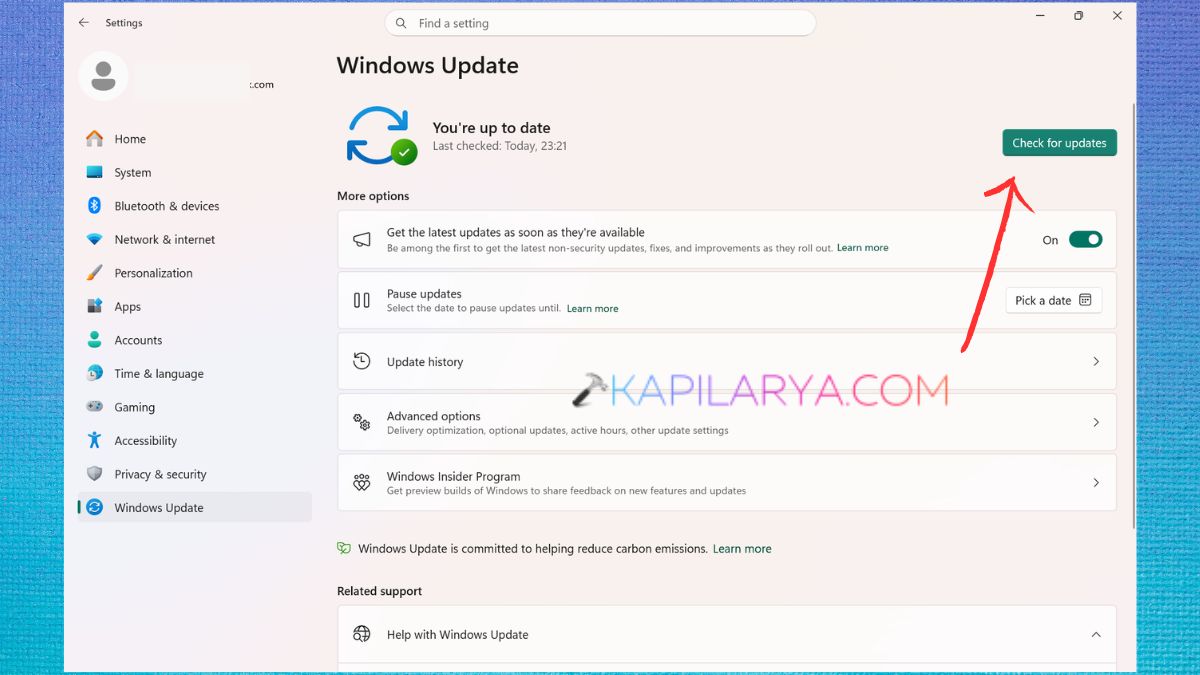
3. Go to Settings > Windows Update.
4. Click on Check for updates, and attempt to install the pending update again.
Why this can help?
Windows Update may have damaged or missing components. If this is the case, you should reinstall the current version of Windows using this recovery option. This also includes the necessary components without a need for a clean installation.
Fix 2: Repair All Corrupt Windows System Files
Corrupted system files are another possible reason for Windows Update error code 0x80070306. Windows has two useful tools that may be used at the command line to fix broken parts: System File Checker (SFC) and Deployment Image Servicing and Management (DISM).
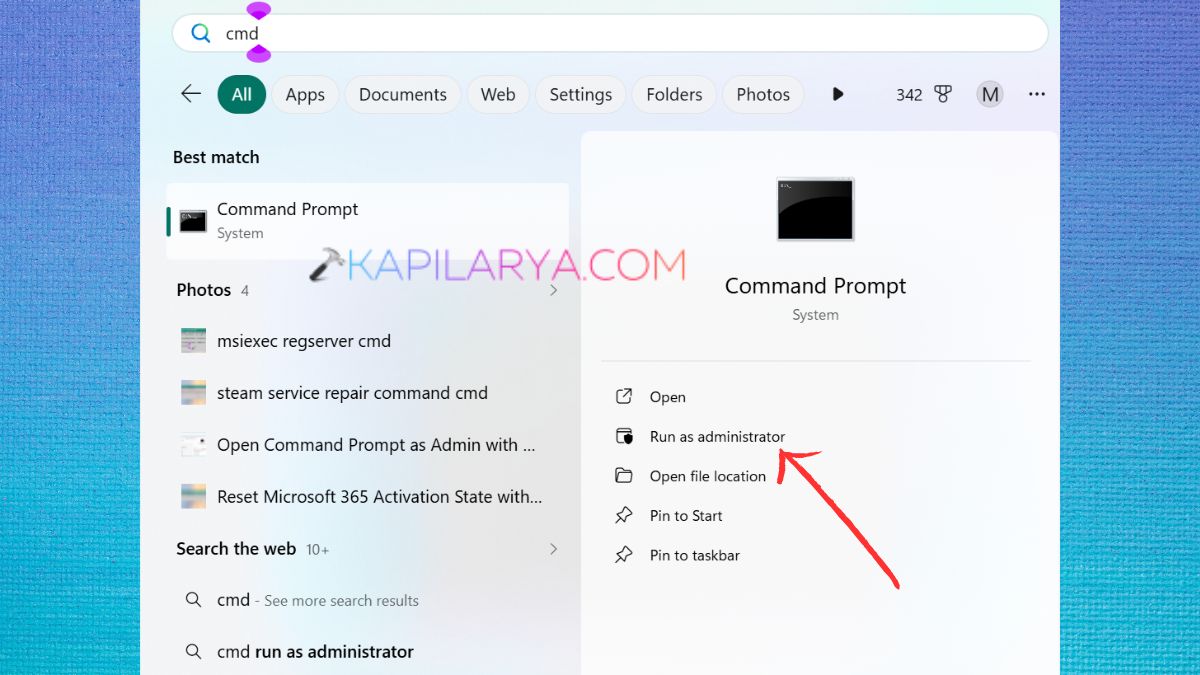
1. Press Windows + S. Type Command Prompt. Choose Run as Administrator. If you see User Account Control, click on Yes.
2. Type in the following command. Wait until the scan and repair are complete.
DISM /Online /Cleanup-Image /RestoreHealth
This may take some time, so be careful not to close the Command Prompt window during this process.
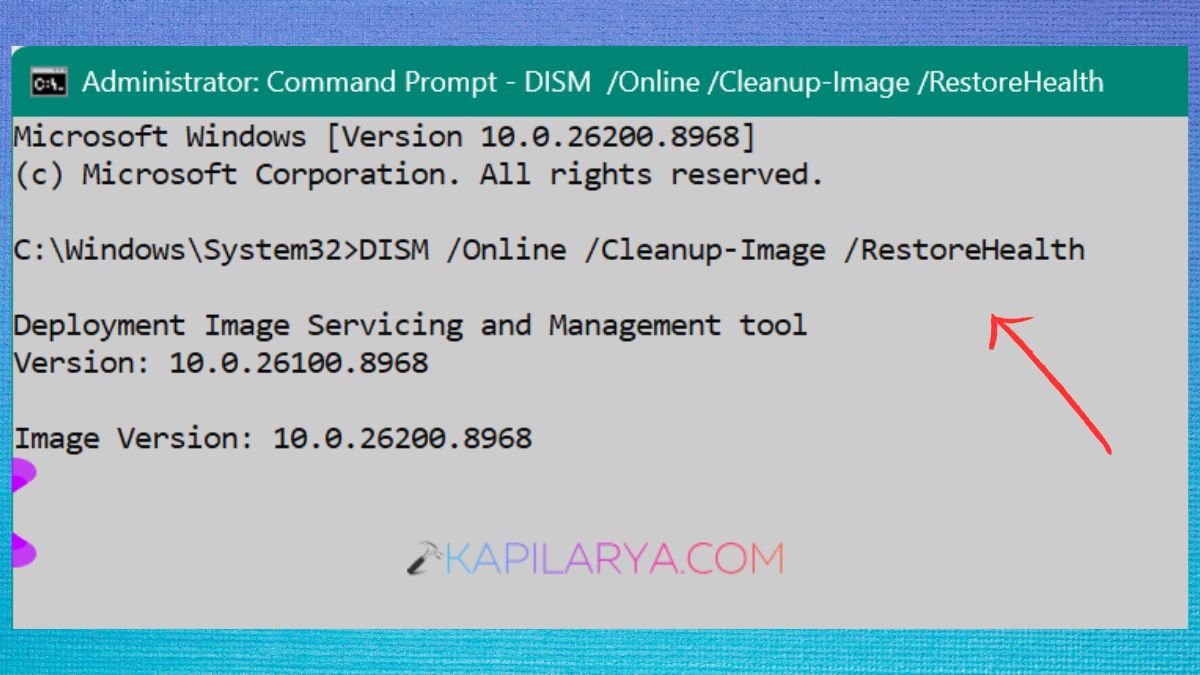
3. Once DISM is complete, click this. Press Enter and wait for verification to be 100%.
sfc /scannow
Once both instructions are done, restart your computer and repeat the steps to Windows Update.
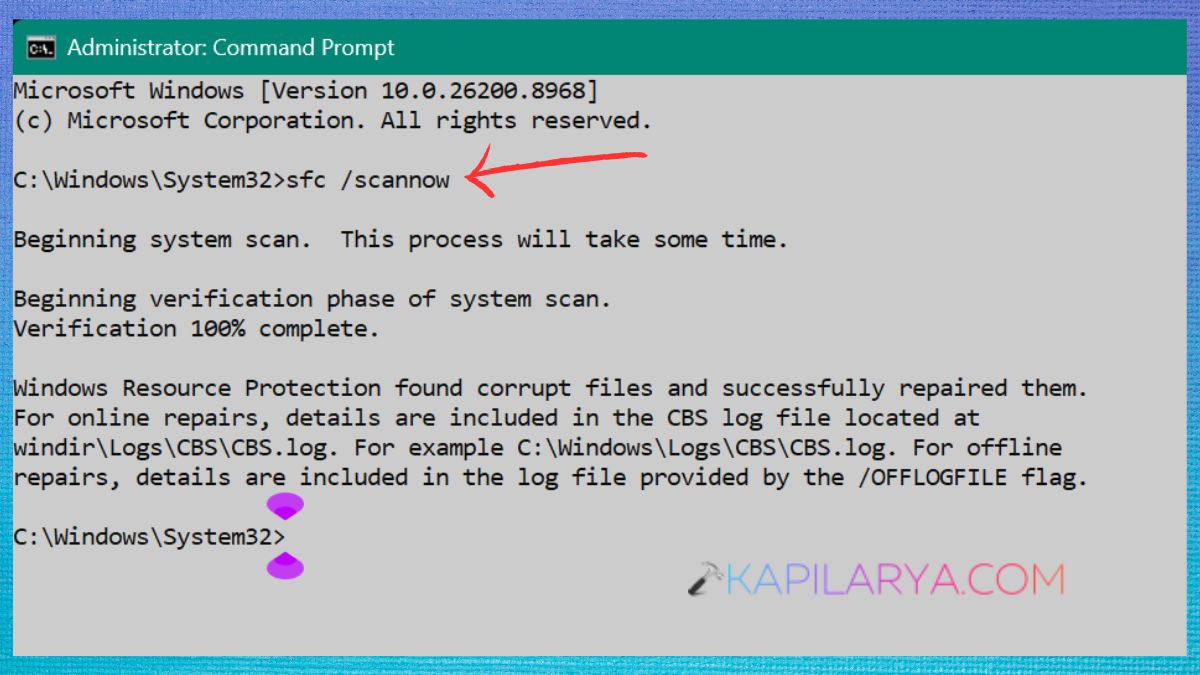
Make sure to run DISM first, followed by SFC.
Fix 3: Run the Windows Update Troubleshooter
Windows has built-in troubleshooter that detects and fixes common issues with updates. You might run it before having more complex changes to your system.
1. Click on Windows + I, then select System. Select Troubleshoot.
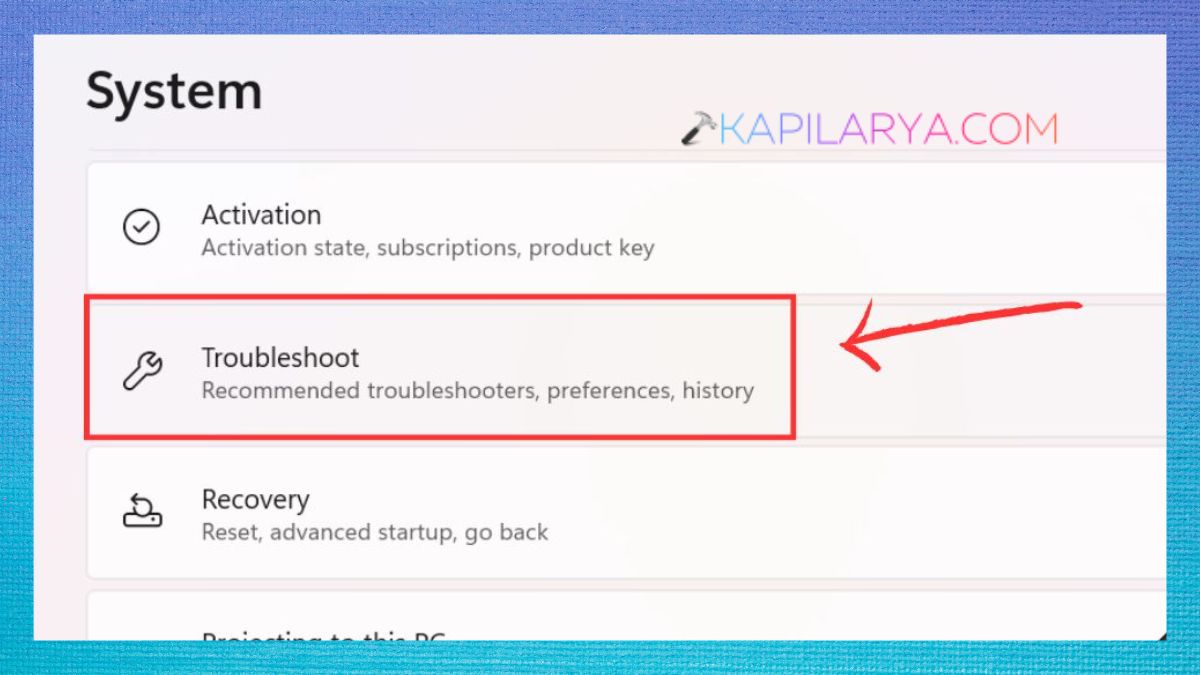
2. Tap on Other troubleshooters.
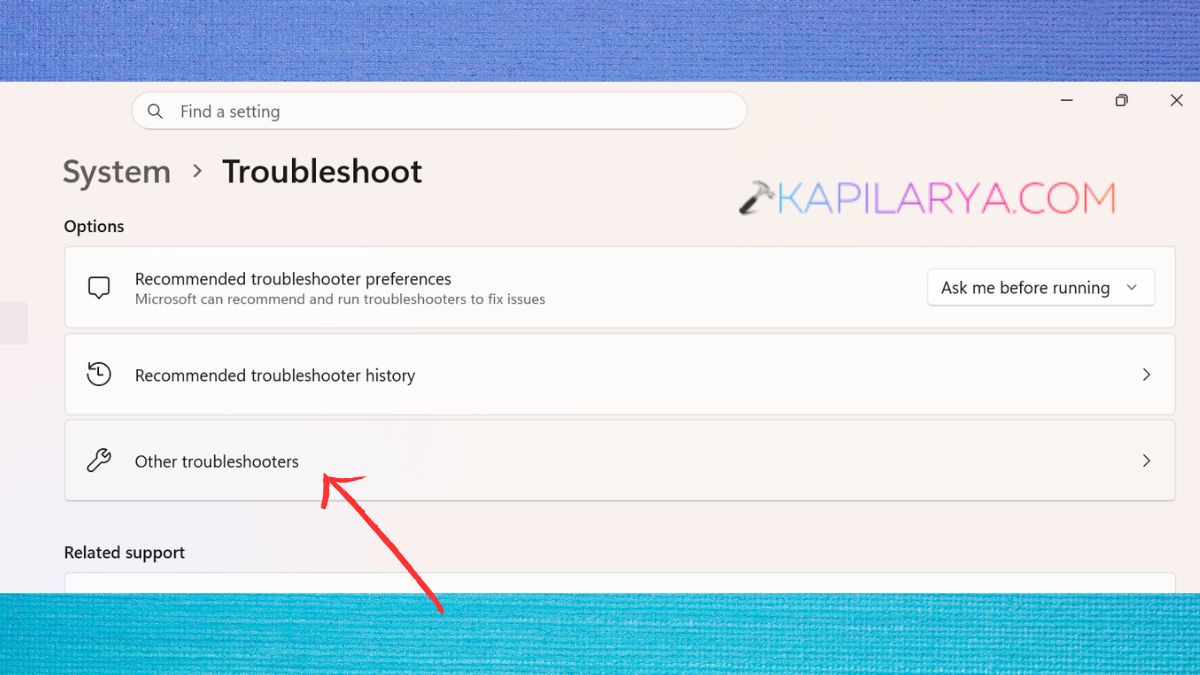
3. Find Windows Update. Click Run. Follow Windows instructions.
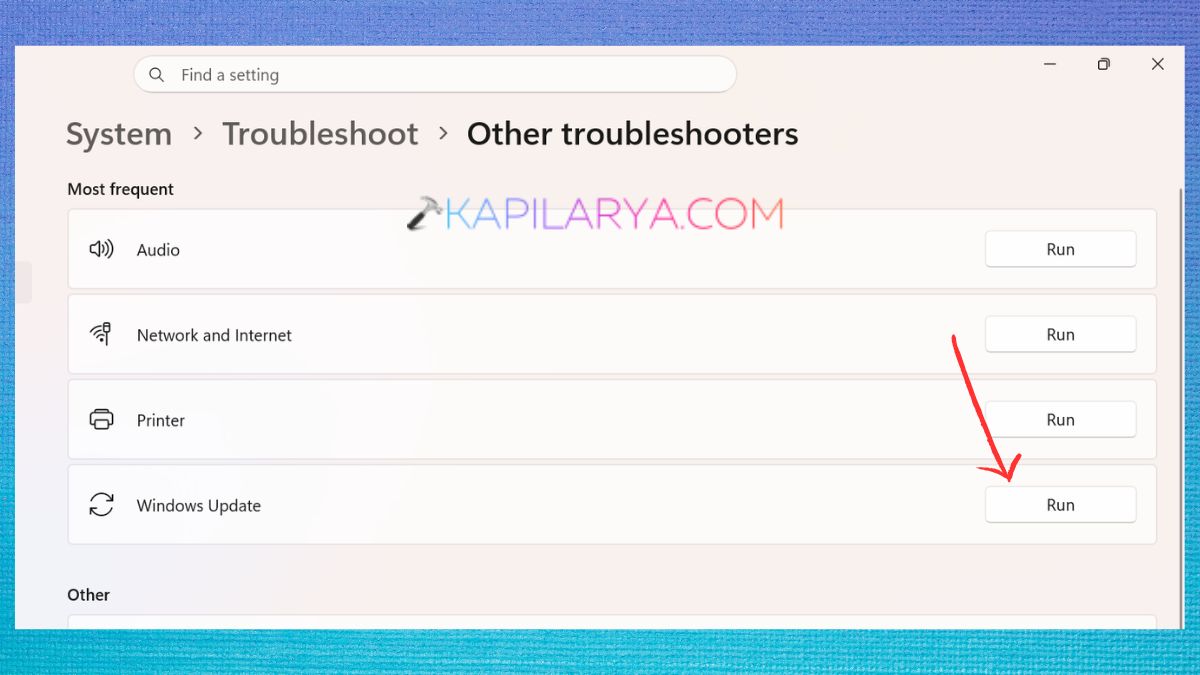
Here, the troubleshooter can identify the problem in the Windows Update components or configuration, and automatically fix it.
4. Now, Implement any suggested changes from the troubleshooter. Restart your computer. Return to Windows Update and see if there are any updates available.
Fix 4: Try Installing the Update in Safe Mode
Safe Mode can be helpful in detecting software conflict. Also, it can check if any background application or third-party service is interfering with Windows Update failing.
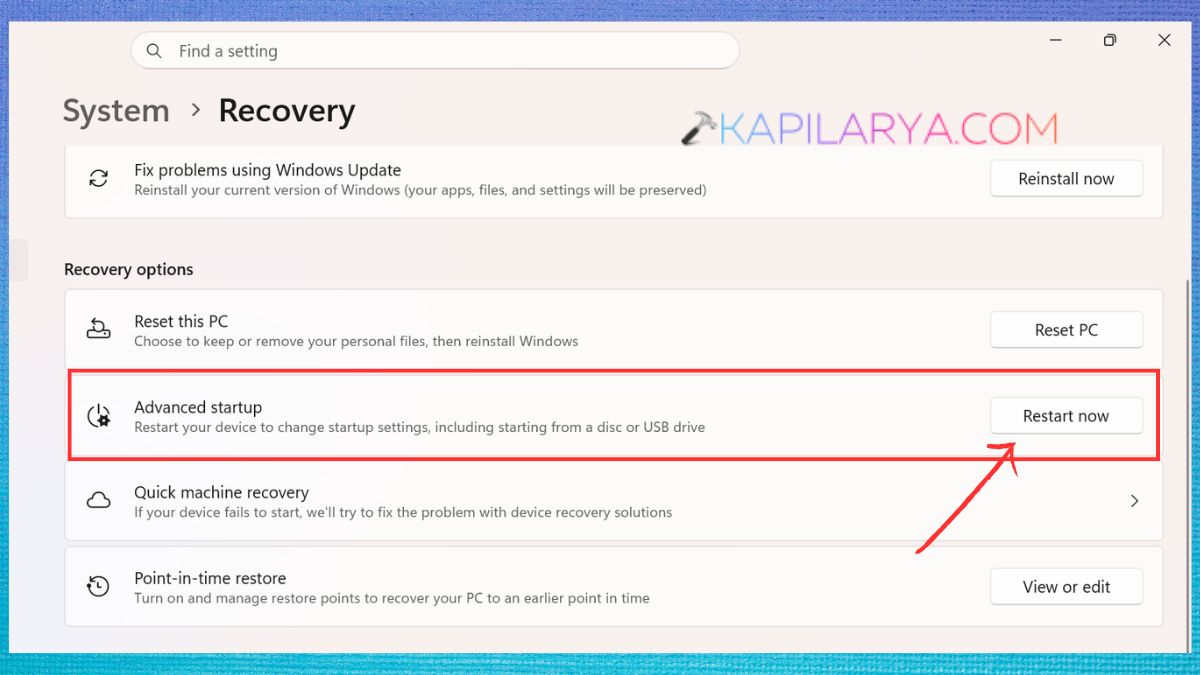
1. To get to Settings, press Windows + I. Select System > Recovery.
2. In Recovery options, select Advanced startup. Click “Restart now” button.
3. Once your laptop/PC restarts, click Troubleshoot. Choose Advanced options. Select Startup Settings. Tap “Restart”.
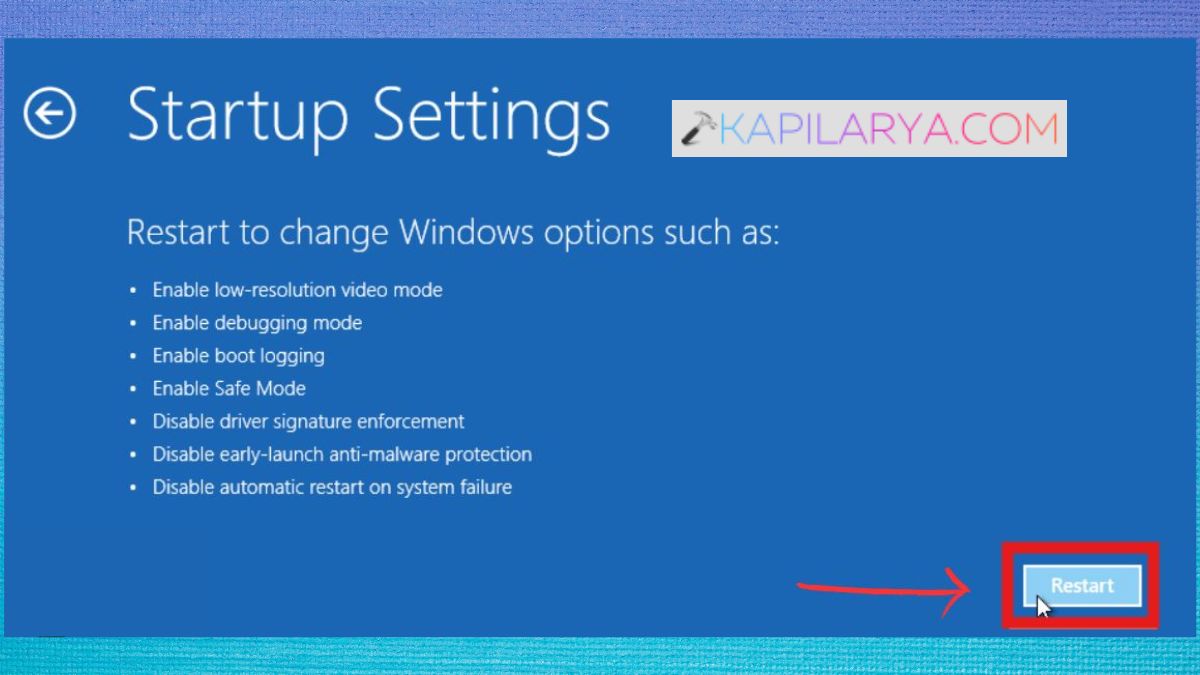
Once you get the Startup Settings screen, press the Safe Mode (F8) button. Once in Safe Mode, see if the update can be installed or the issue goes away. If Windows Update is not able to function in Safe Mode, how will this affect you? Well, some updates need services or networking that are not available in normal Safe Mode. If not, shut down Windows normally and proceed with another of the methods in this guide.
Fix 5: Download and Install the Windows Update Manually
Sometimes, if Windows Update keeps getting the same 0x80070306 error, you can install the missing update manually. Additionally, you should check the KB number of the update in question prior to downloading.
1. First, open Settings. Click on Windows Update from left menu. Then, check upon the history of updates or the failed update notification. Now, you have to record the KB number for the update in Notepad, or somewhere you can copy and paste later, e.g., KBxxxxxxx.
2. Go to the official Microsoft Update Catalog site – https://www.catalog.update.microsoft.com.
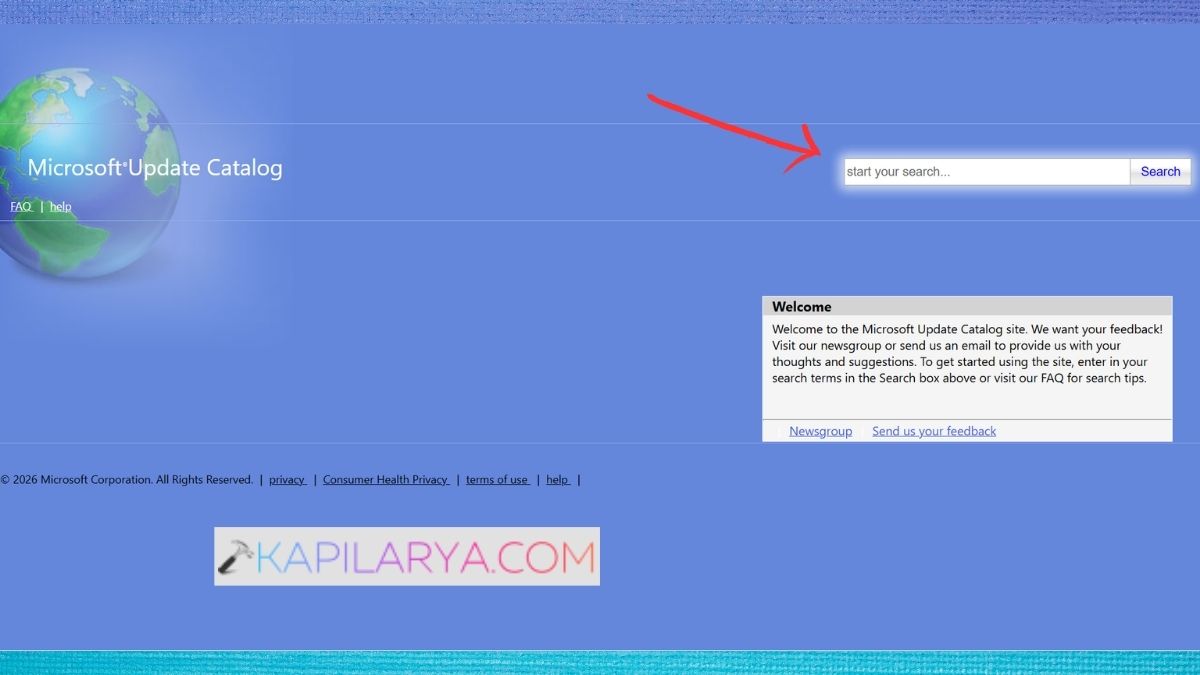
3. In the search bar, paste the correct KB number. Find the package for your Windows version and architecture. Install the ‘appropriate’ package. Run the downloaded installer.
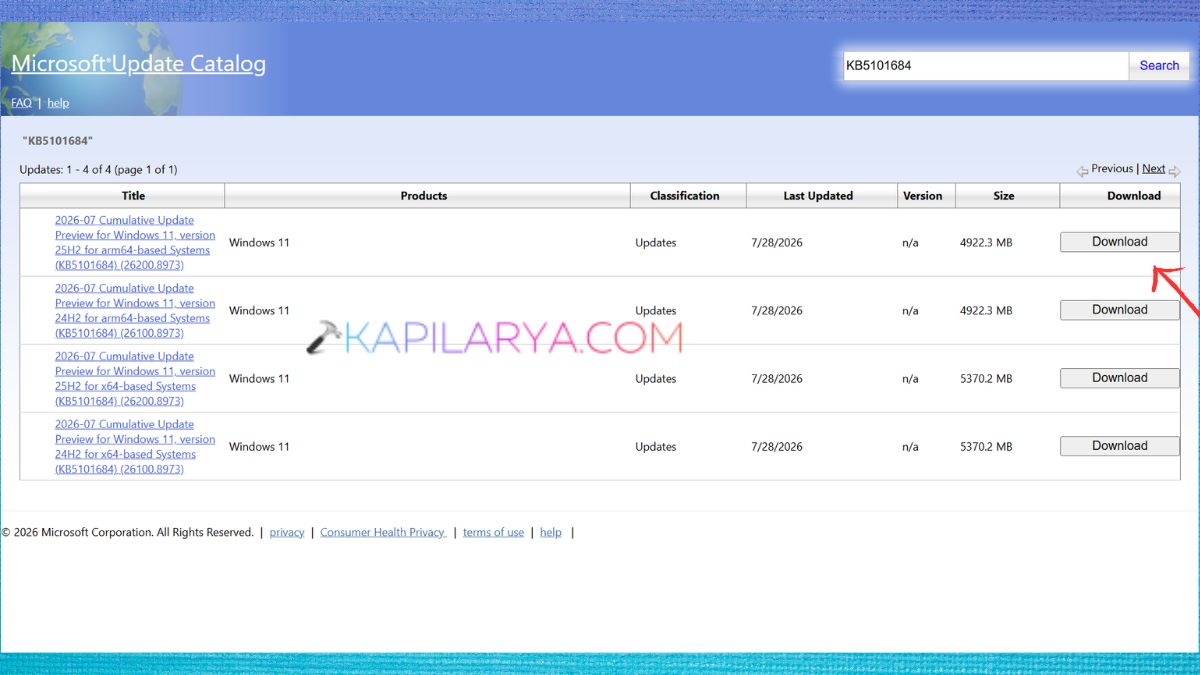
4. Click on the instructions on the screen. Restart it when installation is successfully complete.
Don’t install a random package just because the KB number is similar. Verify the supported Windows version and architecture (x64, ARM64, etc) prior to download.
Frequently Asked Questions (FAQs)
That’s it!