Where you do a right click in Windows 11, you get a right click context menu. Some devices may have a dedicated key for right click context menu on the keyboard. The right click context menu usually provides a variety of options you can perform with the item you’ve clicked on. For example, if you are on Desktop, you can make customization for right-click context menu on the desktop. Similarly, you can do this for right context menu appearing in File Explorer.
Starting with Windows 11 Insider Preview build 26340.9212, Microsoft added the ability to customize the right click context menu. You can add or remove the options you want in the context menu as per your choice. However, this is still under testing since it is released only to Windows Insiders as of this writing. But the feature is aimed to make the right context menu more personal. This adds great productivity experience to end users.
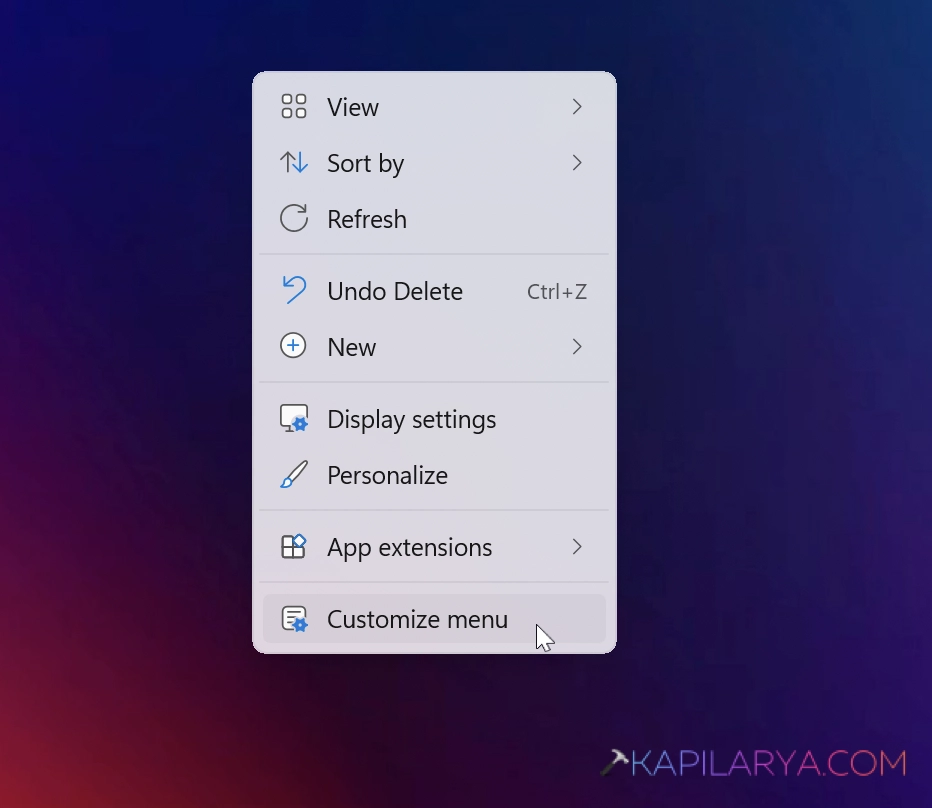
By default, the option to customize right click context menu is there. In case if you ever need to disable that option, you can try steps mentioned below.
Disable Customize Menu in right-click context for Windows 11
1. Right click on the Start button and select Run.
2. In Run window, go to the following registry location:
HKEY_CURRENT_USER\Software\Microsoft\Windows\CurrentVersion\Explorer\ContextMenu\Preferences
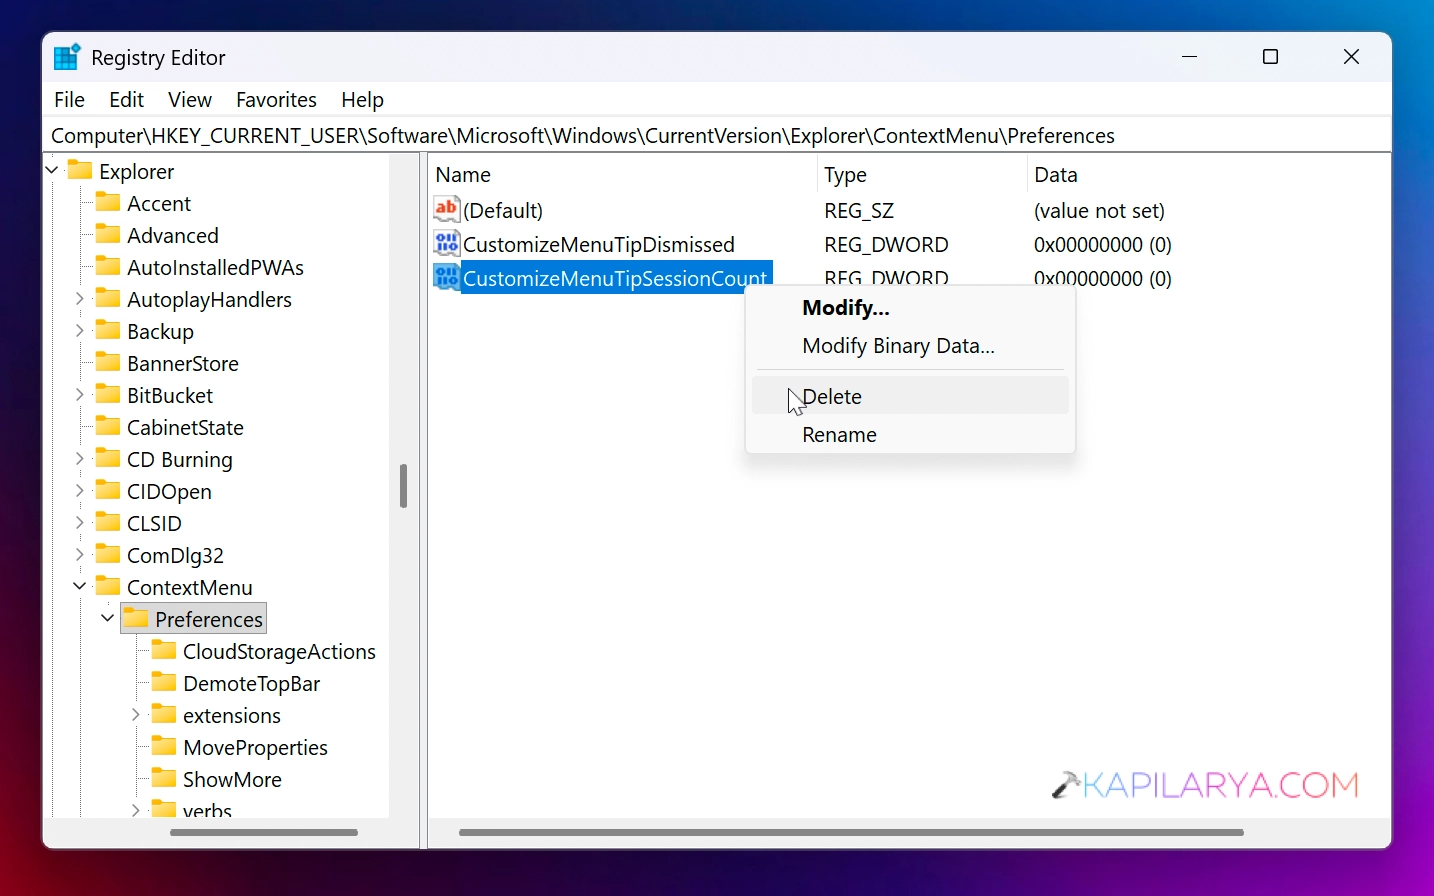
3. In the right pain of preferences, you will be able to locate the registry DWORDS named CustomizeMenuTipDismissed and CustomizeMenuTipSessionCount. Both of them might be corresponding to the Value data 0. To disable the customize menu, right click on the CustomizeMenuTipSessionCount and select Delete. Click Yes in the confirmation prompt.
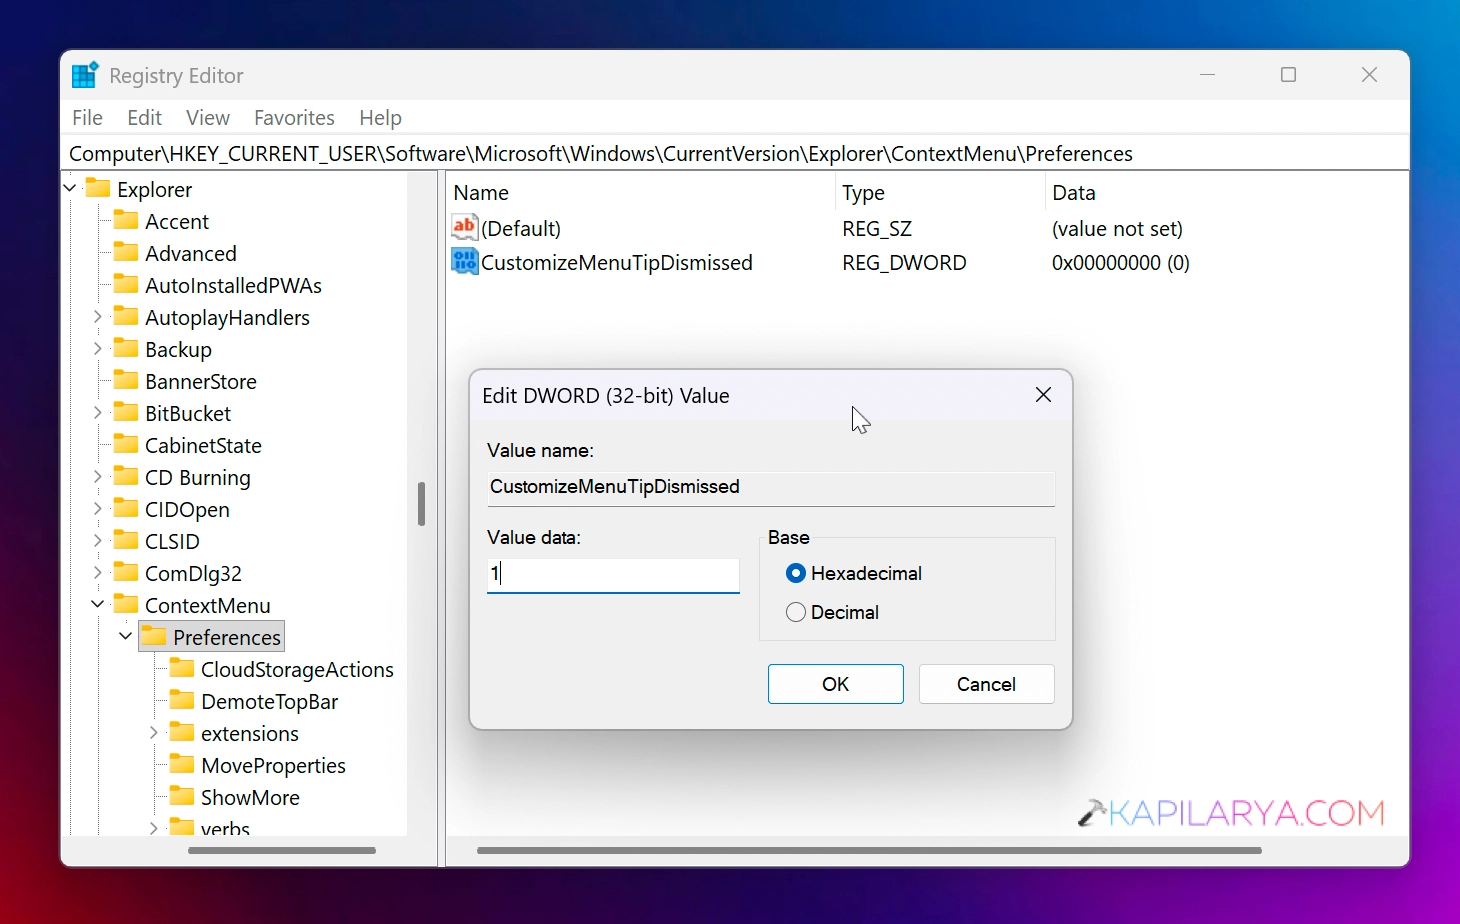
4. Next, double click and set the CustomizeMenuTipDismissed to Value data 1.
5. Close the Registry Editor and sign out, then sign-in back to your account.
After that you would find, the context menu option has been disabled. In case you again want to enable the option, you can simply reverse the changes you have made any step 3 and 4.
That’s it!