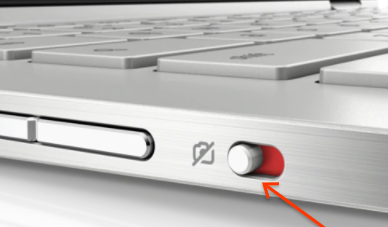
A blurry webcam on Windows 11 can affect video quality and make it difficult for others to see you clearly during meetings or online classes. The problem may be caused by a dirty camera lens, outdated drivers, incorrect app settings, or an unstable internet connection.
Try these eight methods to improve your webcam’s picture quality.
Page Contents
Blurry Webcam on Windows 11: 8 Ways to Fix It
Fix 1: Reset the Camera App
If your webcam looks blurry in the Windows Camera app, repairing or resetting the app may fix the problem.
1. Open Settings and go to Apps > Advanced app settings.
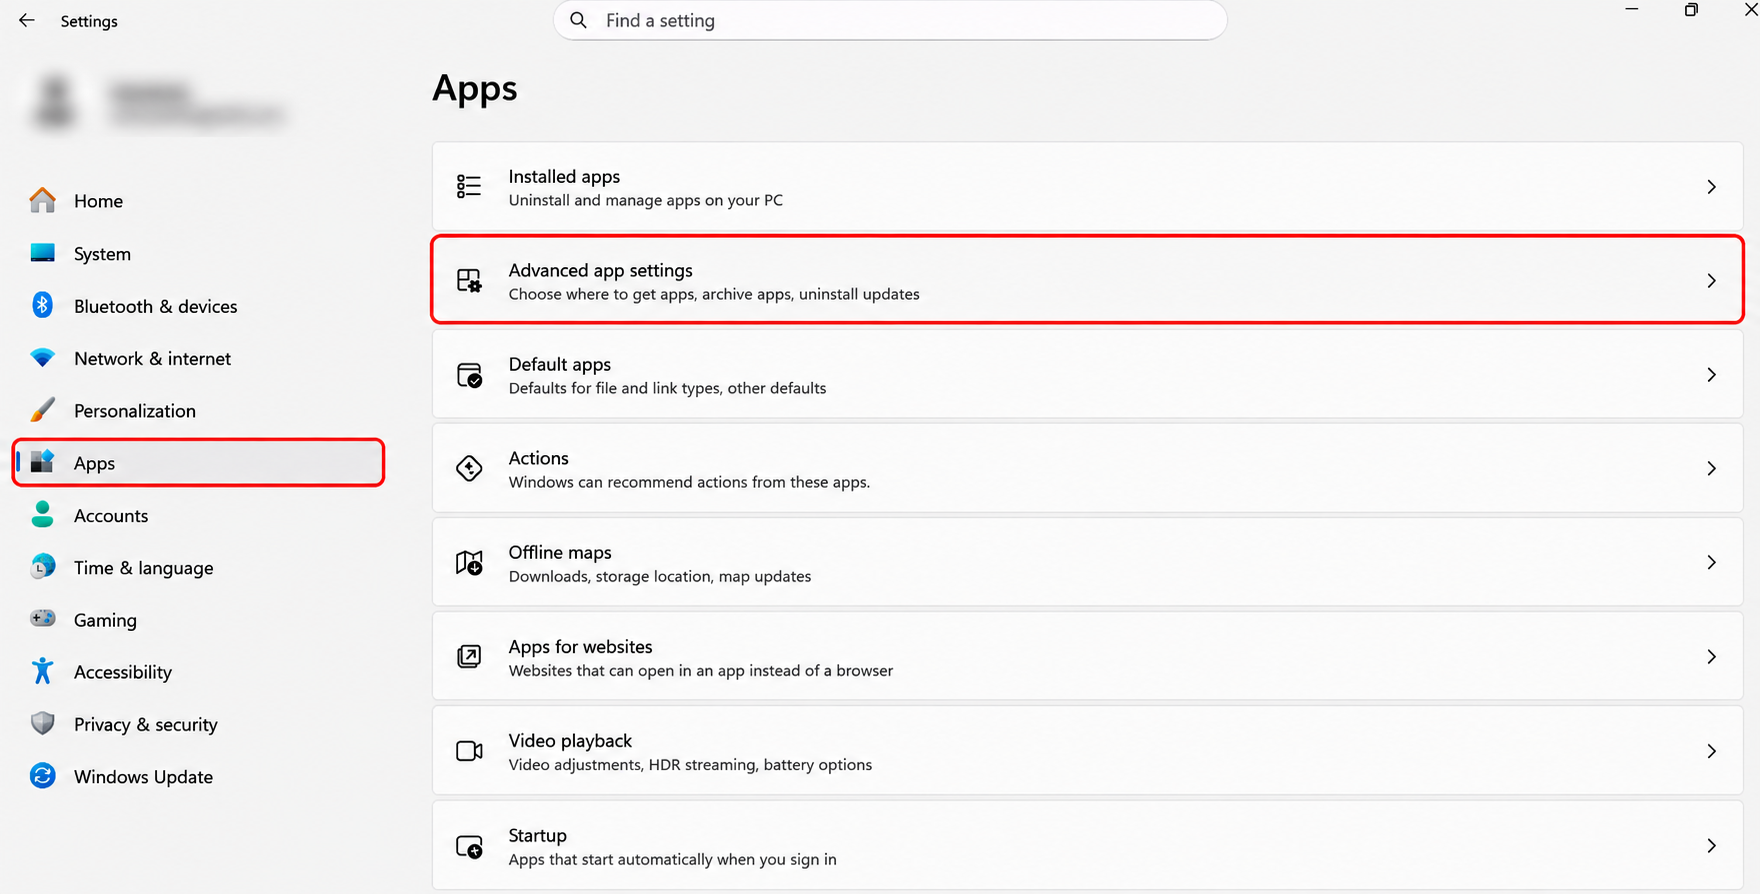
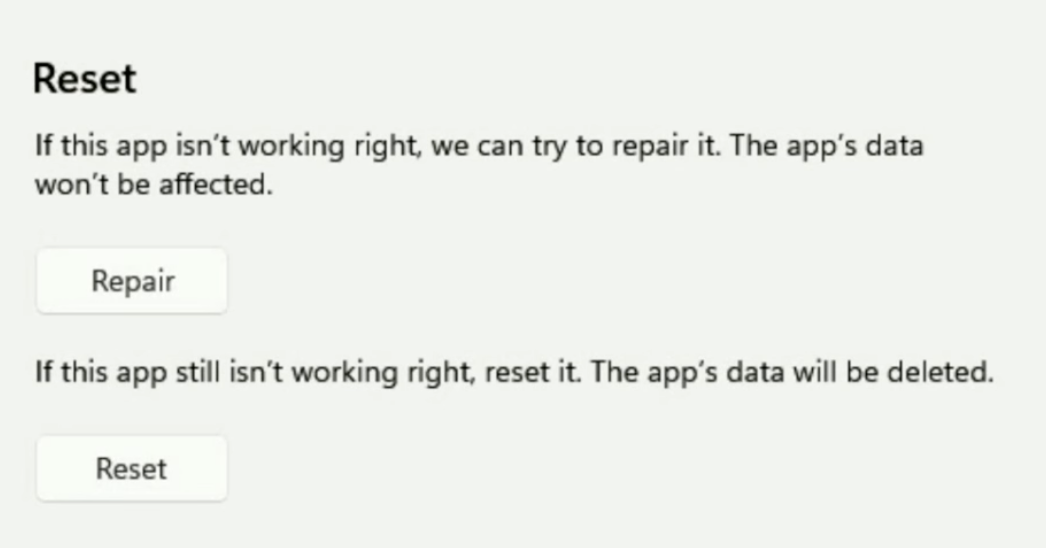
2. Click Repair and check whether the webcam works properly.
3. If the problem is not rectified yet, select Reset.
Fix 2: Clean the Webcam Lens
If your lens has dust, fingerprints, and smudges, it can make the webcam look blurry. So try cleaning it before following any of the below mentioned fixes.
1. Turn off your webcam or shut down your laptop.
2. Use a clean, soft microfiber cloth to gently wipe the camera lens.
3. Additionally, check whether any protective film or cover is blocking the lens. If yes, make sure to remove it.
Once done, open the Camera app and check the image quality again.
Fix 3: Update the Webcam Drivers
If your camera drivers are outdated or corrupted, it can affect the webcam performance. Updating the driver may resolve the problem.
1. Press Win + X and select the Device Manager option.
2. Expand the Cameras section.
3. Right-click your webcam and select Update driver.
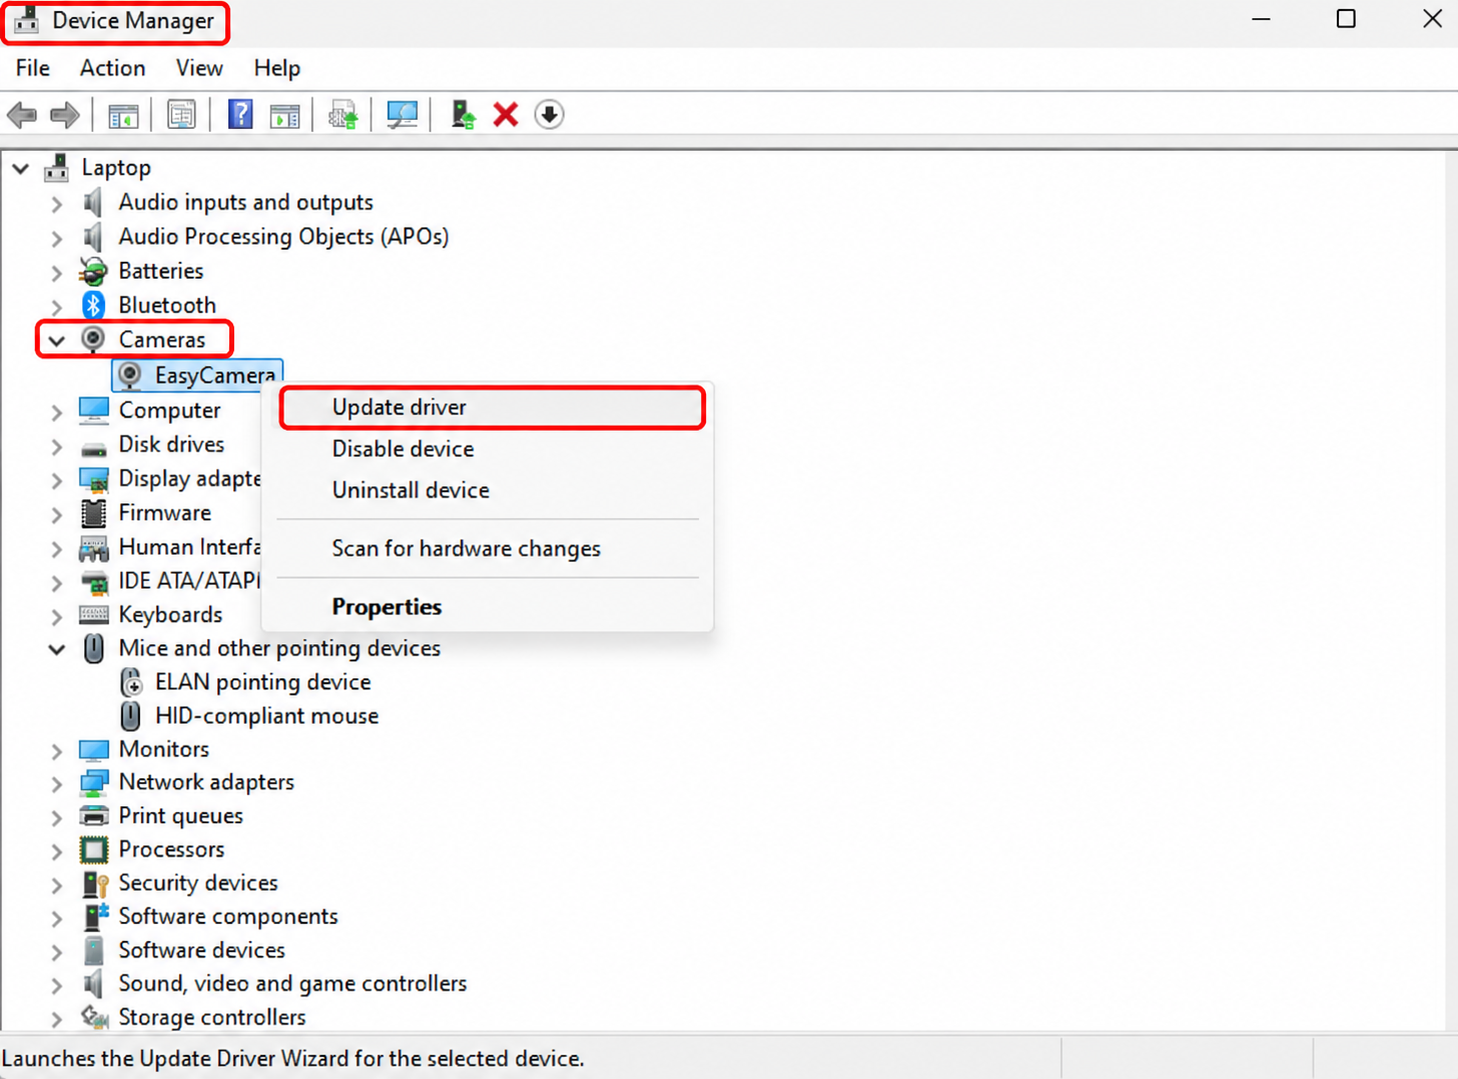
4. Select Search automatically for drivers.
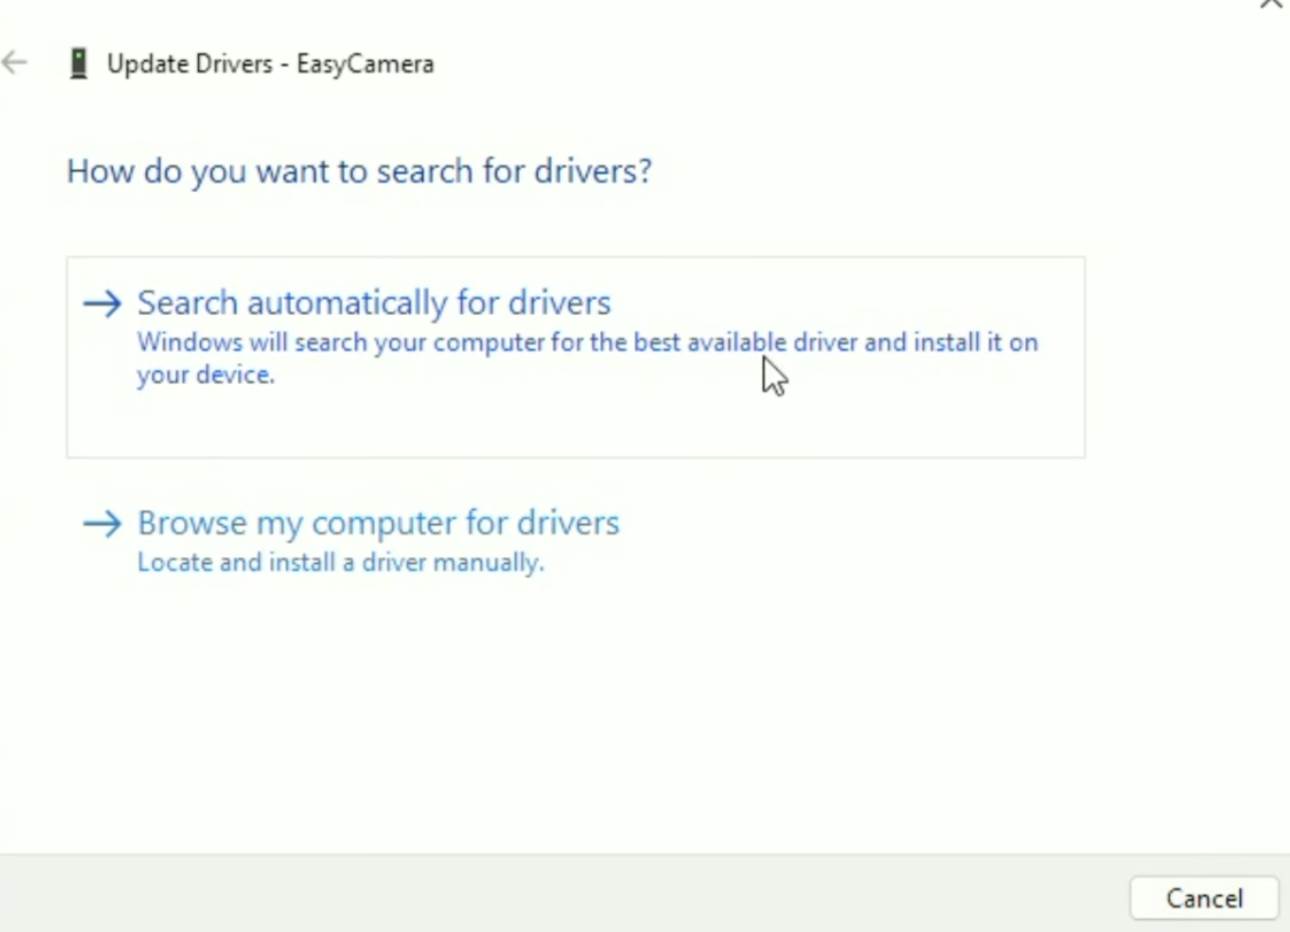
Follow the on screen instructions to install any available driver updates. You can also install latest Windows Updates at this stage.
5. If updating the driver does not help, right-click the webcam again, select Uninstall device, and confirm the action.
Restart your PC so Windows can detect the camera and reinstall its driver.
Fix 4: Check Your Internet Connection
If your webcam looks blurry only during online meetings, an unstable internet connection may be affecting video quality. To fix this,
1. Restart your Wi-Fi router and reconnect your PC.
2. If possible, try another network and check the video quality again.
3. You can also run Network Adapter troubleshooter, to resolve network issues.
Fix 5: Run the Camera Troubleshooter
Windows 11 includes troubleshooting options that can help identify and fix camera-related problems.
1. In Settings, go to System > Troubleshoot > Other troubleshooters.
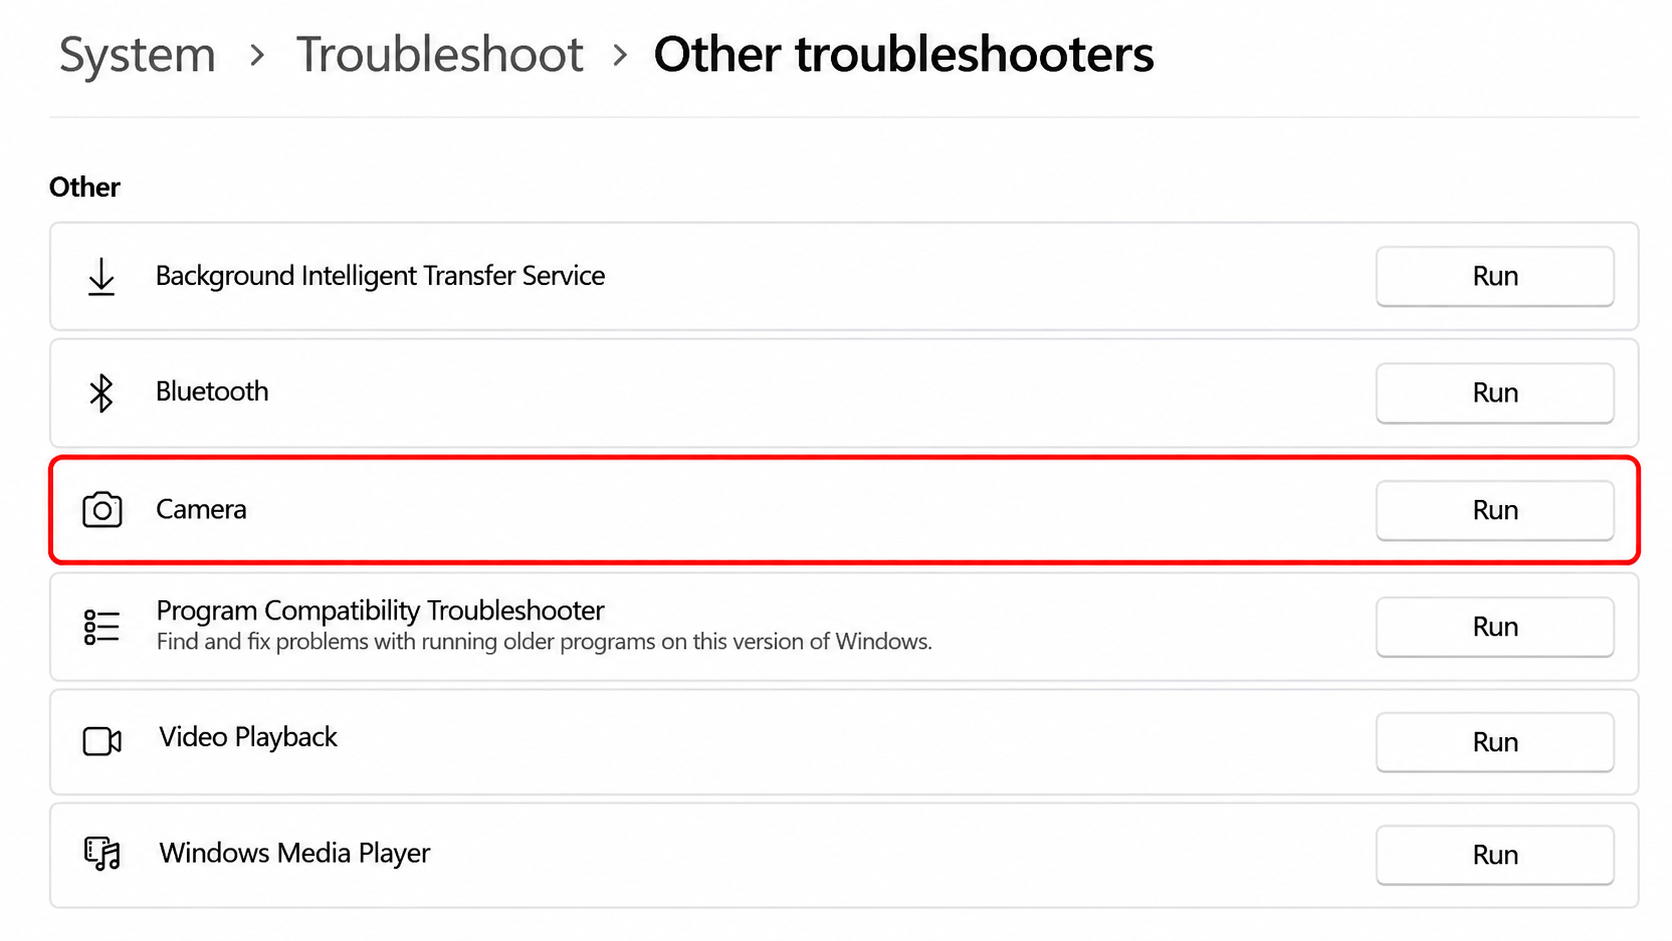
2. Find Camera in the list. Click Run next to it.
Follow the on-screen instructions to complete the troubleshooting process.
Fix 6: Install Optional Driver Updates
Windows may provide additional camera driver updates under Optional updates. Installing this update might fix the issue.
1. Open Settings and go to Windows Update.
2. Select Advanced options.
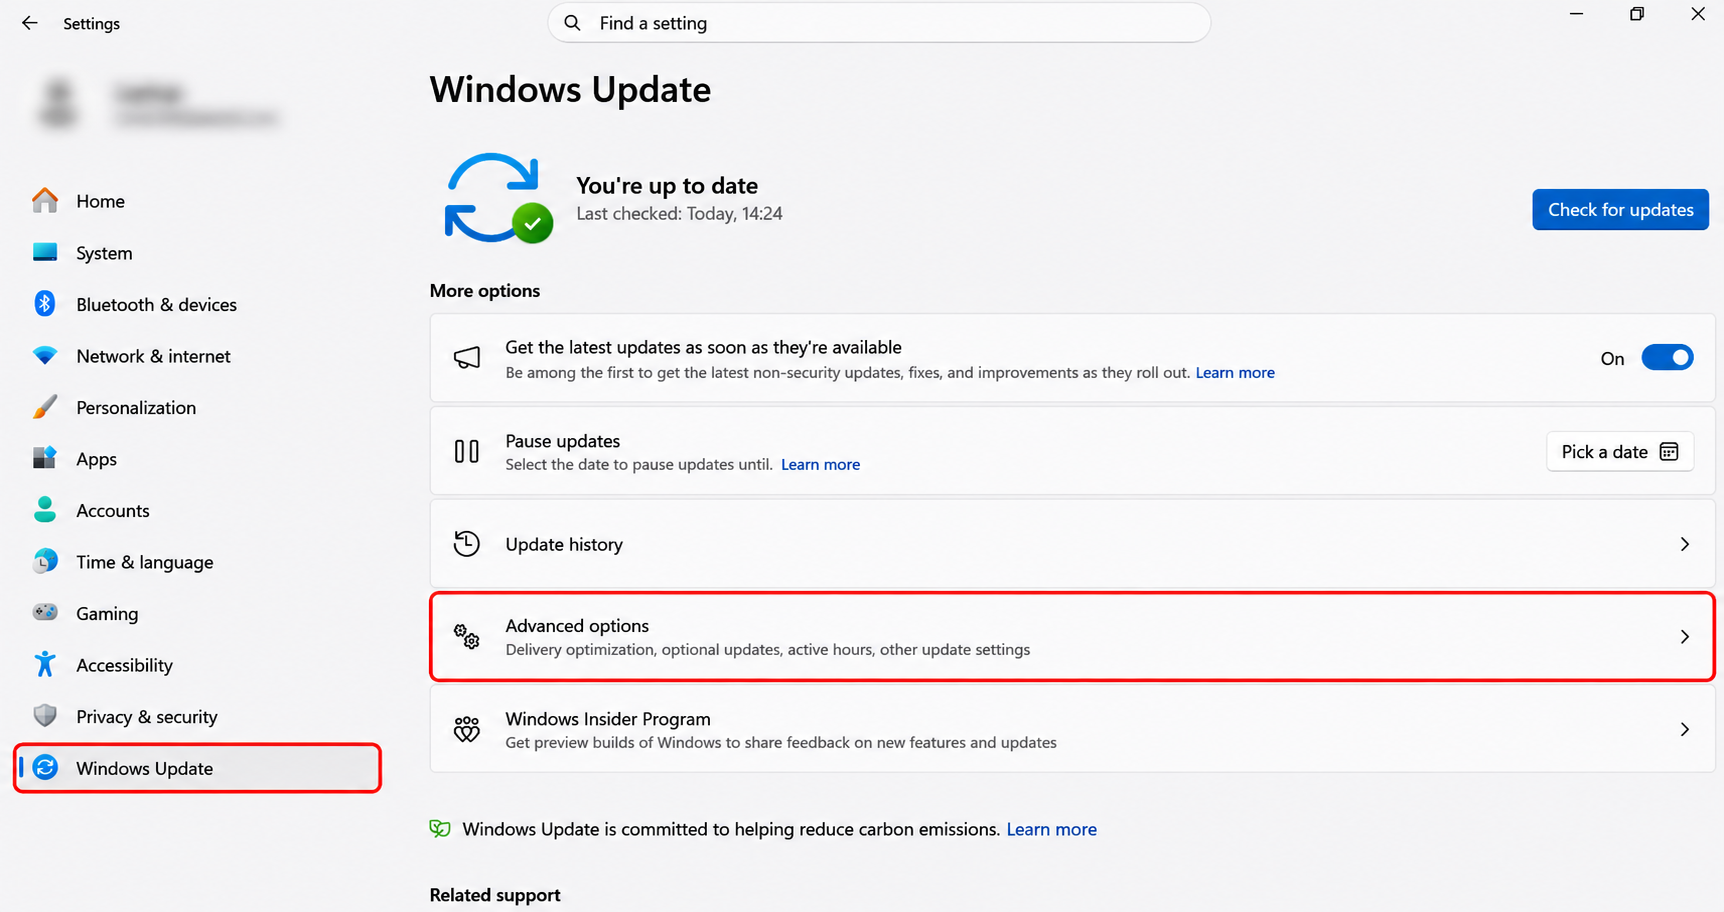
3. Under Additional options, click Optional updates.
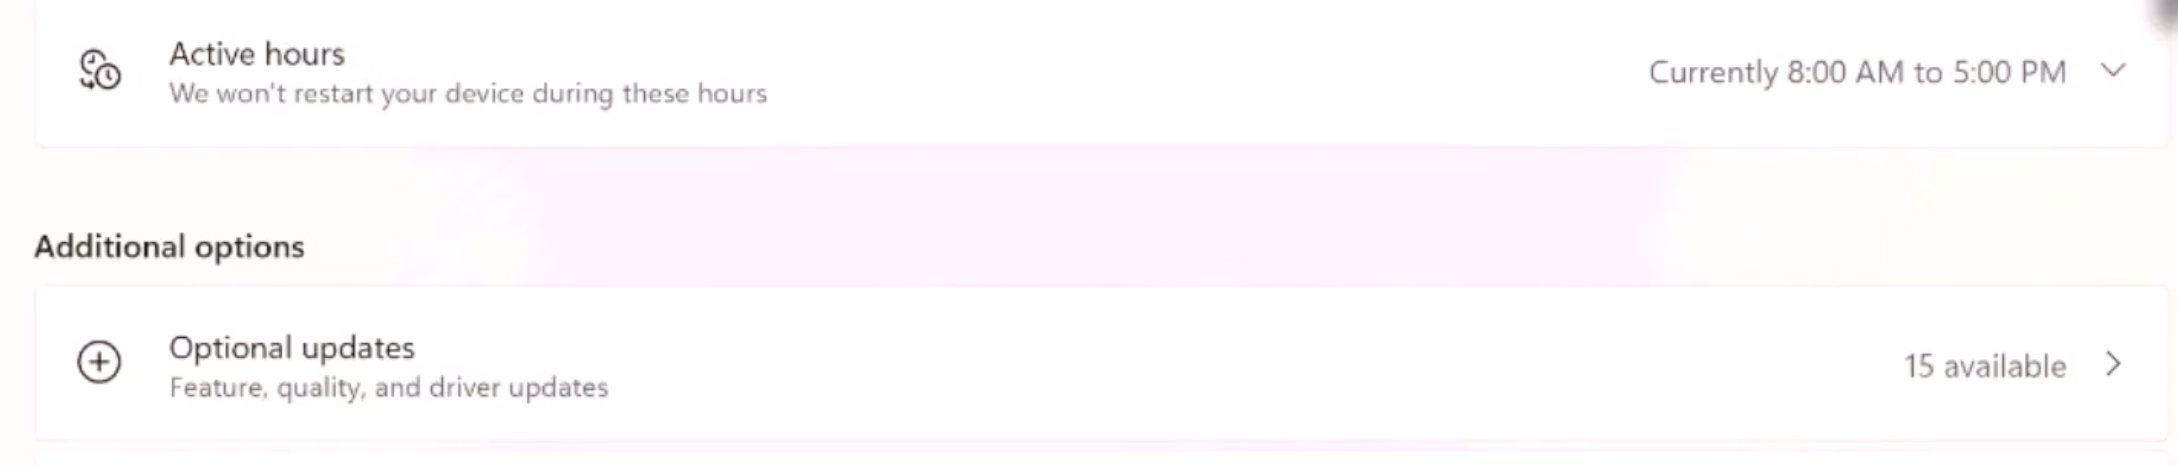
4. Expand Driver updates if available.
5. Select the relevant camera driver update and click Download & install.
Fix 7: Restart Your PC
sometimes, a process issue may affect webcam performance. Restarting your PC can clear these temporary glitches.
1. Save your work and close open applications.
2. Open the Start menu. Click the Power icon and select Restart.
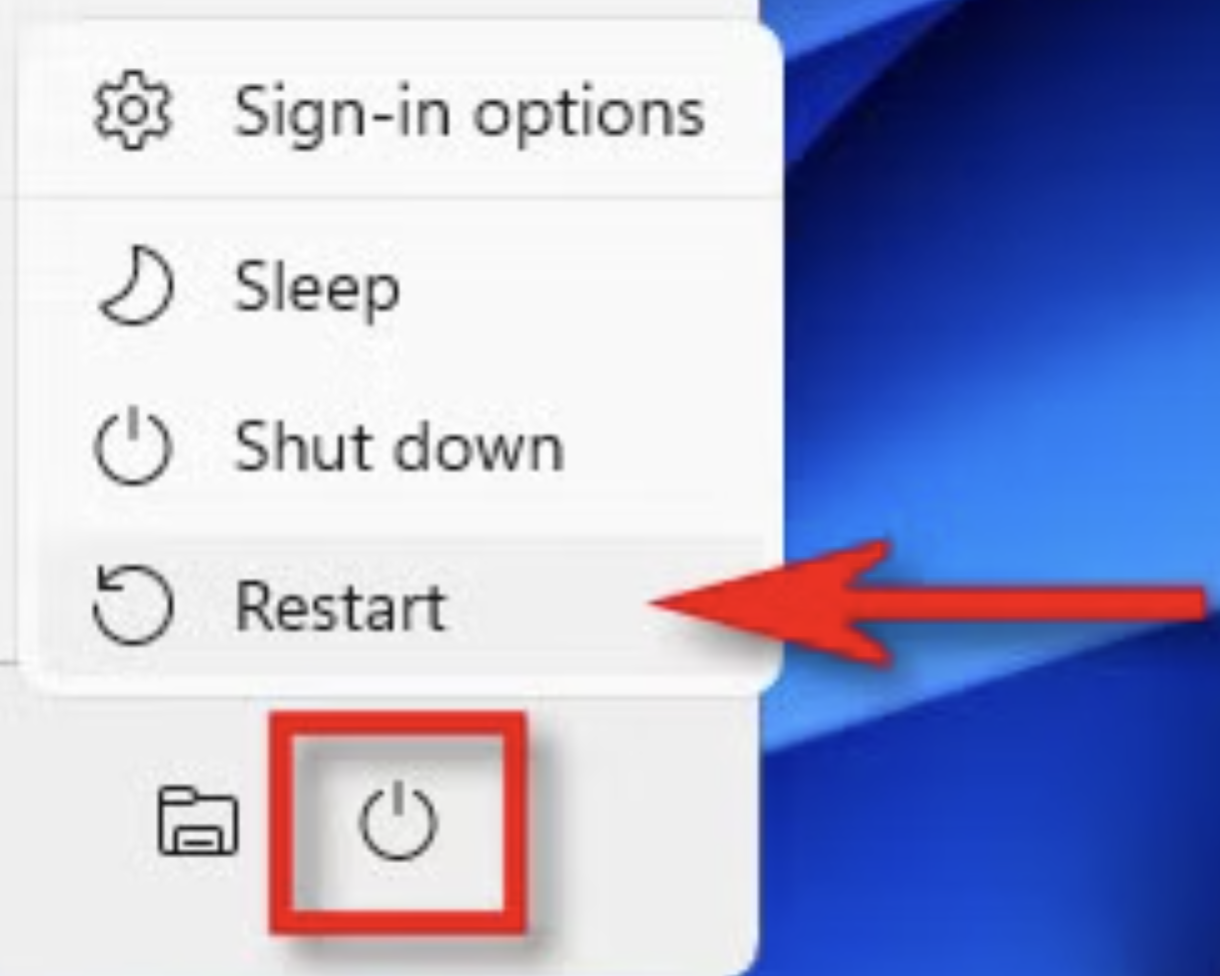
3. After Windows starts, open the Camera app and check the image.
Fix 8: Check the Webcam Hardware
If the webcam remains blurry after trying the software fixes, the camera itself may be damaged or faulty.
1. If you use an external webcam, disconnect it and connect it to another computer.
2. Open the Camera app on that computer and check the image.
3. If the image remains blurry, inspect the camera for any visible damages.
4. If the webcam is built-in, then contact your PC manufacturer’s support or an authorized service center.
That’s it!