File Explorer keeps opening randomly? This article may interest you. In Windows 11, this can interrupt your work and make it difficult to use your PC. This may happen if you’ve incorrect settings, corrupted system files, malware, or interference from other third-party programs.

You can try the following fixes to stop File Explorer from opening on its own.
Page Contents
Fix: File Explorer Keeps Opening Randomly in Windows 11
Solution 1: Clear File Explorer History
Sometimes corrupted or outdated browsing history may cause File Explorer to behave unexpectedly. Try these steps:
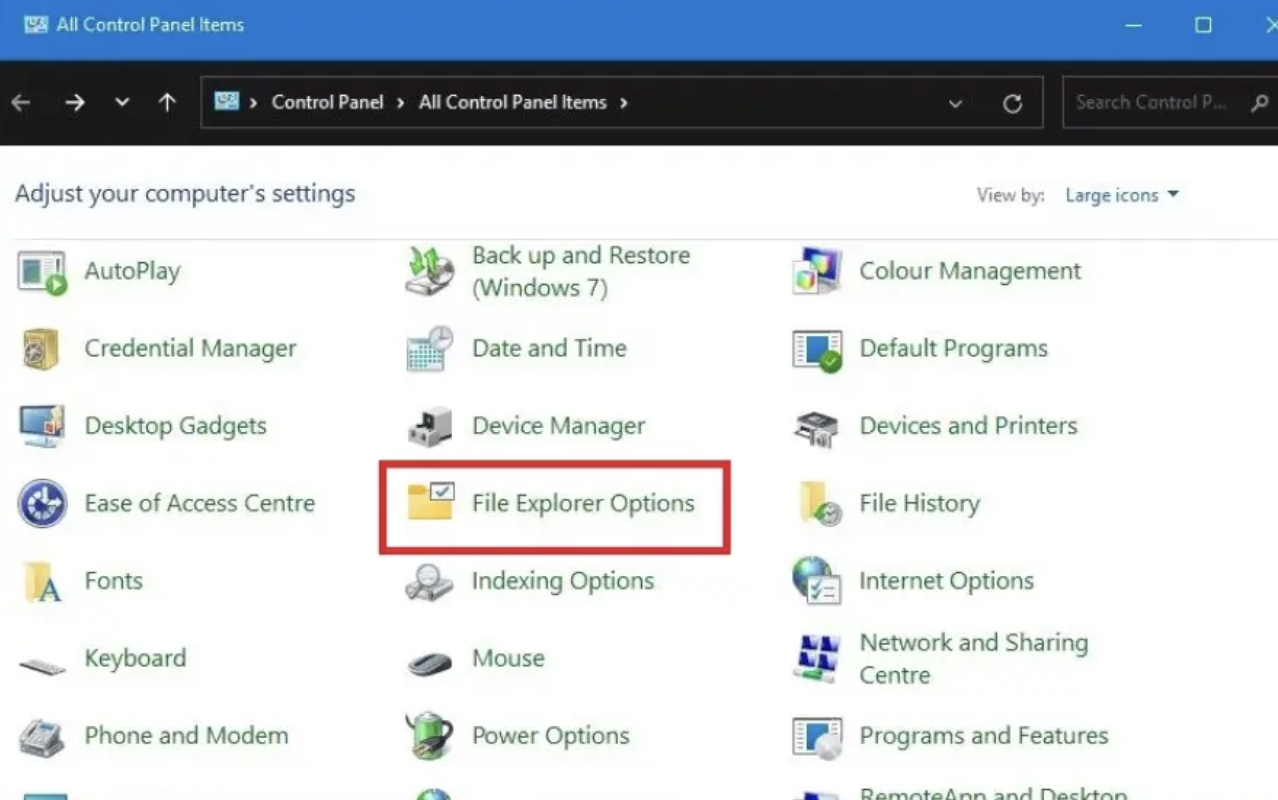
1. Open Control Panel and select File Explorer Options.
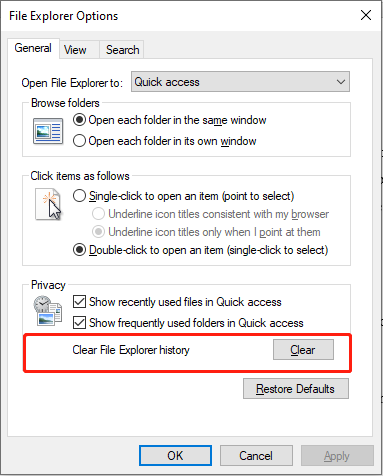
2. Under the General tab, find Privacy.
3. Select Clear next to Clear File Explorer history. Now, Click OK.
Solution 2: Run a Malware Scan
If your system has Malware, it can cause unexpected programs to open on your PC. You must run a full scan to check for threats.
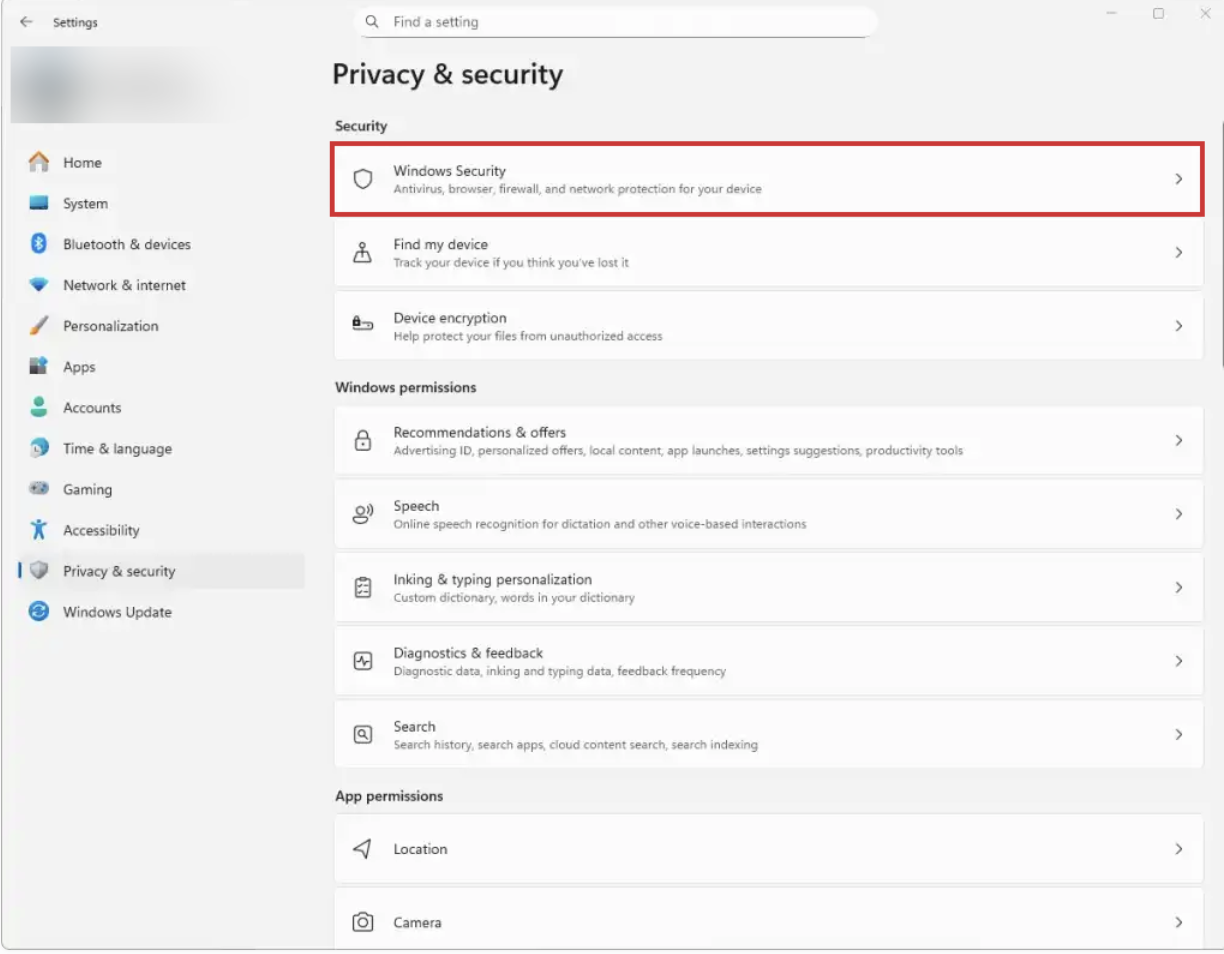
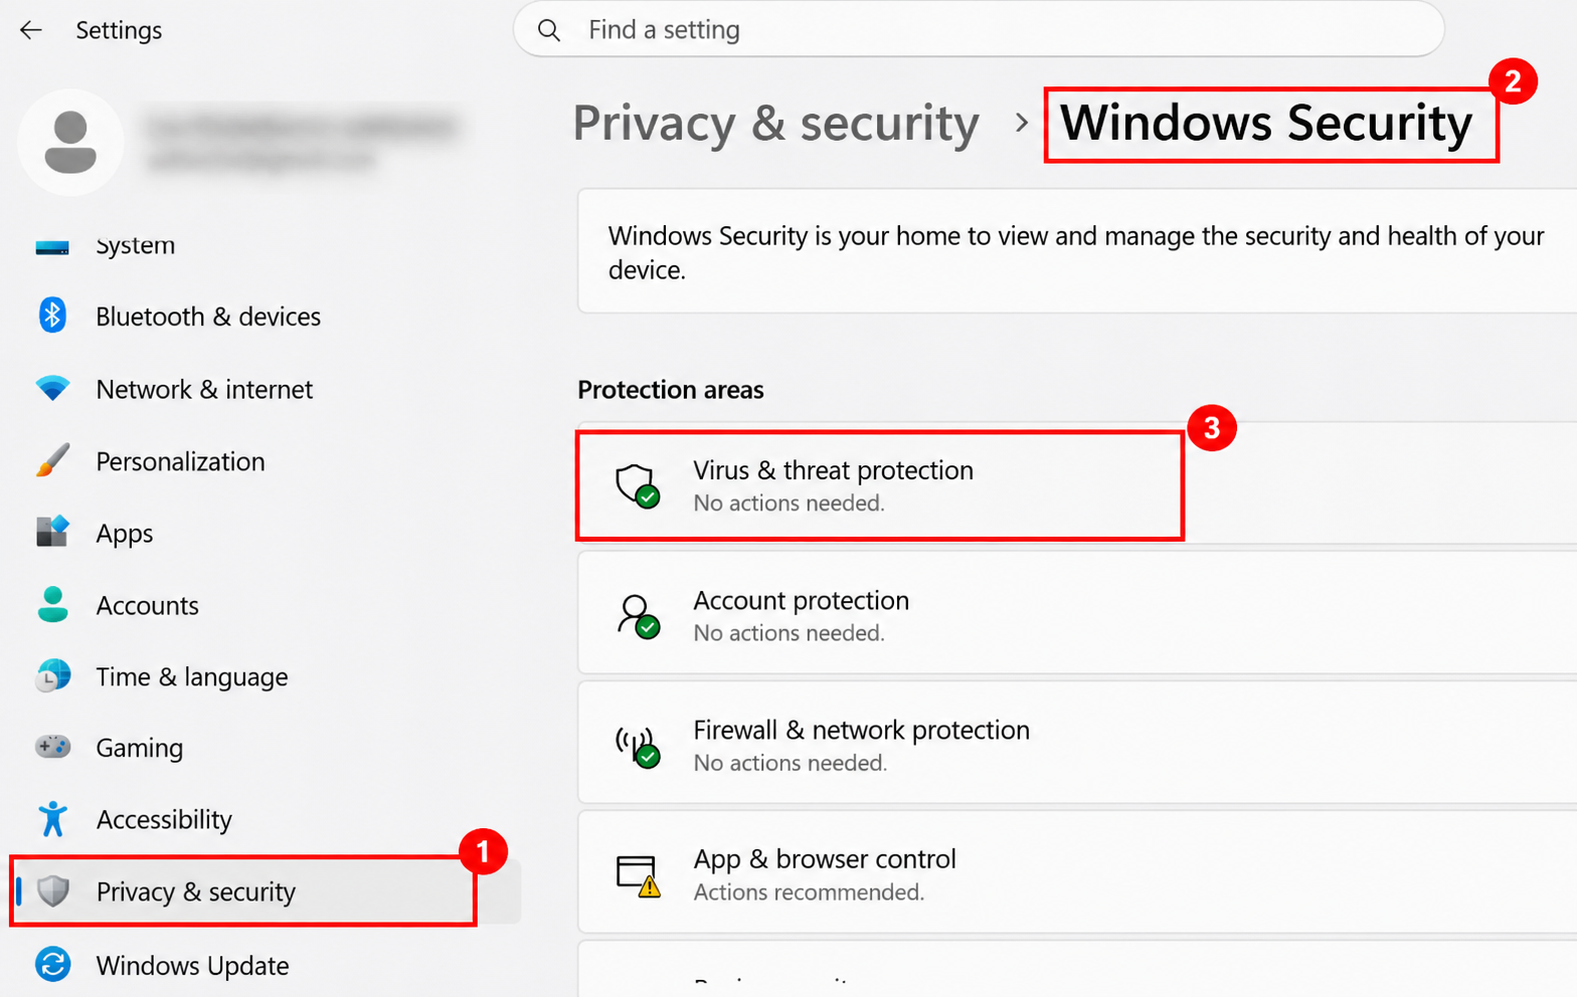
1. Open Settings and go to Privacy & security > Windows Security.
2. Select Virus & threat protection.
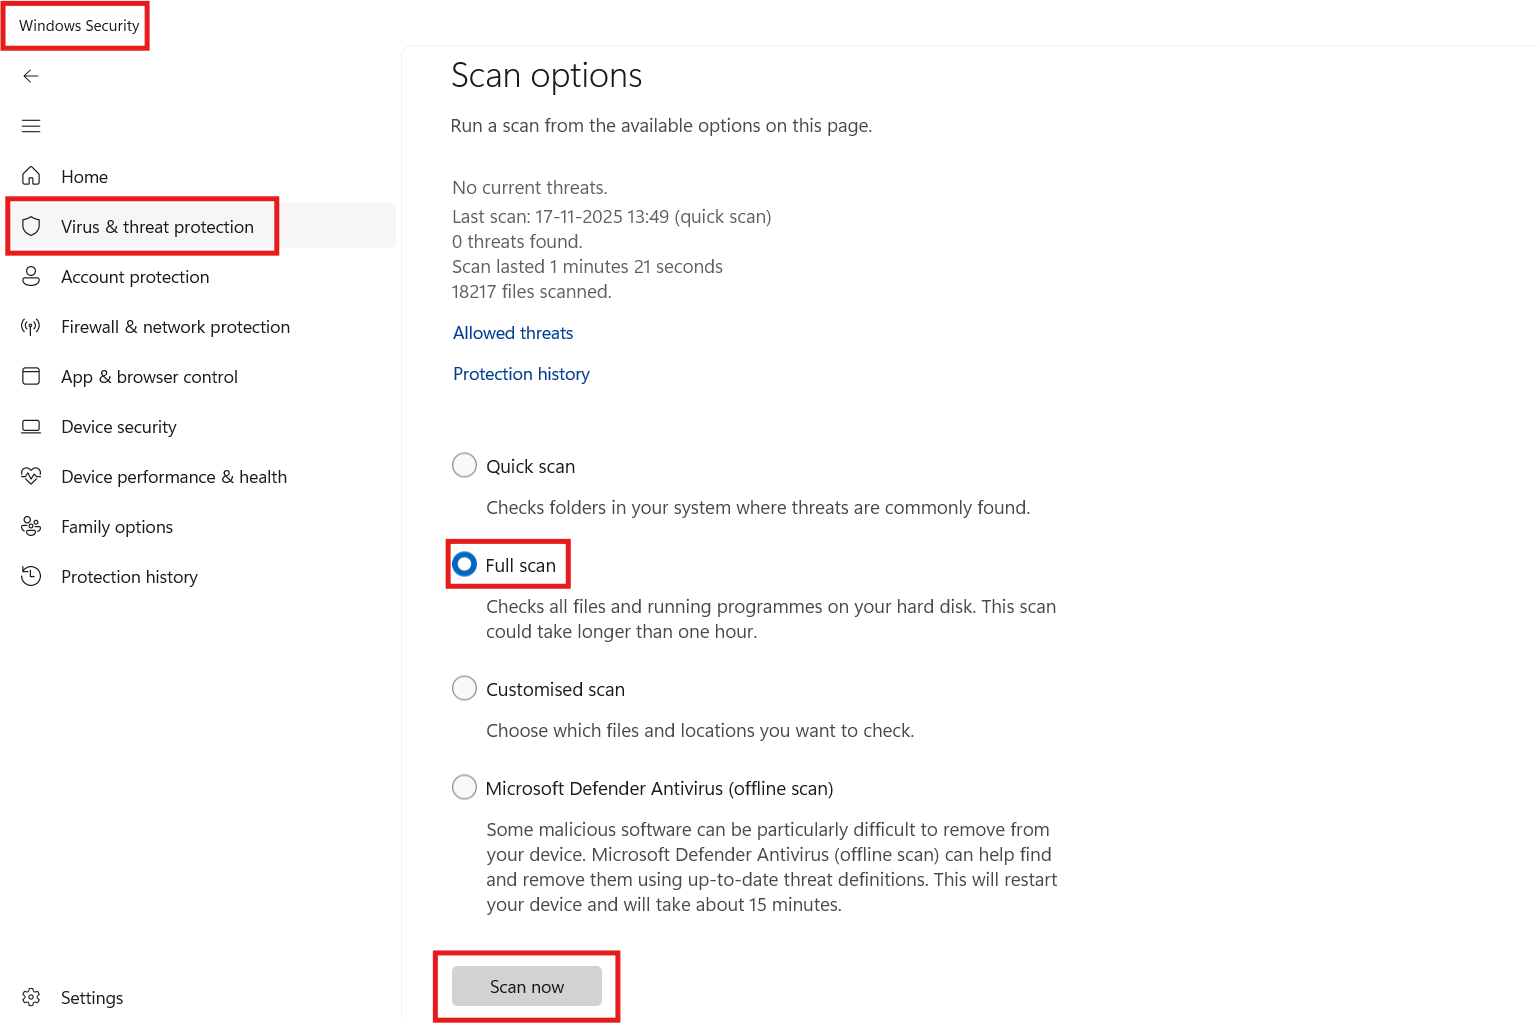
3. Click Scan options.
4. Select Full scan and click Scan now.
Solution 3: Disable AutoPlay
If File Explorer opens when you connect a USB drive or other device, AutoPlay might be responsible. To disable it:
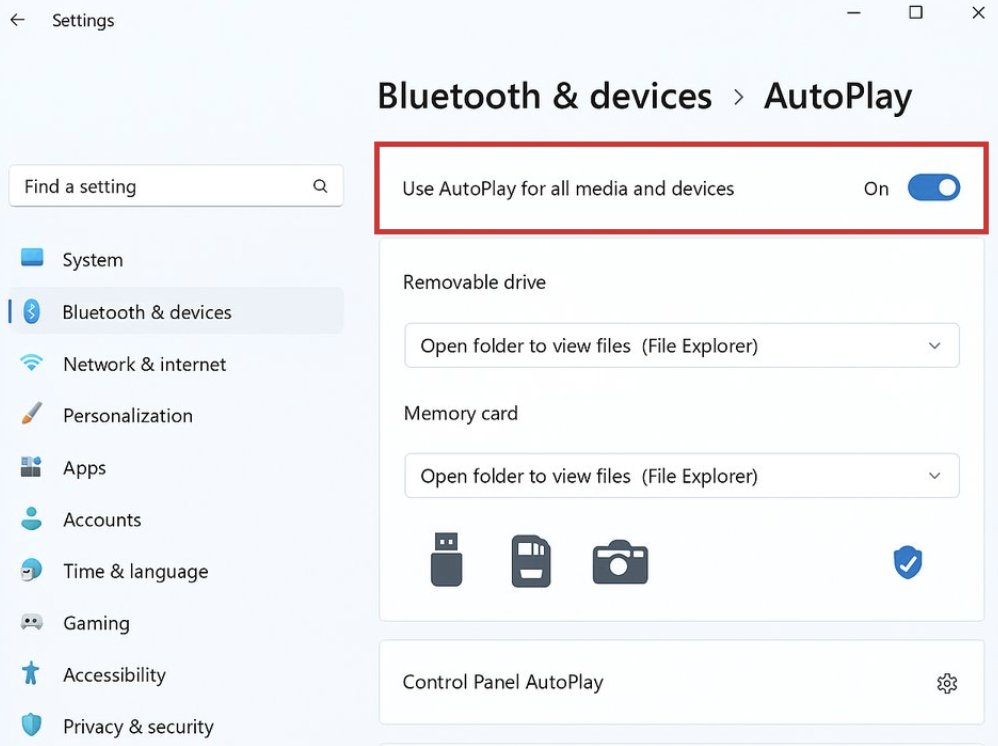
1. Open Settings, navigate to Bluetooth & devices > AutoPlay.
2. Turn off Use AutoPlay for all media and devices.
Solution 4: Perform a Clean Boot
A third-party app or service may be interfering with File Explorer. You can perform a clean boot to identify and rectify the issue.
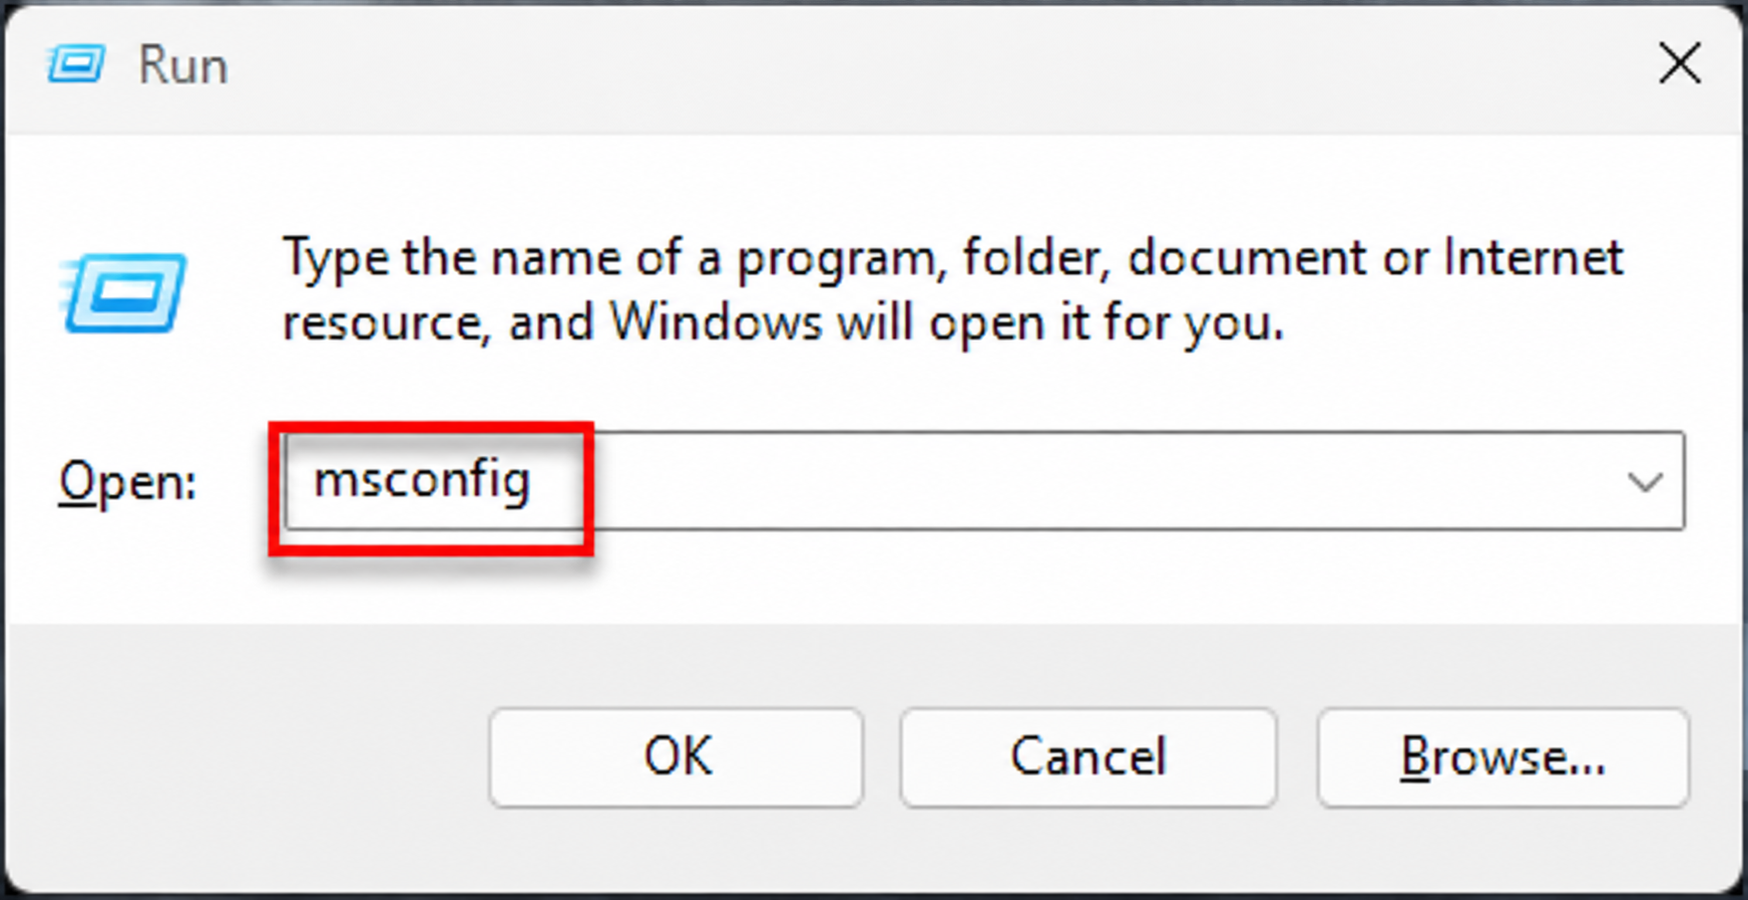
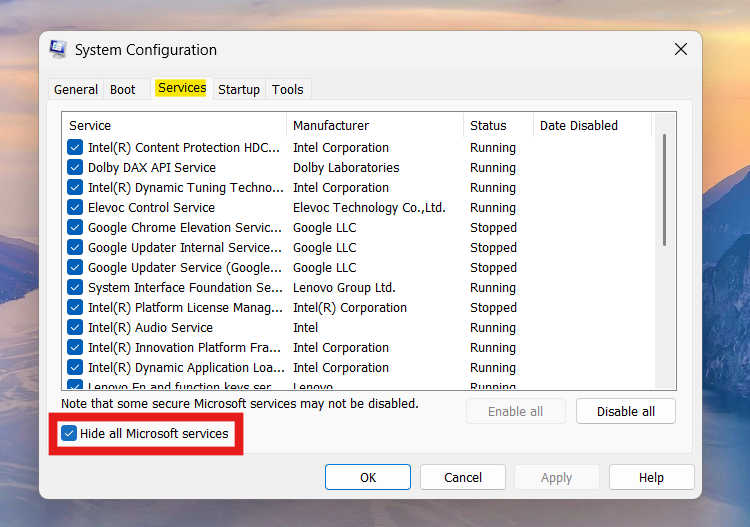
1. Press Win + R, type msconfig, and press Enter.
2. Open the Services tab.
3. Select Hide all Microsoft services and click Disable all.
4. Next, open the Startup tab and select Open Task Manager.
5. Disable enabled startup apps.
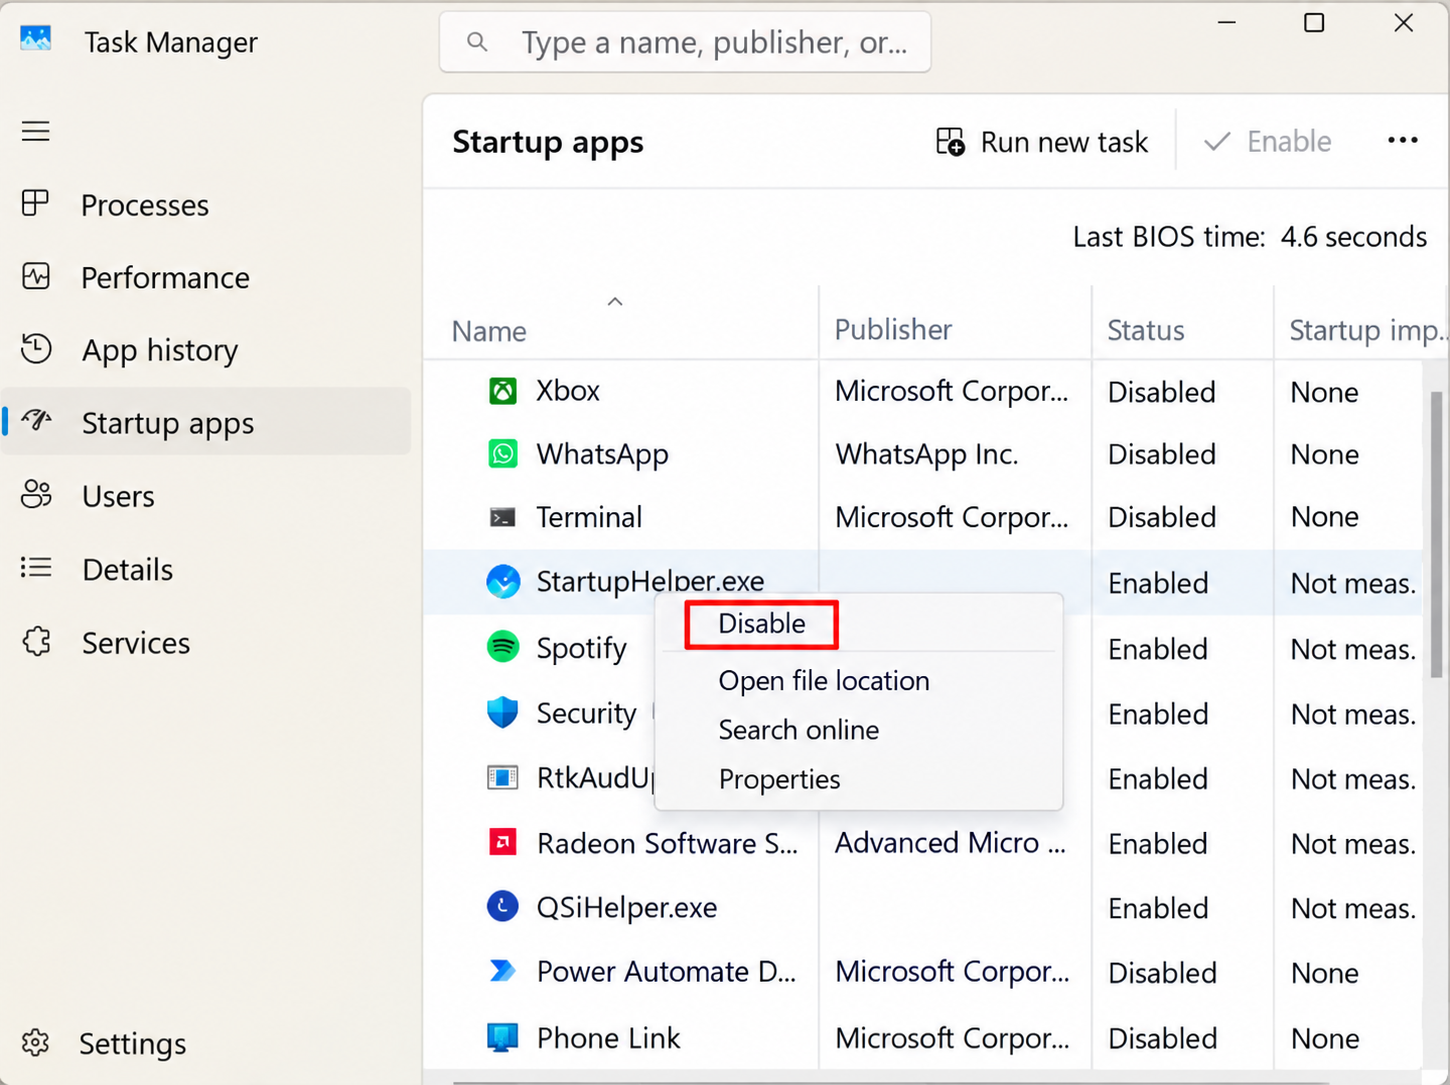
Once this is done, restart your PC.
Solution 5: Restart Windows Explorer
Sometimes, restarting your Windows Explorer can fix temporary glitches that cause File Explorer to behave unexpectedly.
1. Press Ctrl + Shift + Esc to open Task Manager.
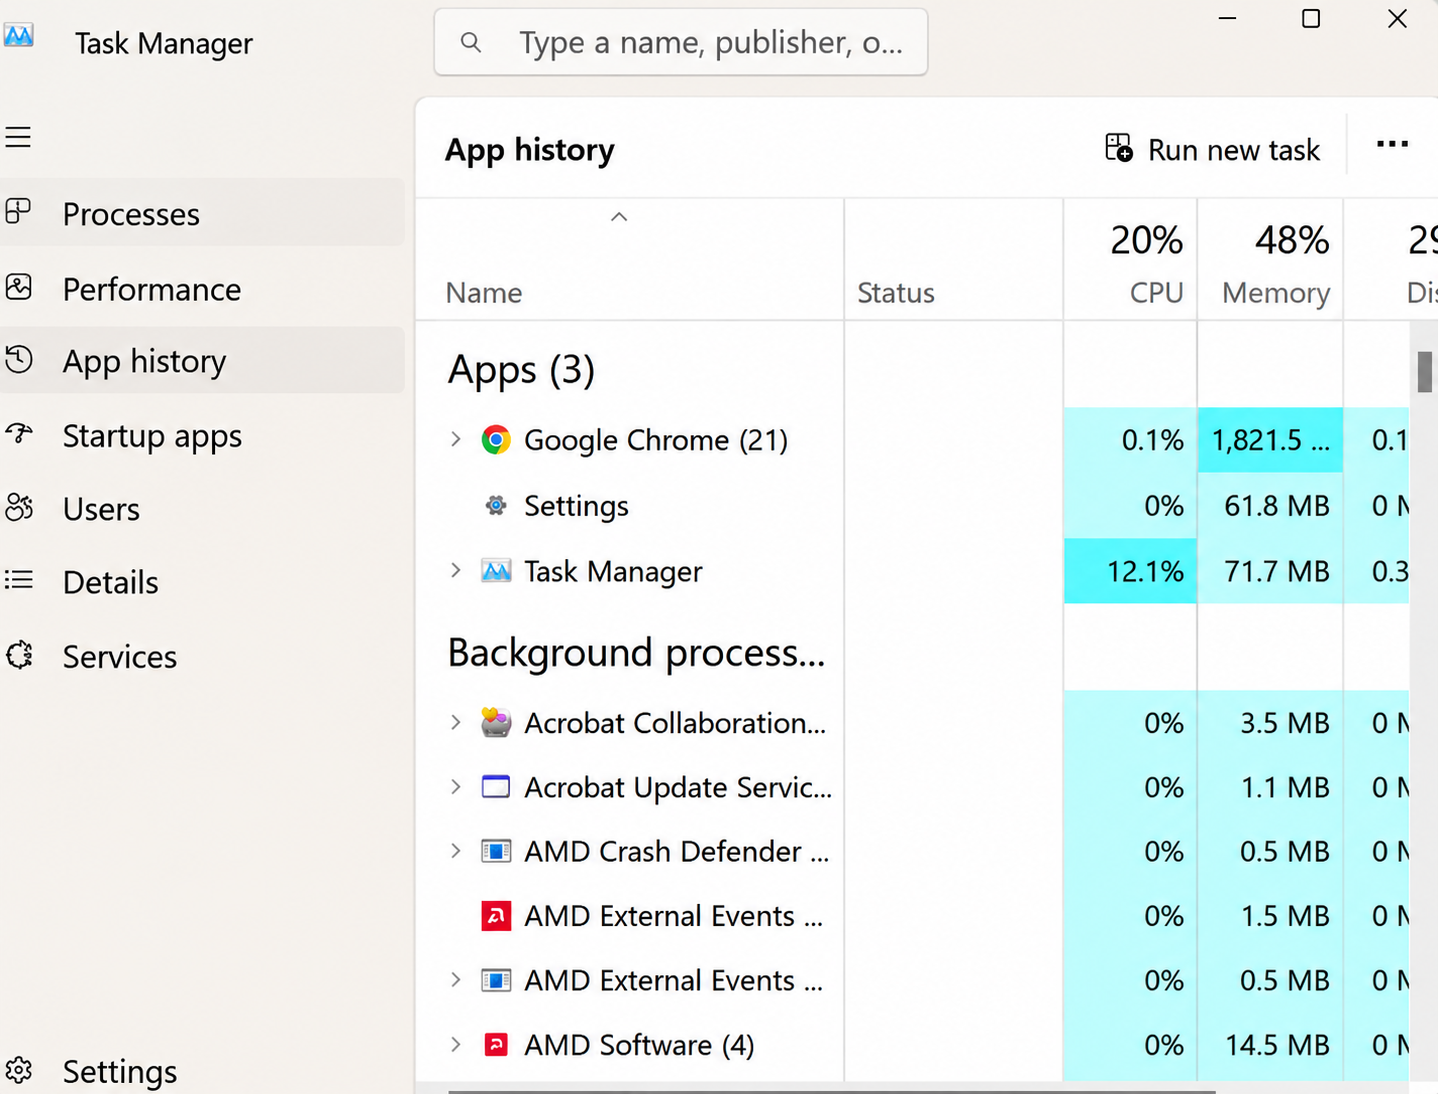
2. Find Windows Explorer under Processes.
3. Right-click it and select Restart.
Solution 6: Update Windows 11
If your Windows version is outdated, it can affect the File Explorer. Installing the updates might fix it.
1. Open Settings and go to Windows Update.
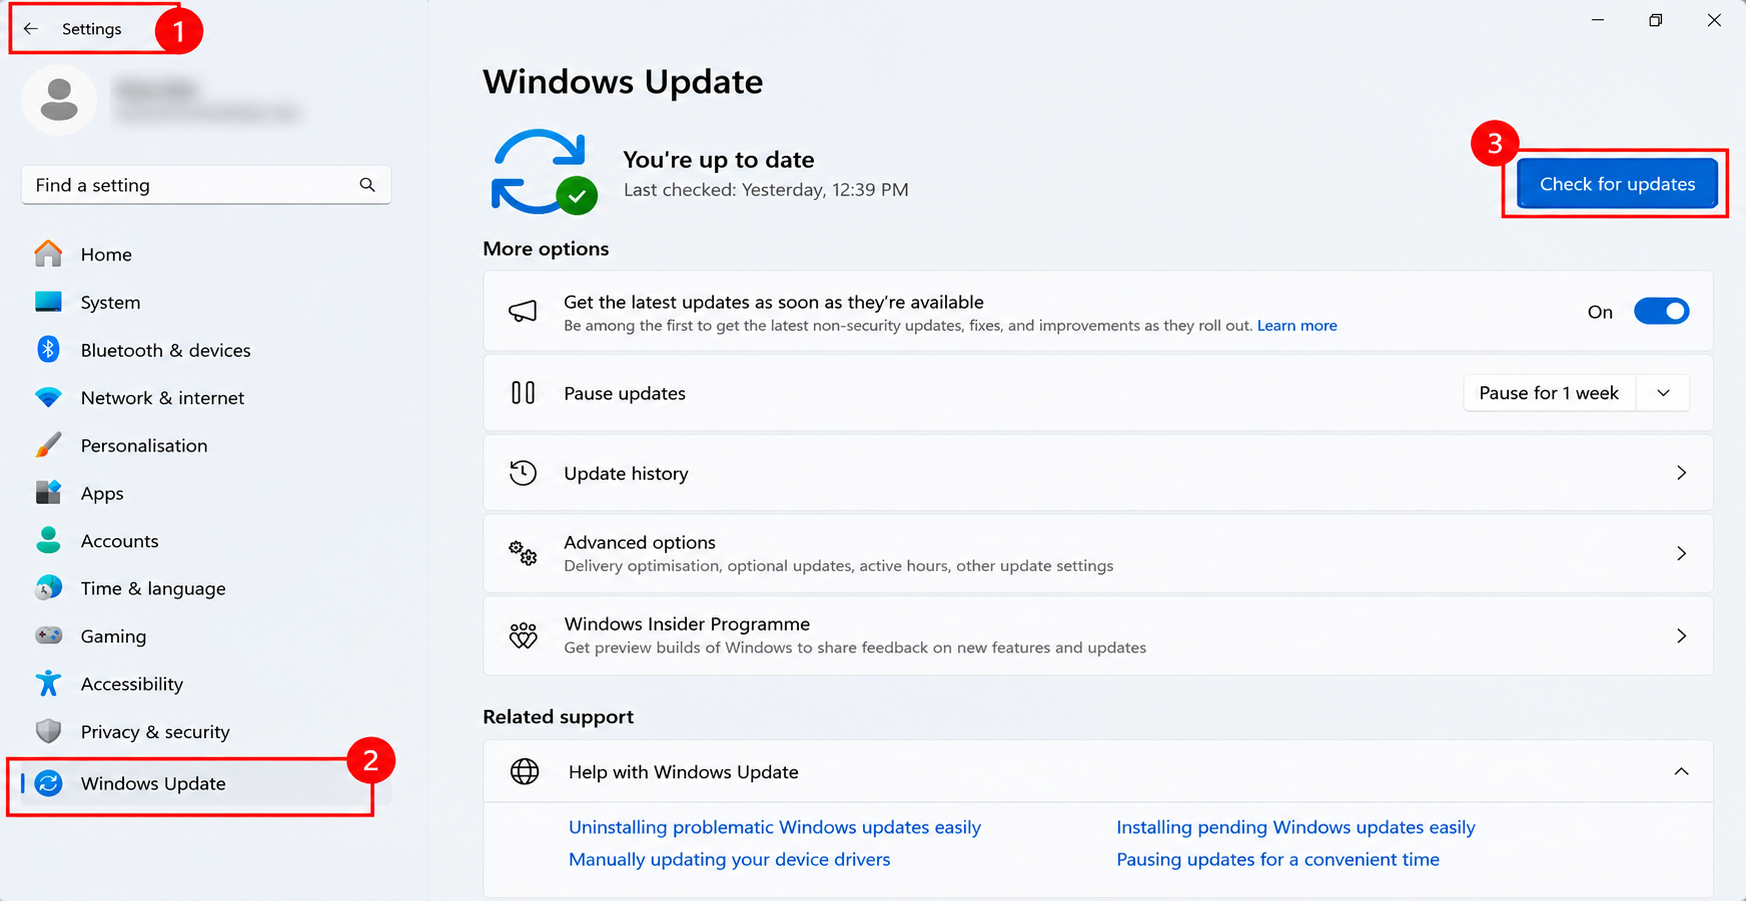
2. Select Check for updates.
3. If any update is available, download and install them.
Once the process is done, restart your PC.
Solution 7: Remove Items from Quick Access
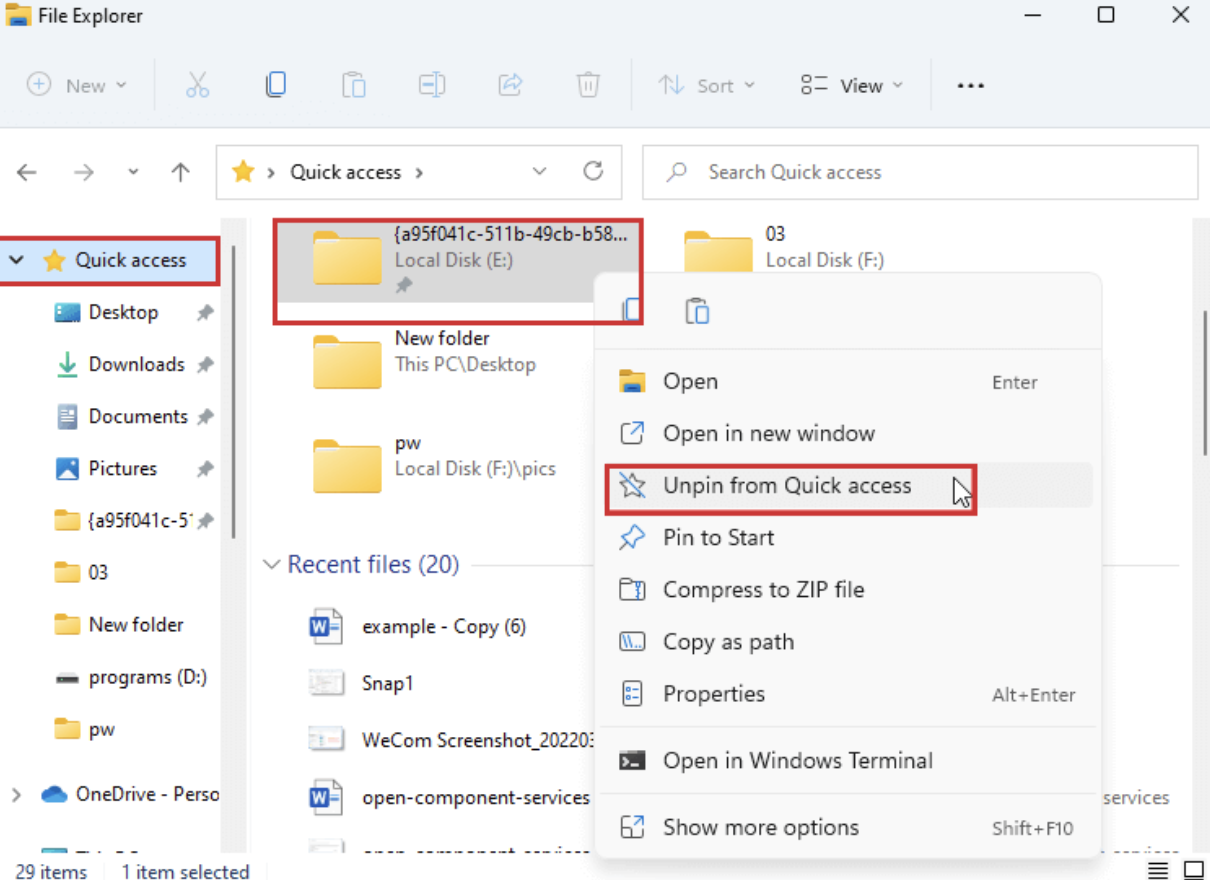
You must remove the pinned items from Quick Access. A problematic pinned folder may cause issues with File Explorer. Once you unpin it, the issue will stop.
1. Open File Explorer and select Home.
2. Under Quick access, right-click a pinned folder.
3. Select Unpin from Quick access.
Solution 8: Run System File Checker
Run SFC to scan and repair your corrupted Windows system files.
1. Open Command Prompt in Admin mode.
2. Run the following command: sfc /scannow
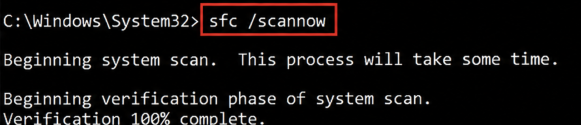
Wait for the scan to finish. Once done, restart your PC.
Solution 9: Perform a System Restore
If the problem started after a recent system change, restore your Windows to an earlier point. To do so,
1. In Windows search, Create a Restore point.
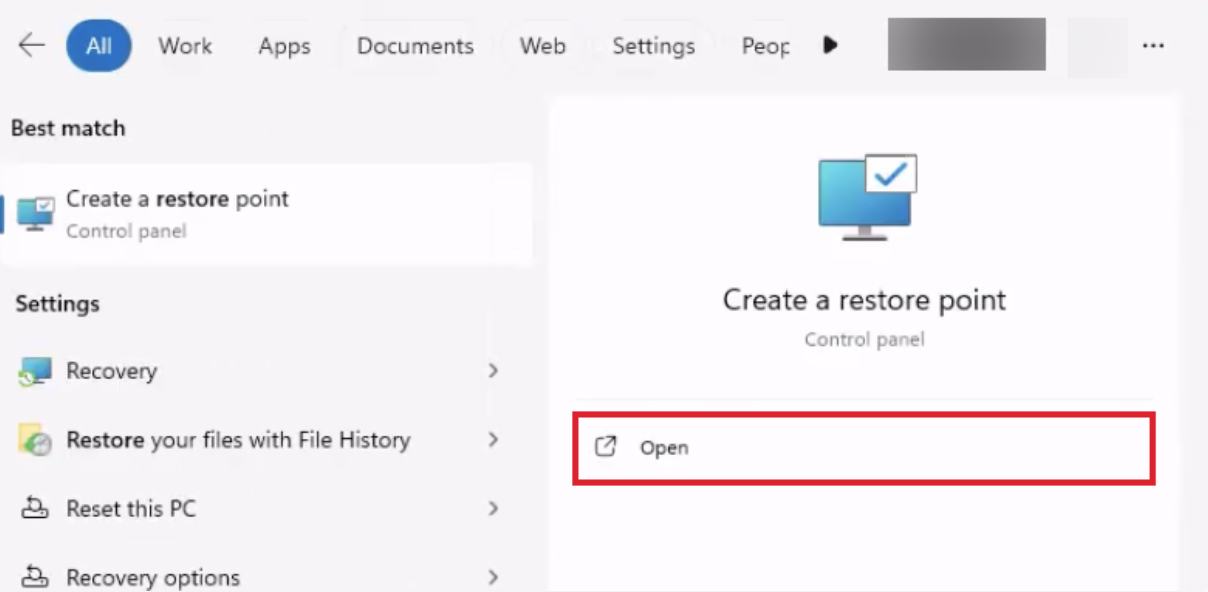
2. Select System Protection.
3. Click on System Restore.
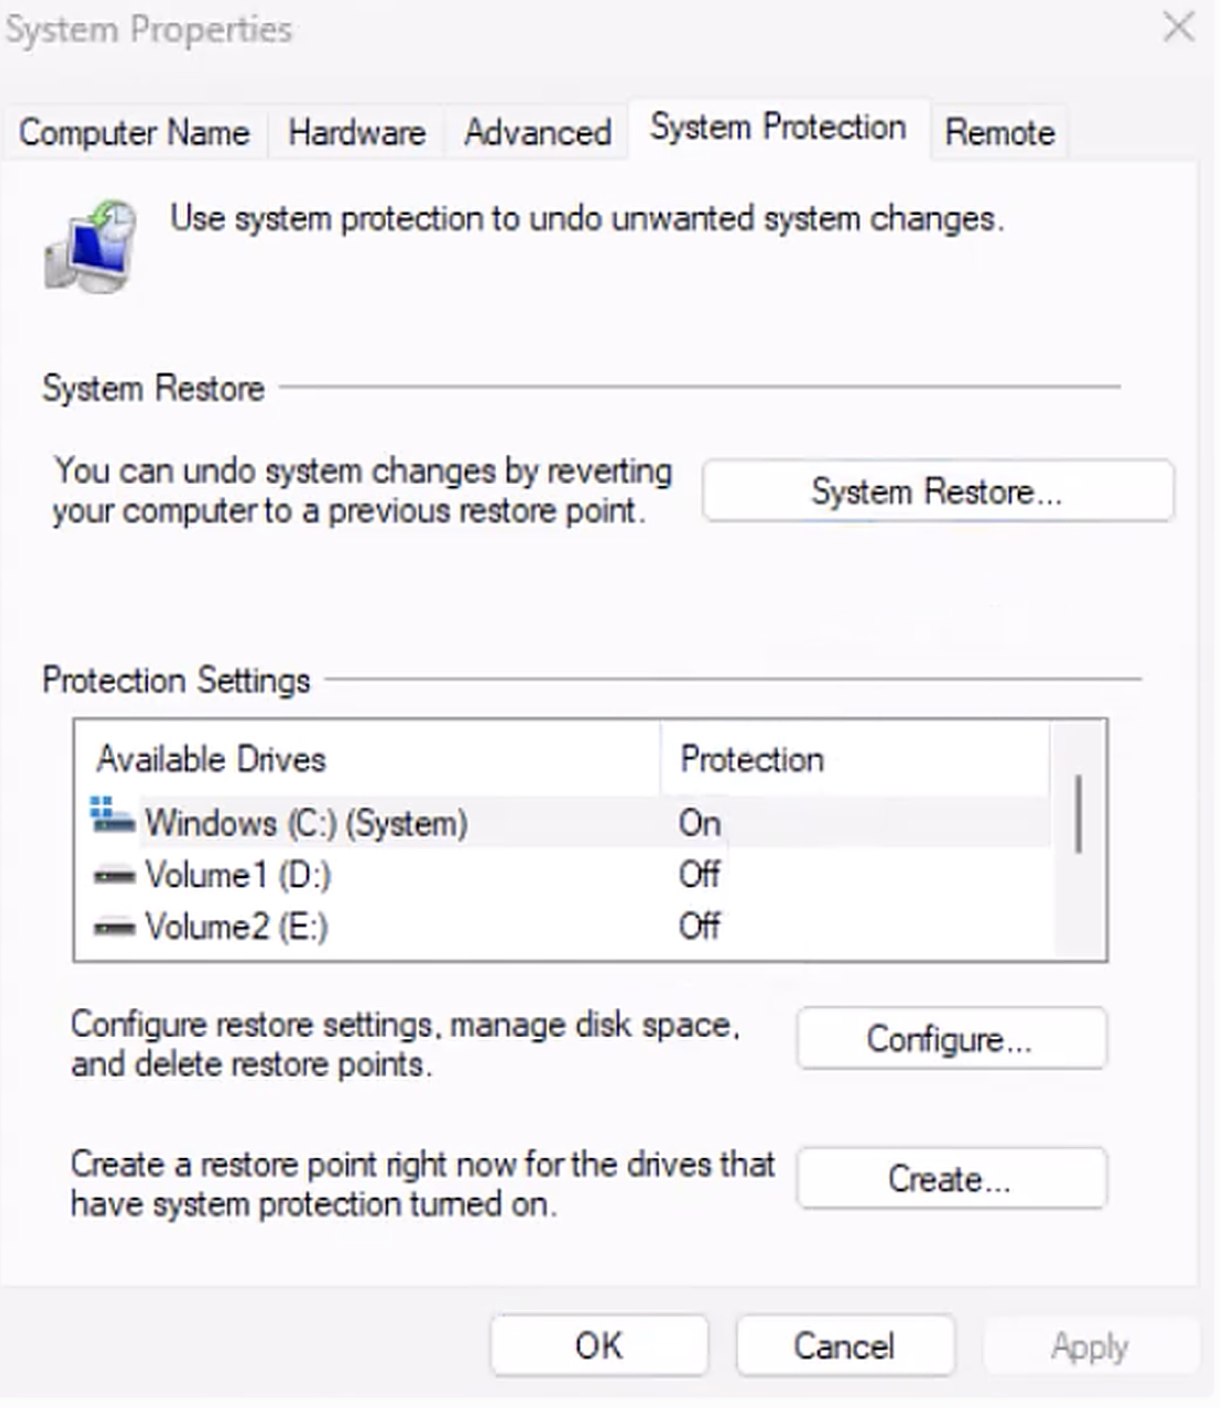
Then, follow the on-screen instructions to restore your computer.
Solution 10: Reset Your PC
If none of the above methods work, resetting Windows 11 can be the option. But make sure that you back up your important files before proceeding. To do this,
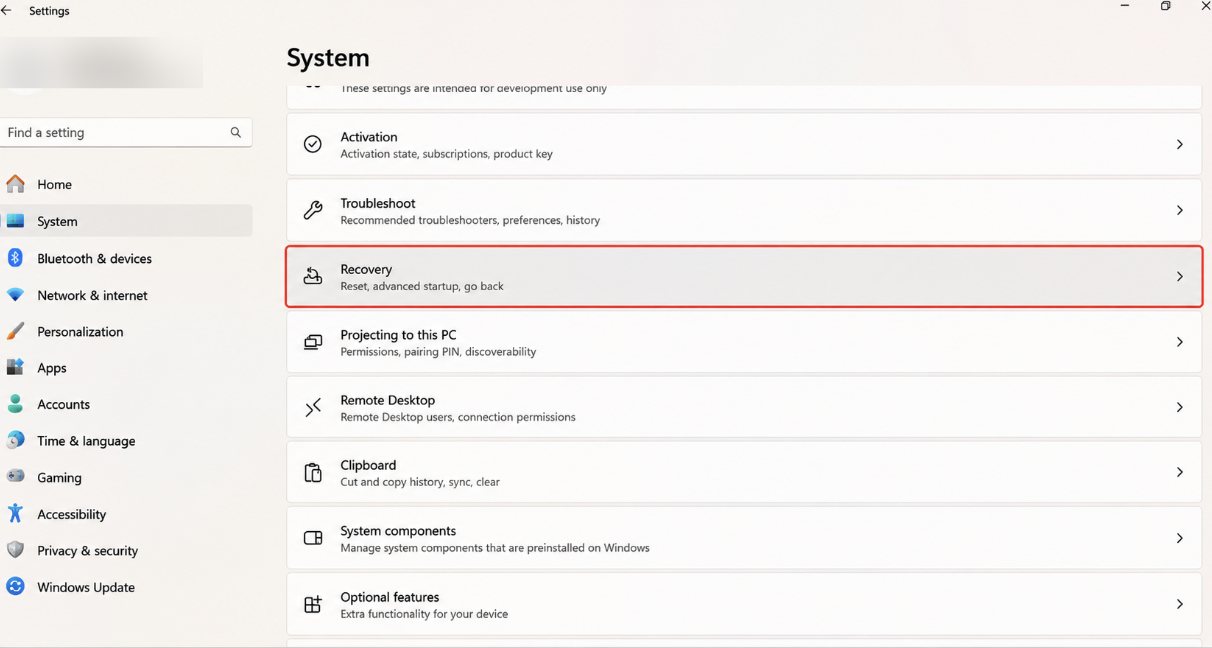
1. Open Settings and go to System > Recovery.
2. Click on Reset PC next to Reset this PC.
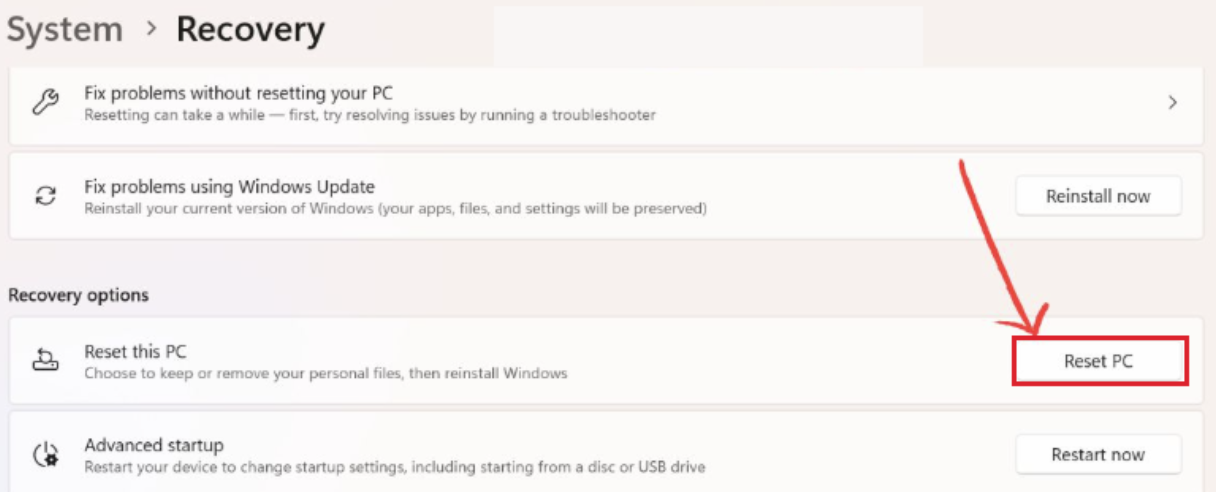
3. You can either choose Keep my files (recommended) or Remove everything based on your preference.

Now, you can follow the on-screen instructions to complete the Reset.
That’s it!