Microsoft’s new Cross-Device Experience Host lets you connect your Windows 11 computers to your phone more seamlessly, allowing you to easily share data and receive notifications from your phone directly on your PC. However, some users have trouble installing or updating the feature on their PCs. If you’re facing this issue, this guide can help you.
Page Contents
Cross-Device Experience Host not Installing/Updating
Method 1: Run the Windows App Troubleshooter
Since Cross-Device Experience Host is a Microsoft service, running the built-in Windows Troubleshooter might help diagnose and fix any issues affecting the service or related apps.
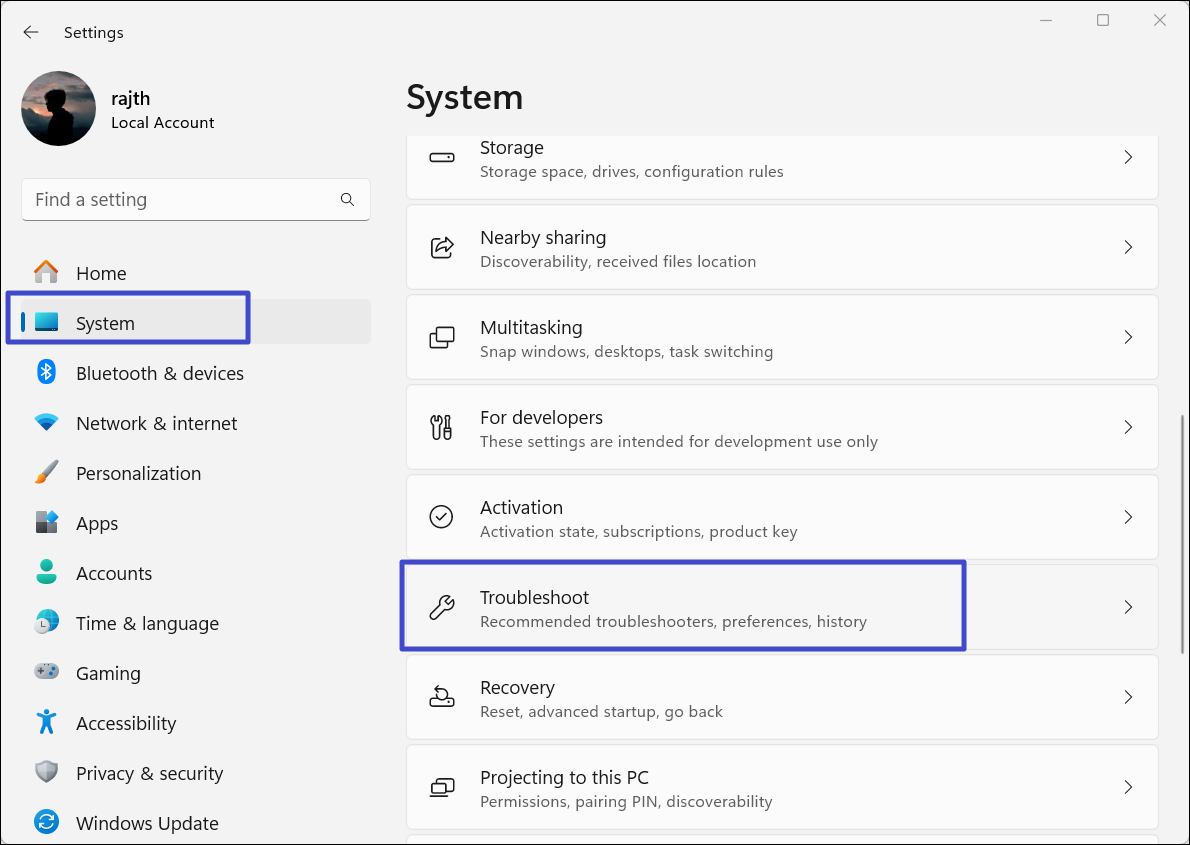
1. Open Windows Settings and go to “System” > “Troubleshoot“.
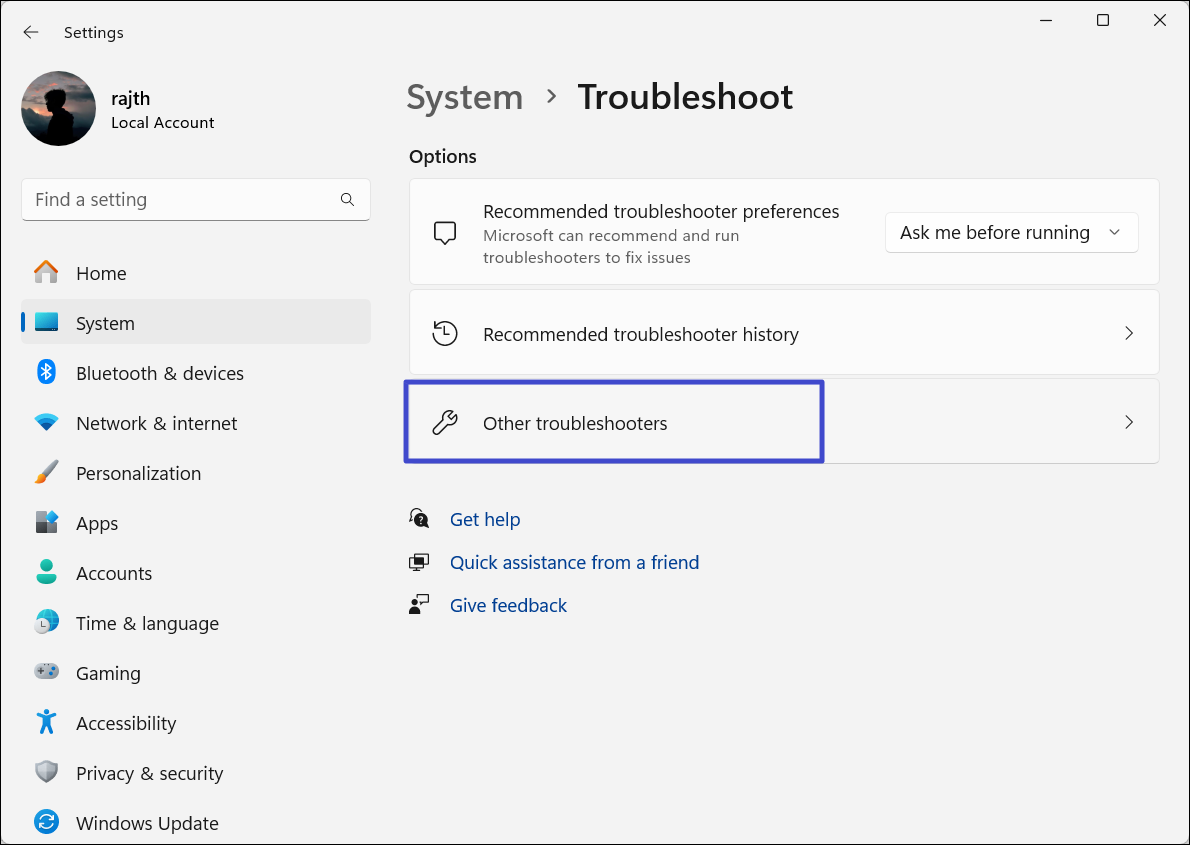
2. Click “Other Troubleshooters“.
3. Look for “Windows Store Apps” and click the corresponding “Run” button.
Method 2: Reset MS Store Cache
Sometimes, corrupted cache files can prevent the Microsoft Store from installing or updating apps. To fix this, we can clear the cache using the WSReset.exe command.
1. Open Run Command by pressing Win + R.
2. Type WSReset.exe and hit Enter.

This will clear all the Microsoft Store cache files and recreate them.
Method 3: Close Cross Device Experience Services
Before installing or updating, close any running instances of Cross-Device Experience Host in Task Manager. Look for processes named “Mobile device” or “Microsoft Cross-Device Service” and terminate them. Killing these services might resolve the issue.
Method 4: Install/Update Cross Device Experience Host
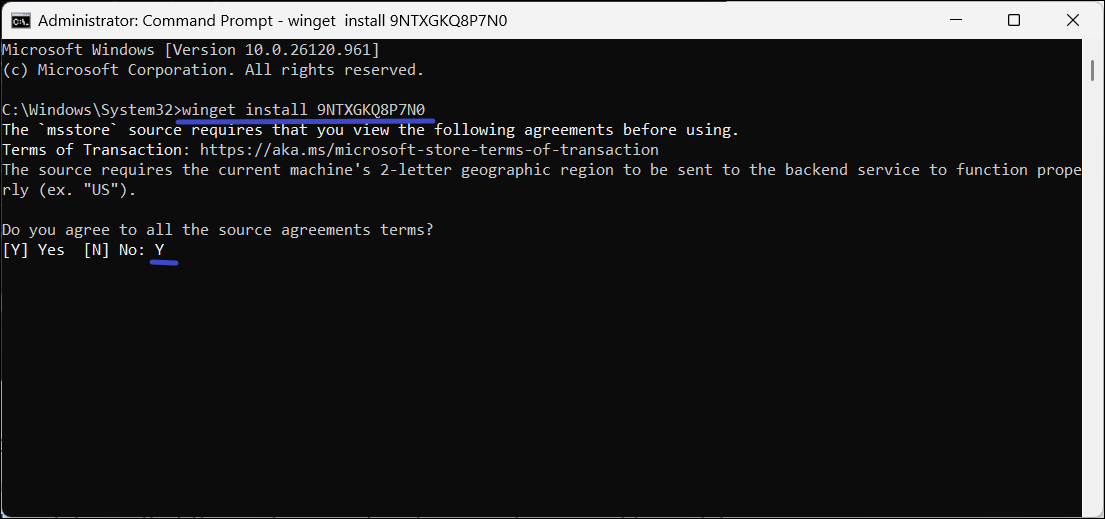
1. Open Command Prompt as administrator.
2. Type the following command and press Enter.
winget install 9NTXGKQ8P7N0
Method 5: Install Cross Device Experience Host in Clean Boot State
1. Open the Run Command box, type “msconfig” and press Enter to open the System Configuration window.

2. Switch to the “Services” tab.
3. Then, check the “Hide all Microsoft services” box to view only the third-party services.

4. Click “Disable” and then “Apply“.

5. Switch to the “Startup” tab and click “Open Task Manager“.

6. Disable all the third-party items listed there and restart your computer.

7. Once your computer is in a clean boot environment, run the command from the previous method to install the Cross Device Experience Host:
winget install 9NTXGKQ8P7N0
Method 6: Repair or reset Cross Device Host Experience
1. Open the Windows Settings app, go to the “System” section, and select “System components” on the right.
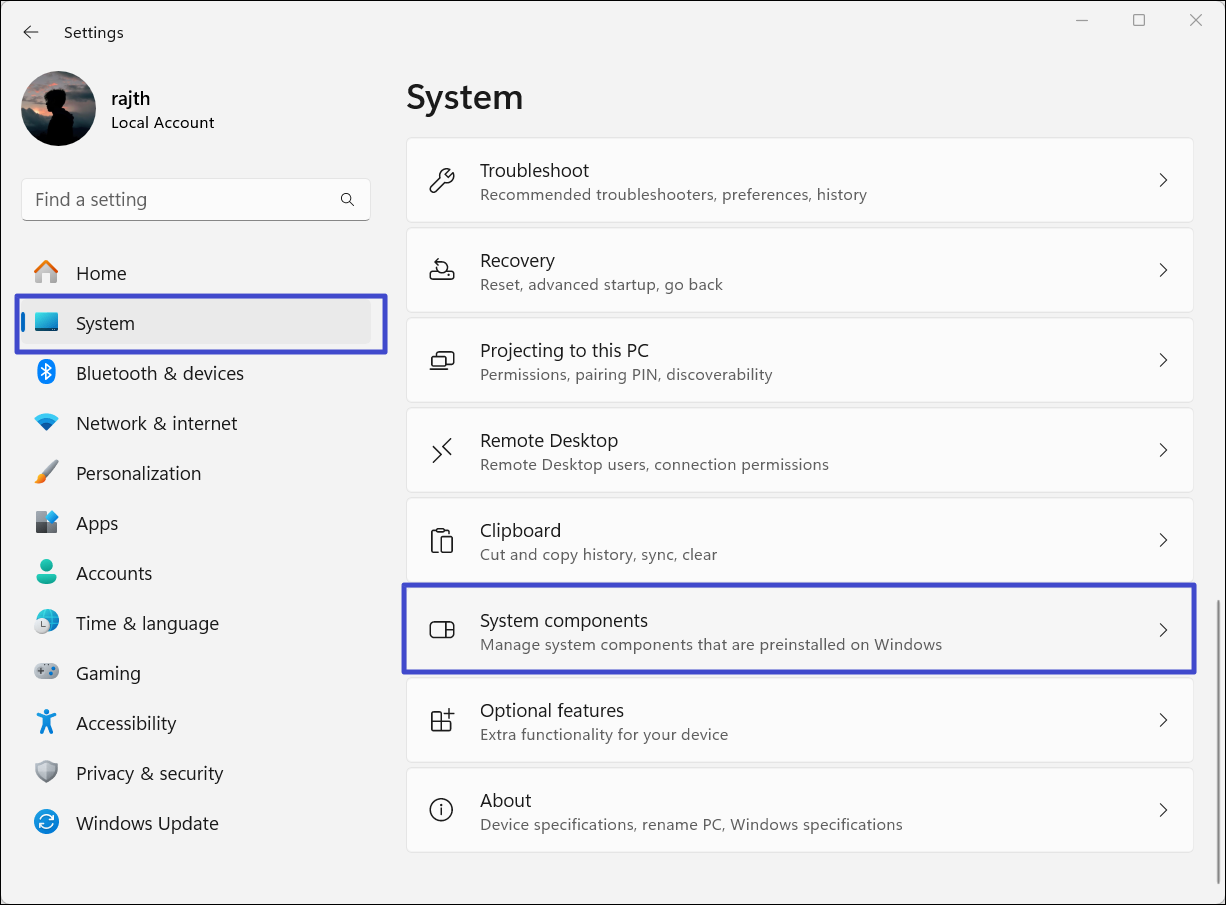
2. Under System Components, look for Cross Device Host Experience or Phone Link app.
3. Click on the three dots button next to it and then select “Advanced Options“.

4. On the next page, scroll down and click the “Repair” button. If it doesn’t work, you can also try resetting the component.