
Do you also wish to know how to use and enable Agent in Settings on Windows 11? This is an effective inbuilt agent tool and system component that allows users to control their operations of devices efficiently in Windows 11. However, most people are unaware of the location of this setting or how to activate this setting. This guide will help you learn how to use Agent in Windows 11, how to enable the feature of using the agent by use of Windows registry and the Local Group Policy Editor.
The Agent in Settings feature is actually a new AI-advanced addition in the Windows 11 update. This was first launched on Copilot+ PCs and laptops. This implies that it is not automatically accessible on all Windows 11 standard and older systems.
Page Contents
How to use Agent in Settings on Windows 11
In the Windows 11 version, it is so simple and easy to use the agent feature when you know where it is located. As you go to the Windows settings (Win + I), you will see a search icon or a magnifying glass is contained within the search bar. Such an icon will ensure that the Settings Search Experience using Agent is active and operational.
When this is activated, the Settings app is smarter and livelier. You can just enter your question or issue in the search box, and the Agent can immediately analyze what you require and direct you even though in numerous menus.
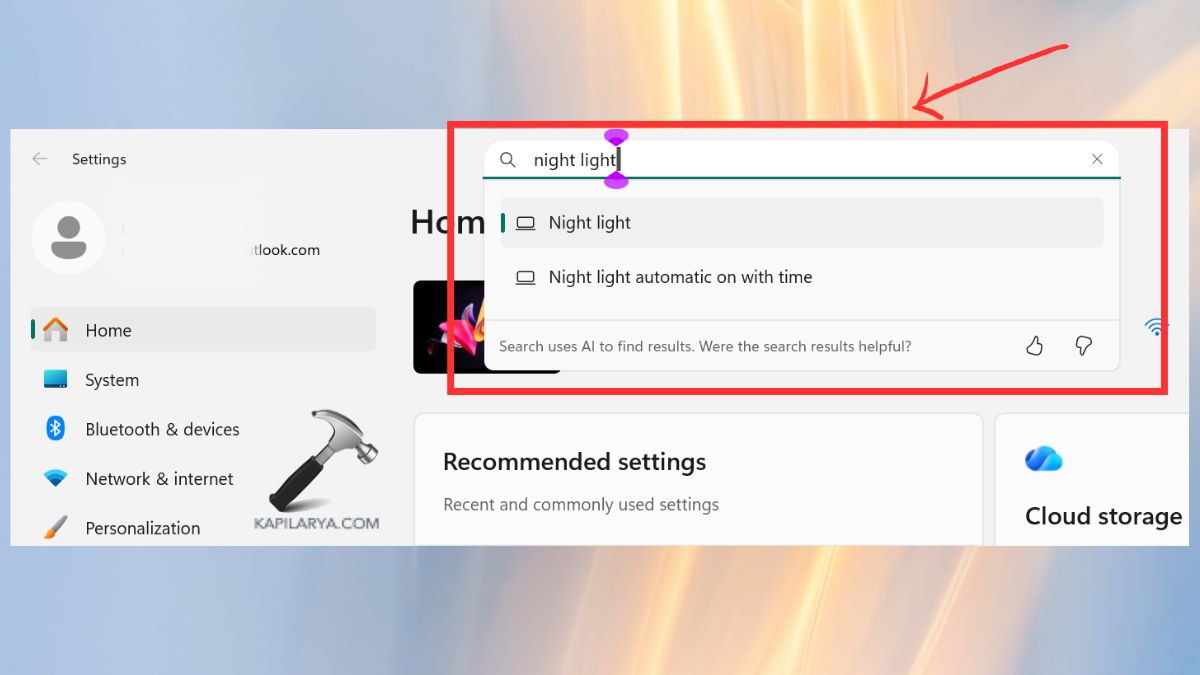
Type Your Query and Let the Agent Handle the Rest
Just type anything like-
- Night Light.
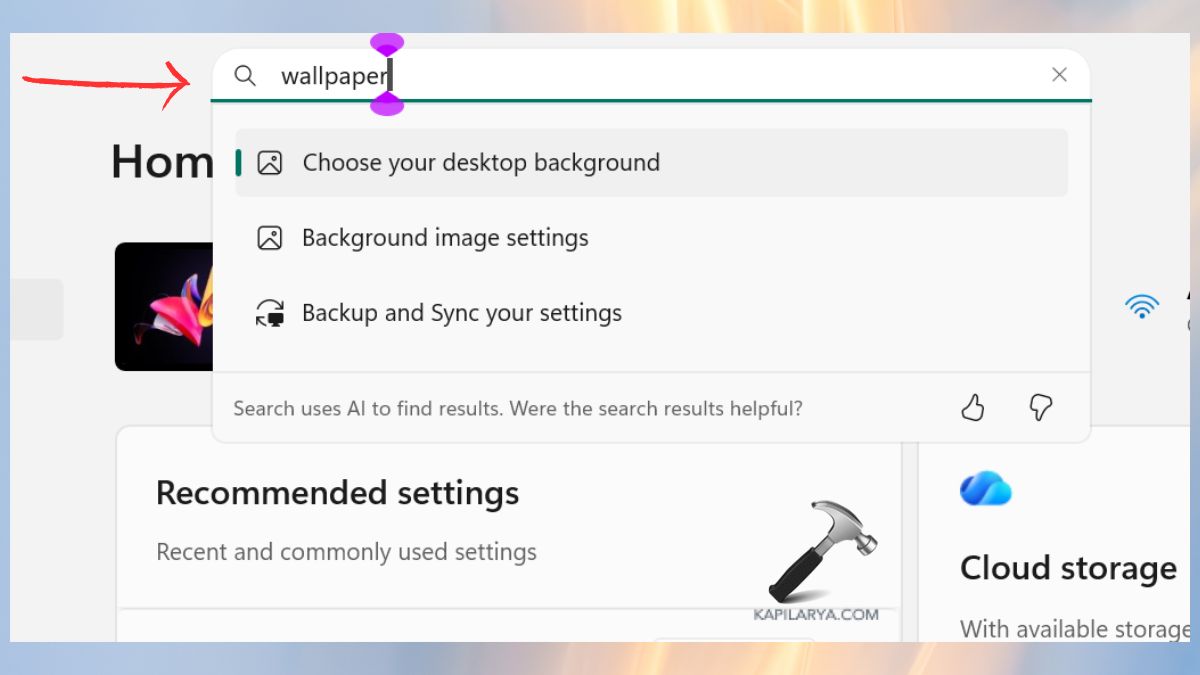
- Wallpaper.
- Bluetooth.
Just type your request, and the Agent analyses your query and shows:
- Personalized recommendations
- Direct actions
- Related settings
- Their settings already contain help information.
This implies that you do not have to open each and every category in Settings individually because you want to switch a particular toggle. The Agent presents you with the precise choice that you require in a single search.
Apply or Undo Settings Instantly
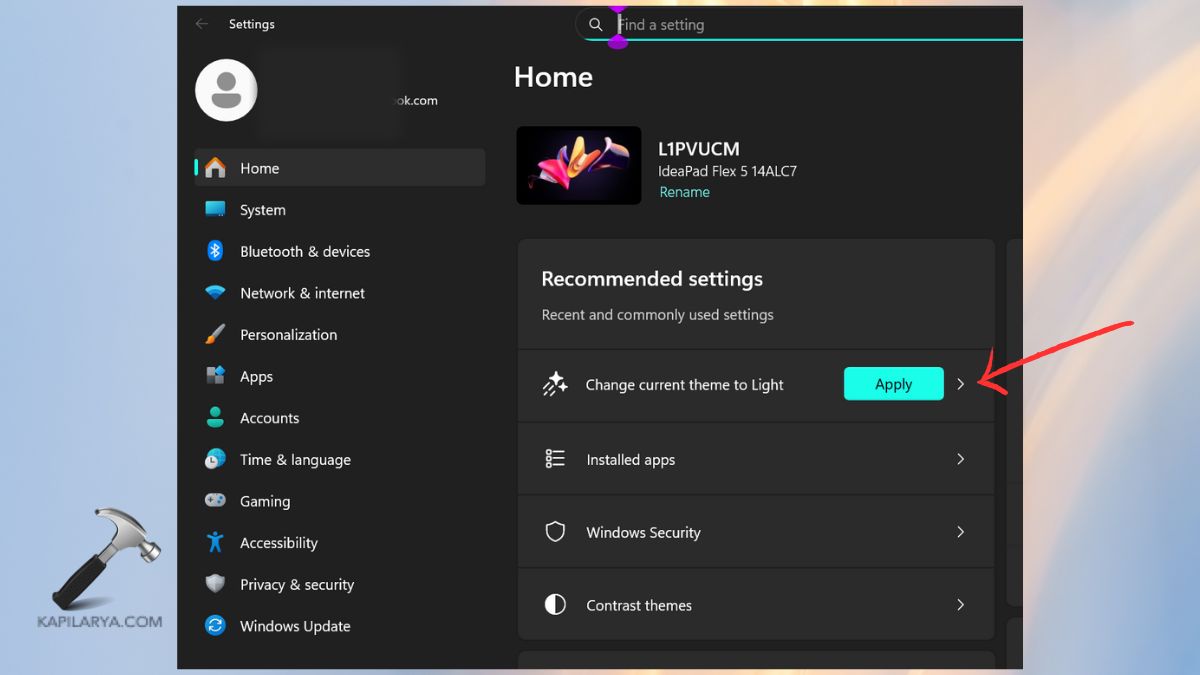
The best aspect of the Agent feature is that it does not only display the results, but can apply the setting as well.
Once a setting is suggested by the Agent, you can activate the change by clicking the “Apply” button.
Should you wish to revert it, just press “Undo”.
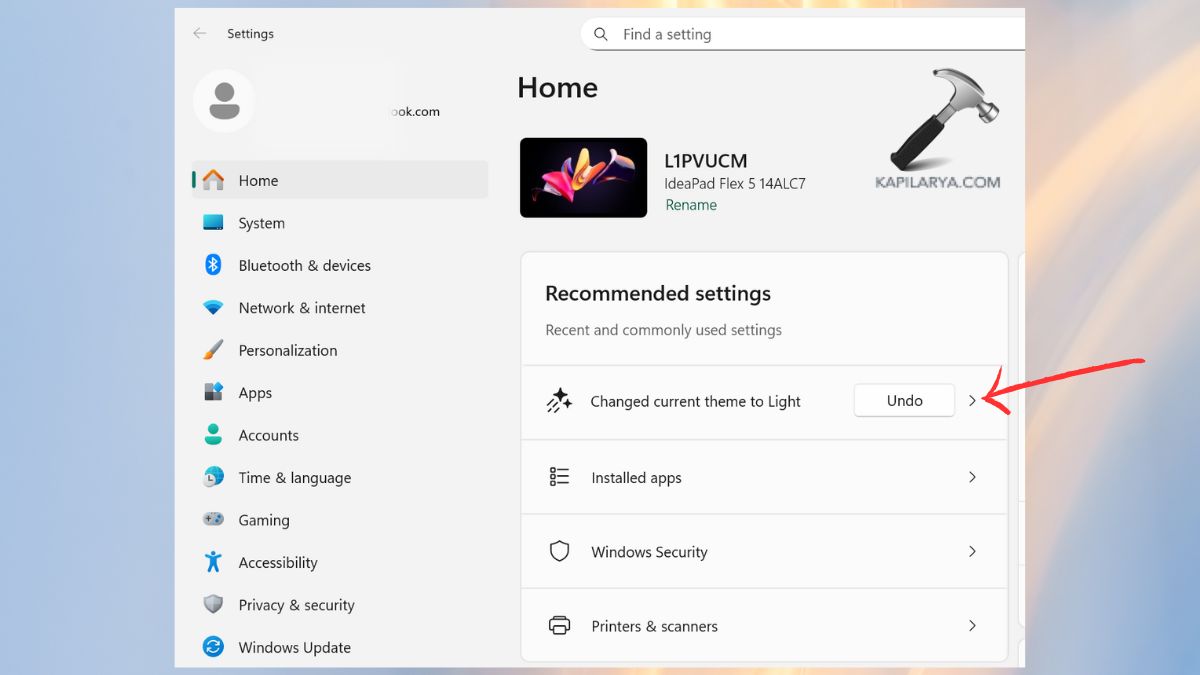
This simplifies the customization of system settings more than ever before, quicker and easier.
How to Enable Agent in Settings on Windows 11
You can find the agent feature on your device fully enabled and in control with the use of Registry and Group Policy Editor as follows.
Method 1: Enable Agent Using the Registry
It is possible to enable it in the Windows Registry Editor. This technique is effective and easy, even in a scenario whereby the GUI toggle is not provided.
Notice: Modifying the registry in the wrong way may lead to multiple problems with the system. Be very careful in following the instructions.
1. Launch Registry Editor throughout the gazette search menu.

2. Go to this path for Agent configuration.
HKEY_LOCAL_MACHINE\SOFTWARE\Policies\Microsoft\Windows\WindowsAI
In case it does not have “DisableSettingsAgent” visible, then create a new value (if needed).
3. Register a New DWORD Value within the key. Right-click > NEW > DWORD (32-bit) Value.
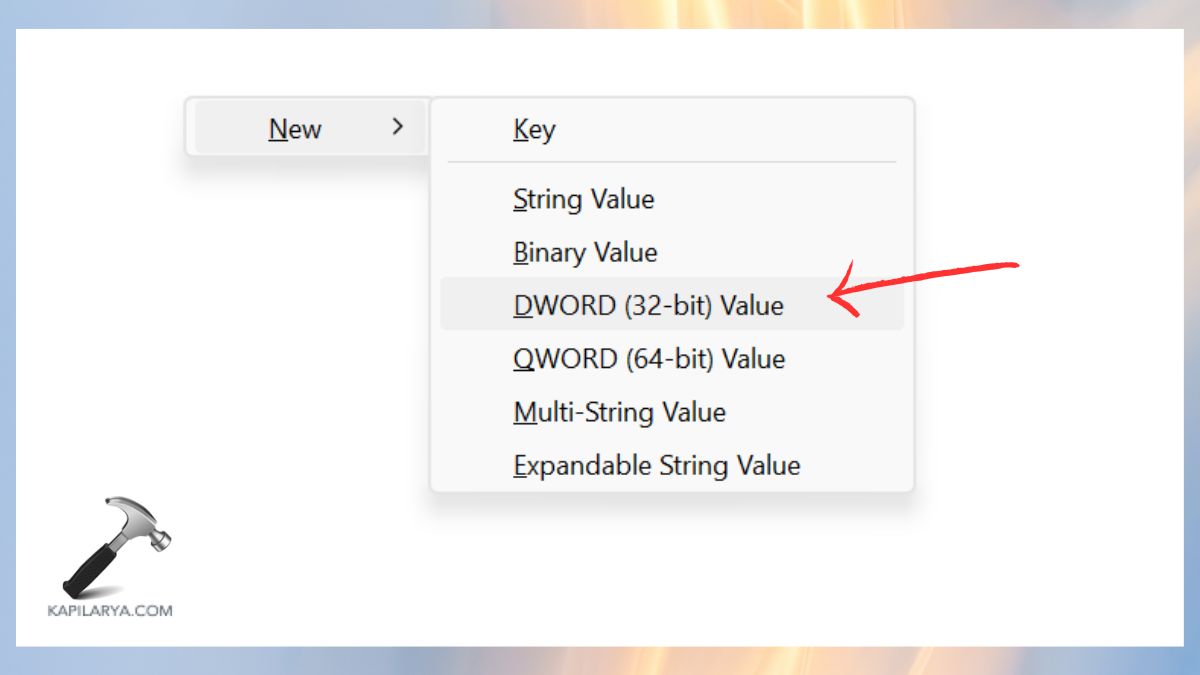
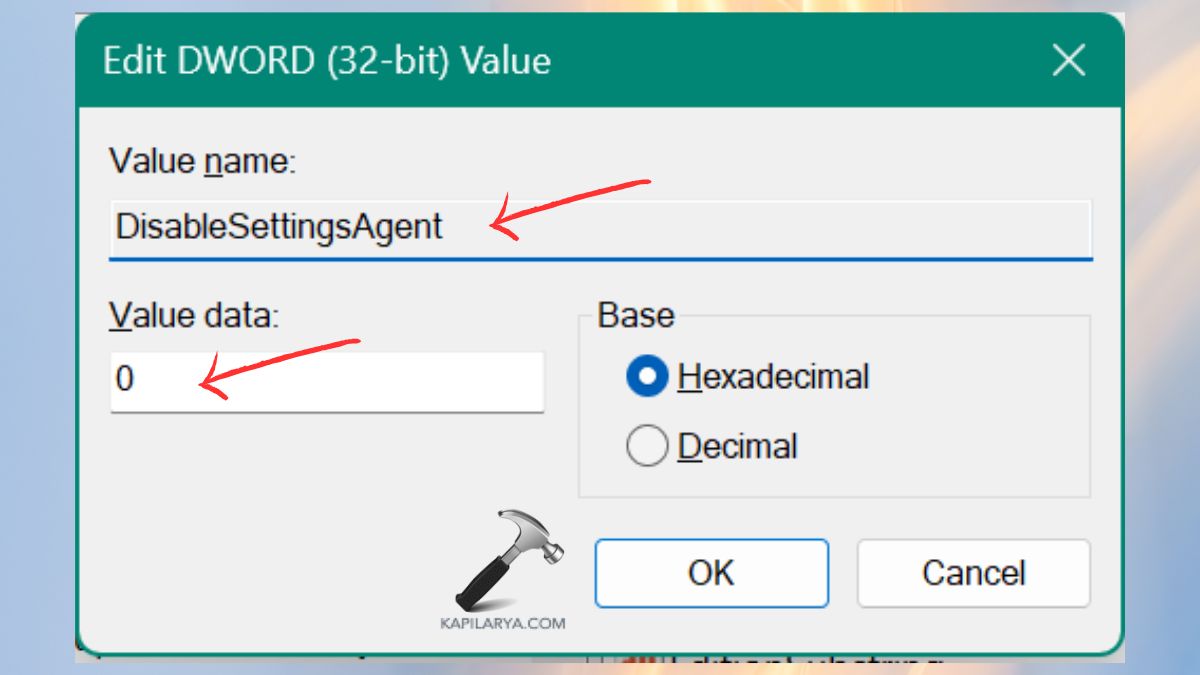
4. Name it “DisableSettingsAgent”. Click on it twice and make the Value data = 0.
Reboot the laptop or PC, and this will cause the agent feature to go into effect everywhere on the system.
Method 2: Using Local Group Policy Editor to Enable Agent
The technique is applicable to Windows 11 Pro, Enterprise, and Education. Registry can be used instead with Home Edition users.
1. You can open the Group Policy Editor that is available on the search menu. Or press Windows + R and type in the following command.
gpedit.msc

2. Go to this Agent Policy Location.
Computer Configuration > Administrative Templates > Windows Components > Windows AI
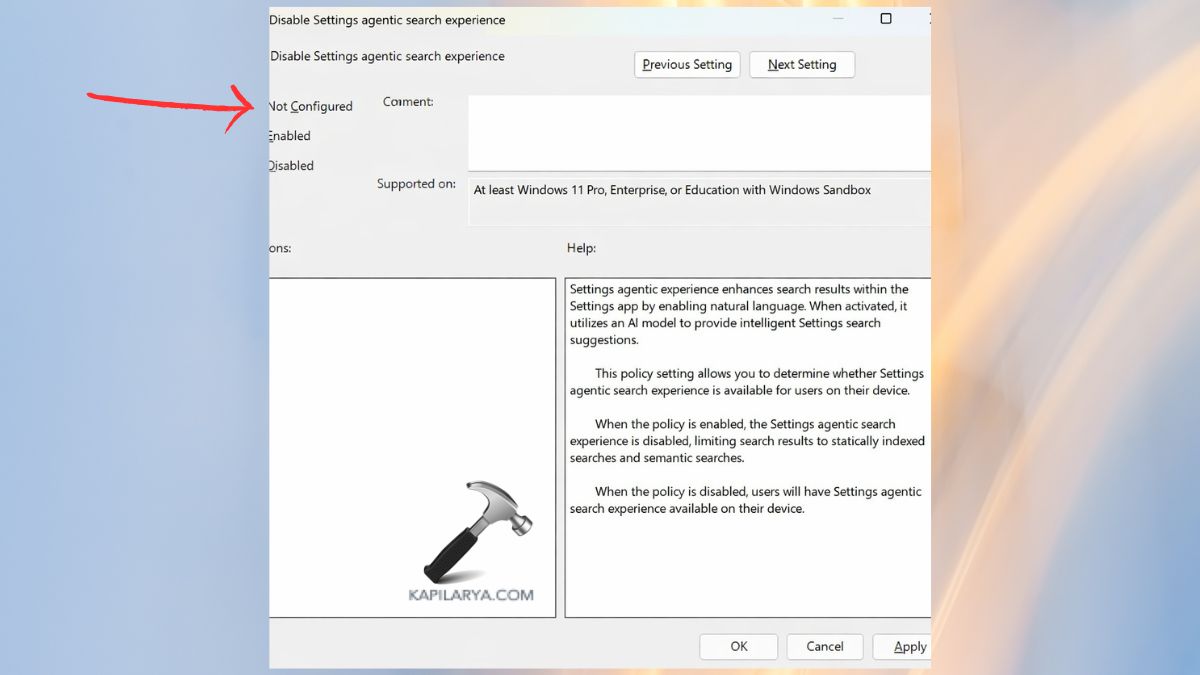
Select the Disable Settings agentic search experience. Double-click the policy. Select “Disabled” or “Not Configured”. Click Apply, then OK.
Restart your device.
Why Users Need the Agent Feature in Windows 11
The Agent feature comes across to most Windows 11 users during troubleshooting or when choosing advanced settings. Few, however, know how potent it is. The Agent system is capable of enhancing these with the correct setup.
- Performance optimization.
- Background task management.
- App responsiveness.
- Diagnostics and problem-solving.
- User experience automation
To put it briefly, by turning on the Agent feature in Windows 11 you are providing your system with a smart but silent helper in the background that will allow it to make everything smoother, faster, and more stable.
Frequently Asked Questions (FAQs)
Why can’t I find the Agent option in Windows 11 Settings?
It can be suppressed by OS version limitations, limitations placed by your administrator or by the absence of the registry keys. It can be enabled by means of the Registry or Group Policy Editor.
Is it safe to enable Agent on Windows 11?
Yes, it is safe. A component within the system is the Agent, that is aimed at automation and diagnostics. All you have to do is to take your steps.
Does the Agent feature work on Windows 11 Home Edition?
Yes. It can be automatically installed with the latest update. Also, it can be enabled with the help of Registry Editor, as the Home edition does not have Group Policy Editor.
Do I need to restart my PC after enabling Agent?
Yes. It is to restart everything so that all the changes can come into effect accordingly.
That’s it!


