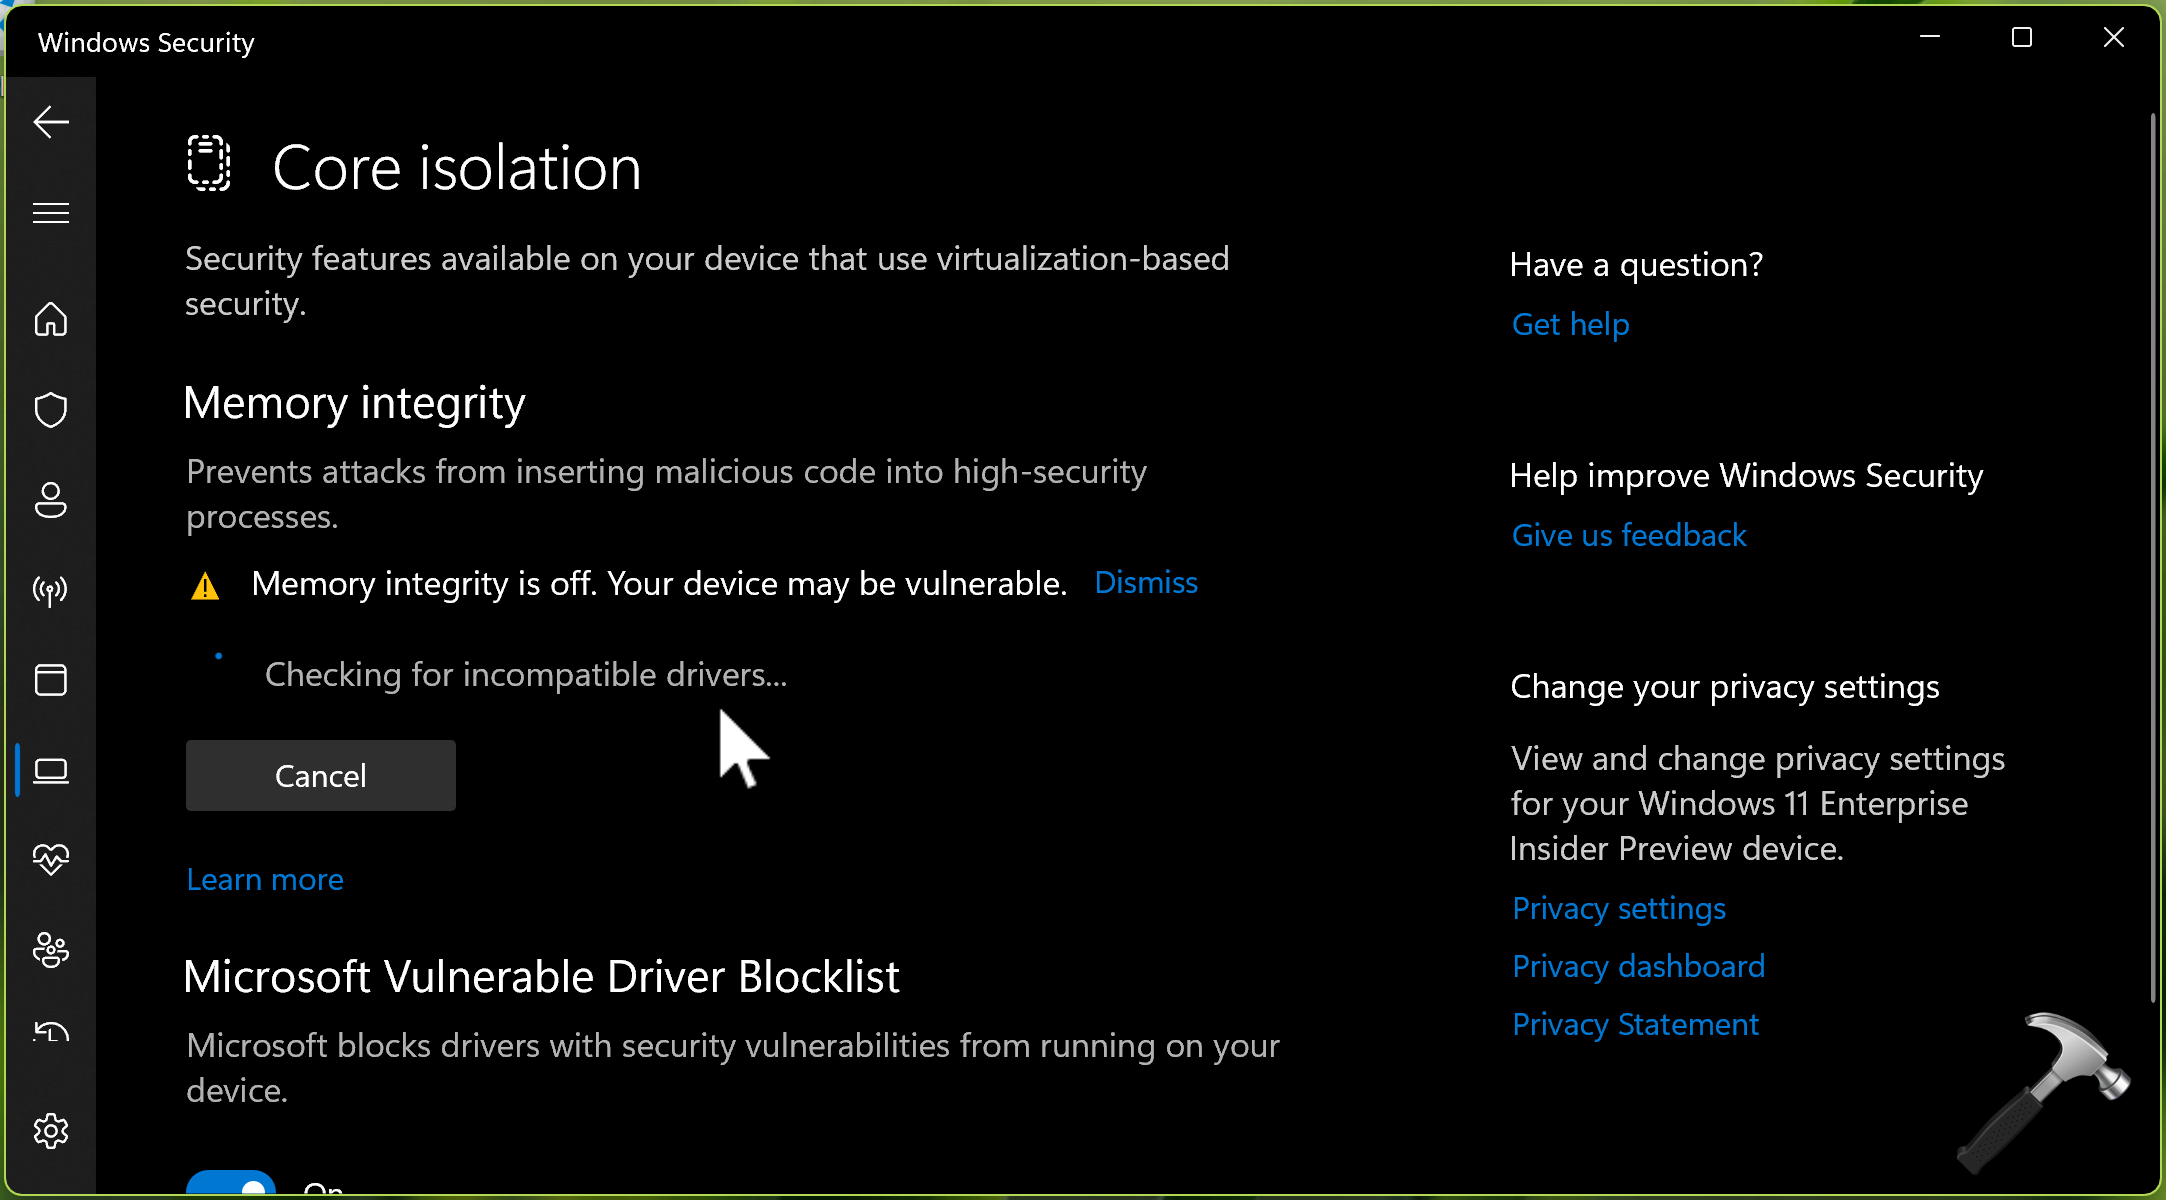
In Windows 11, when Memory integrity is turned off, you might get a pop-up message in Windows Security saying that you need to check for incompatible drivers. The message might be alarming, but it typically indicates an older, incompatible, or even potentially vulnerable driver that doesn’t allow Memory integrity to enable.
Fortunately, you can easily solve the Windows 11 Memory integrity turned off issue without reinstalling Windows. This tutorial will help you understand why Memory integrity is turned off and how to attempt to determine the name of the driver being used, update it, disable it, or remove it.
Page Contents
What Does Memory Integrity Do?
Within Core isolation, there’s a security feature called memory integrity. It helps prevent malicious programs from using low-level drivers to compromise Windows.
Windows 11’s Core isolation security features include Memory integrity, also known as Hypervisor-protected Code Integrity (HVCI). The feature uses the hardware virtualization to protect important Windows processes from malicious or untrusted code. If Memory Integrity is turned off, Microsoft suggests to review the incompatible driver(s).
In simple words: Memory integrity is a solution where hardware virtualization is used to create an isolated environment, and code is checked before it is run in protected areas. This will make it more difficult for malware to disrupt important Windows processes.
Hence, it is for this reason that Windows will not allow Memory Integrity to be enabled when it finds a driver that is not compatible or secure enough.
Ways to fix Memory Integrity being turned off in Windows 11
Try the following solutions to try in order. Use Windows Update and driver updates first, since it is safer to install a newer version of a driver that is compatible than to remove an incompatible driver.
Fix 1: Check Which Driver Is Blocking Memory Integrity
Before switching drivers, determine what Windows is reporting.
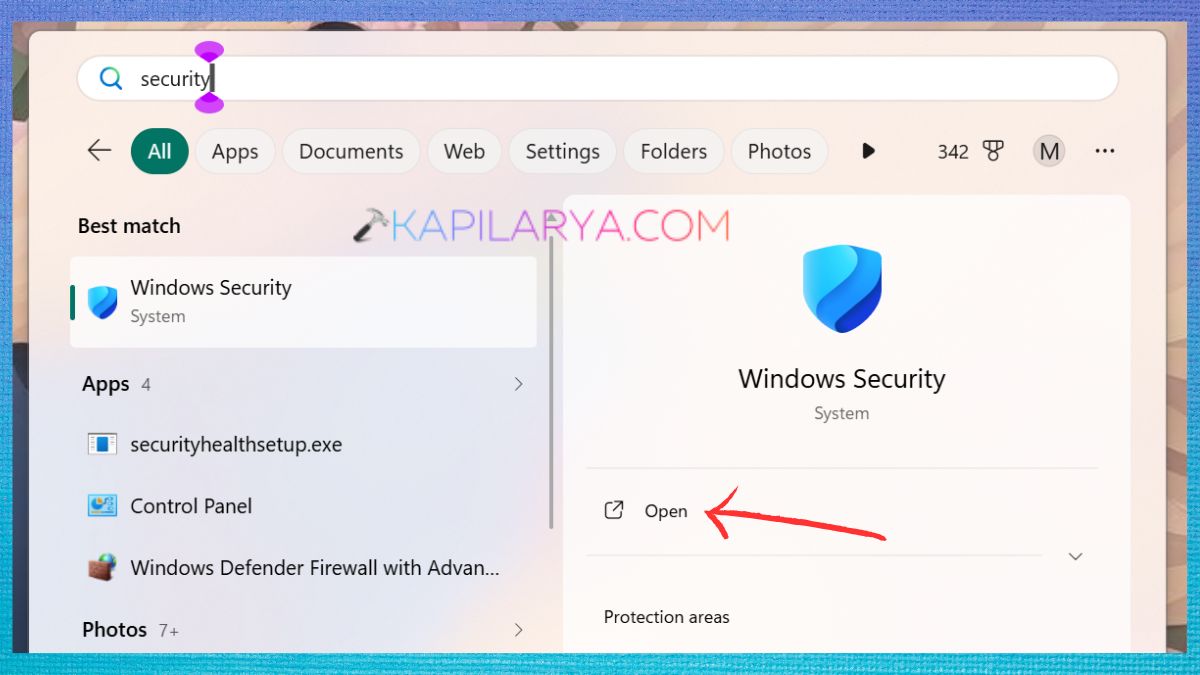
1. Click on the Windows icon and select Windows Security.
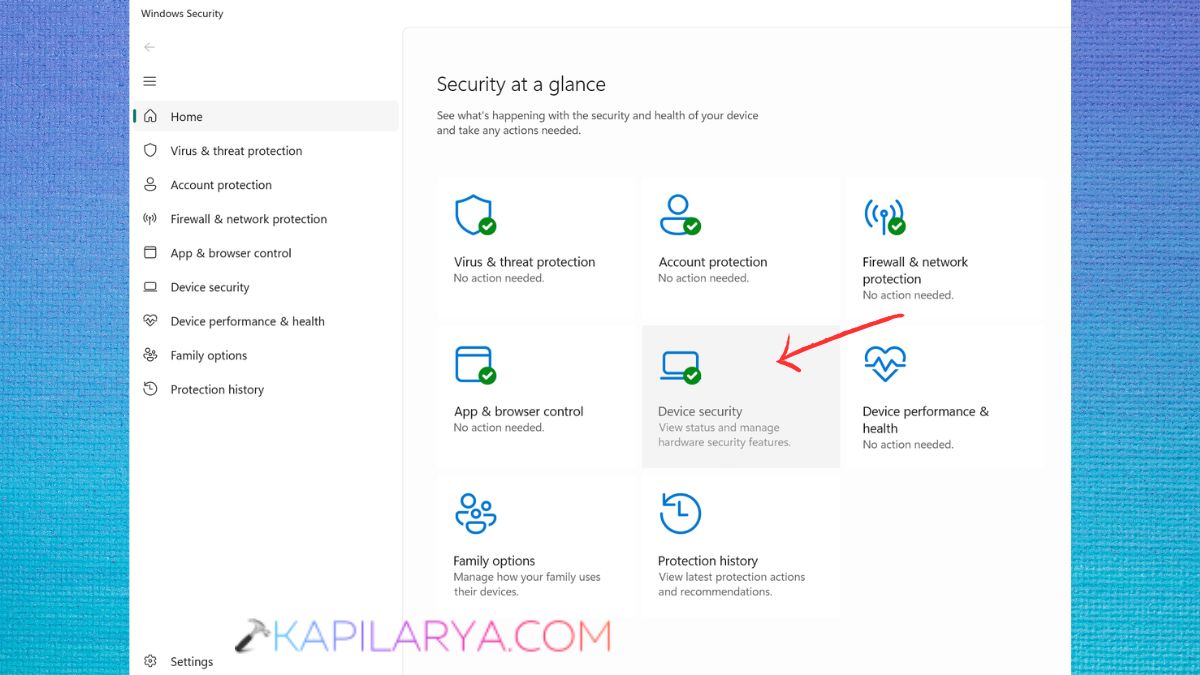
2. Select Device security.
3. When Core isolation is selected, click on Core isolation details.
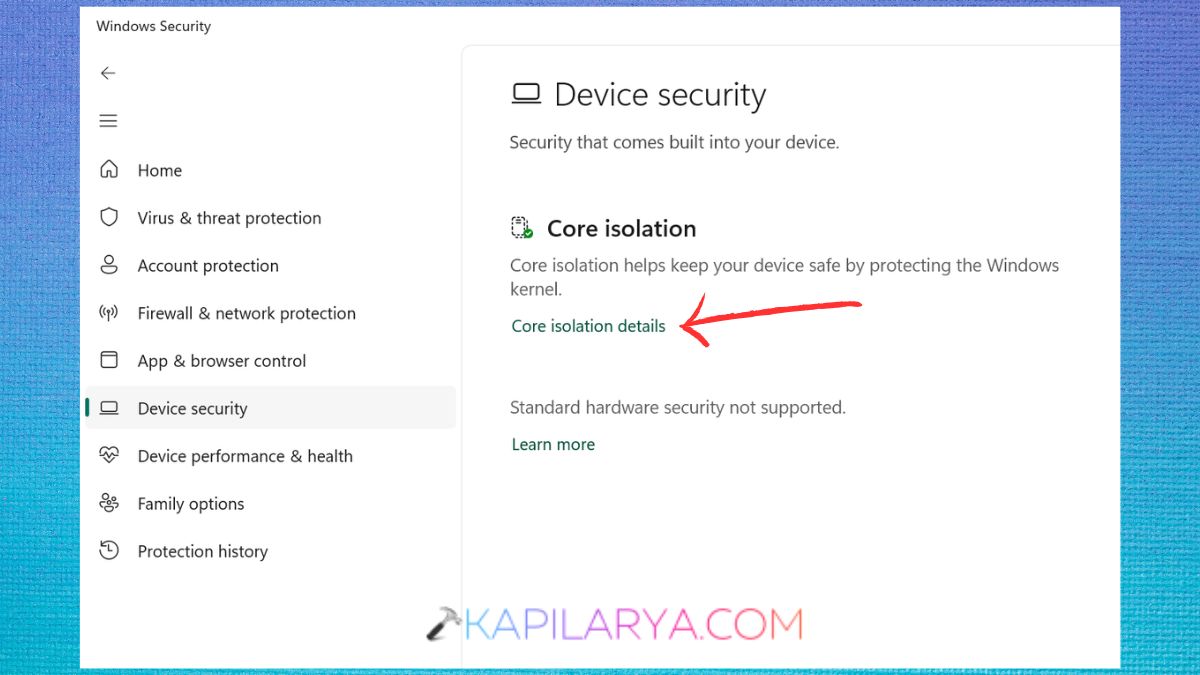
4. Check for Memory integrity.
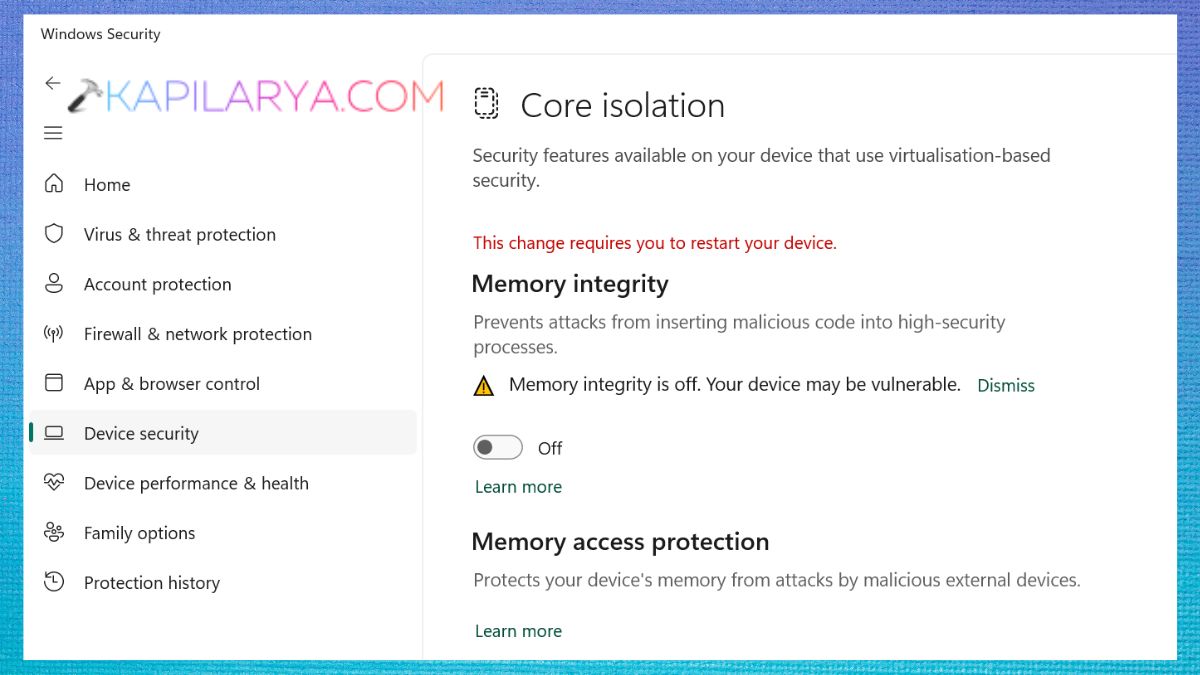
When Windows says there are incompatible drivers, choose to View drivers. Record the driver’s name, company and other data displayed on the screen. This is a crucial part, as the driver that is causing problems could be from hardware or software that you don’t use that often.
If the driver’s .sys file is displayed, retain it; Windows will provide you with the name of the driver. That information can be used later to determine the driver package.
Fix 2: Install the Latest Windows Updates
When the Windows installation is outdated, some components of the driver may be older or could be missing new compatibility updates. Microsoft says it is important to keep Windows updated, and Windows Update can provide driver updates for compatible hardware.
1. Open Settings. Select Windows Update.
2. Click on Check for updates.
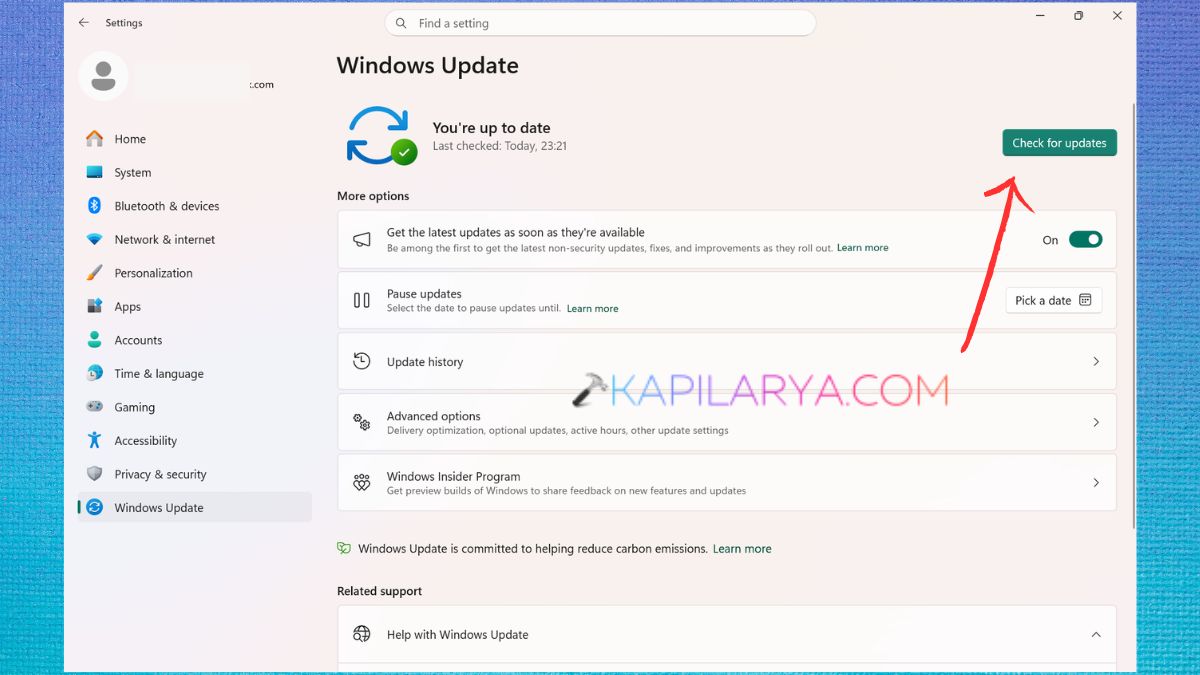
Let the Windows system to download and install any updates that are available. If Windows asks you to restart, select to Restart now. Once restarted, go back to Device security > Core isolation in Windows Security. Look to see if the Memory integrity warning is gone.
You may be able to turn on Memory integrity without removing anything when a new driver has been installed by Windows Update.
Fix 3: Update the Problematic Driver
If Windows Security detects a certain driver, then it’s time to upgrade it. If you wish to try out Windows’ built-in driver update process, you can.
1. Right-click on the Start button. Select Device Manager.
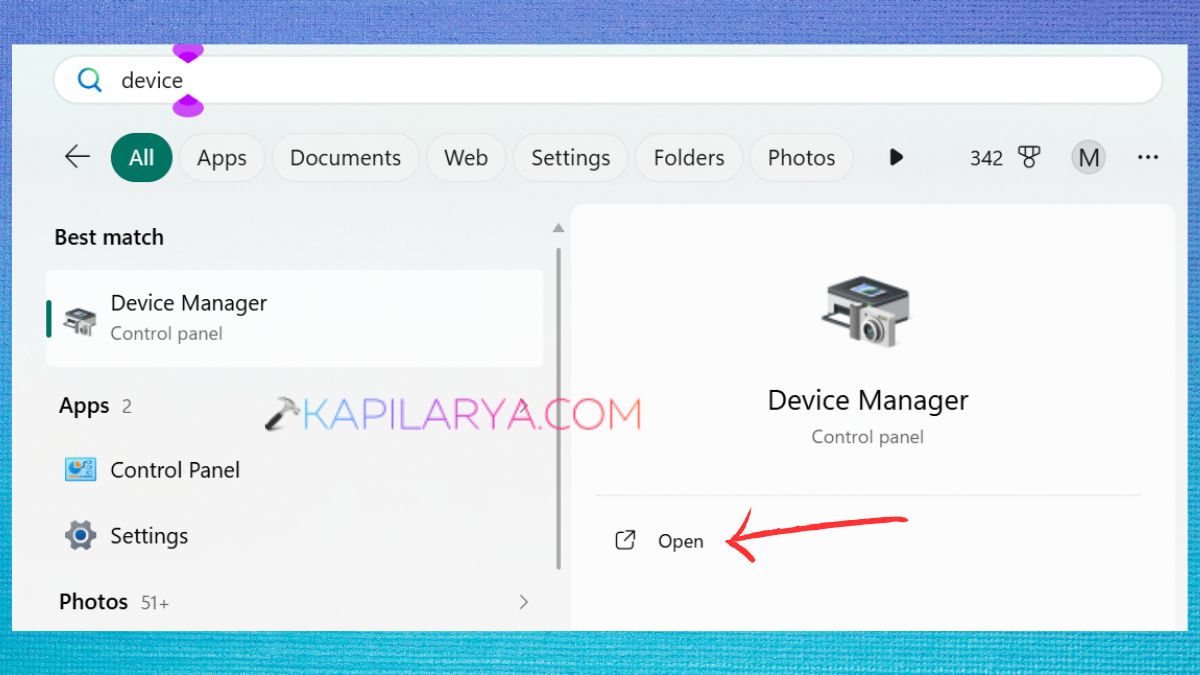
2. Look up the device of the problematic driver. Right-click the driver.
3. Select Update driver.
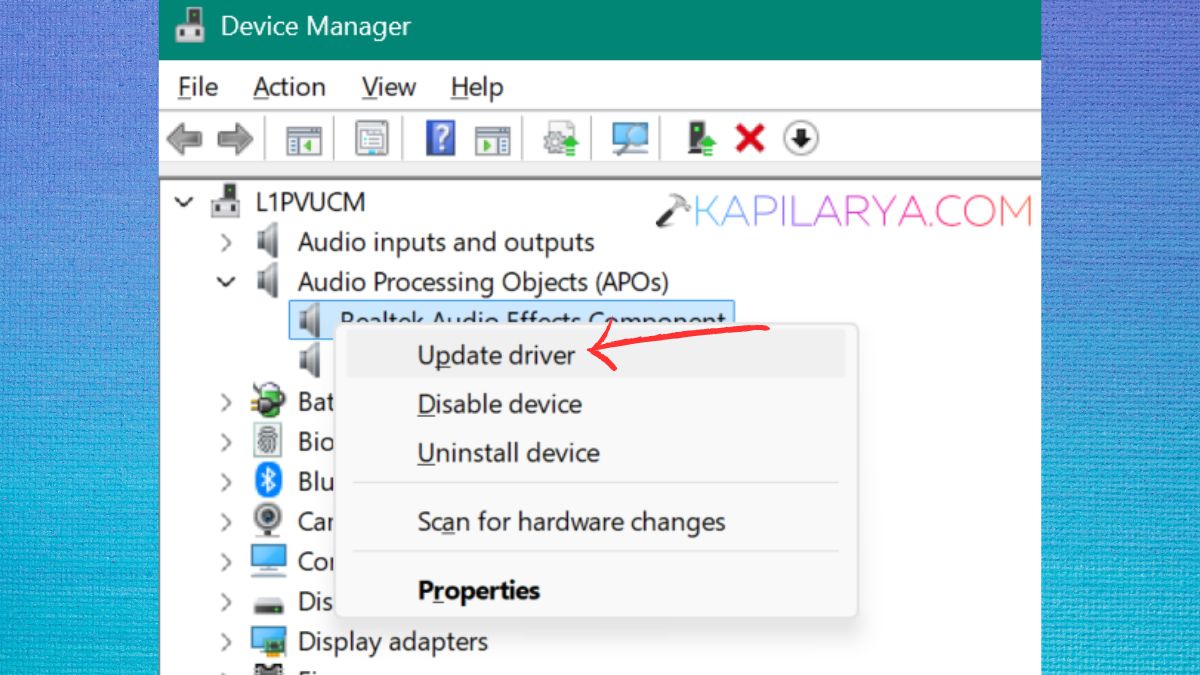
4. Select “Search” automatically for drivers. Allow Windows to check for an available driver.
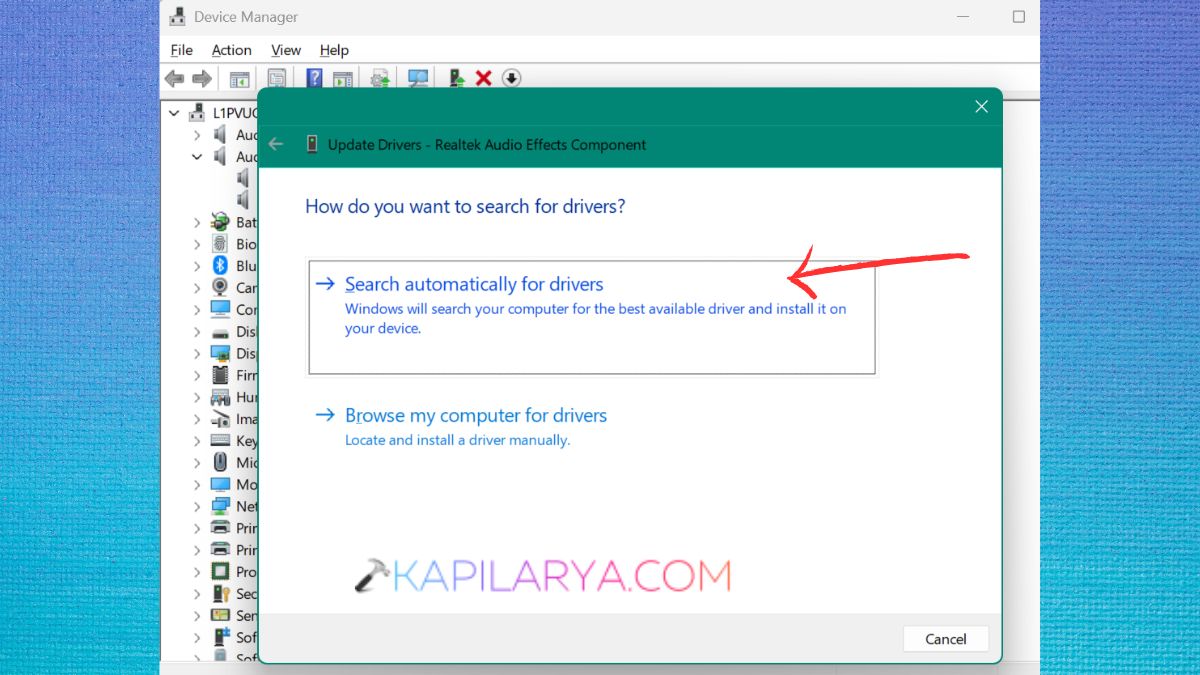
Re-boot computer after installing. If Windows doesn’t detect a newer driver, check the manufacturer of the hardware or software and get the correct model of the device.
Fix 4: Check the Windows Driver Package
If Memory integrity is disabled in Windows 11 due to an incompatible driver, see if the driver is listed in the Installed Apps as a Windows Driver Package.
1. Press Windows + I to enter into the Settings screen. Tap on Apps > Installed apps.
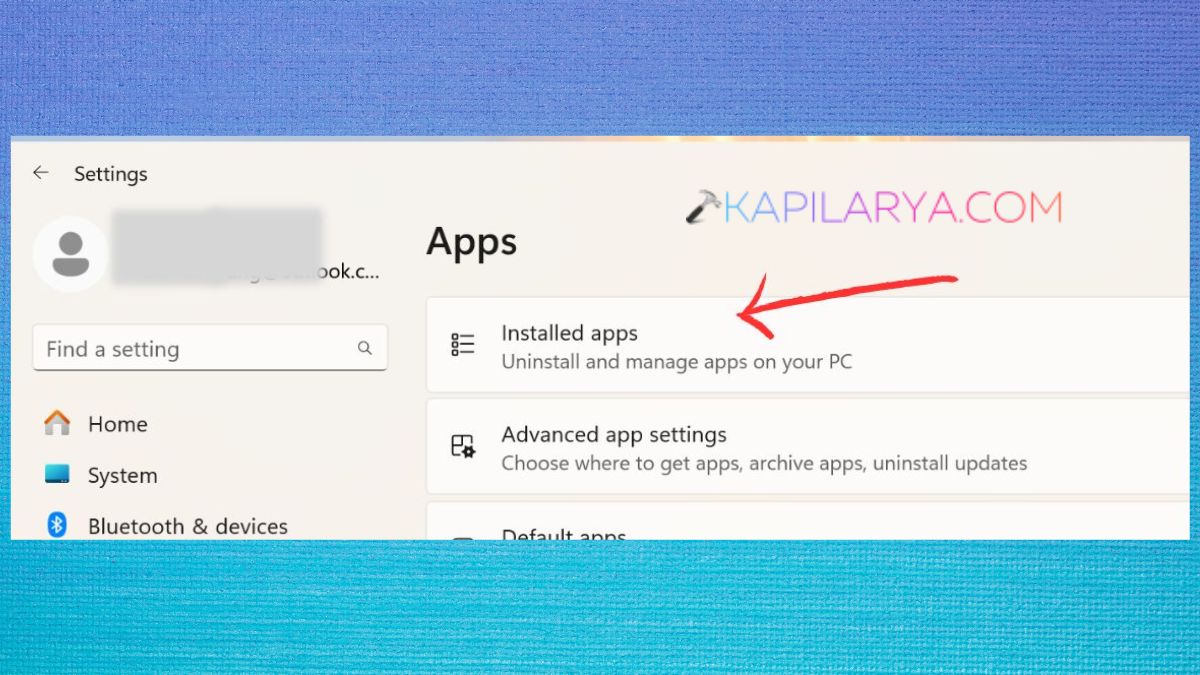
2. Look for a Windows Driver Package. Uninstall any driver package that is either outdated or no longer needed.
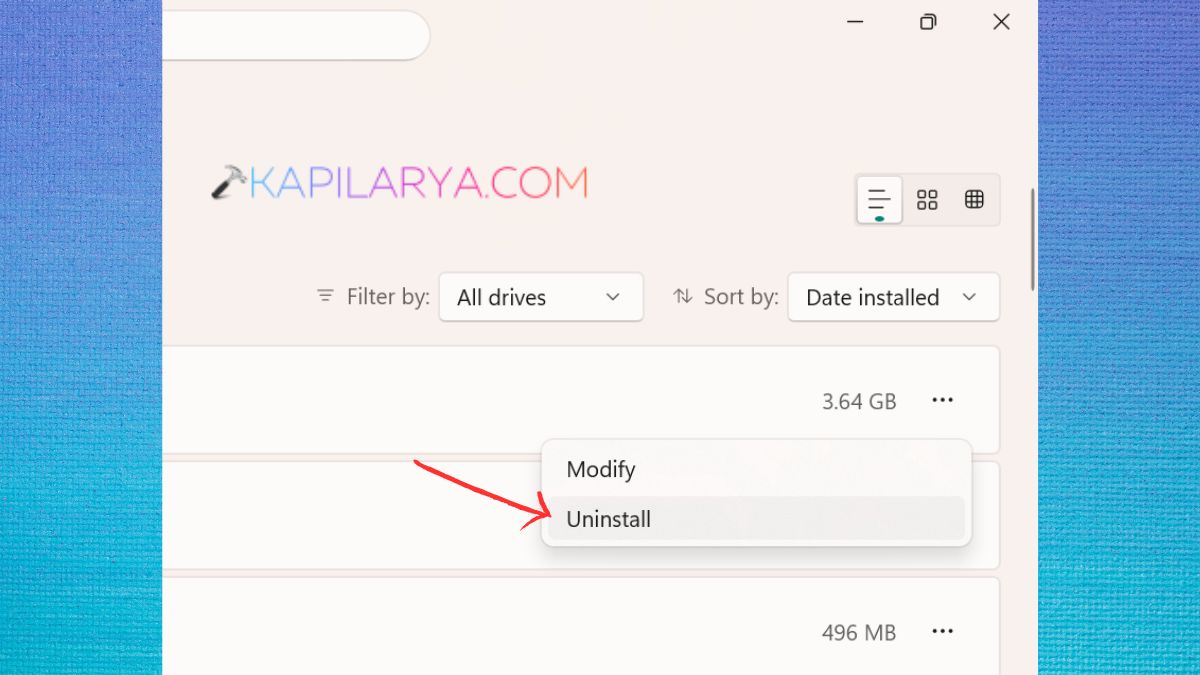
Reboot the computer and re-check Core isolation.
If you don’t have a driver package in Installed apps, do not delete random driver files. To do this, however, you need to use Device Manager or the following PnPUtil method to locate and safely uninstall the incompatible driver.
Fix 5: Disable the Problematic Device or Driver
Sometimes, it is useful to disable the device temporarily. If you’ve identified the device that is giving you the warning, but you still need to determine if the warning is causing the problem.
1. Again, open Device Manager. Find the device that’s affected.
2. Right-click it. Select Disable device. Confirm the action.
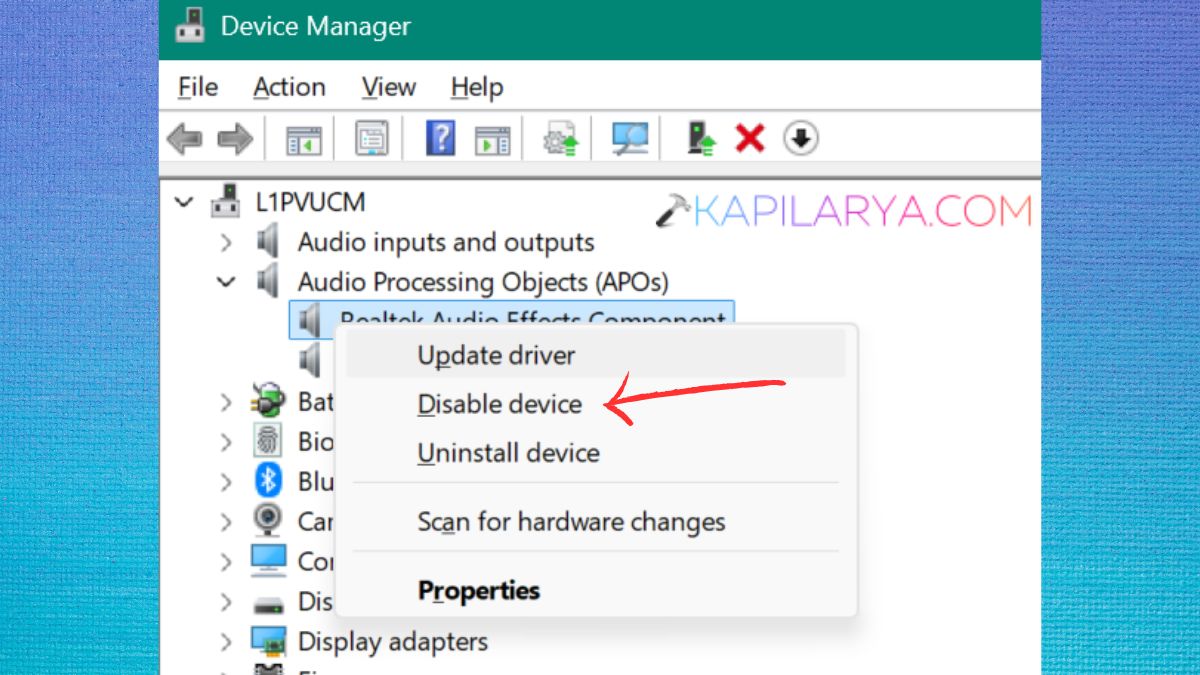
Restart the computer. Now, check the Memory integrity status. If Memory integrity is now enabled, the disabled device or its driver is probably the culprit.
Fix 6: Uninstall the Problematic Driver
You might want to try uninstalling the driver to address the Memory integrity is turned off in Windows 11 message if the manufacturer doesn’t offer a driver for your hardware or software and you no longer need the hardware or software.
Microsoft suggests that you uninstall devices and their driver packages using Device Manager.
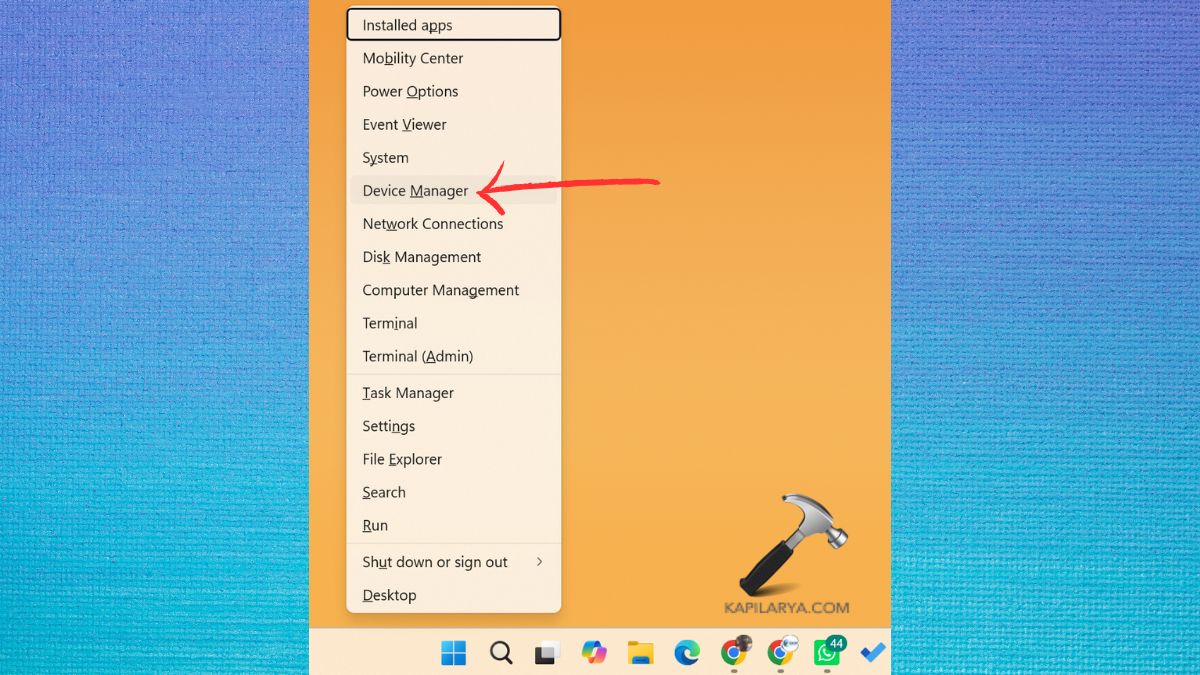
1. Press Windows + X. Select Device Manager.
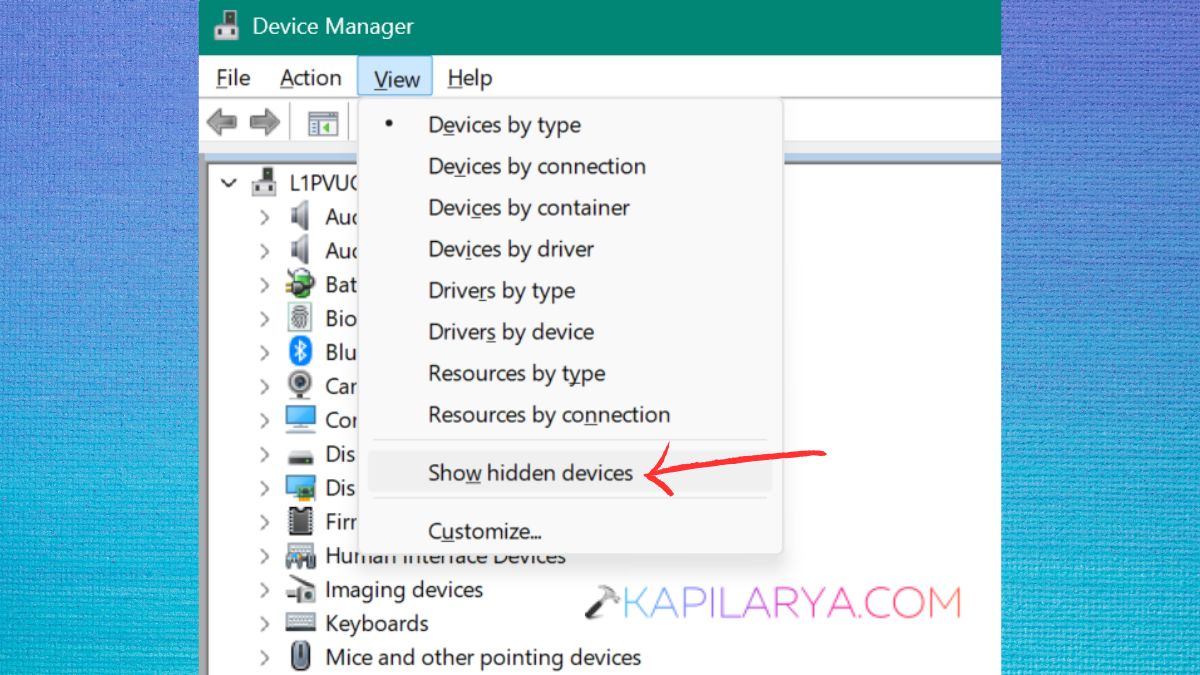
2. In the top menu, click View. Choose Show hidden devices if necessary.
3. Find the impacted device. Right-click it. Select Uninstall device.
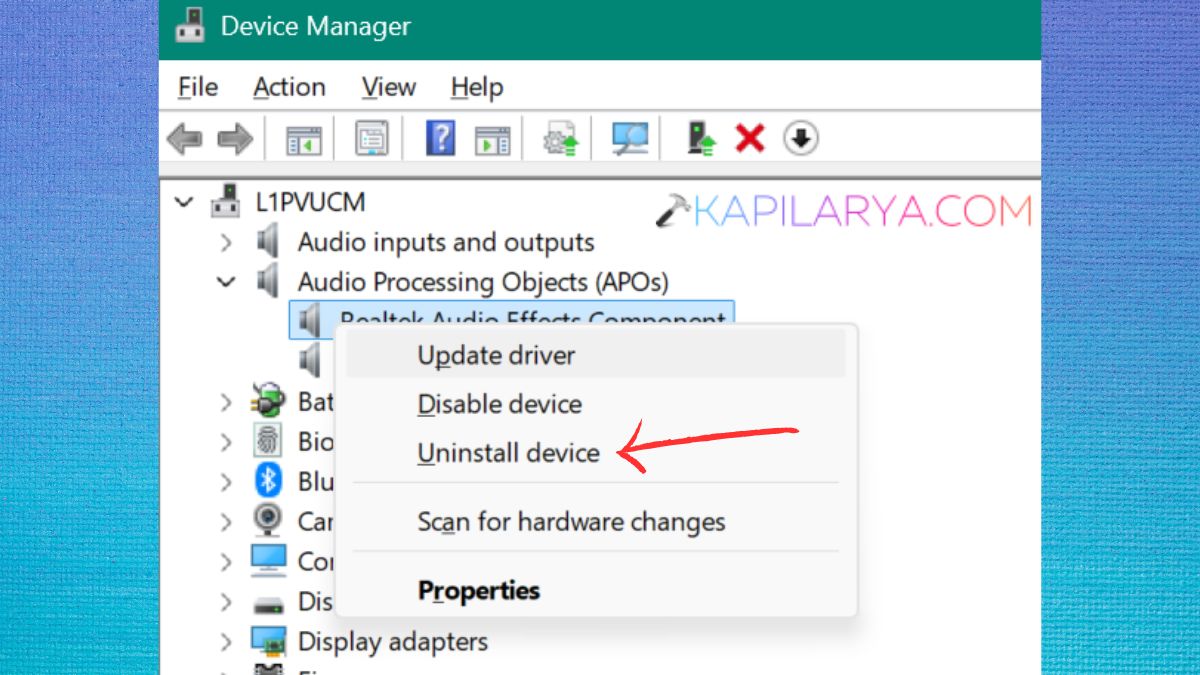
If possible, choose Attempt to remove the driver for this device or Delete the driver software. Click Uninstall.
Restart Windows. If the computer continues to detect the device and re-installs the driver, then it may be re-installed again. Microsoft mentions that Windows will be able to re-detect a device and re-install its driver package once it has been removed.
Fix 7: Remove the Incompatible Driver Using PnPUtil
If Device Manager doesn’t completely uninstall the driver package, you can use PnPUtil.
Be careful when using this method. Taking out an incorrect driver can cause hardware to fail or system instability. Microsoft explicitly advises checking whether a driver is critical or not before removing it.
1. Run Command Prompt as administrator.
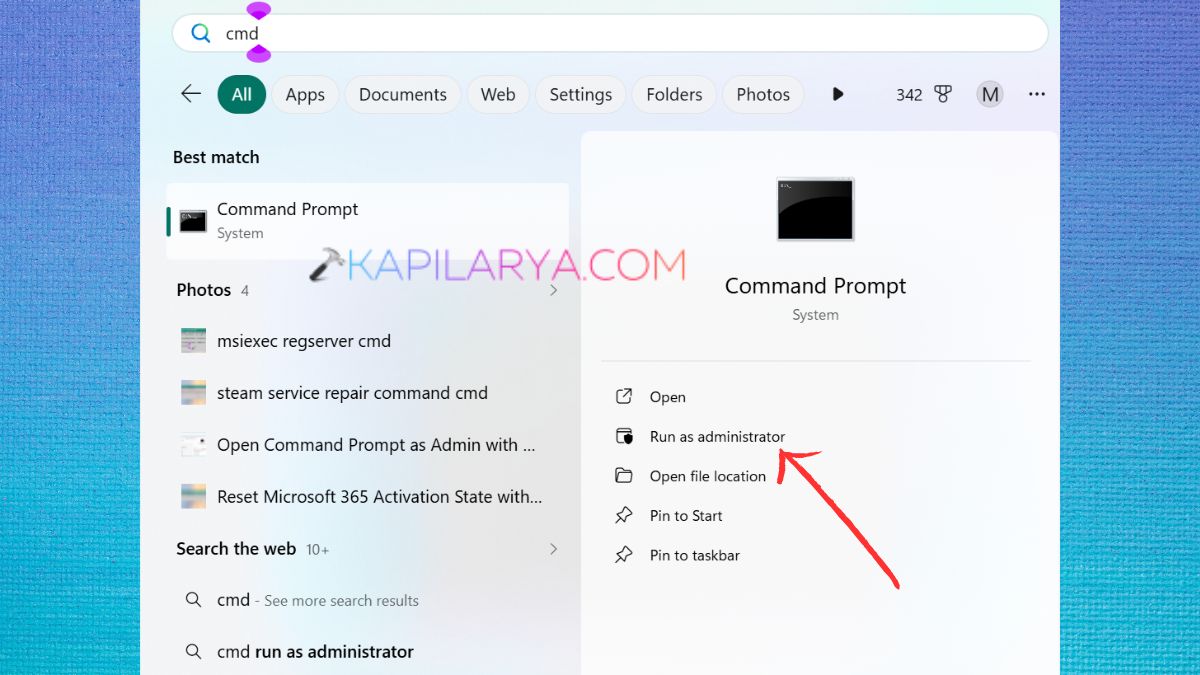
2. Then, run this command.
pnputil /enum-drivers
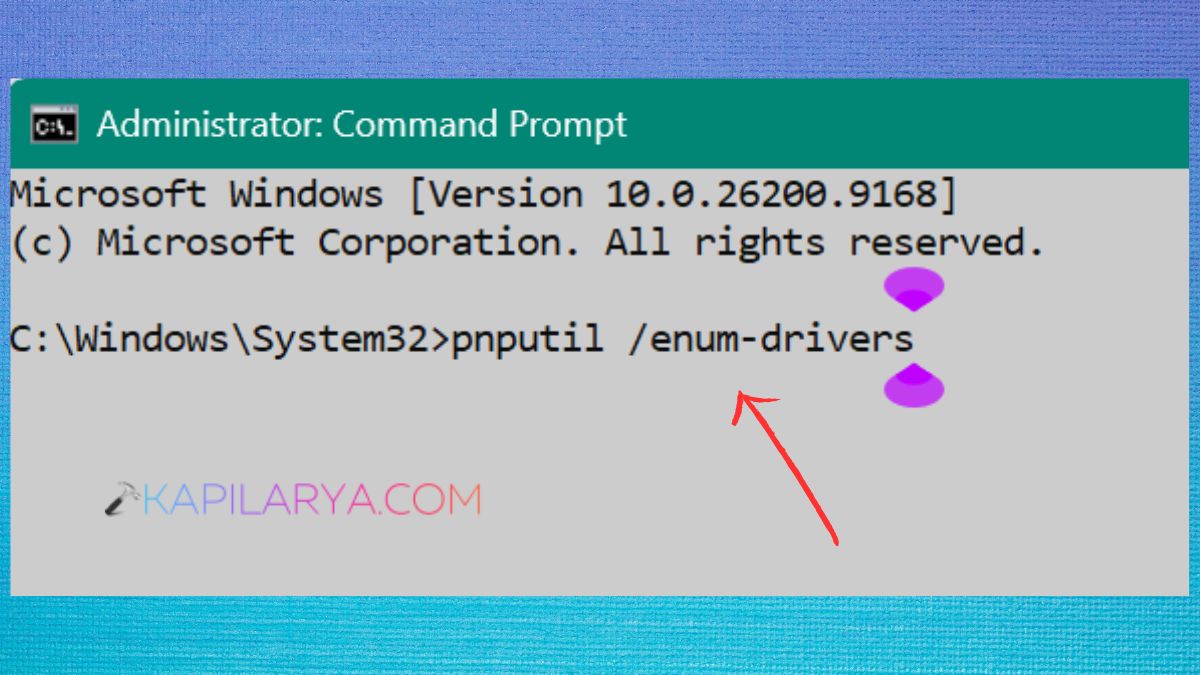
Find the incompatible driver and note its Published Name, such as: “oem42.inf”.
3. Run this.
pnputil /delete-driver oem42.inf /uninstall
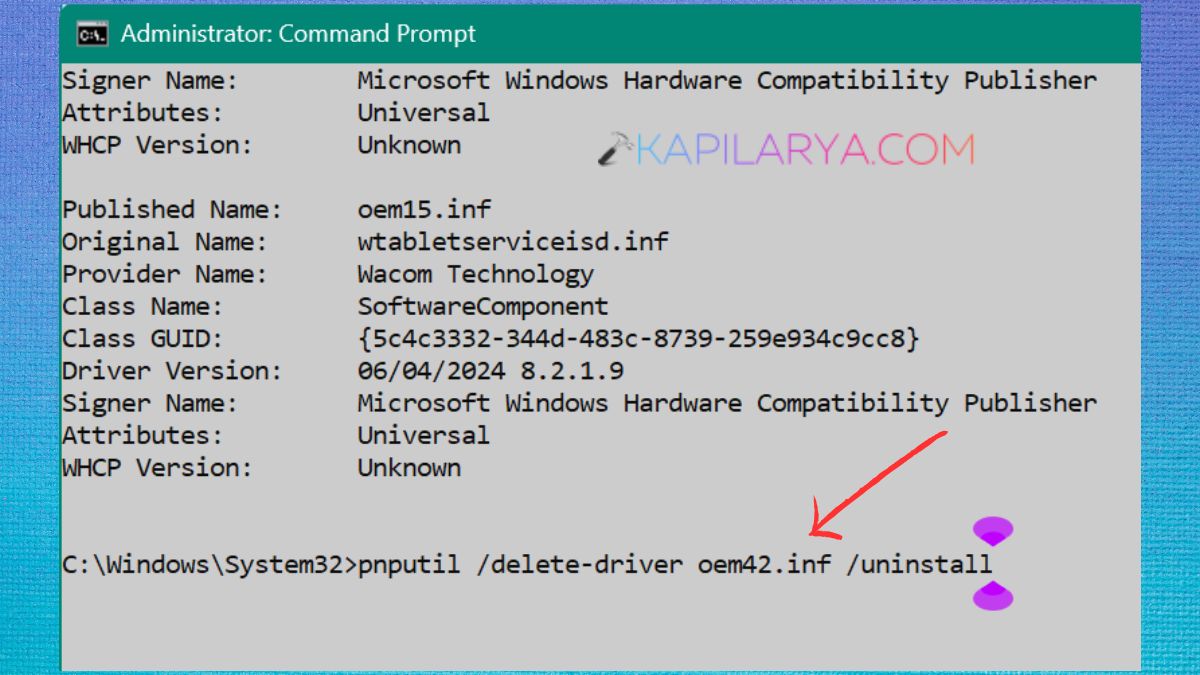
Replace “oem42.inf” with the Published Name of the driver you are having problems with.
After removing the driver, try to turn Memory integrity on. If Windows asks to restart, do so again.
Fix 8: Update BIOS or UEFI Firmware If Needed
An update to the BIOS/UEFI is typically not the first fix for an incompatible-driver warning. If the system stability, virtualization, security or Windows 11 compatibility is part of the firmware update released by the PC manufacturer, however, it may be necessary to check it out.
Memory integrity is hardware virtualization dependent. And, Microsoft says that Memory integrity requires hardware virtualization to be enabled in UEFI/BIOS.
Therefore, before updating the BIOS, check these:
- Know the exact model of your PC or motherboard.
- Check the manufacturer’s official Support Web page.
- Look for the current version of the BIOS/UEFI and release notes.
- Follow the manufacturer’s instructions for installation.
- Plug in the laptop (if applicable).
- DON’T interrupt the BIOS Upgrade process.
- Don’t install a BIOS for another model.
If your manufacturer has made a BIOS update just for Windows 11, virtualization, or firmware security, or for Windows 11 and security, you may be able to help by installing the BIOS update provided by your manufacturer that addresses it.
Video fix
Here’s a video fix to help you more on this:
What If Memory Integrity is Still turned off?
If you still see the Windows 11 message after upgrading the driver, follow these troubleshooting steps:
- Ensure that Windows 11 is completely updated.
- Check Core isolation again for the exact incompatible driver.
- Shop around online for the latest driver from the manufacturer’s website.
- Look for hidden devices in Device Manager.
- Remove software that installed the “old” driver if it is not required.
- To determine the driver package, use pnputil /enum-drivers.
- Only remove the driver package if certain it is safe to do so.
- Turn on the computer and repeat Memory integrity.
- Check if hardware virtualization is enabled in UEFI/BIOS.
However, the options for Device Security and Core isolation are also dependent on the version of Windows and hardware installed.