In Windows 11, there is an in-built antivirus software called Microsoft Defender Antivirus. This software helps in protecting your system from malware, viruses and other potential threats. Also, Controlled folder access offers protection of your valuable data against malicious threats and applications, including ransomware. It is recommended to enable Controlled folder access in Windows 11.
To turn this feature on for Windows Security in Windows 11, follow some of the easiest methods given below:
Page Contents
How to Enable Controlled Folder Access in Windows 11
Method 1: Enable Controlled Folder Access Through Windows Security
1. Firstly, open Windows Security by clicking on its icon on the taskbar.
2. From there, select the Virus & threat protection
3. Now, manage Controlled Folder Access option using one of the following methods:
- Click on Manage ransomware protection present under the Ransomware protection tab.
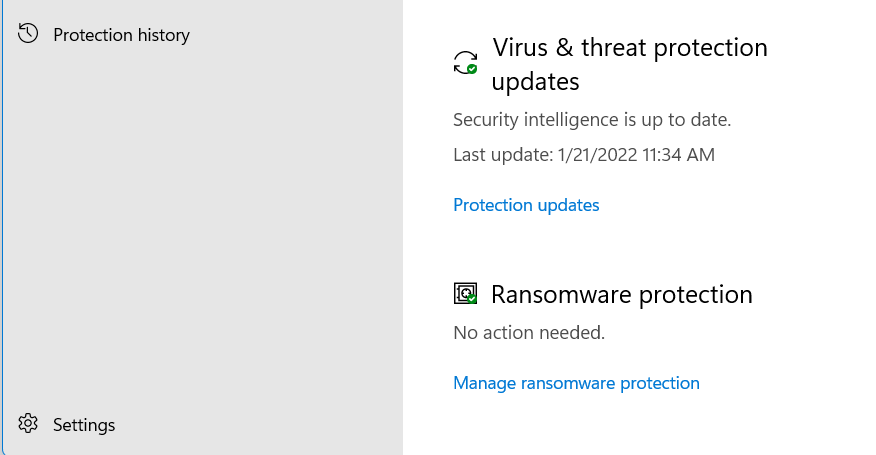
- Click on Manage settings present under Virus & threat protection settings. From there, click on Manage Controlled folder access present under the Controlled folder access tab.
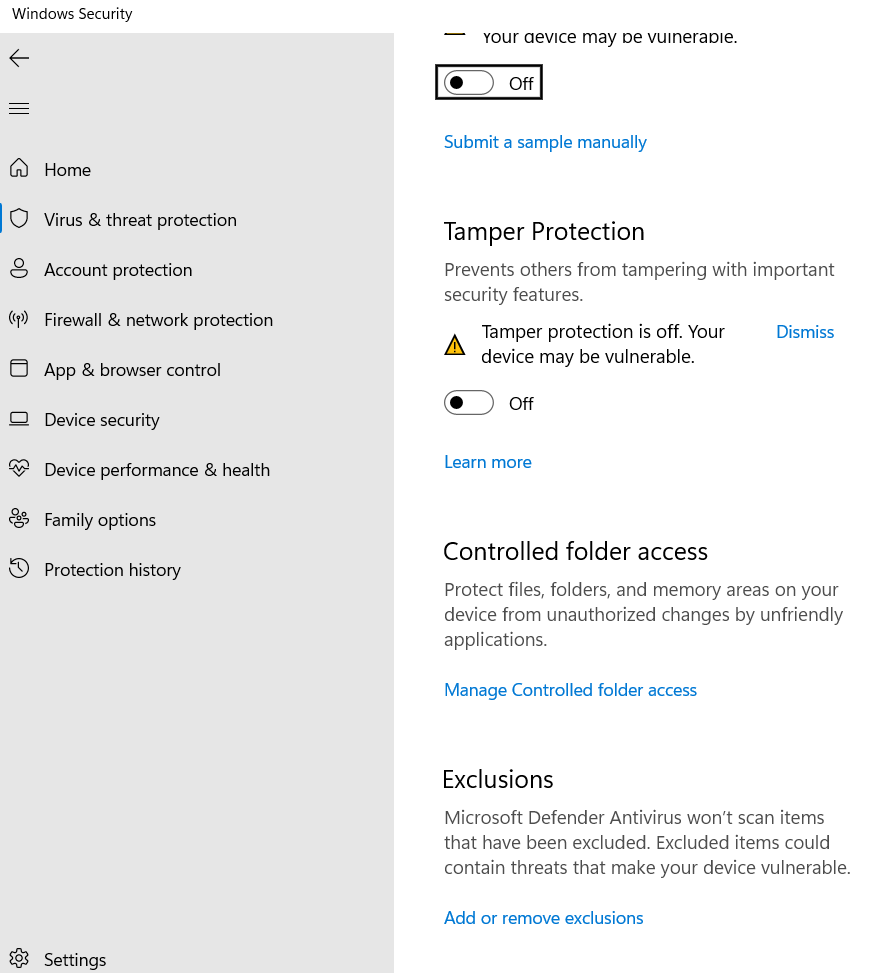
4. To enable Controlled folder Access, turn the toggle On.

5. If a pop-up shows up, click on Yes for confirmation. If you want, exit Windows Security now.
Method 2: Turn On Controlled Folder Access Through Command Prompt
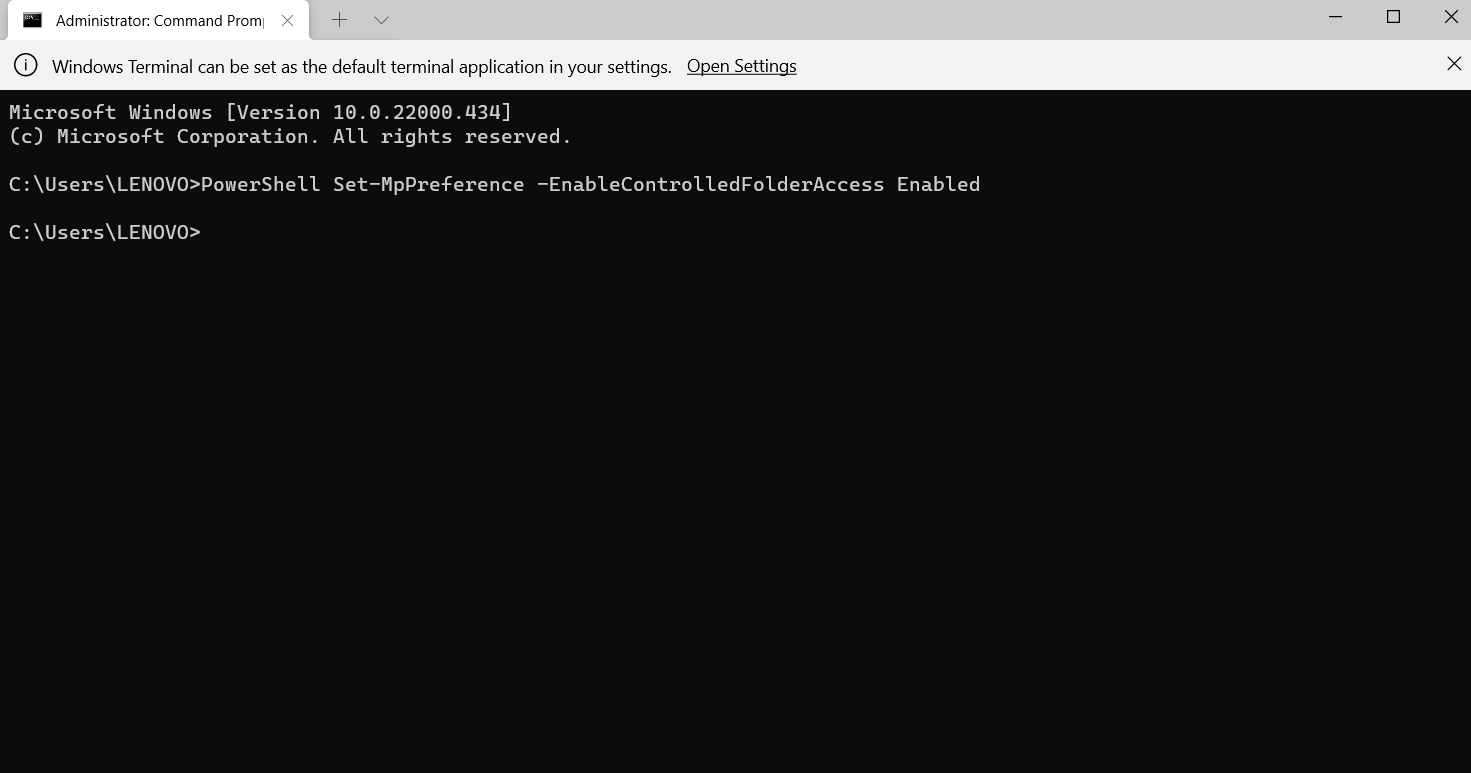
1. In the first place, run Window Terminal as Administrator and choose Command Prompt.
2. Now, copy-paste the following command to turn on Controlled folder access and hit Enter:
PowerShell Set-MpPreference -EnableControlledFolderAccess Enabled
3. Lastly, exit Windows Terminal.
Method 3: Turn On Controlled Folder Access Through Registry Editor
 Registry Disclaimer: It is recommended to create a System Restore point first, if you’re not familiar with registry editing.
1. Initially, open Registry Editor by typing regedit in the Run dialog box. One can open the Run dialog box using Windows + R
2. Once done, go to:
HKEY_LOCAL_MACHINE\SOFTWARE\Policies\Microsoft\Windows Defender\Windows Defender Exploit Guard\Controlled Folder Access
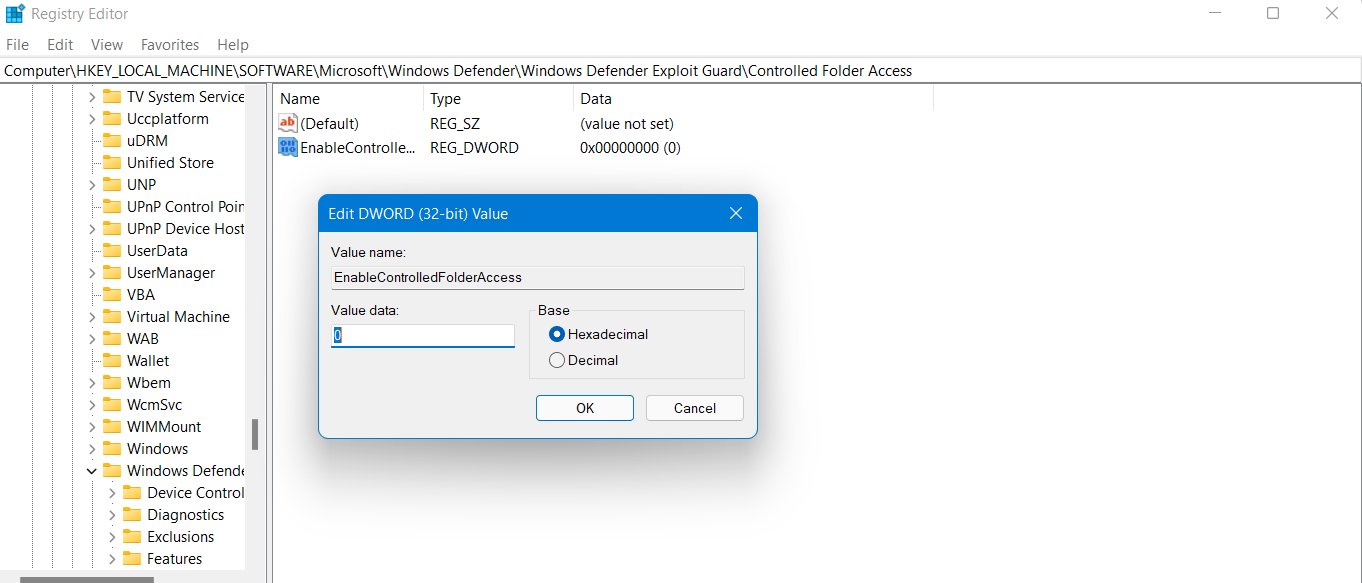
3. Now, double-tap on EnableControlledFolderAccess to turn on Controlled folder access and enter the value 1 to the Value data.
4. Lastly, press OK and then, restart the system for saving the changes.
So, this is how Windows users can turn on Controlled Folder Access using different methods.