In Windows 11, AutoPlay allows you to select an action for different types of media after plugging in a device or media. It can be set for different types of content like music, video, and photos on different types of media like DVDs, CDs, phones and cameras. So, how to enable or disable AutoPlay?
For instance, users can use AutoPlay for choosing an application that will open photos automatically on a removable drive while plugging into the computer. Using AutoPlay, you do not need to open the same application or select preferences again you plug in the same device.
Now, let’s have a look at some of the effective ways to enable or disable AutoPlay in Windows 11!
Page Contents
Enable or Disable AutoPlay in Windows 11
Method 1: Enable or Disable AutoPlay Through Settings
1. In the first place, open Settings through the Windows + I hotkey.
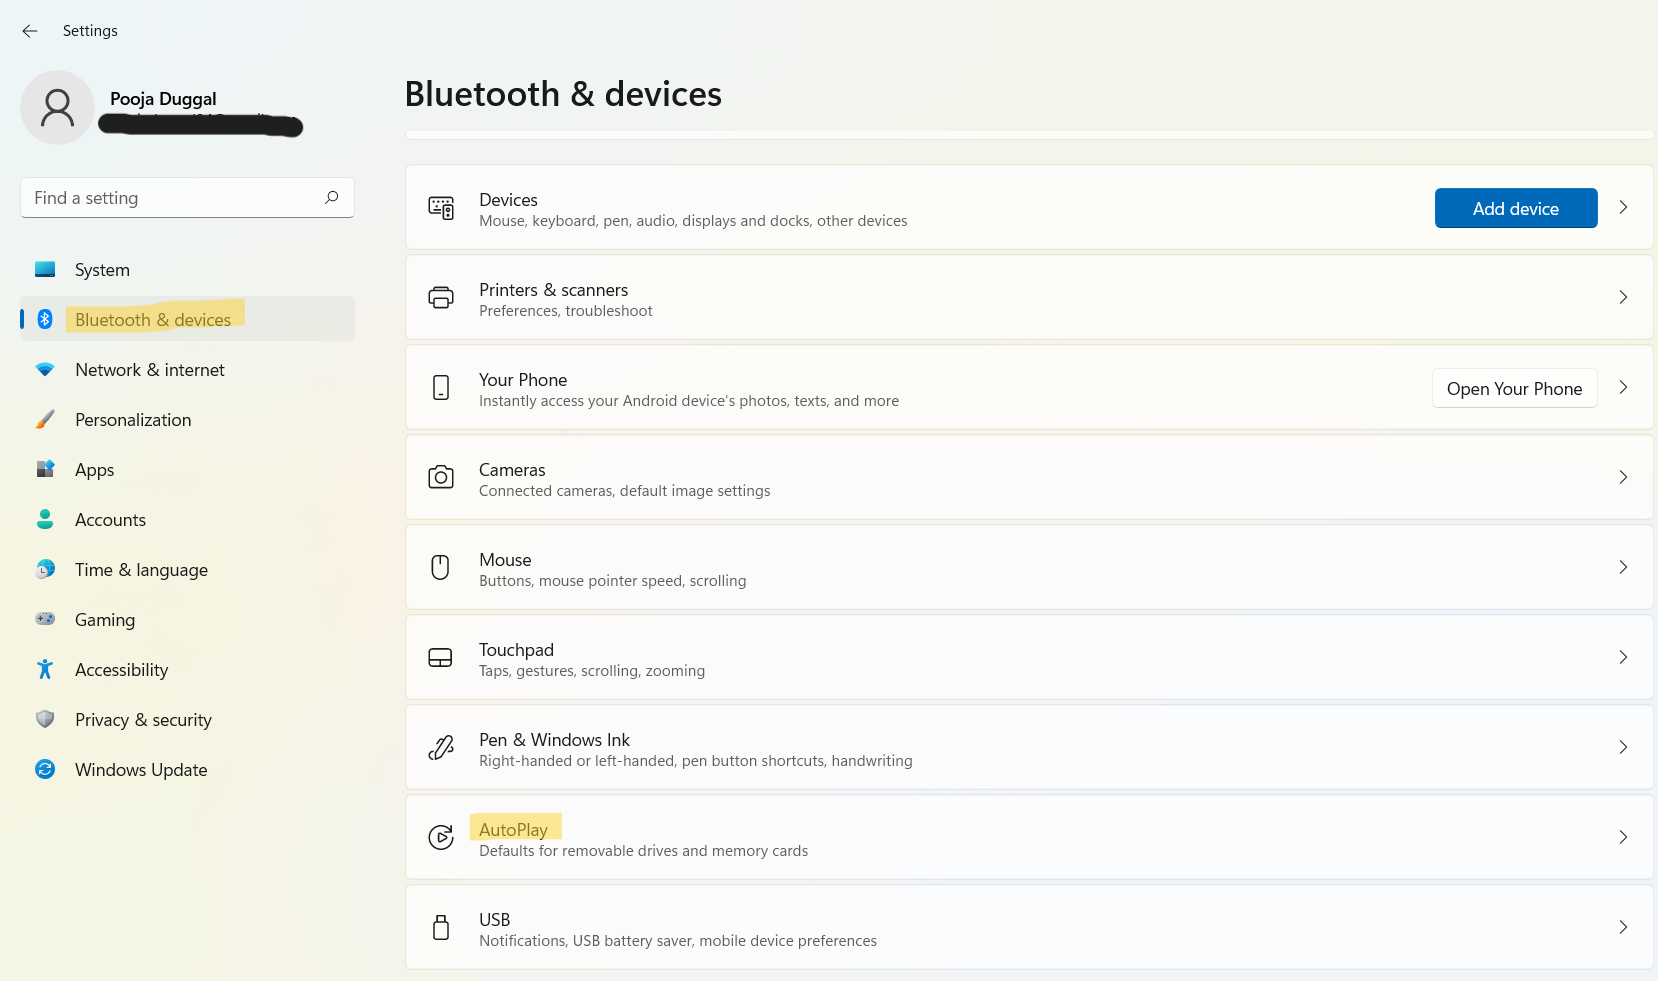
2. Next, click on Bluetooth & devices and then, click on AutoPlay present on the right.
3. From there, turn the toggle on or off for Use AutoPlay for all media and devices.
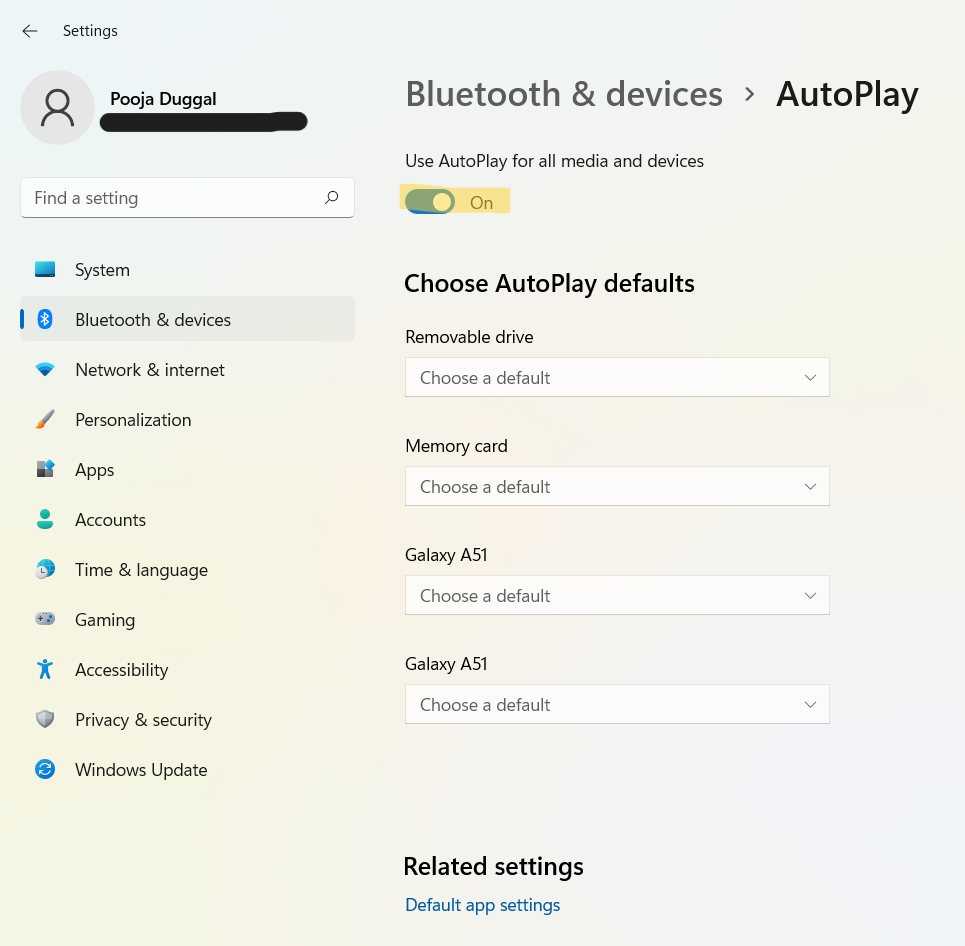
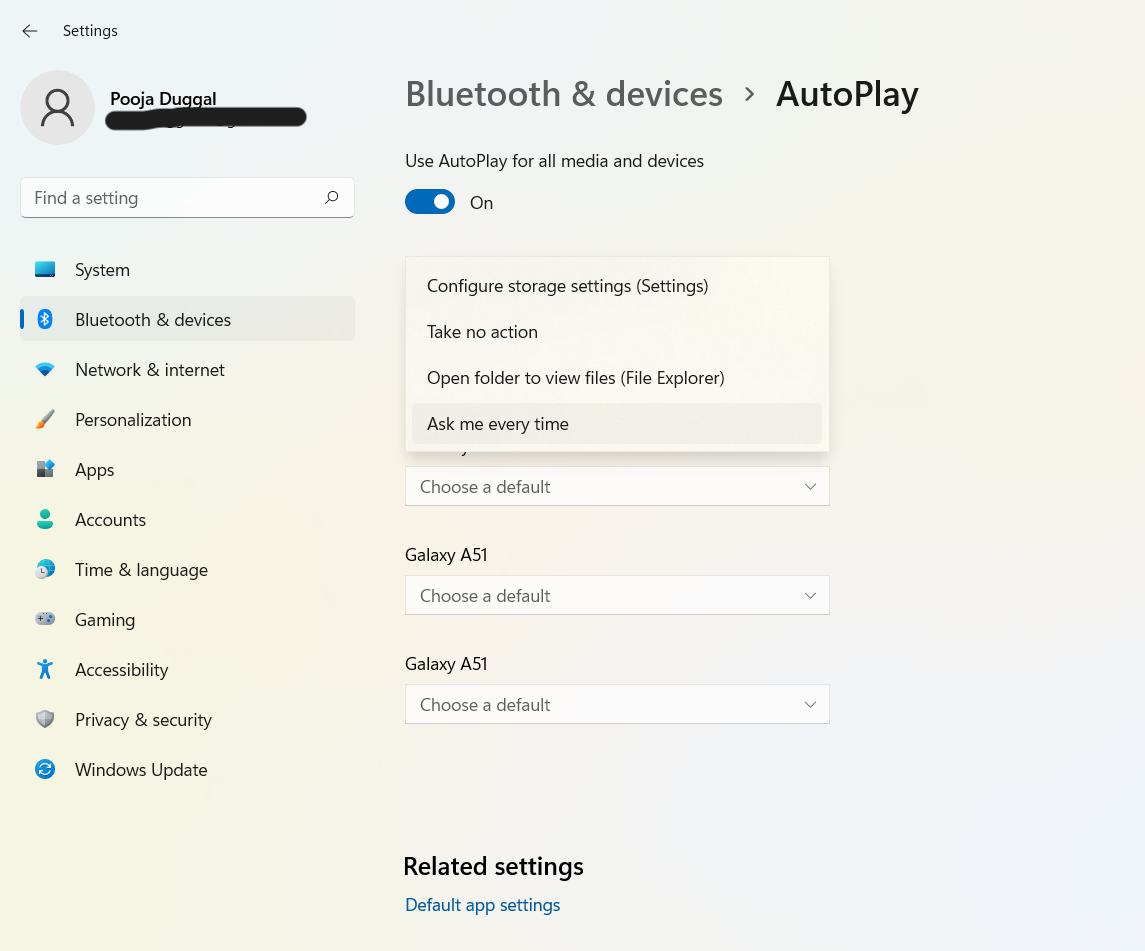
4. If you turn on AutoPlay, then you can Choose AutoPlay defaults for any listed media and devices.
5. Now, you can close Settings.
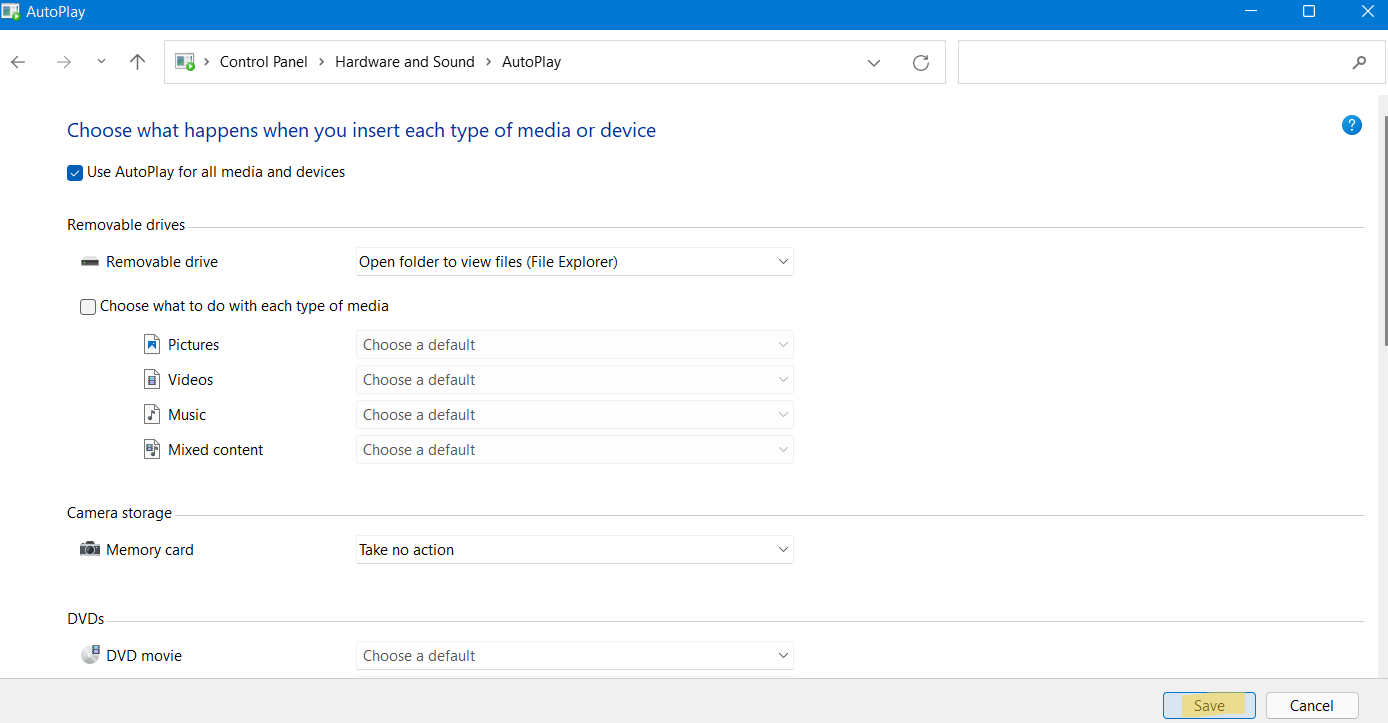
Method 2: Enable or Disable AutoPlay Through Control Panel
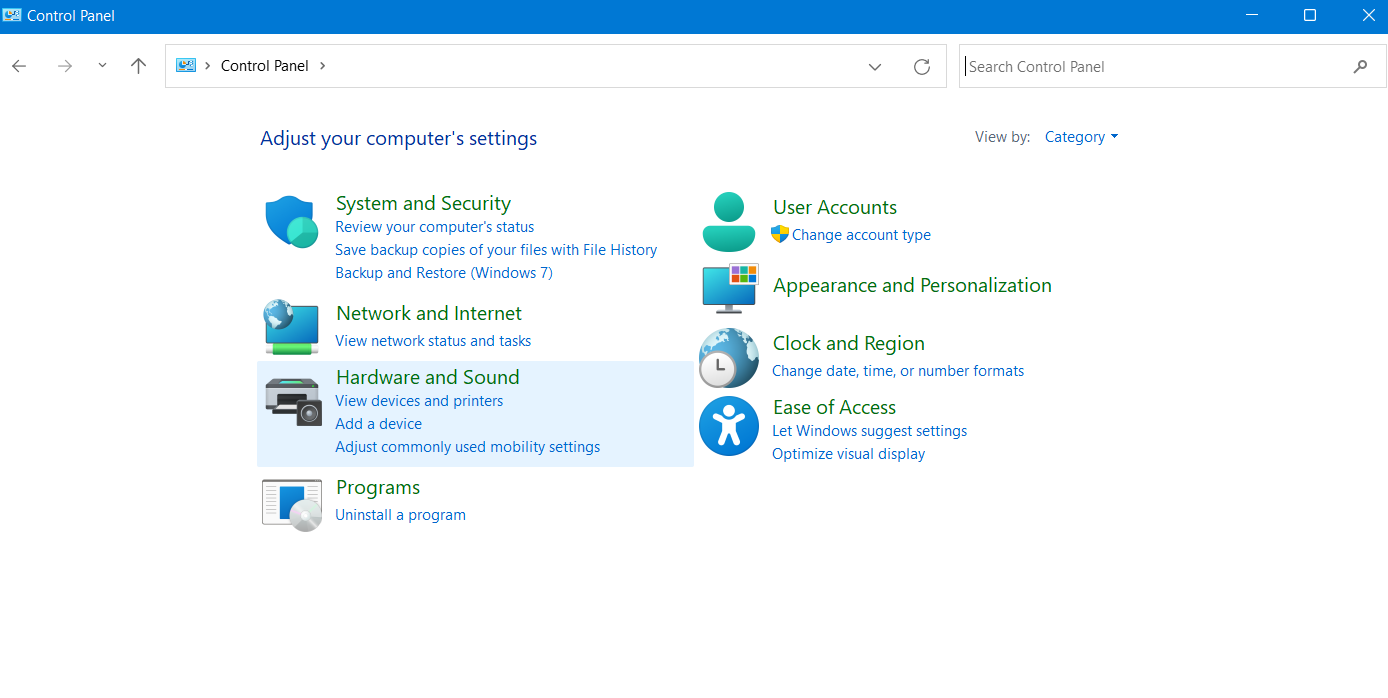
1. Firstly, open Control Panel and go to Hardware and Sound.
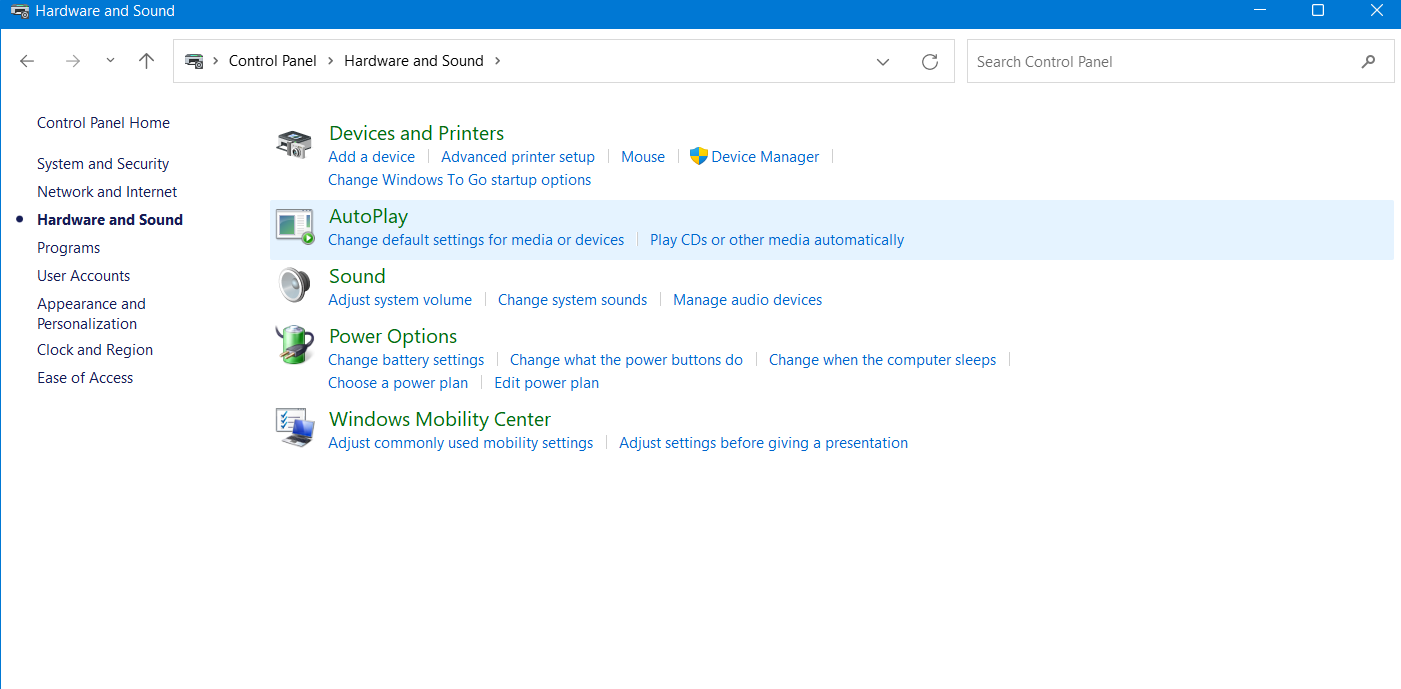
2. After that, tap on AutoPlay.
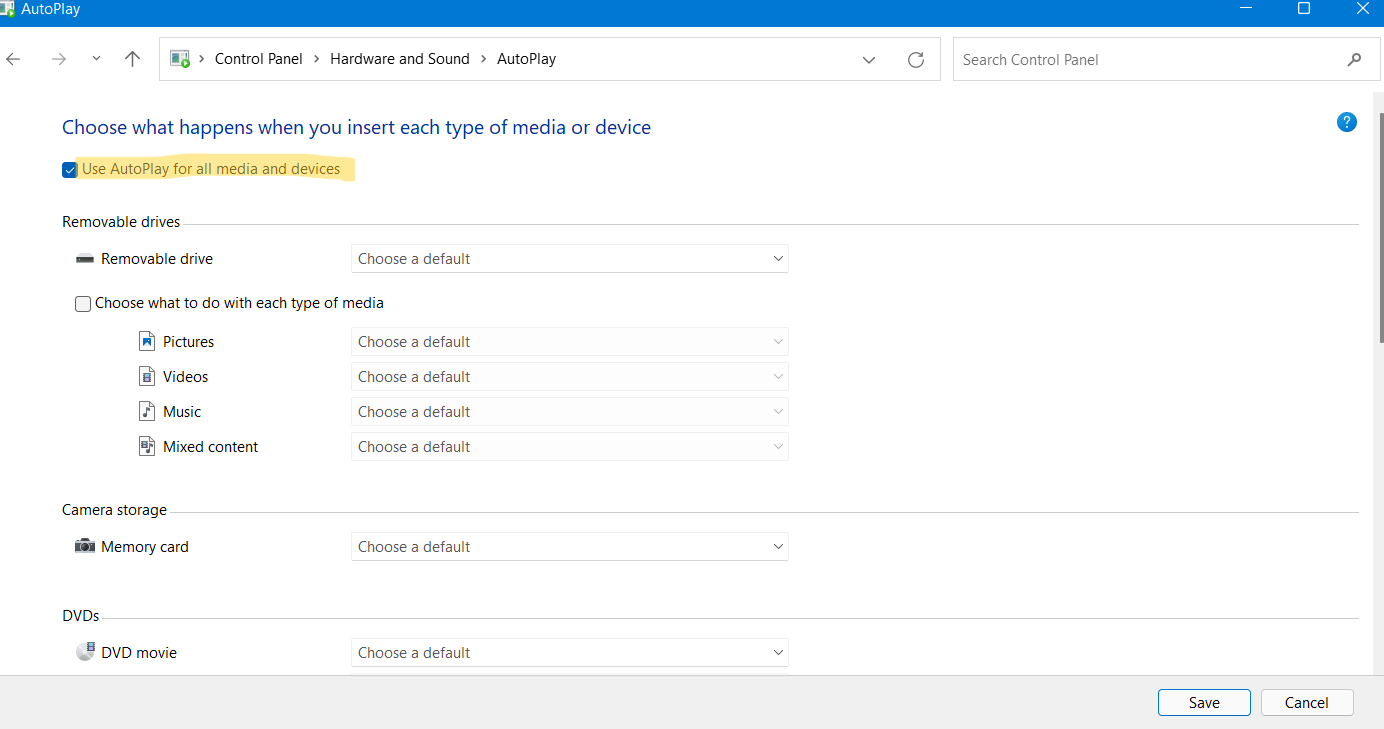
3. Next, you can check or uncheck the box present next to Use AutoPlay for all media and devices.
4. If you turn on AutoPlay, then you can Choose a default for any listed media and devices.
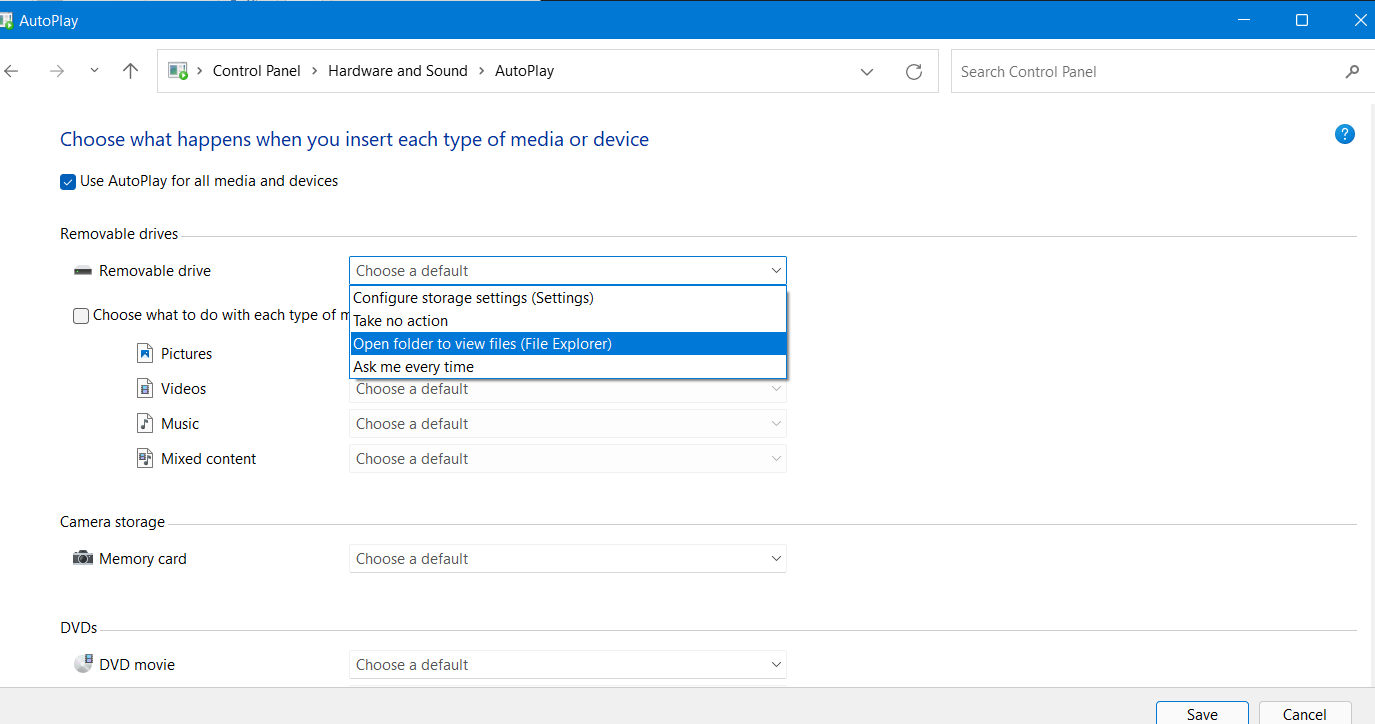
5. Now, click on the Save tab and exit Control Panel.
Method 3: Enable or Disable AutoPlay Through Registry Editor
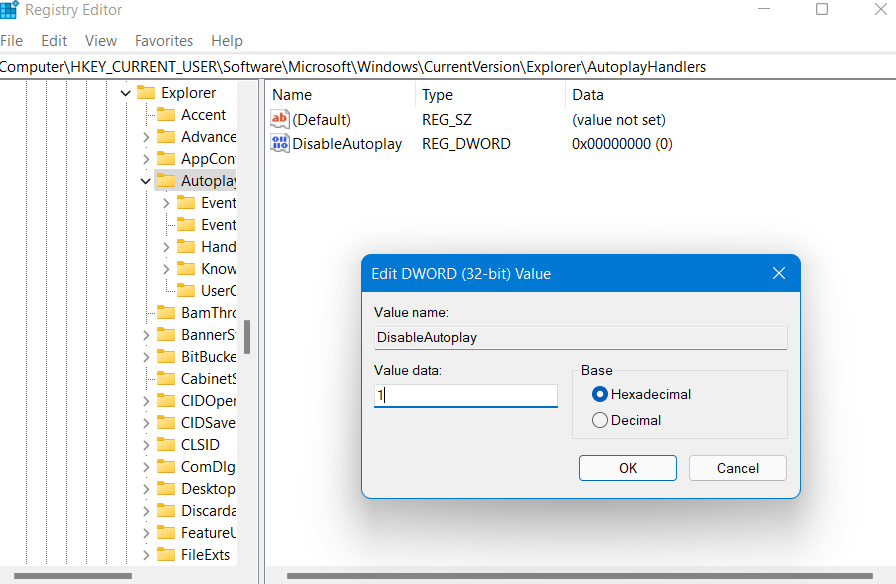
1. Firstly, open Windows Registry. To do so, type regedit in the Run dialog box.

2. After that, navigate to the following location:
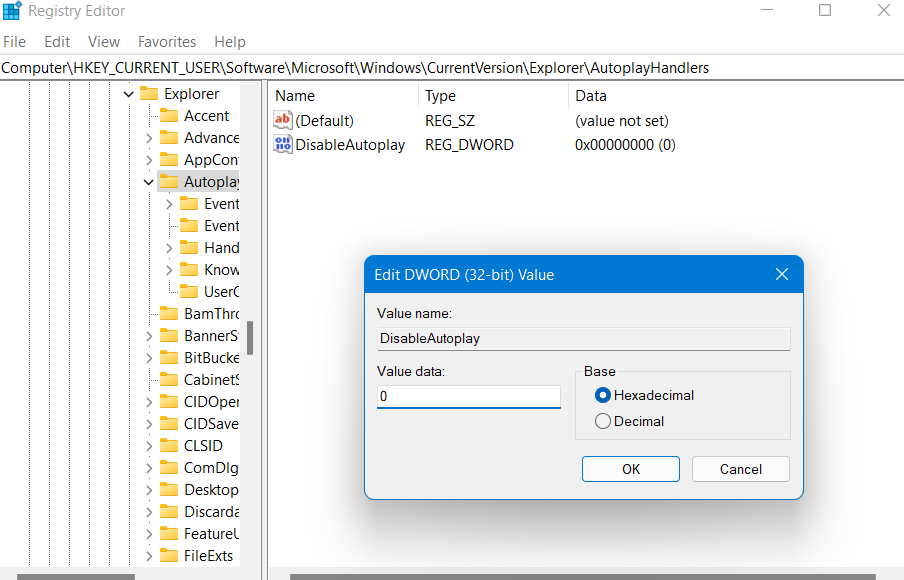
HKEY_CURRENT_USER\Software\Microsoft\Windows\CurrentVersion\Explorer\AutoplayHandlers
3. To enable AutoPlay, right-click on DisableAutoplay and change the value data to 1.
Or
To disable AutoPlay, right-click on DisableAutoplay and change the value data to 0.
4. Lastly, restart your system to apply the changes.
So, these are some methods to turn on or off AutoPlay in Windows 11.