Microsoft Defender SmartScreen protects your Windows 11 system against potential threats and malicious software. It does so by checking web content and downloaded files on your PC. Before you open potentially unsafe or unknown downloaded file, it will display a warning. So, your system remains safe when Microsoft Defender SmartScreen is enabled. Now, let’s see how to enable/disable Microsoft Defender SmartScreen!
In this post, learn about some of the easiest ways to turn on or off Microsoft Defender SmartScreen in Windows 11. Now, have a look at the methods listed below to enable or disable this feature on your own hassle-free!
Page Contents
Enable/disable Microsoft Defender SmartScreen in Windows 11
Method 1: Enable or Disable Microsoft Defender SmartScreen Using Windows Security
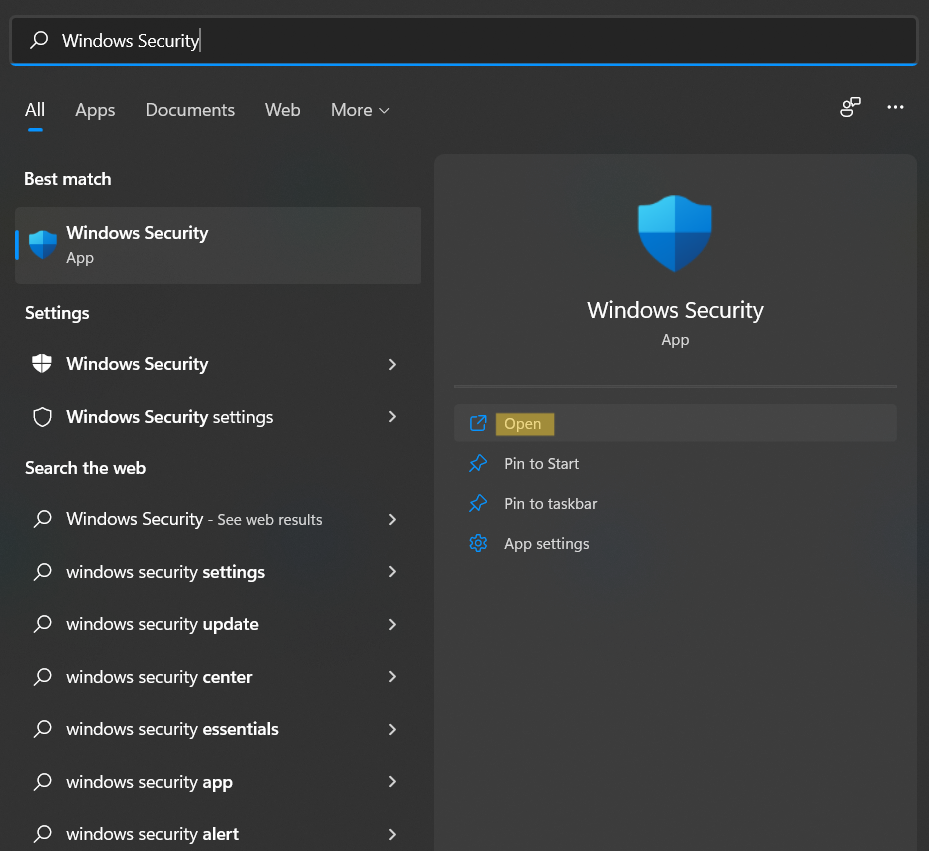
1. Open Windows Security through Windows Search.
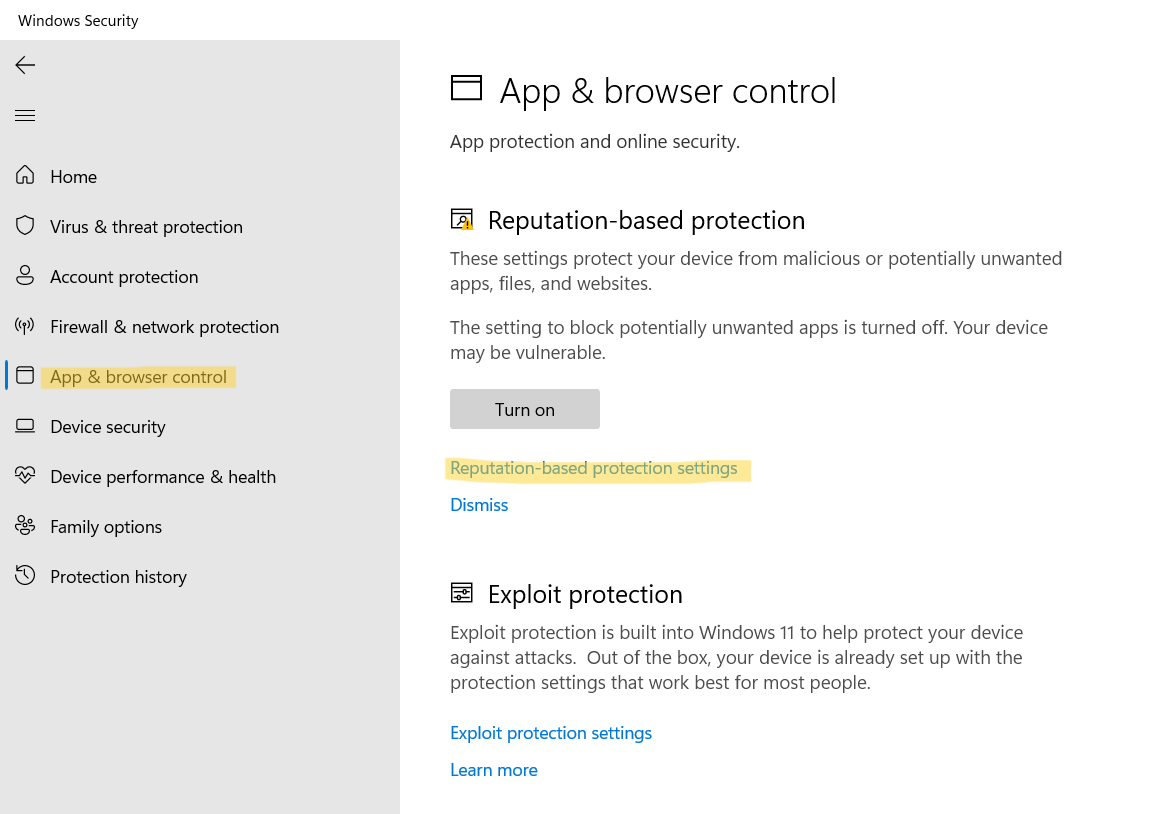
2. After that, go to App & browser control. Under the Reputation-based protection tab, click on the Reputation-based protection settings.
3. Now, turn On the toggle for Check apps and files. If prompted by UAC, click on Yes.

So, this is how you can enable this feature. If you want to disable Microsoft Defender SmartScreen, then turn Off the toggle for Check apps and files.

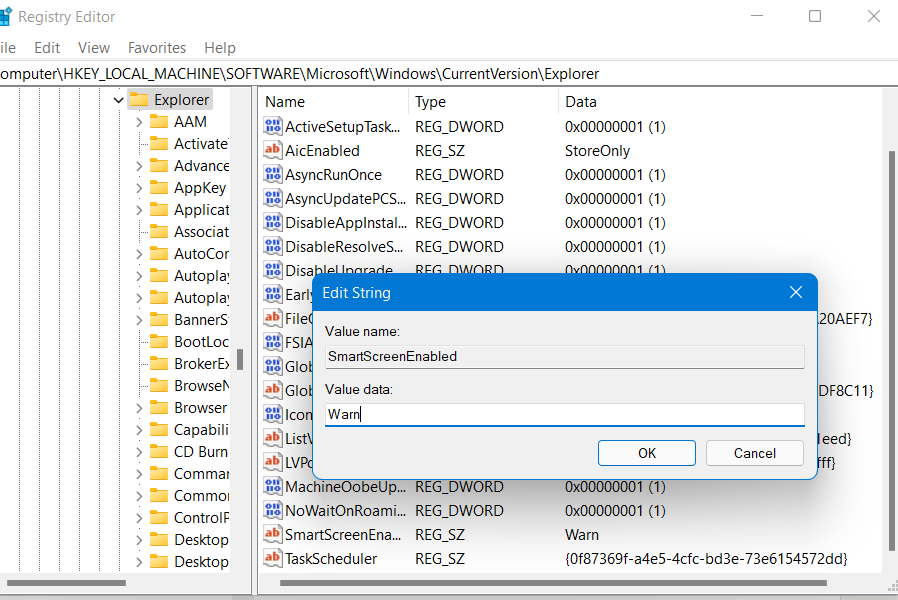
Method 2: Enable or Disable Microsoft Defender SmartScreen Using Registry Editor
1. In the first place, open Registry Editor by typing regedit in the Run dialog box. In order to open the Run dialog box, press the Windows + R tabs together on your keyboard.

2. Now, go to the following location:
HKEY_LOCAL_MACHINE\SOFTWARE\Microsoft\Windows\CurrentVersion\Explorer
3. Once there, scroll down and double-click on SmartScreenEnabled.
5. To turn on Microsoft Defender SmartScreen, change its value to Warn.
6. To turn off Microsoft Defender SmartScreen, change its value to Off.
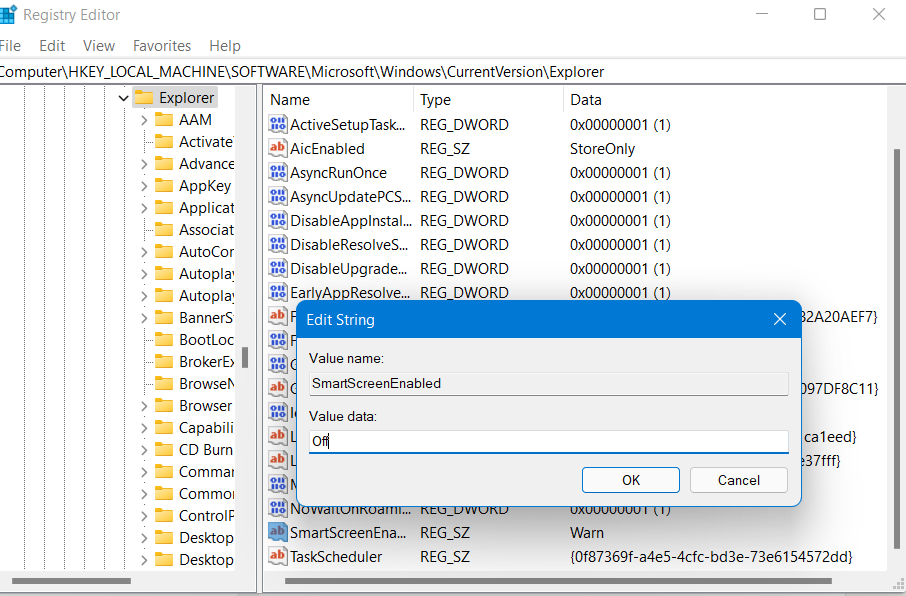
7. Now, exit Registry Editor and reboot your Windows system to apply the changes.
So, these are two easiest ways to turn on or off Microsoft Defender SmartScreen in Windows 11 PC. Select the one that works for you now!