
If you have MacOS, but you want to use Windows 11 on it, this guide is for you. You can easily install Windows 11 using a virtualization software such as VMware Fusion. The reason I am specifically referring to VMware Fusion because it is officially free for everyone. You do not need to separately purchase the VMware Fusion license. In this guide, I will show you the step-by-step instructions to install Windows 11 on Mac using VMware, which is a free software.
So without wasting the time anymore, let’s start this detailed guide.
Page Contents
Install Windows 11 on Mac using VMware Fusion
Requirements
- A device with MacOS running, preferably the latest MacOS version.
- Windows 11 ARM ISO file, available as free download from Microsoft’s website (https://www.microsoft.com/en-us/software-download/windows11arm64).
- VMware Fusion software that you can free of course download from Broadcom website.
- A decent Internet connection to download ISO file and VMware Fusion and configure Windows 11 VM.
- Windows 11 genuine license/product key. Note that you’re not allowed to use Windows 11 without proper license.
Part 1: Downloading VMware Fusion
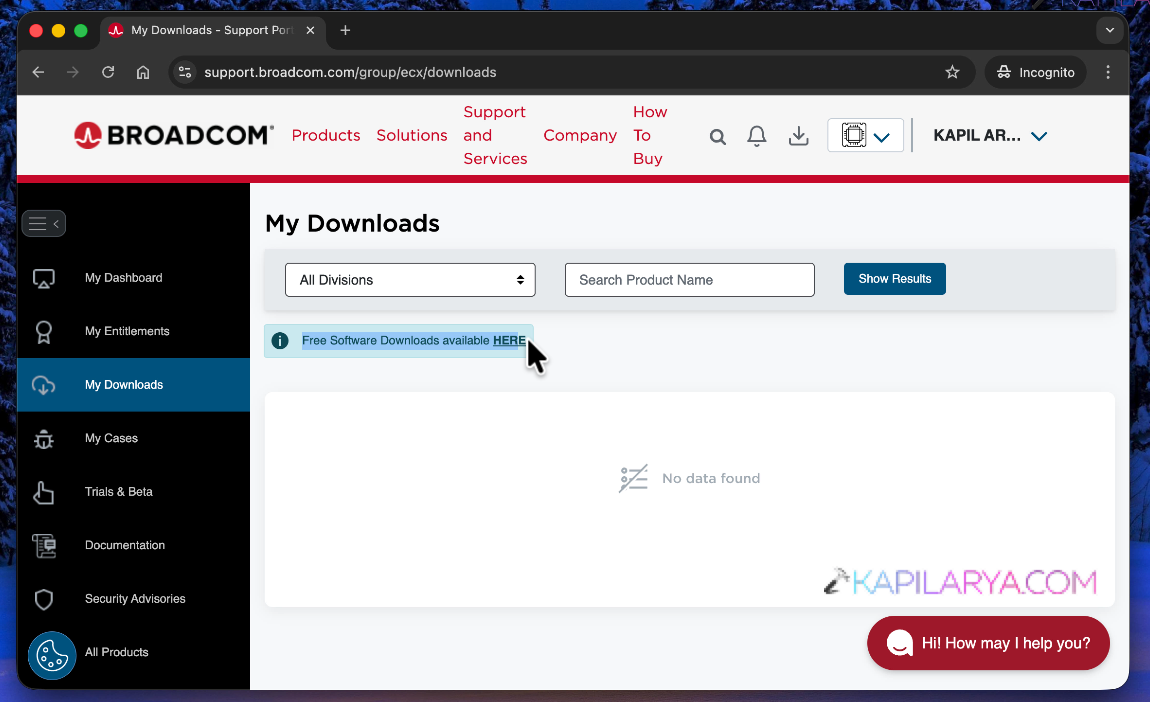
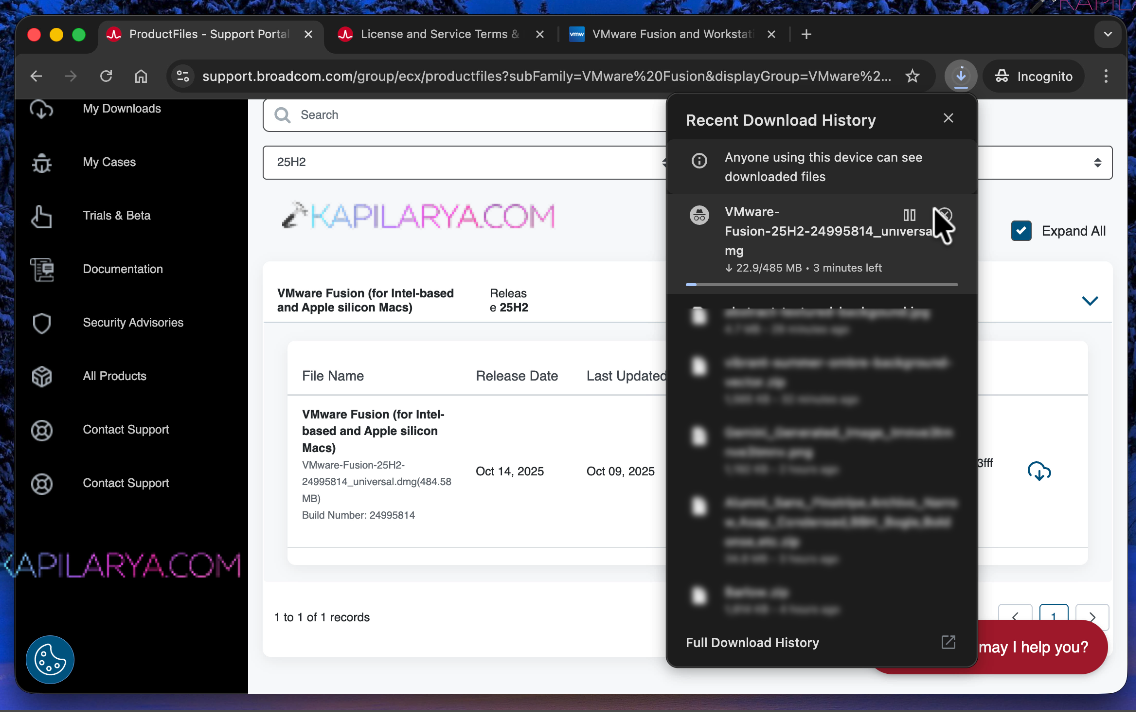
1. Login to Broadcom customer support portal (https://support.broadcom.com/group/ecx/free-downloads). Then go to My Downloads. Then locate ‘Free software downloads available HERE’. Click on ‘HERE’ link there.
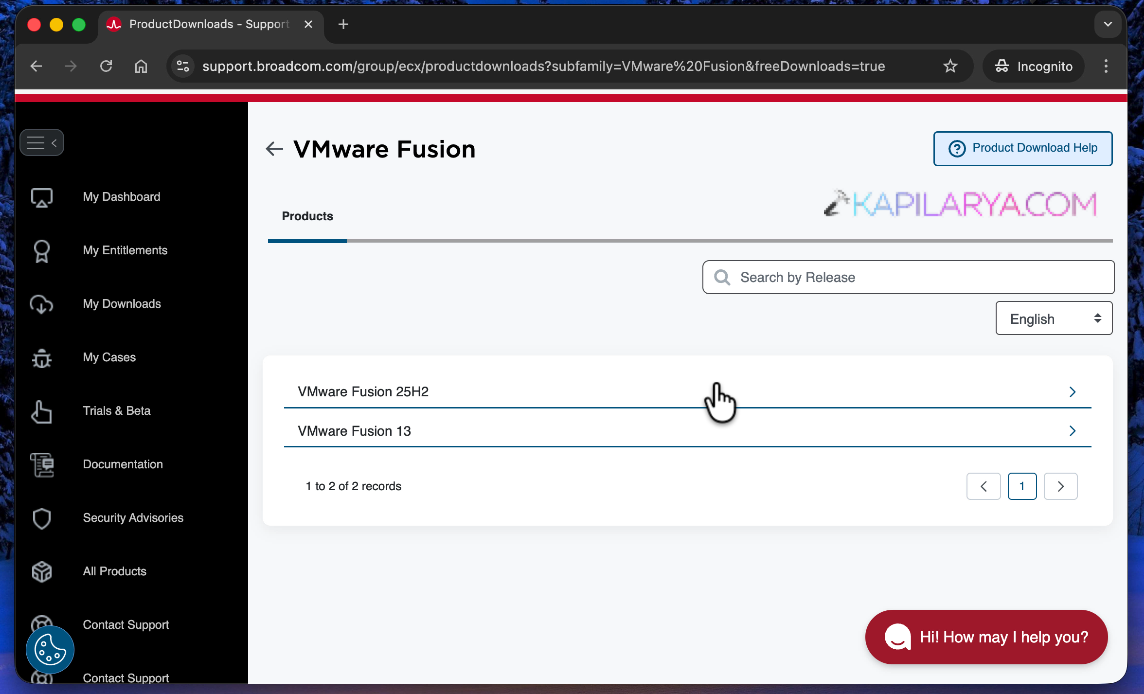
2. On the next page you should be able to locate VMware Fusion releases. Click on the software you want to download.
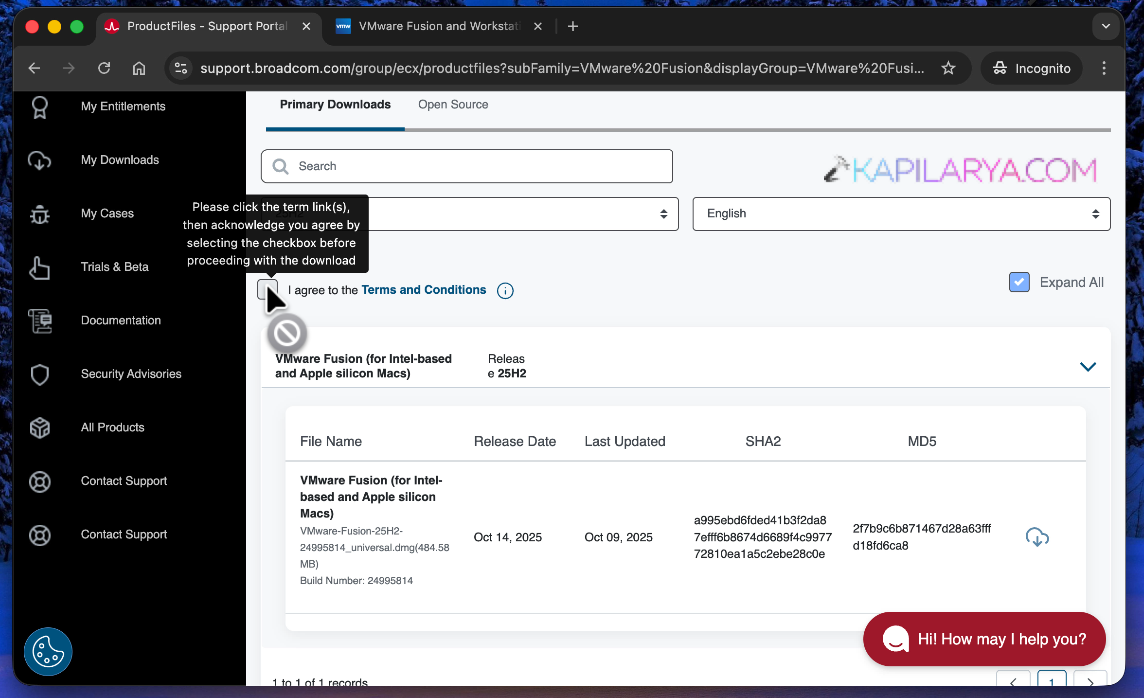
3. In the next page first click on Terms and Conditions link. This will open another page for terms and condition you can go through them. Then come back to this page and check mark ‘I agree to the Terms and Conditions’. Then click on the download icon next to the software you are opting to download.
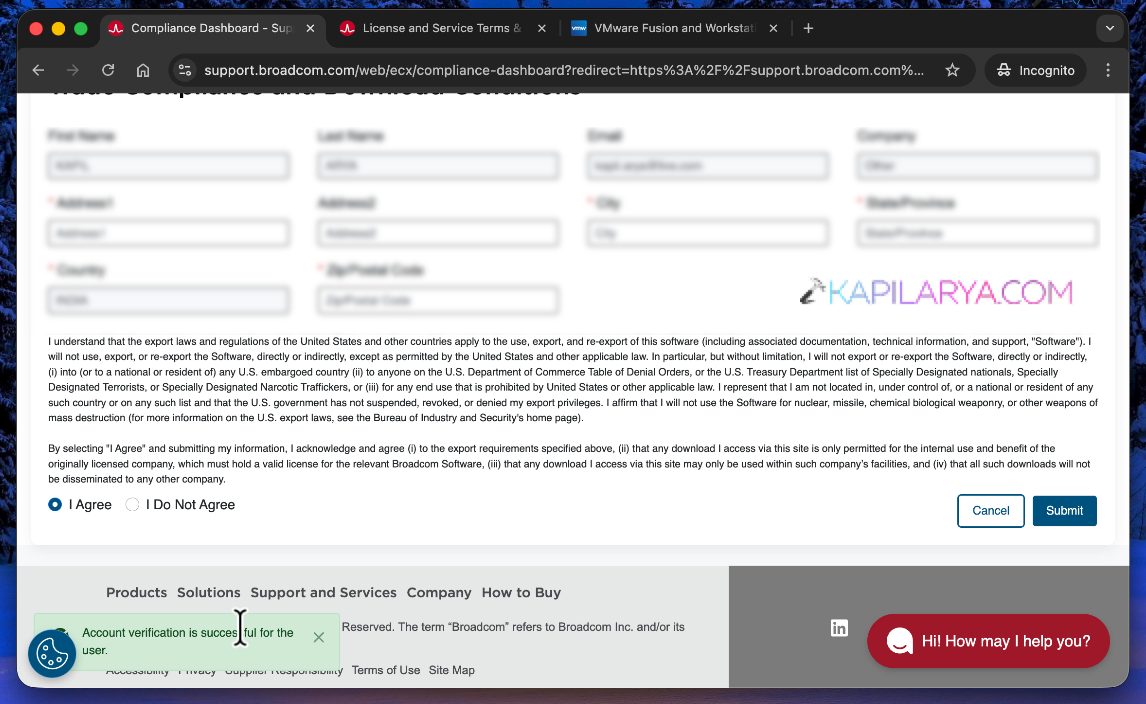
4. It may ask you to verify your details prior to download. Just fill out your details and click on Submit button in the next page. Once you receive account verification is successful for the user you should be redirected to the previous page automatically.
5. Now you are back to that product download page simply download the VMware Fusion by clicking on the cloud download icon.
Part 2: Creating Windows 11 Virtual Machine on VMware Fusion
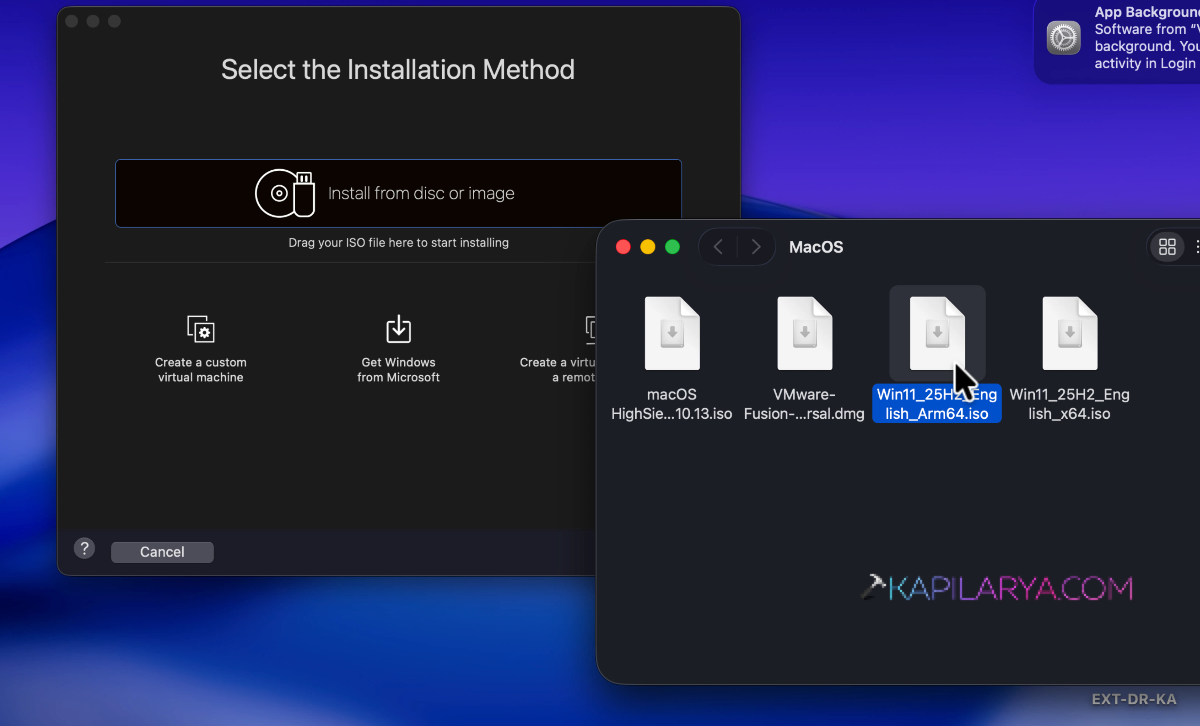
Assuming that you have already downloaded VMware Fusion using the Part 1 described in this guide, once you launch the DMG file, it will allow you to complete the installation of VMware Fusion. You can then try next steps to create Windows 11 virtual machine:
1. Under ‘Select the Installation Method’, you have to drop your Windows 11 ARM ISO file.
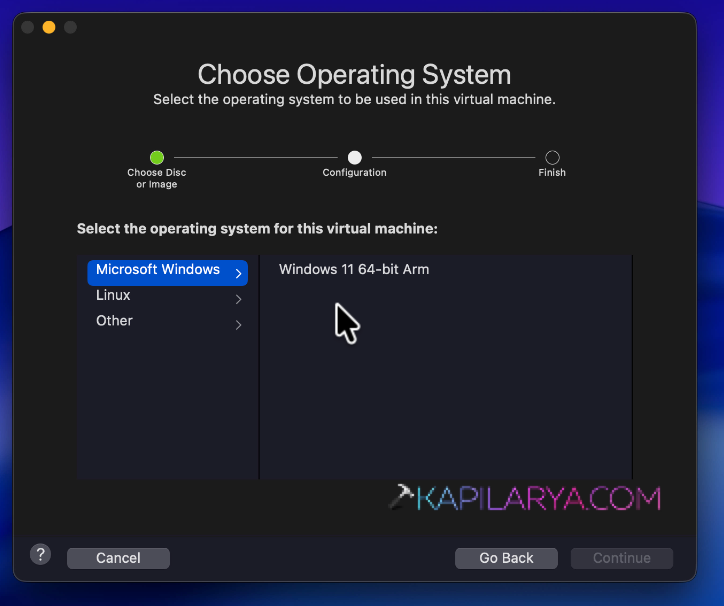
2. Under ‘Choose operating system’ click on Microsoft Windows > Windows 11 64-bit ARM.
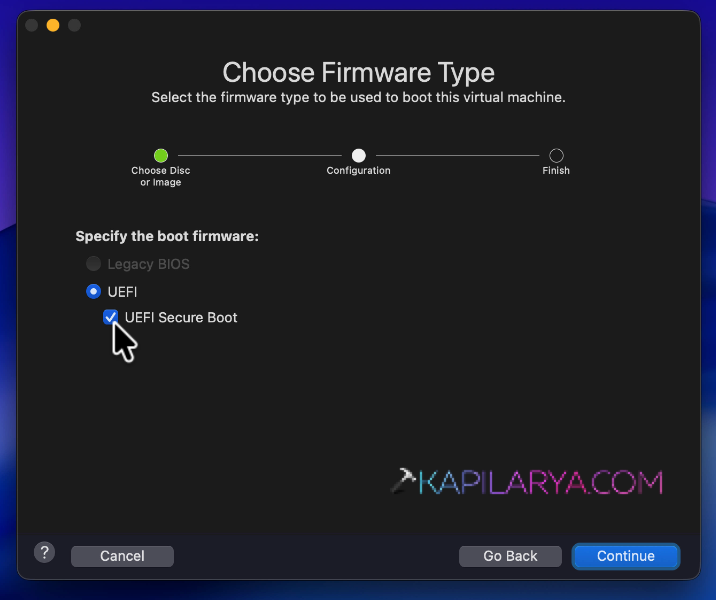
3. Under ‘Choose Firmware Type’, choose UEFI and then click UEFI Secure Boot.
4. Under Choose Encryption window, you have to type in a password and then verify it in order to encrypt the drive.
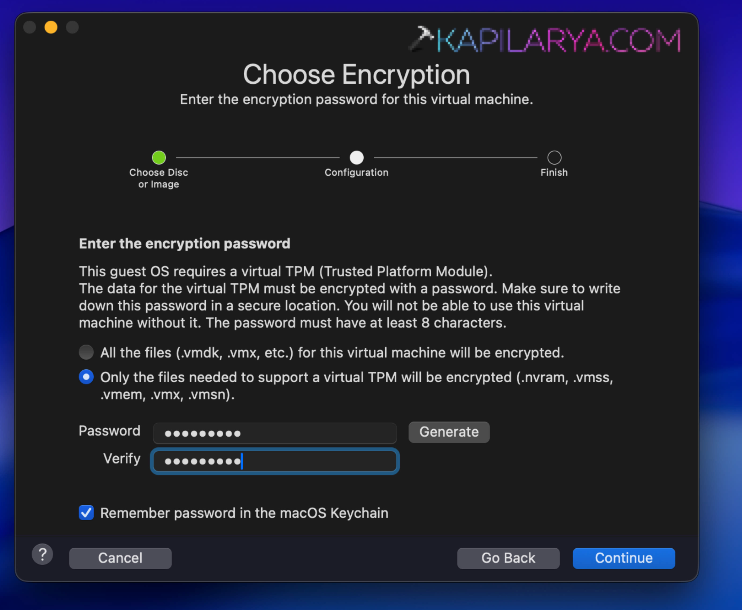
This encryption is required in order to enable the virtual TPM in order to fulfill the minimum requirements for windows 11. If you like you can check mark remember password in the macOS keychain option in order to prevent enter entering password when opening Windows 11 virtual machine.
5. Once you’re done with the configuration click on the Finish button.
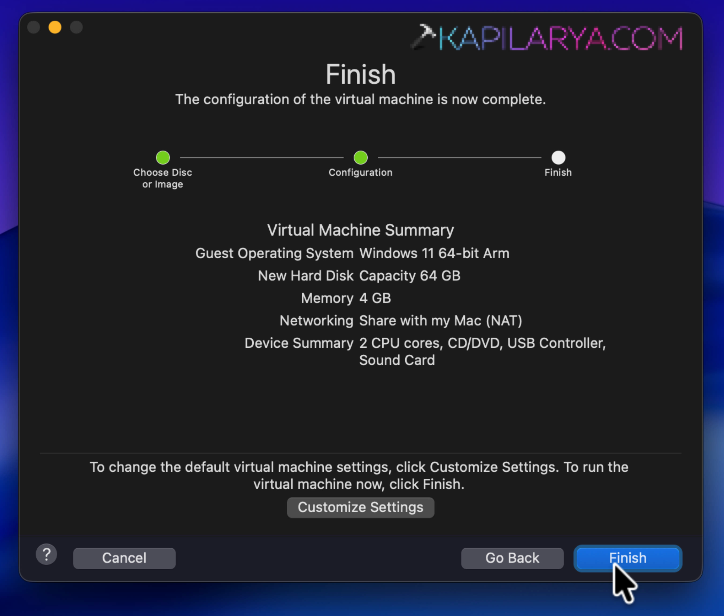
6. Next you will be asked to specify the name of the virtual machine for Windows 11.

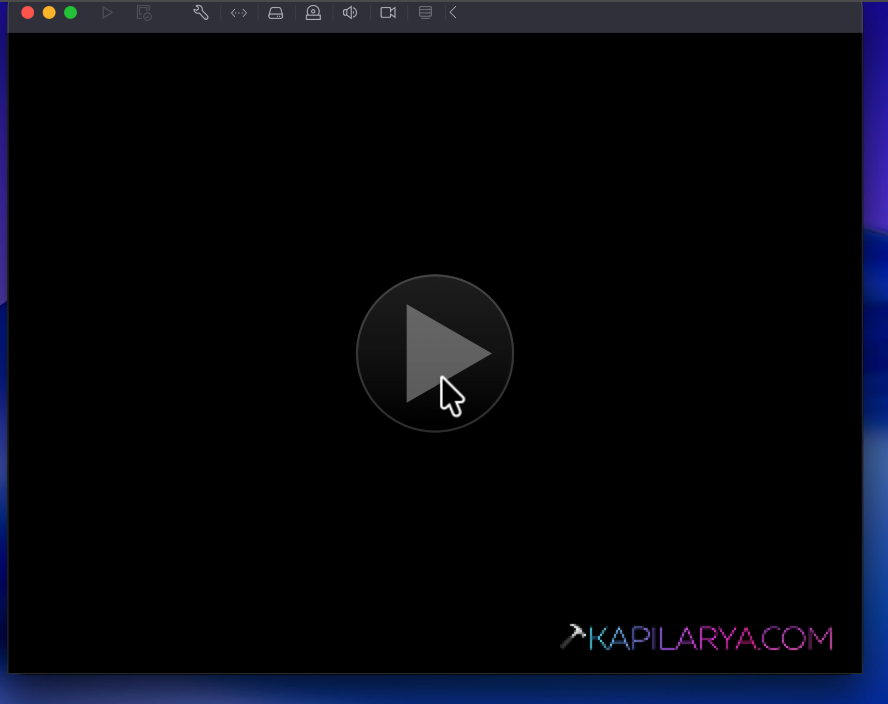
7. In this way, your virtual machine for Windows 11 is now ready to start. Click on the play icon to start the virtual machine.
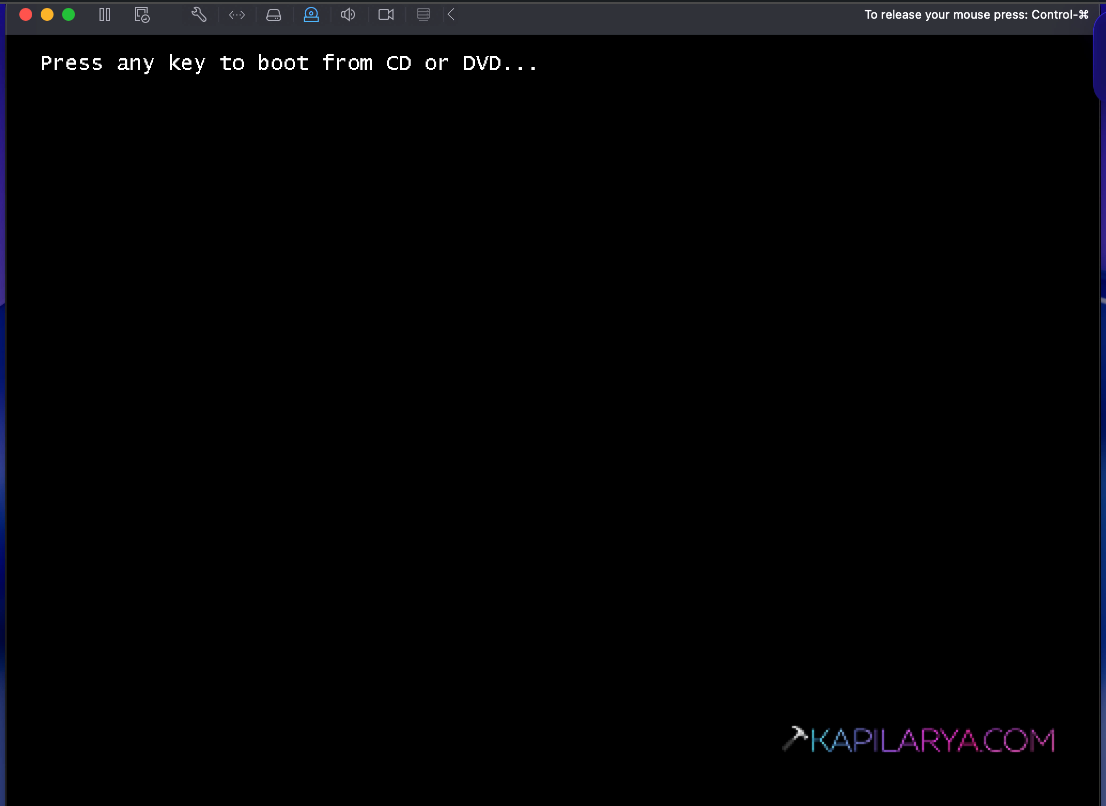
8. Quickly press any key to boot from the setup.
Part 3: Installing Windows 11 & OOBE Setup
When you complete the Part 2 successfully, you arrive to the installation for Windows 11.
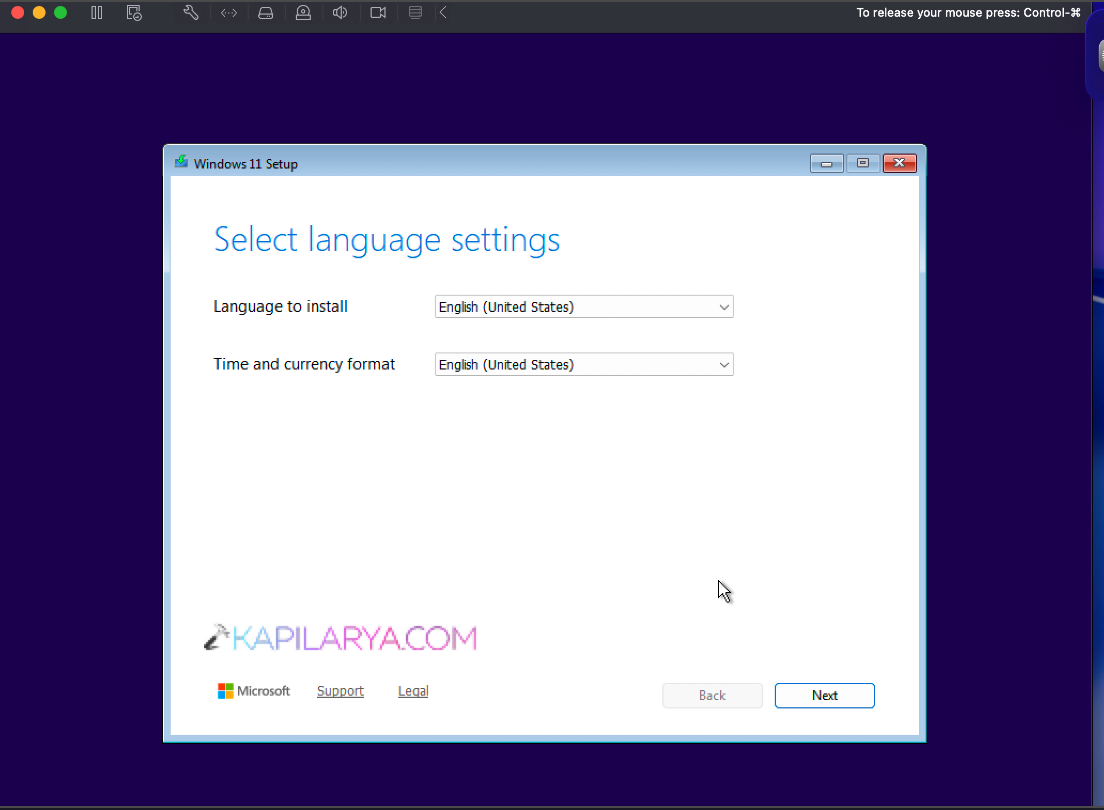
1. At the very first, choose the language to install Windows 11.
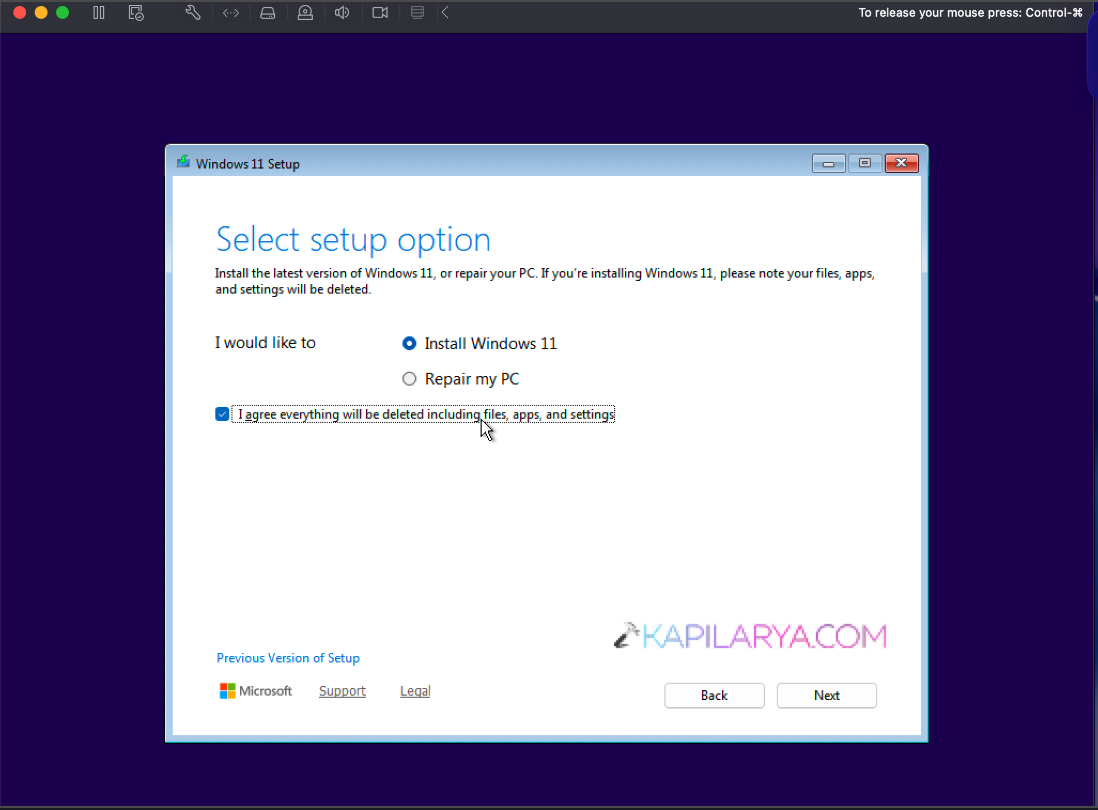
2. In the next Select setup option, choose Install Windows 11. Click Next, and then you can input your Windows 11 genuine product key, review licensing terms and complete setup window.
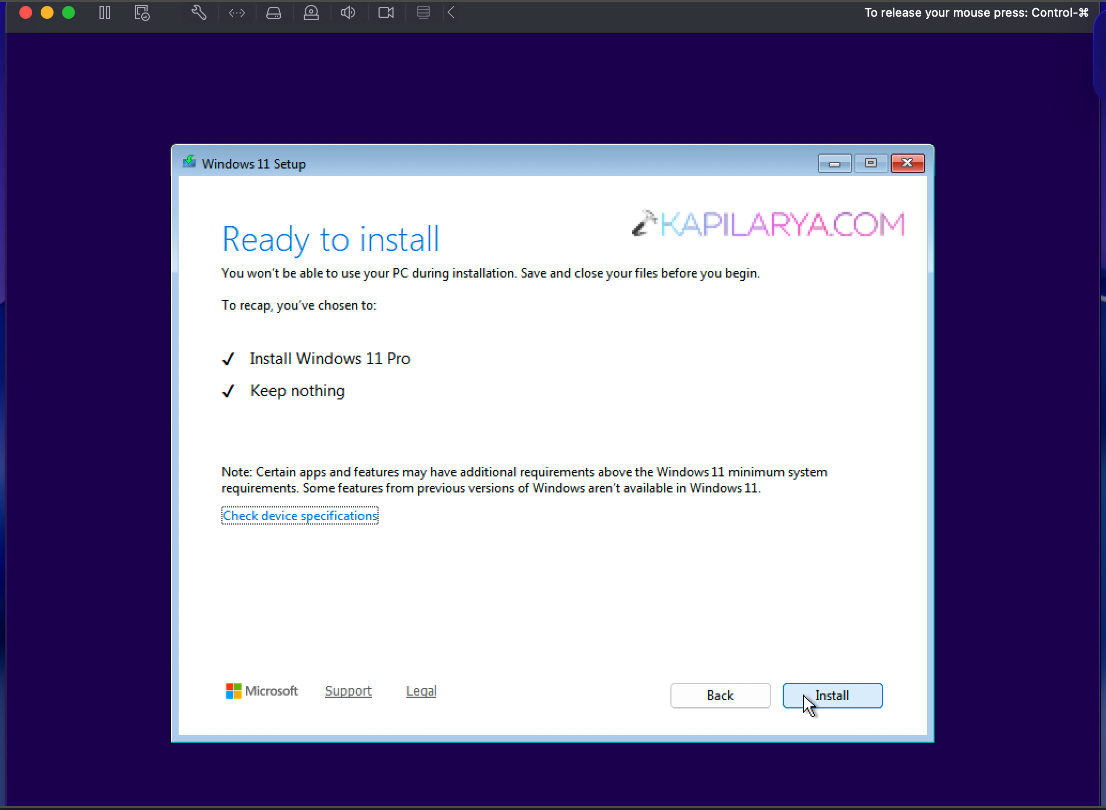
3. Under Ready to install screen, click on the Install button.
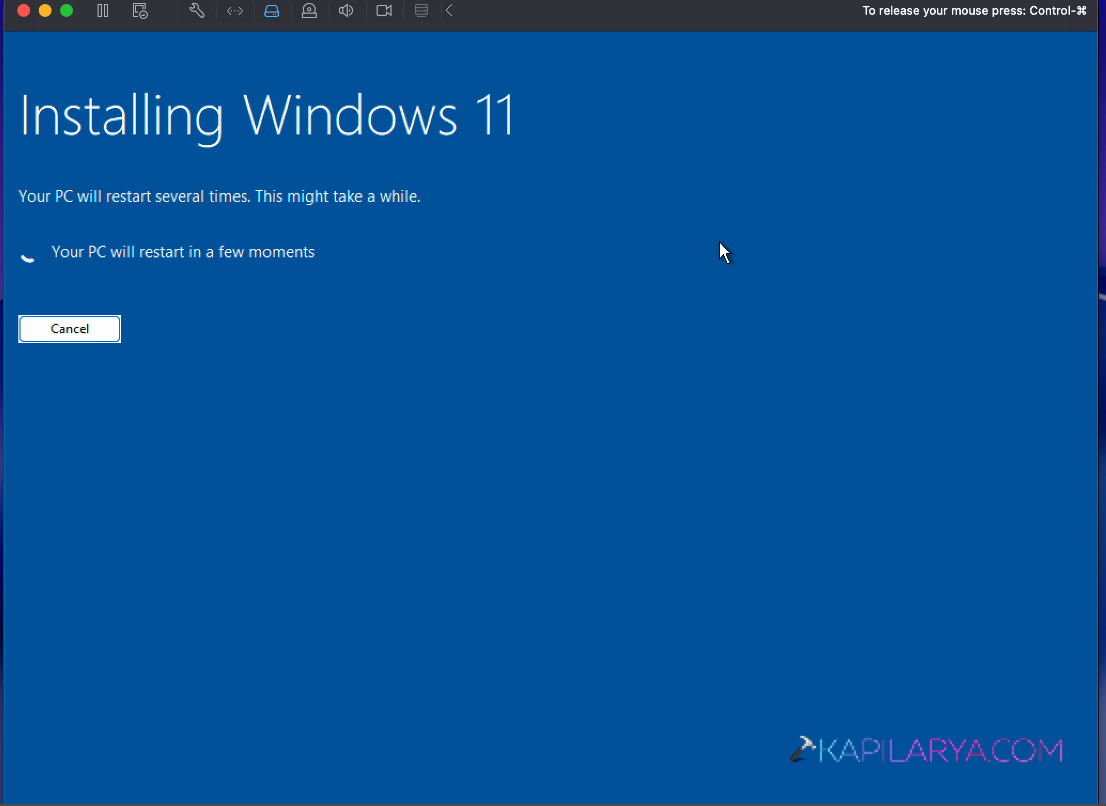
4. Now you will see that Windows 11 is being installed on your virtual machine it may take a while to complete. Your system will be automatically started once it is installed in order to proceed for OOBE setup.
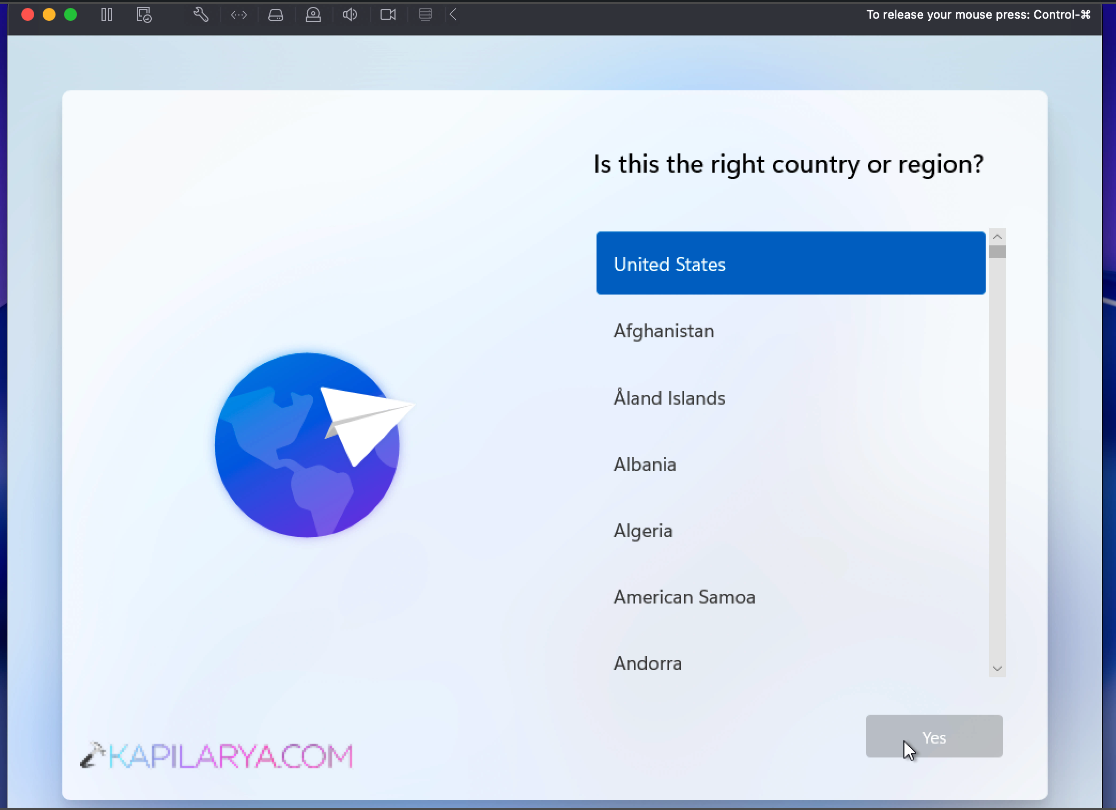
5. After the restart you have OOBE set up to configure. Choose the options relevant to you and proceed. You can take help of steps 11 to 28 of this clean install guide.
6. Once you complete the OOBE setup, you should be landed to the Desktop.
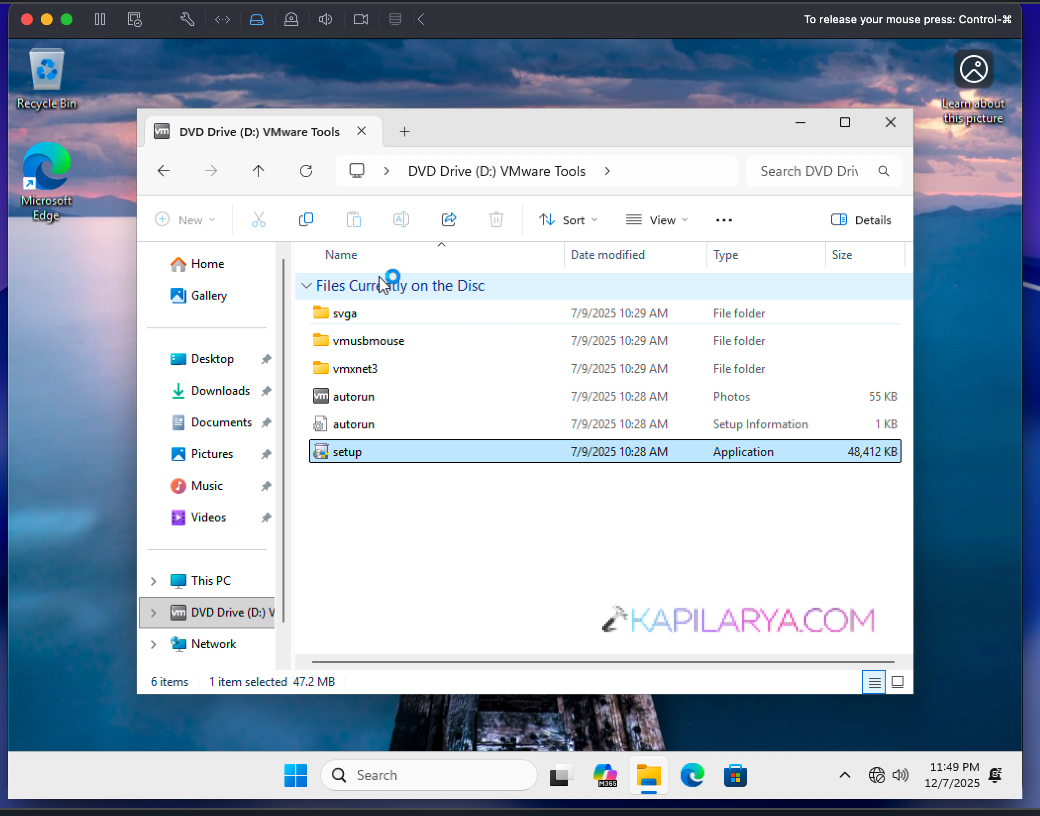
To enhance the experience with virtual machine, you can install the VMware tools already mounted to the DVD drive of your virtual machine. Once the VWware tools are installed, you should be able to customize the screen display and have additional features supported for the virtual machine.
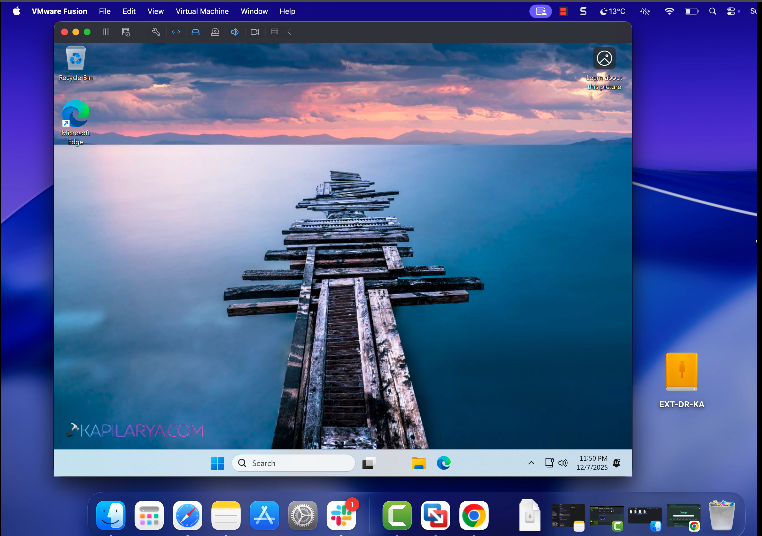
7. Finally, you are on the Windows 11, while running on Mac using VMware Fusion. You can start using it as required.
Video guide
To help you with above steps, I’ve create detailed video guide which can refer:
That’s it!


![[GUIDE] How To Make Clean Install Of Windows 10](https://www.kapilarya.com/assets/windows_10_wallpaper_1705148703-768x432.png)