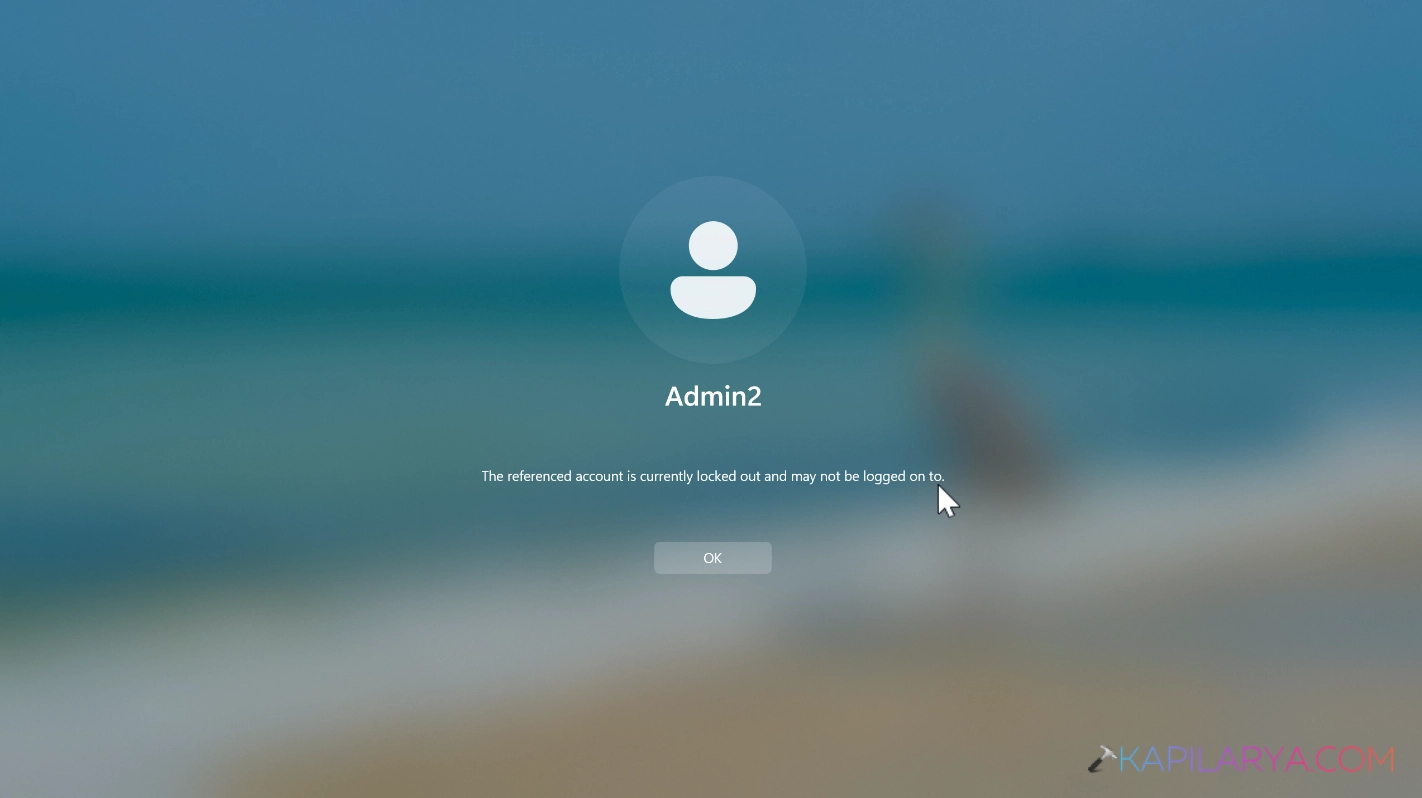
While signing into Windows 11, you have some limited attempts to login. For example, if you enter the wrong password multiple times, there is a limit that your account can be locked out. This limit is called login lockout threshold. Basically, when your system hits this limit, you might receive The referenced account is currently locked out and may not be logged on to error. In this article, we will see how you can fix this problem.
Page Contents
Fix: The Referenced Account is Currently Locked Out in Windows 11
So as I said earlier this error may appear due to input of wrong password multiple times. Once the lockout occurs, it may be for a certain duration. Mostly it is for 10 minutes to 30 minutes. In such a condition, you can certainly wait for that time. After this time, Windows may allow you to login normally. After logging into the account, you can try following methods to avoid this error in future.
Method 1: Using Terminal
1. Right click on the Start button and select Terminal (Admin).
2. By default the Terminal (Admin) app opens to Windows PowerShell.
3. In the PowerShell tab, paste or type this command:
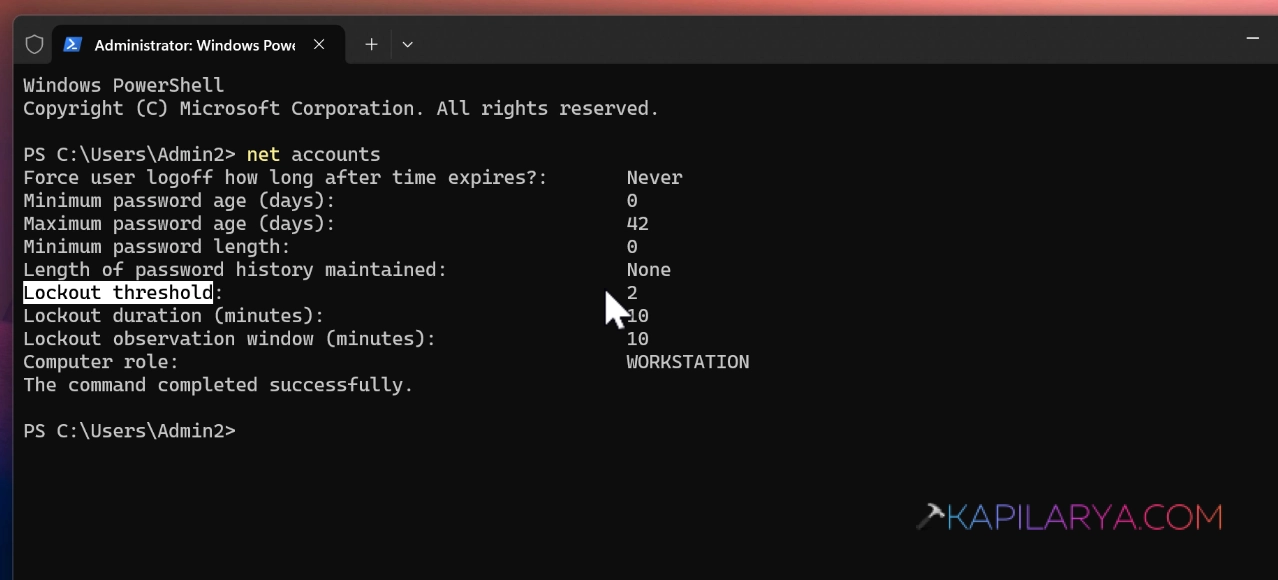
net accounts
4. Now notice the output of this command execution. In the example, you can see in the below screenshot, Lockout threshold is set to 2. This indicates, if we enter the wrong password 2 times, the account will be locked out and we will see the error in the context. To avoid the error to occur, we have to change this value.
5. Type in the next command:
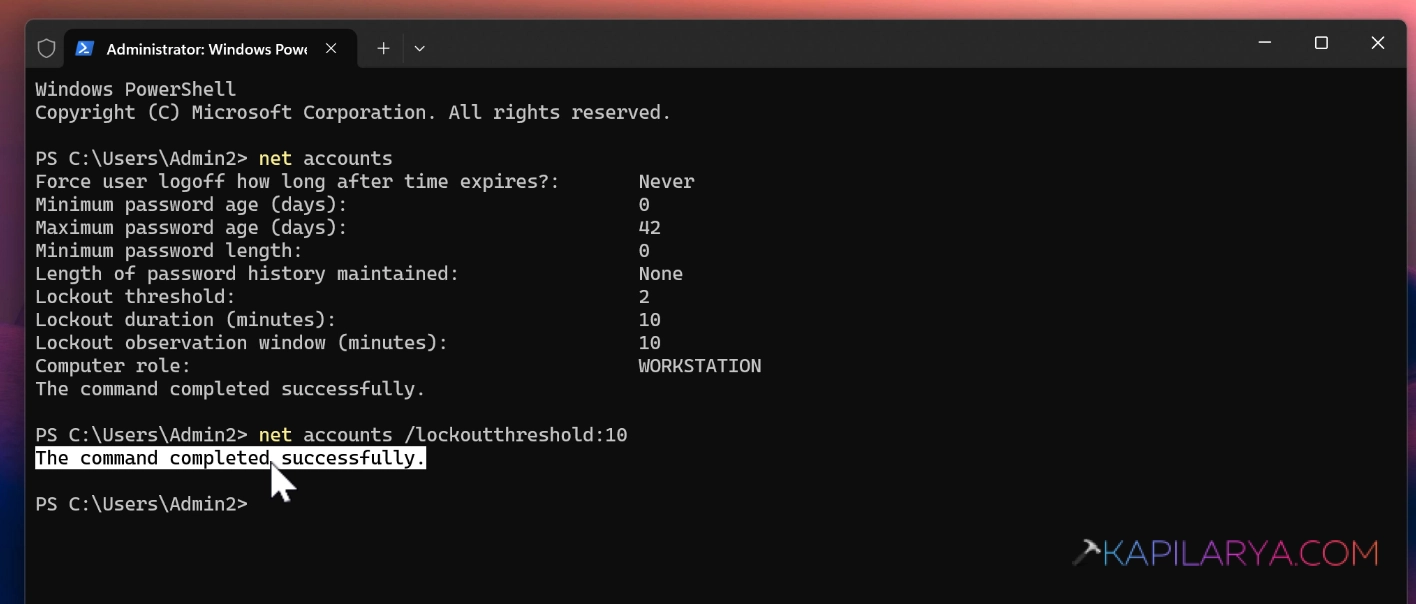
net accounts /lockoutthreshold:10
In the above command, I have used value 10. But you are free to use any value between 0 and 999. When you use the value 0, it would permanently disable account lockout.
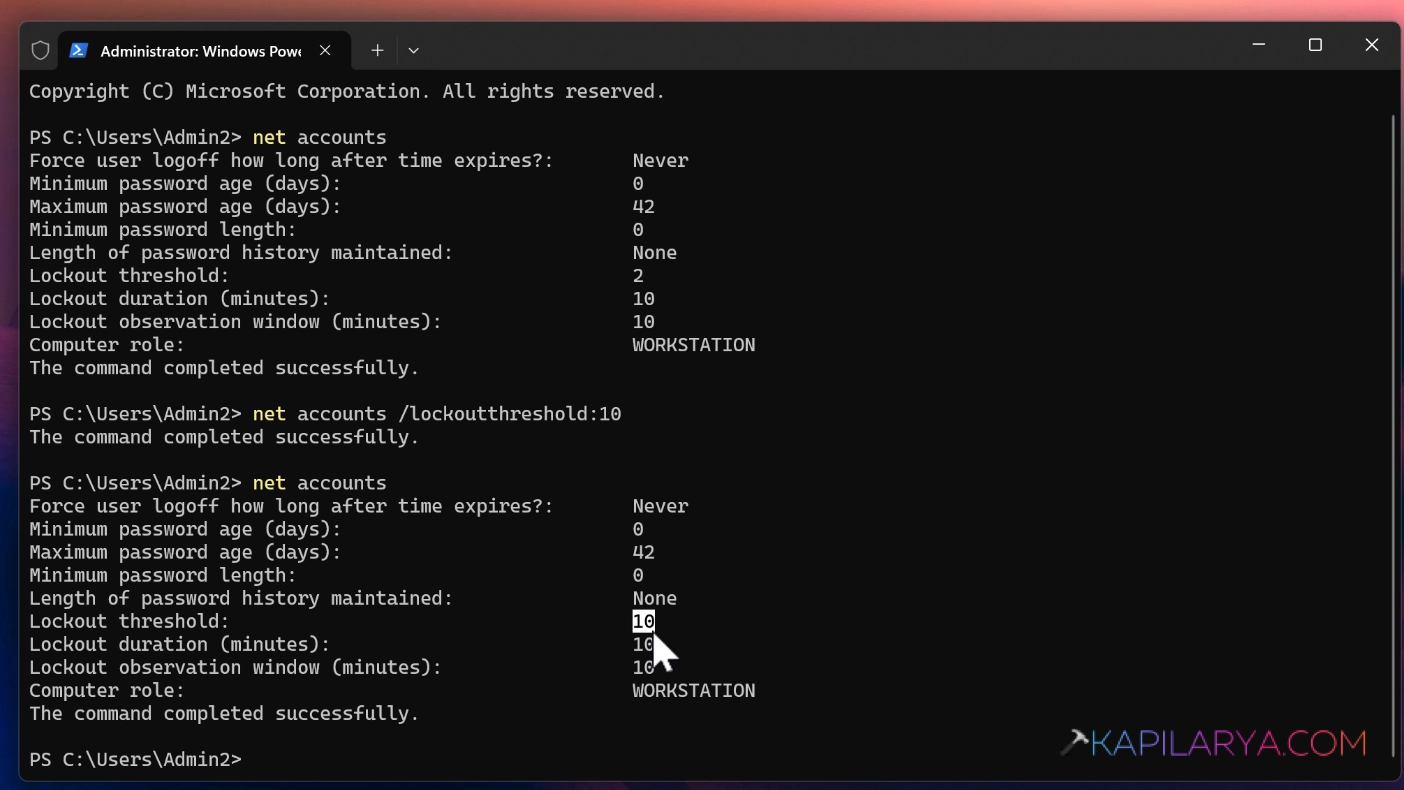
6. After executing the previous command, you can again run the net accounts command to confirm if the Lockout threshold value is changed.
7. Once done, you can close the Terminal app. After this you can avoid the error depending upon how you set the value for Lockout threshold.
Method 2: Using Security Policy Editor
1. Right click on the Start button and select Run. In run window type, secpol.msc and click OK.
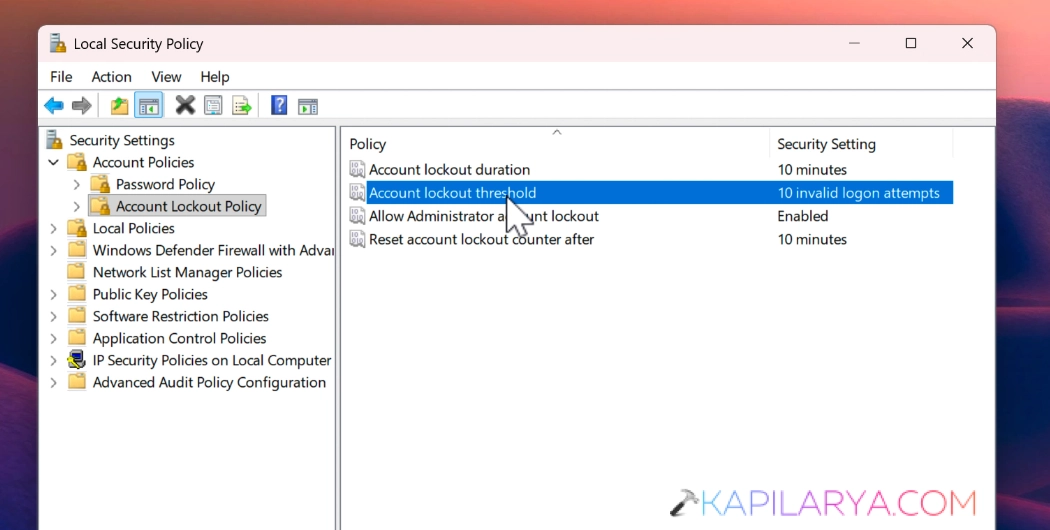
2. In Local Security Policy window, navigate to Security Settings > Account Policies > Account Lockout Policy. In the corresponding right pane, double click on Account lockout threshold.
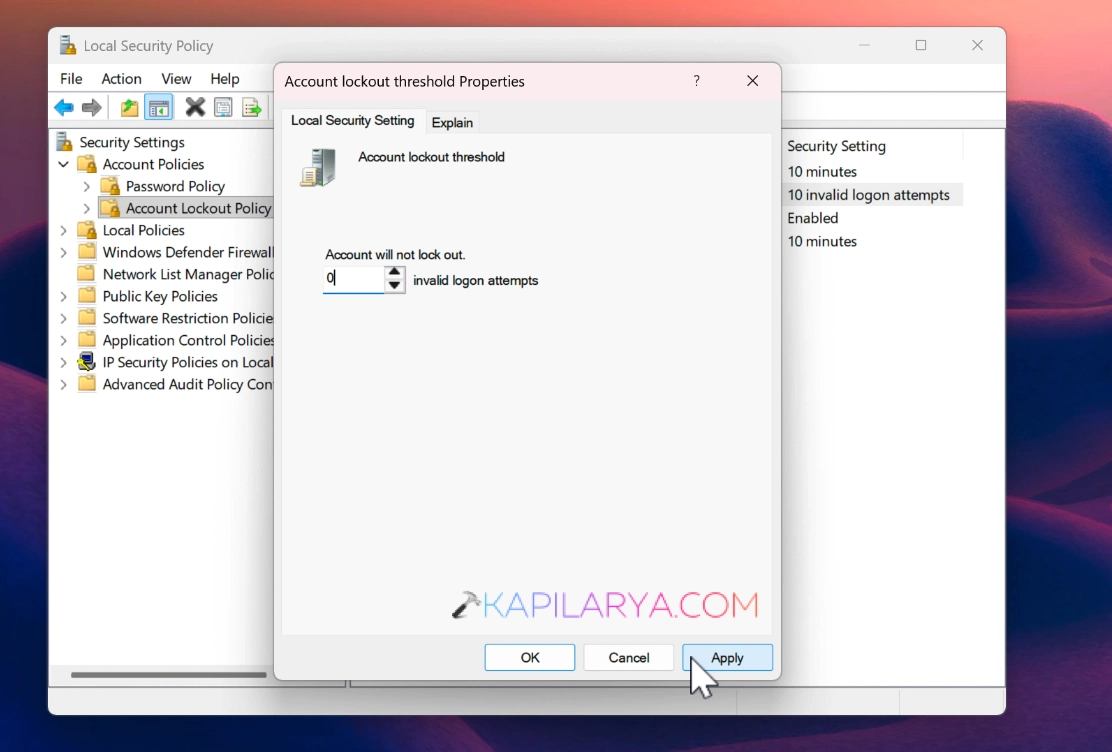
3. Now set the Value data to 0. The value 0 indicates that account will not lock out. If you like you can also input any other value between 0 and 999. Click Apply followed by OK.
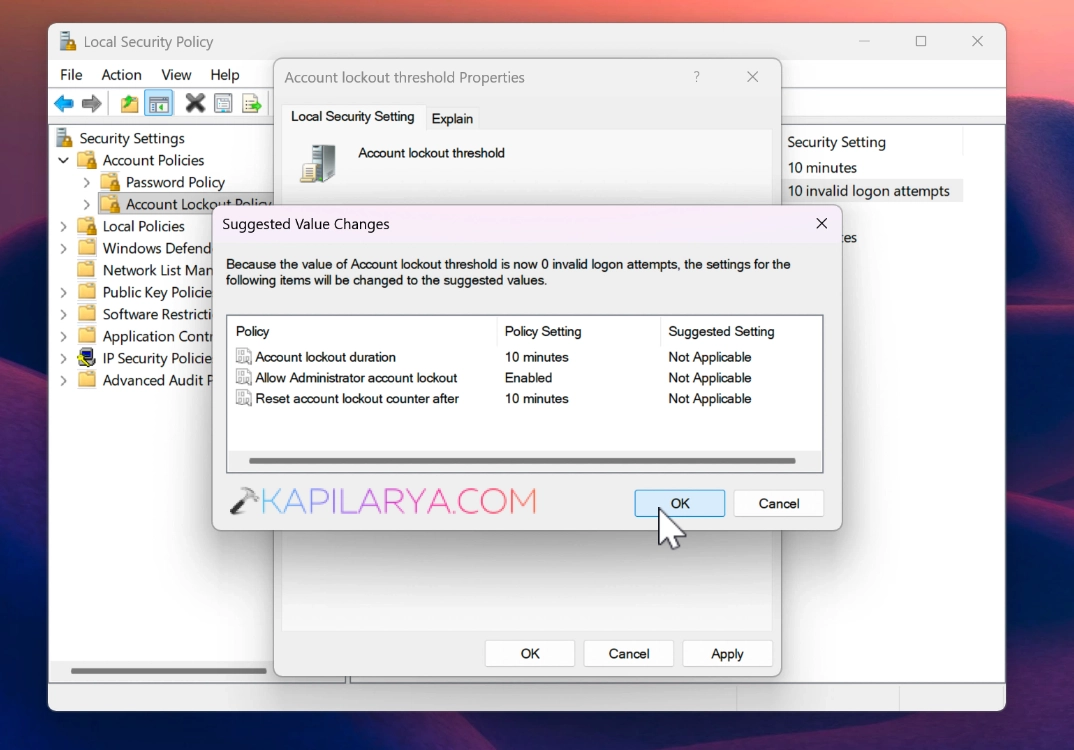
4. Based upon the value you input, Windows would automatically suggest you to change the related policies. In this example, I used 0 value, so Windows automatically suggested me to change other policies to Not applicable.
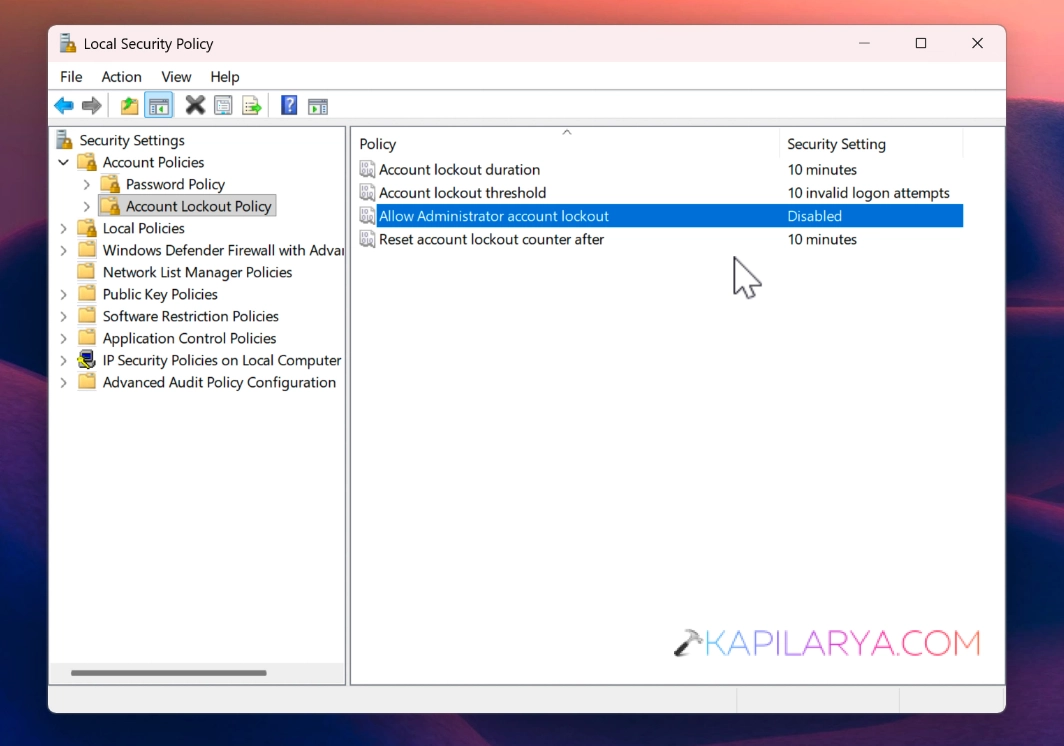
5. If you like, you can also set the policy setting Allow administrator account lockout to Disabled in case if you want the administrator accounts to never get locked out.
6. What about changes you made in the previous step, make sure to close the Local Security Policy editor window and restart your system to make them effective.
Video fix
You can also check out the following video fix, for more help on this:
That’s it!
![Windows needs your current credentials [Fix]](https://www.kapilarya.com/assets/password_icon_1783831080.jpg)