Is your Windows 11 PC caught in an endless cycle of restarting, leaving you frustrated and wondering how to put an end to this issue? You’re not alone. In this guide, we’ll explore the common causes behind the Windows 11 keeps restarting problem and provide effective solutions to the fix Windows 11 keeps restarting issue to regain control of your computer.
Common Causes:
- Driver Issues: Outdated or incompatible drivers can trigger frequent restarts.
- Software Conflicts: Conflicting or problematic software installations can disrupt system stability.
- Hardware Problems: Faulty hardware components may lead to unexpected reboots.
- Windows Updates: Failed or incomplete updates can result in reboot loops.
- Overheating: Excessive heat can force your system to restart as a safety measure.
- Malware: Malicious software can tamper with your system and cause continuous restarts.
- Power Settings: Incorrect power settings may trigger unwanted restarts.
Page Contents
Fix: Windows 11 keeps restarting
Fix 1: Change Windows Update Settings Causing Random Restarts
Windows 11 random restarts can be caused by changing Windows Update settings. This is because Windows Update needs to be compatible with the BIOS and software in order to run properly. If you are experiencing this problem, there are a few things you can try to fix it, such as disabling automatic restart, resetting Windows Update, or uninstalling recent updates.
You can change the Windows update settings causing random restart using the registry editor. To do so, follow the steps:
1. Press the Windows key + R. Type “regedit.exe” to open the registry.
2. Navigate to the following path:
Computer\HKEY_LOCAL_MACHINE\SOFTWARE\Microsoft\Windows
3. Now, you have to create a registry key called the “Windows Update” key.
To create a key, right-click on “Windows” and select “New => Key“.
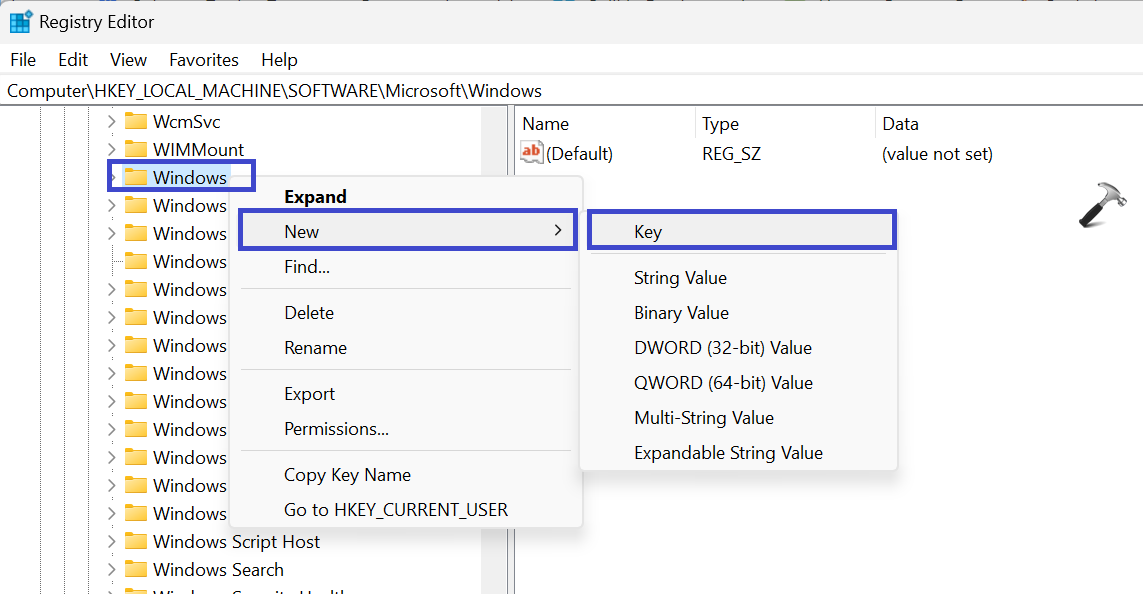
A prompt box will appear. Type “Windows Update” and click OK.
4. Now, again you have to create a registry key called “AU“.
To create a key, right-click on “Windows Update” and select “New => Key“.

A prompt box will appear. Type “AU” and click OK.
5. Right-click on the “AU” key and select “New => DWORD (32-bit) Value“.

A prompt box will appear. Type “NoAutoRebootWithLoggedOnUser” and click OK.
6. Now, double-click on the “NoAutoRebootWithLoggedOnUser” and click “Modify“.

Set the Value to 1 and click OK.
7. Close all the Registry Editor Windows and restart the PC. Check whether this helped you to Fix: Windows 11 keeps restarting issue.
Fix 2: Un-install the Latest OS Update
If you are experiencing random restarts on your Windows 11 computer after installing the latest OS update, there is a possibility that the update is causing the problem.
To fix this, you can try uninstalling the update. To do so, follow the below steps:
1. Open the Settings App and go to “Windows Updates“.
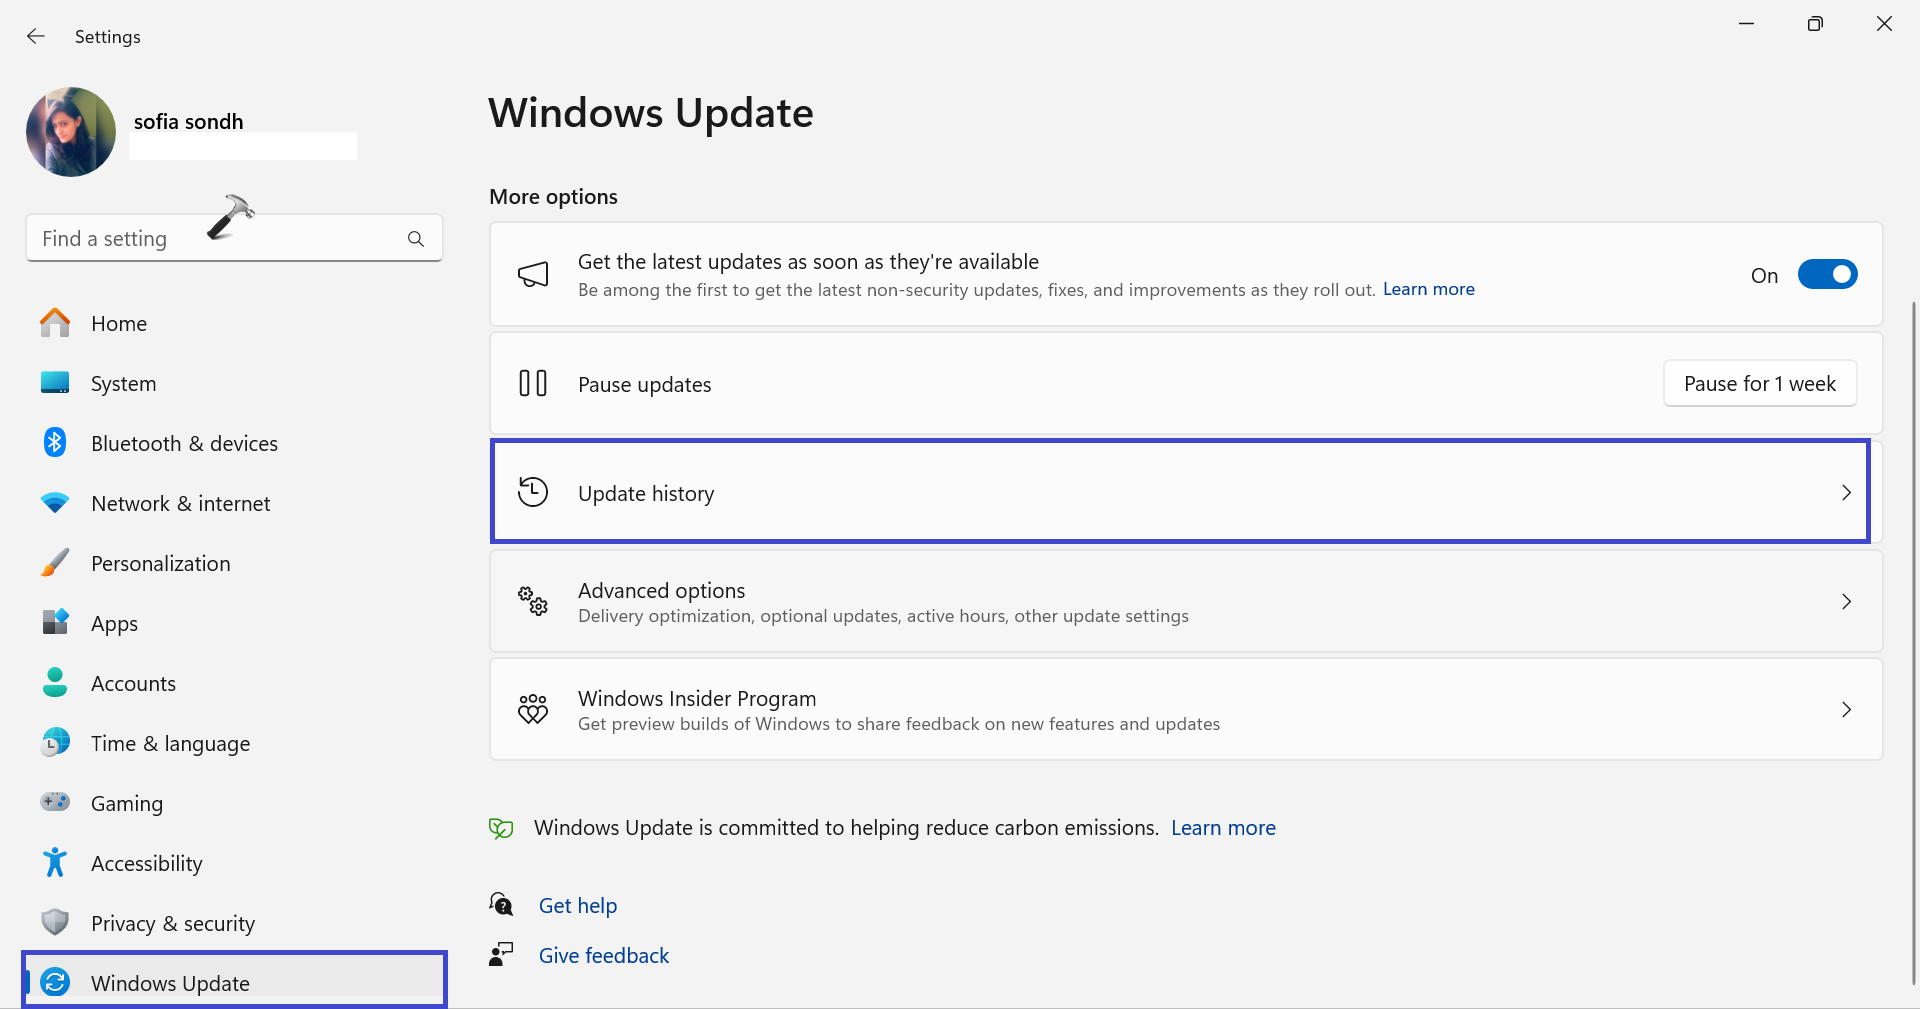
2. Now, click on “Update history“.
3. Click on “Uninstall Updates“.
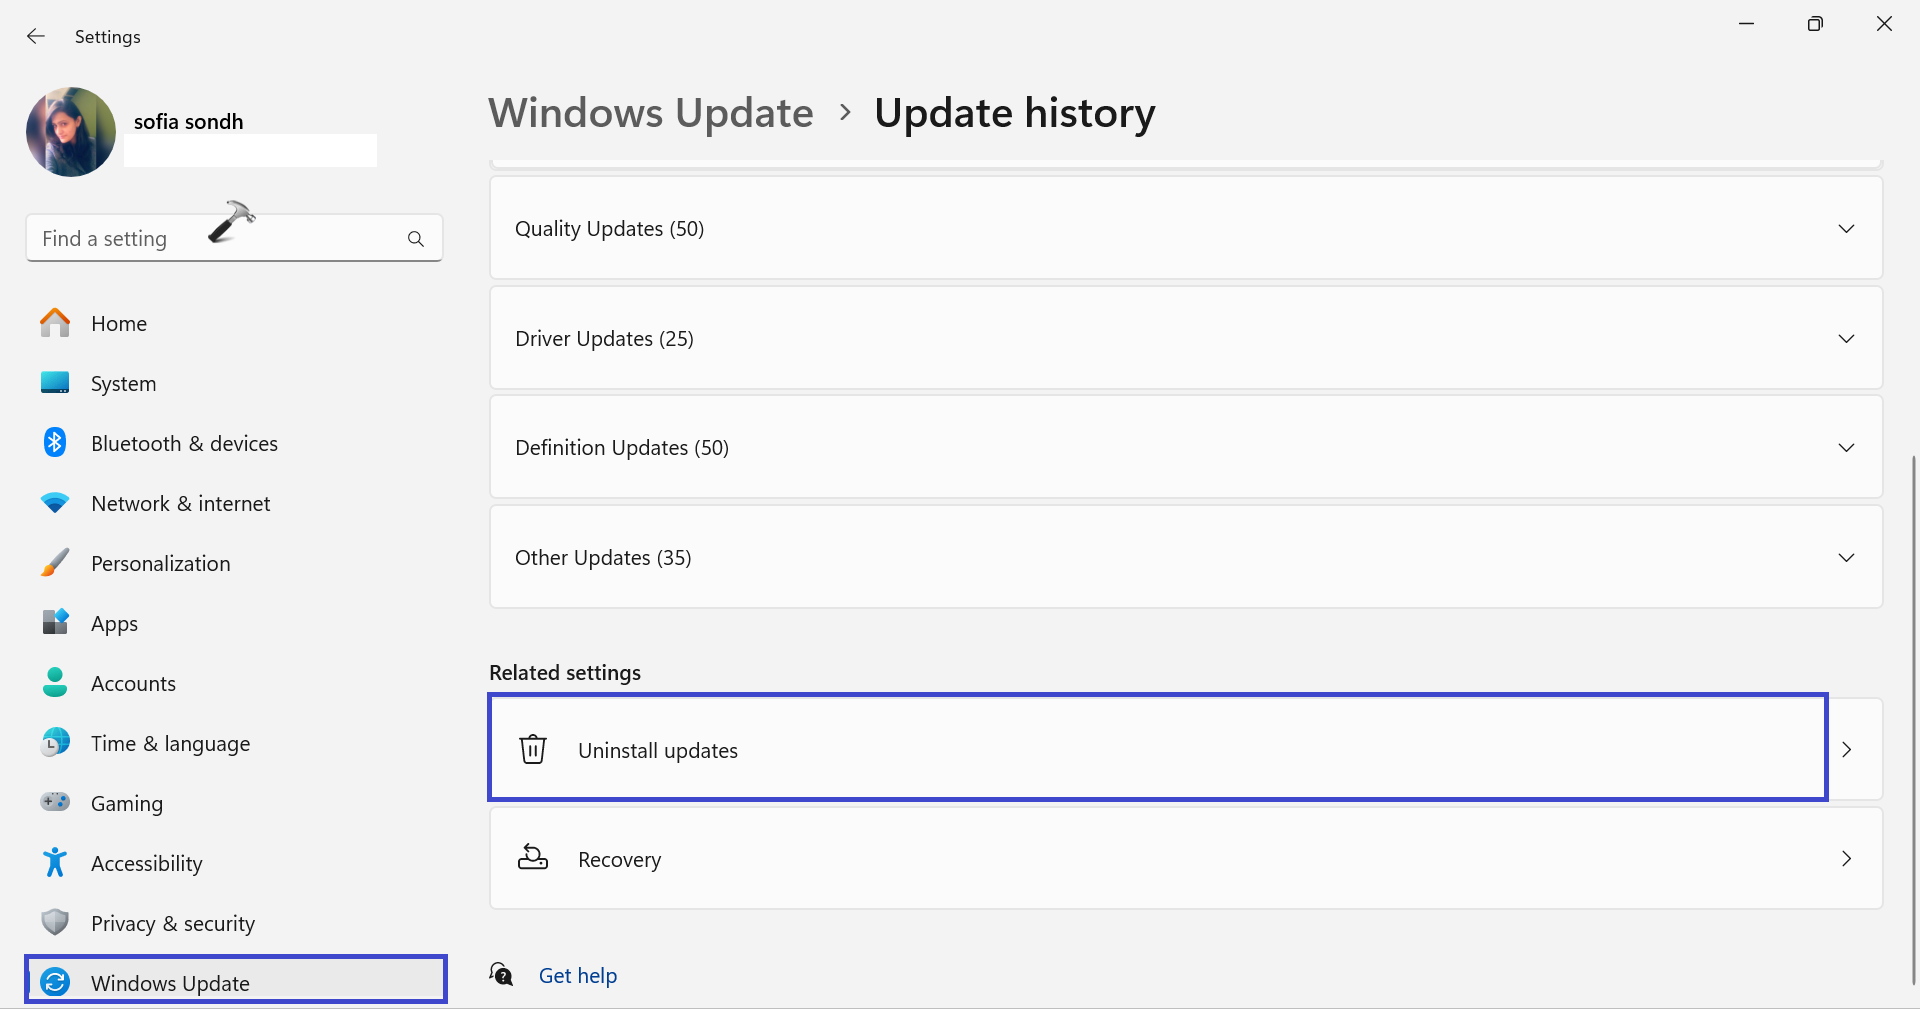
4. Here, click on the Top Windows Update and select “Uninstall“.

Fix 3: Disable Automatic Restart
Automatic restart is a feature in Windows that automatically restarts the computer after a system failure. This feature is enabled by default in Windows 11.
Disabling automatic restart can be a useful fix for Windows 11 users who are experiencing random restarts, especially if the restarts are happening after changing Windows Update settings.
Follow the below steps to disable the automatic restart of Windows 11:
1. Open the Settings App and click on “About“.
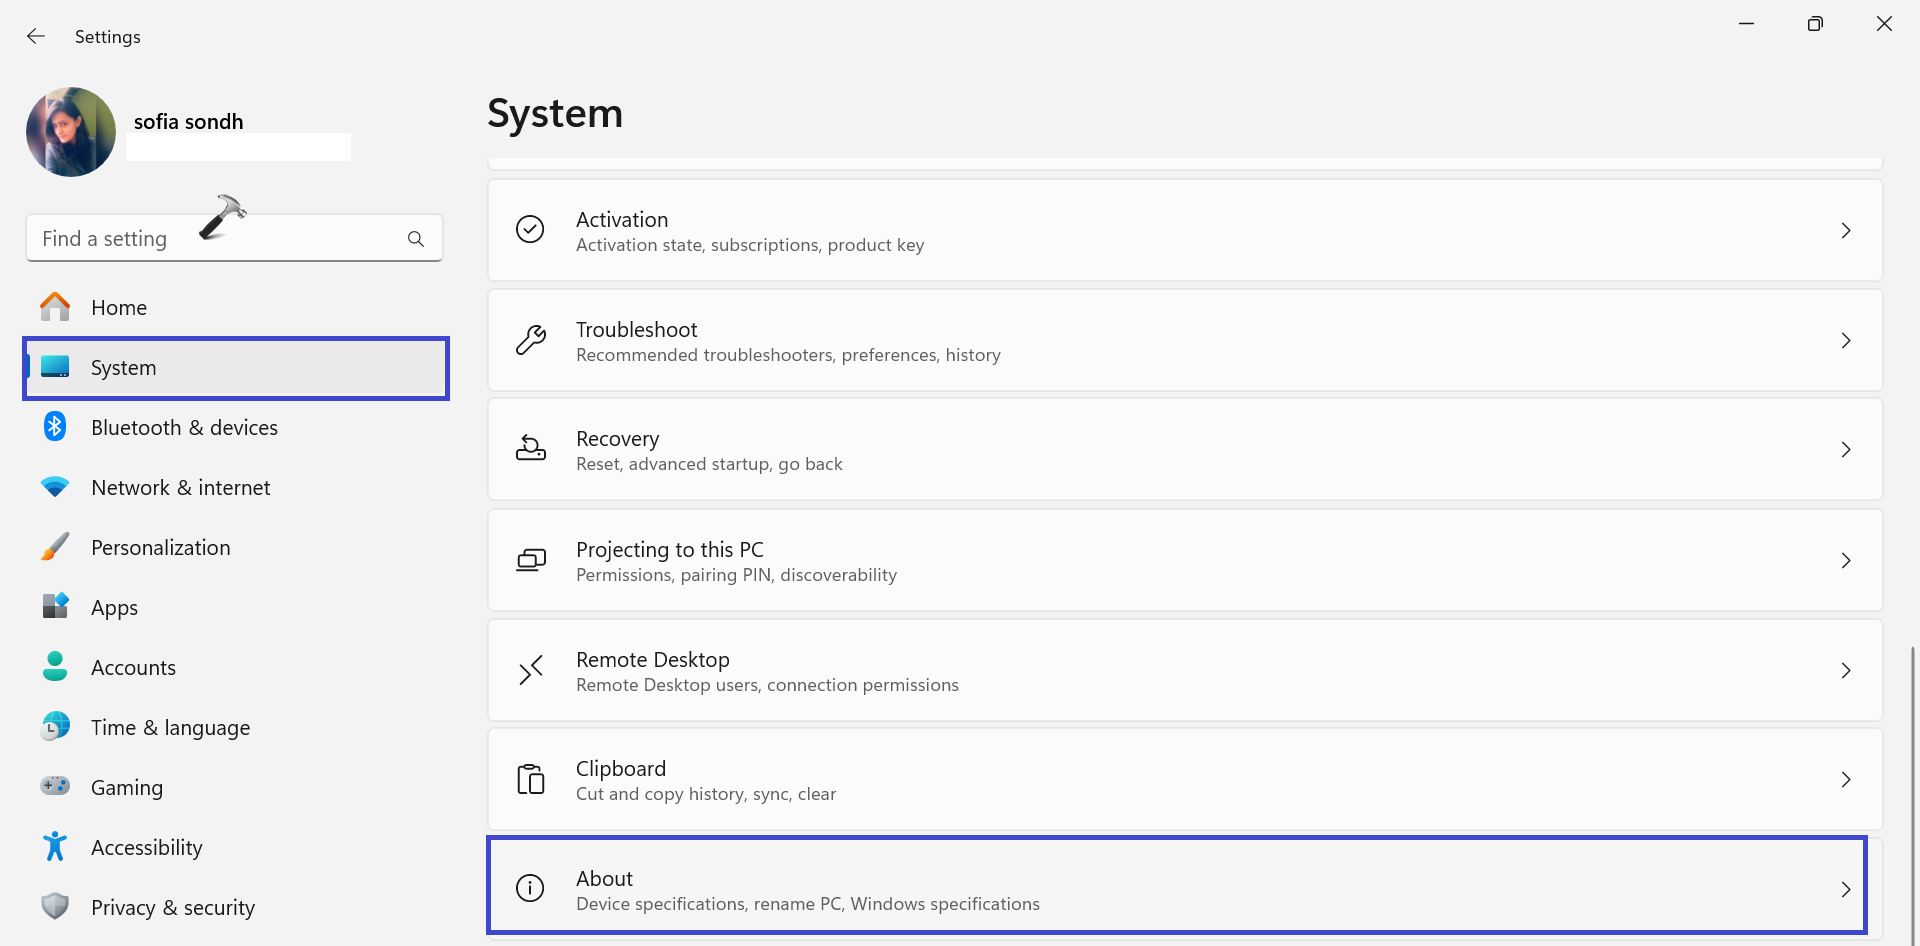
2. Now, click on the “Advanced system settings” option.

3. A prompt box will appear.
In the Advanced tab, click on “Settings” under “Startup and Recovery”.

4. Under “System failure“, uncheck the “Automatic restart” option.

5. Click OK.
Restart the PC to save the changes and then check whether the issue is fixed or not.
Fix 4: Disable Fast Startup
Fast startup is a feature in Windows 11 that speeds up the startup process by loading some of the system files into memory during shutdown. However, it can sometimes cause problems, such as random restarts.
To disable fast startup:
1. Open the Control Panel and select the “System & Security” option.

2. Now, click on “Power options“.

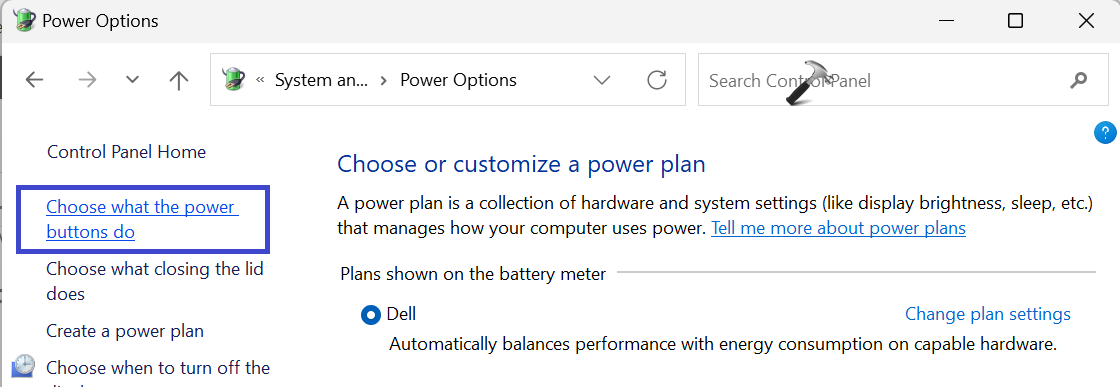
3. From the left panel, select “Choose what the power buttons do“.
4. Now, click on the “Change settings that are currently unavailable” option.

5. Uncheck the “Turn on fast startup (recommended)” option and then click on “Save changes“.
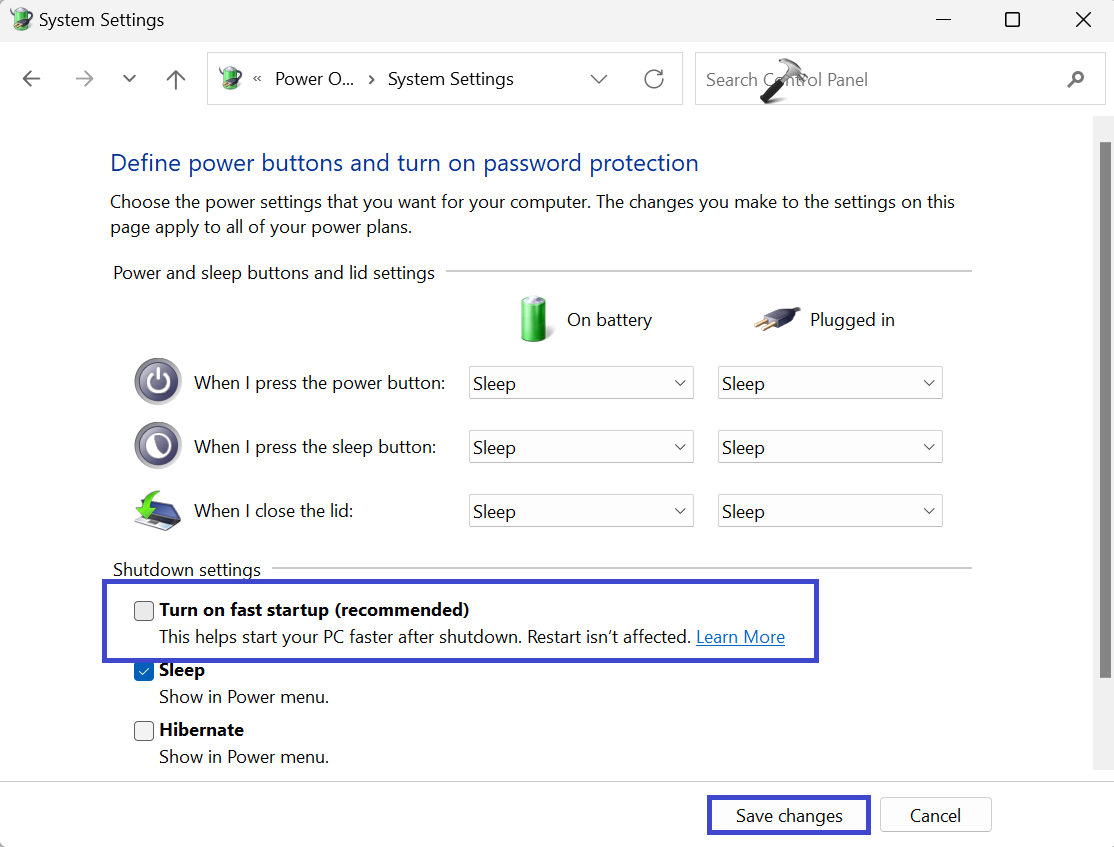
Disabling fast startup will slightly increase the startup time of your computer.
Fix 5: Update your BIOS
Even if you have the newest or oldest laptop, you may need to update the BIOS or software at some point. This can cause Windows 11 to keep restarting after shutdown.
The BIOS (Basic Input/Output System) is a firmware program that controls the basic functions of your computer, such as starting up the operating system and managing hardware devices. The software on your computer includes the operating system, drivers, and other programs.
If the BIOS or software is not up to date, it can cause problems with Windows 11, including restarting after shutdown. This is because Windows 11 needs to be compatible with the BIOS and software in order to run properly. You can get BIOS update from your device manufacturer’s website.
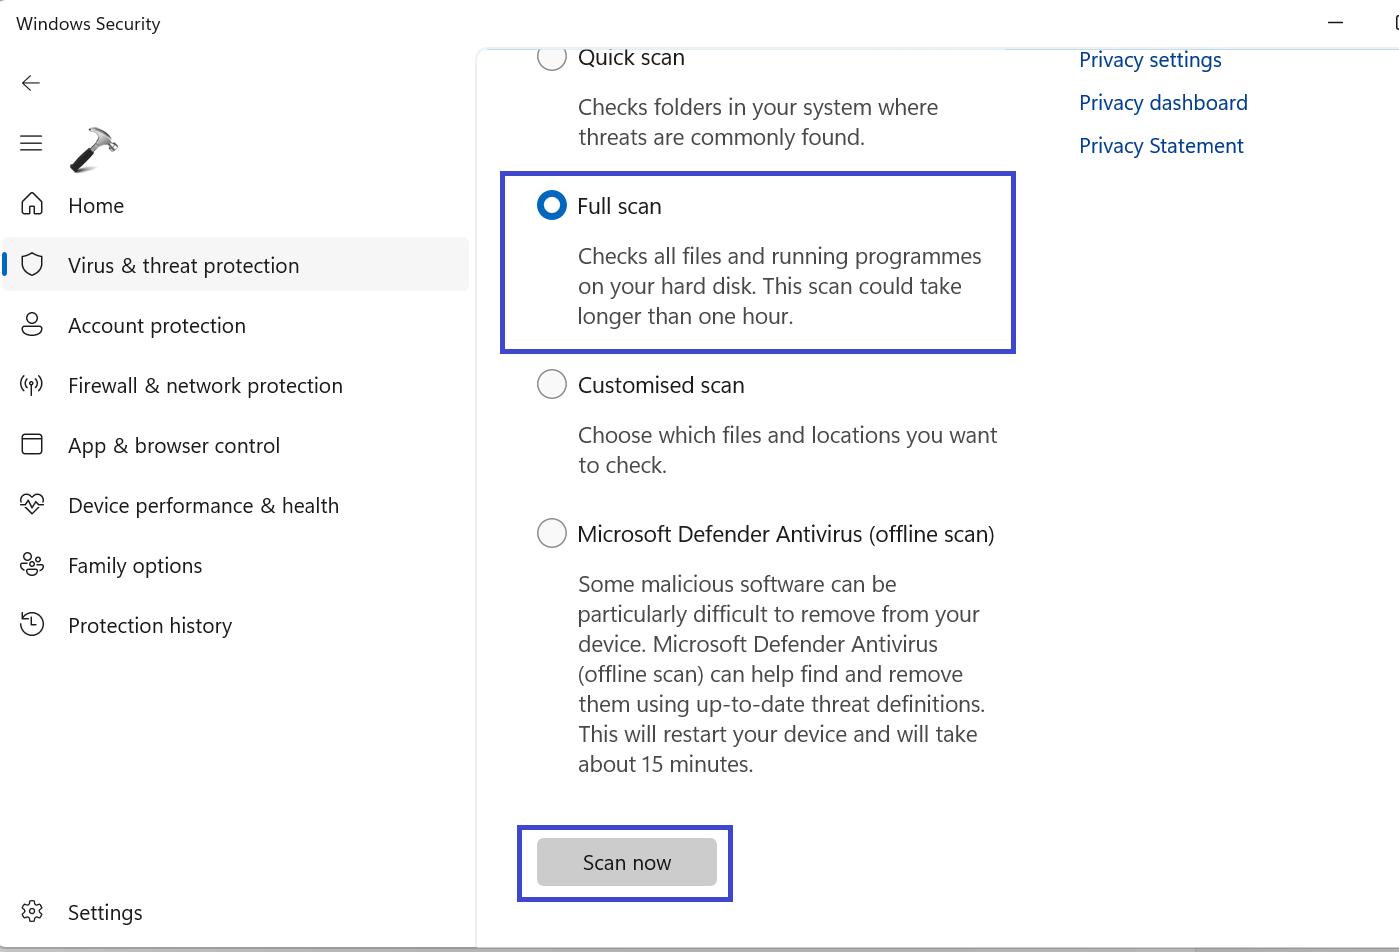
Fix 6: Scan for Malware
This issue can occur when Windows 11 encounters malware while scanning your system for threats. The malware may be interfering with the scanning process, causing Windows to restart repeatedly.
Follow the below steps to scan for malware:
1. Open the search box and type “Windows Security”.
2. Click to open the “Windows Security” app.
3. Now, select the “Virus & threat protection” option.

4. Click on “Scan options“.

5. Here, select the “Full scan” option and then click on “Scan now“.
Fix 7: Run SFC and CHKDSK Scans
SFC (System File Checker) and CHKDSK (Check Disk) are two built-in Windows utilities that can be used to scan for and repair system files and disk errors. If Windows 11 keeps restarting after running SFC and CHKDSK scans, it could indicate a more serious problem with your operating system or hardware.
Here are the steps on how to run SFC and CHKDSK scans:
1. Open the Command prompt and run as administrator.
2. Copy and paste the below command:
sfc /scannow
Press Enter.
3. Now, after executing the above command, copy and paste the below command:
chkdsk /x /f /r
Press Enter.
4. Here, press “Y” and hit “Enter” to schedule the scan to run the next time you restart the PC.
Restart the PC and check whether the issue is resolved or not.
Fix 8: Update Graphics Driver
Windows 11 may keep restarting after updating the graphics driver if the new driver is incompatible or corrupted. This can also happen if there is a conflict between the graphics driver and another software on the computer.
Update the graphics driver by following the below steps:
1. Press the Windows Key + X. Select “Device Manager“.
2. Expand the “Display Adapter” option.
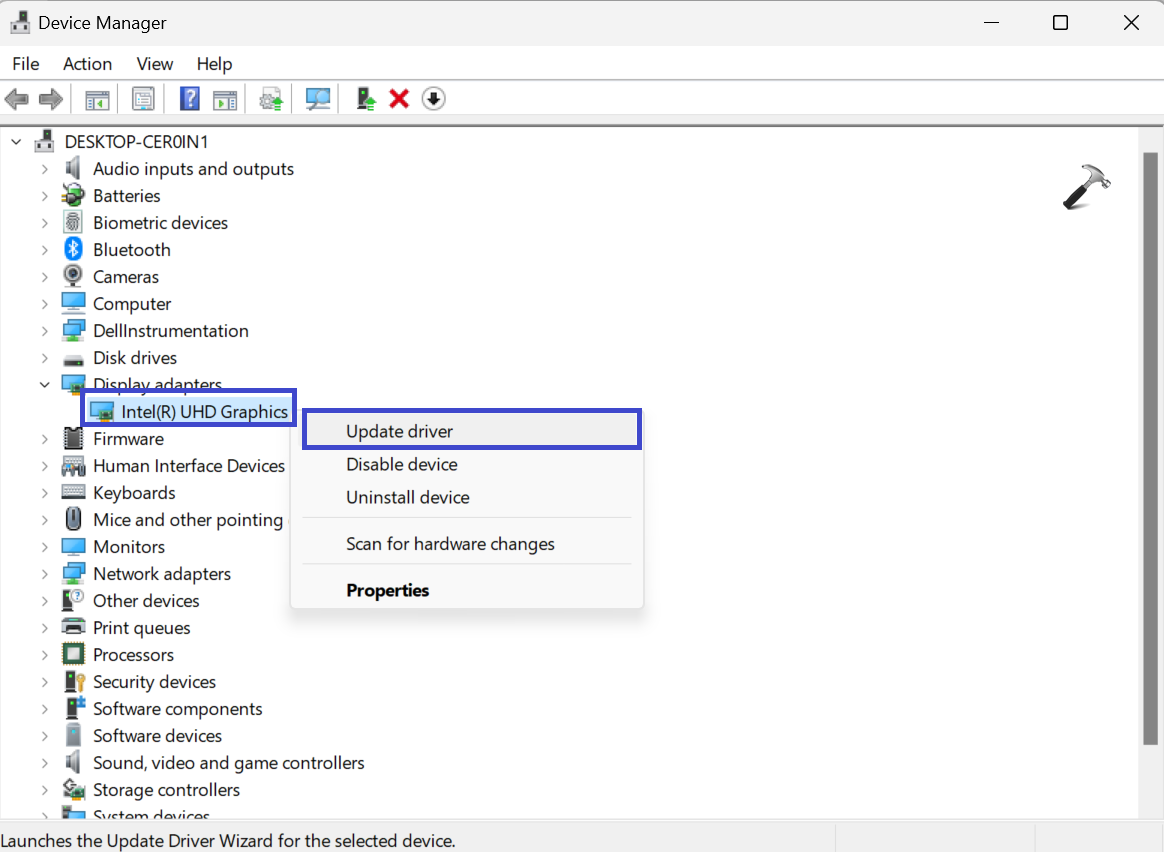
3. Right-click on the adapter and click on “Update driver“.
4. A prompt box will appear. Select “Search automatically for drivers“.

This will automatically search and update the adapter on your system.
Fix 9: Re-install Graphics Driver
Corrupted or outdated graphics drivers can also cause Windows to keep restarting. To fix this problem, you can re-install the graphics driver. Follow the below steps to do so:
1. Press the Windows key + X. Select “Device Manager“.
2. Expand the “Display adapter” option.

3. Right-click on the adapter and click on “Uninstall driver“.
4. A prompt box will appear.
Check the “Attempt to remove the driver for this device” box and then click on “Uninstall“.

After uninstalling the driver, restart your PC and check whether the issue is resolved or not.
Fix 10: Update Group Policies
Group policies are a set of rules that can be used to configure and manage Windows computers. They can be used to control user settings, computer settings, and software settings.
If Windows 11 keeps restarting after updating group policies, it may be due to a conflict with the new policies or a problem with the group policy engine.
Follow the below steps to update the group policies:
1. Open the Command prompt and run as administrator.
2. Copy and paste the below command:
gpupdate
Press Enter.
That’s It!