Sometimes, you might need to delete a problematic device driver which is not compatible for your system. Under such conditions, completely uninstalling the driver is recommended by experts. Unless you do not remove incompatible driver from your system, it might create more and frequent problems for you.
In this article, we’ll see how to complete remove or uninstall a driver in your Windows 11/10. This involves uninstalling the driver in Device Manager, then deleting its base files and finally removing it from registry database.
How To Completely Uninstall A Driver In Windows 11/10
1. Press  + R and type
 devmgmt.msc in the Run, hit Enter key to open Device Manager snap-in.
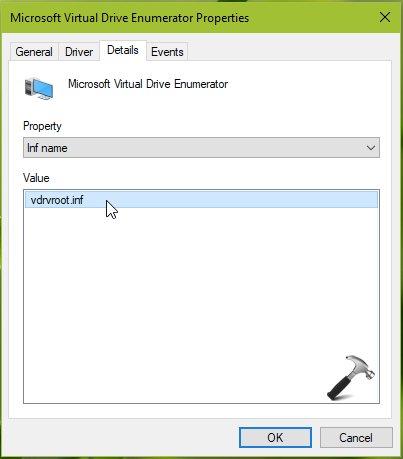
2. In the Device Manager window, double click on the driver you want to uninstall. On the property sheet, switch to Details tab. Under Property name, select Inf name and note down the Value presented.
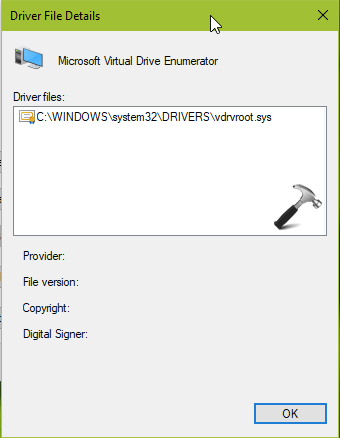
3. Then go to Driver tab, click Driver Details. In the details window, note down the driver name (with .sys extension) and location of driver.
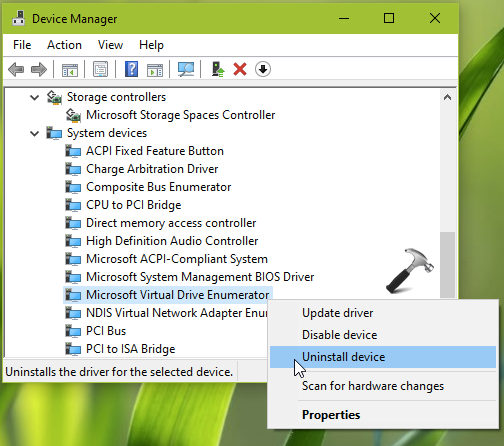
4. To uninstall the driver, simply right click on it and select Uninstall device.
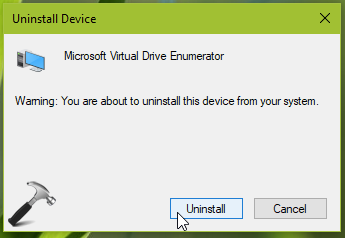
5. On the confirmation prompt, click on Uninstall. As you can see this dialog not mentions any option to deleting driver files, we need to delete them manually.
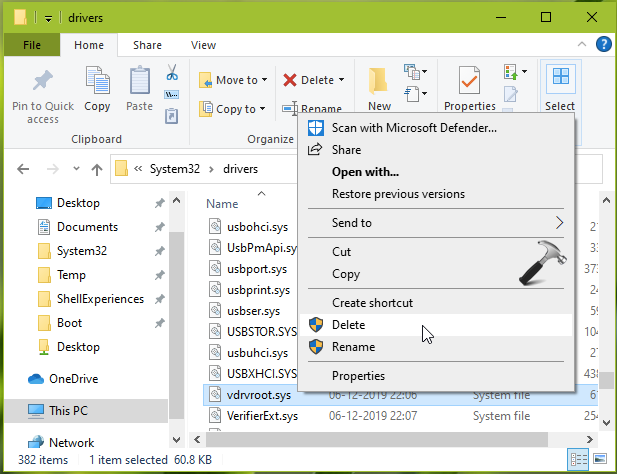
6. As in step 3, we got the actual location of driver file. So we go to C:\Windows\System32\drivers folder and located the driver. You can simply right click on the driver and select Delete. If you’re asked for UAC permissions, provide them to complete the operation.
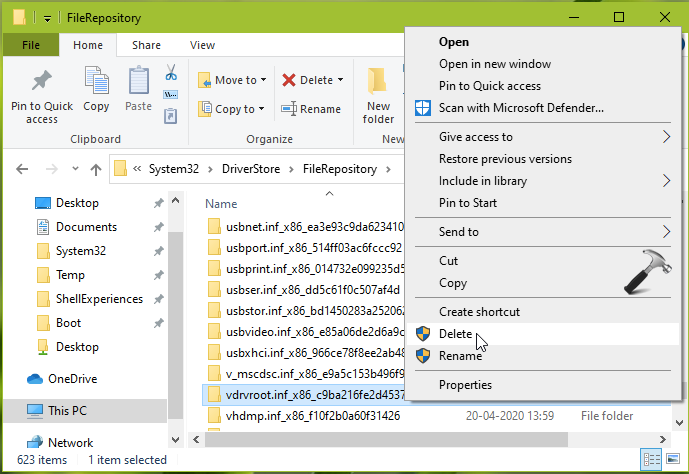
7. Next, we’ve delete the .inf file for the drive. So as we got the Inf name in step 2, use that as intials and with the help of this, locate the driver inf folder at C:\Windows\System32\DriverStore\FileRepository. Right click on the folder to delete it, provide UAC permissions to finish.
8. Next, we’ll remove the driver from registry. So open Registry Editor and go to following location:
HKEY_LOCAL_MACHINE\SYSTEM\DriverDatabase\DriverPackages
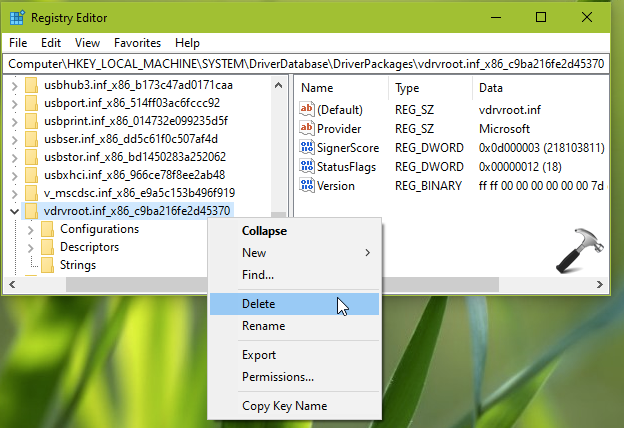
9. Using the Inf name intials we got in step 2, locate the driver. You can click on Strings sub-key of your located driver and confirm its name it corresponding right pane. Now simply export the driver registry key as a backup. Then right click and Delete the driver. Close Registry Editor.
Hence, finally, the driver is now deleted from your system.
That’s it!