[How To] Enable/Disable Controlled Folder Access In Windows 10

Controlled folder access improves Ransomware protection on Windows. Here's how to enable/disable controlled folder access in Windows 10.

Kapil Arya
11x Microsoft MVP · Admin
2 min read
Add as a preferred
source on Google

Controlled folder access is new feature introduced in Windows 10 V1709 or later. It helps you to stay protected and prevents unauthorized apps to make changes in protected system folders. This is a feature designed to deal increasing Ransomware cases on Windows systems.

Read: Beware of Ransomware attacks on Windows 10.

When you have controlled folder access, the apps trying to modify data on protected folder files will be immediately blocked, ensuring safety of the machine. Here’s how you can configure this feature, and select your own protected folders and apps that you trust.

How To Enable/Disable Controlled Folder Access In Windows 10

FYI: These steps are illustrated on Windows 10 V1803. Wording, positioning of corresponding links/options may be changed in subsequent versions.

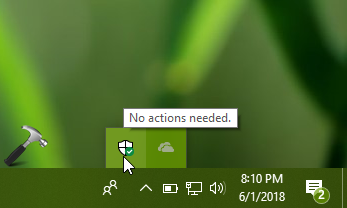
1. On the taskbar, click on Windows Defender Security Center icon.
How To Enable/Disable Controlled Folder Access In Windows 10

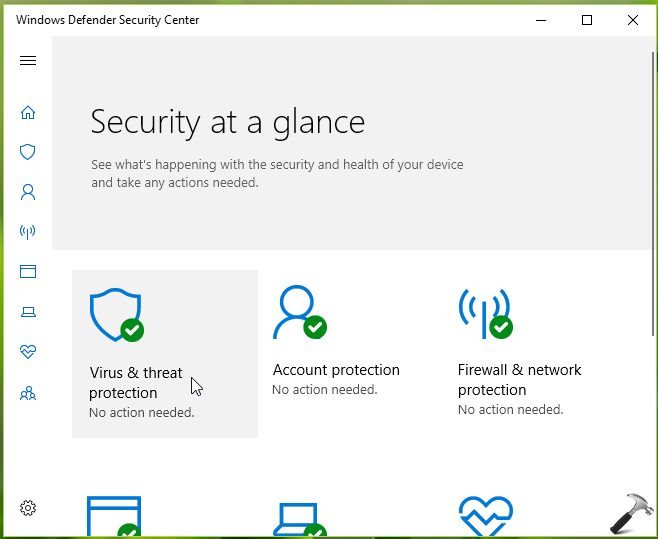
2. Next, in the Windows Defender Security Center window, click on Virus & threat protection tile.
How To Enable/Disable Controlled Folder Access In Windows 10

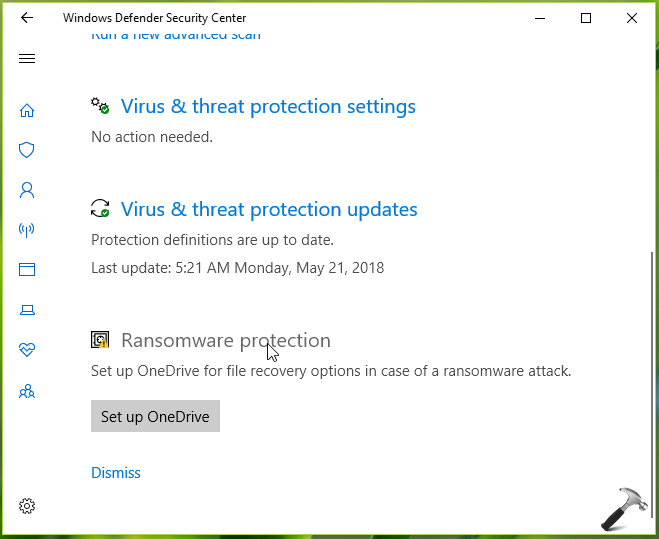
3. Then click on Ransomware protection on next screen.
How To Enable/Disable Controlled Folder Access In Windows 10

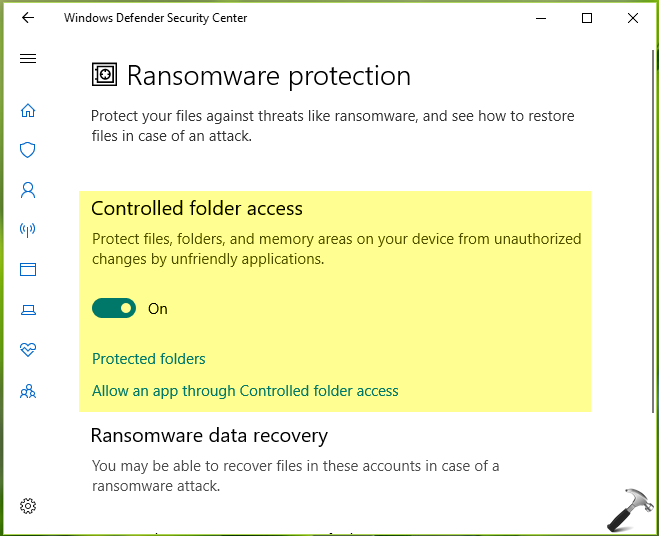
4. Moving on, in Ransomware protection screen, under Controlled folder access section, you can toggle the option to On or Off, to enable or disable this feature, respectively.
How To Enable/Disable Controlled Folder Access In Windows 10

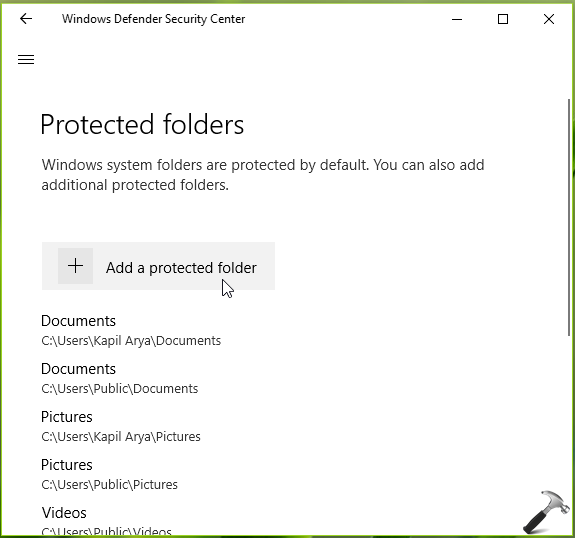
5. Once the option is turned On, click on Protected folders link. On next screen you can add additional folders to protect. Note that Windows system folders are protected by default and you’ll find them already on this list.
How To Enable/Disable Controlled Folder Access In Windows 10

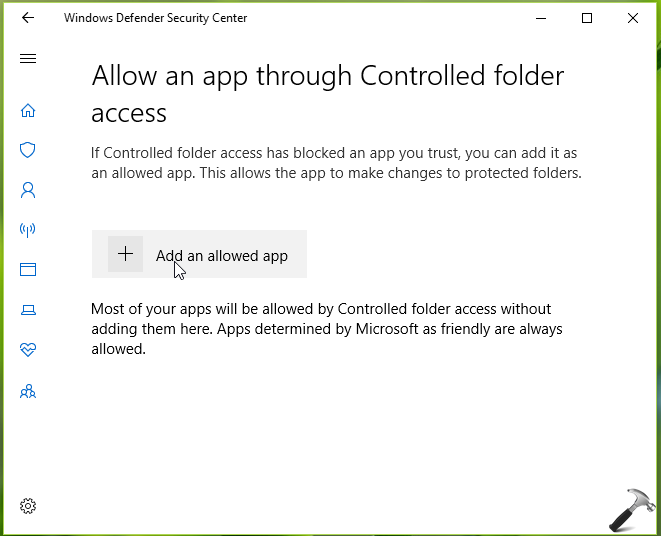
6. You can also click Allow an app through Controlled folder access link on step 4 window and then click on Add an allowed app to add a trusted app.
How To Enable/Disable Controlled Folder Access In Windows 10

All the settings you configure here are saved immediately.

TIP: If you want to configure controlled folder access feature for your organization/workplace machines, you can deploy the relevant GPO setting. Set Configure Controlled folder access policy at Computer configuration > Administrative templates > Windows components > Windows Defender Antivirus > Windows Defender Exploit Guard > Controlled folder access to Enabled to allow the feature. The feature is disabled and policy is set to Not Configured, by default.

So this is how you can configure controlled folder access feature in Windows 10.

That’s it!

Share this article
https://www.kapilarya.com/how-to-enable-disable-controlled-folder-access-in-windows-10

Shareable URL

Article by

Kapil Arya
11x Microsoft MVP · Admin

Kapil holds Microsoft MVP title in Windows IT Pro expertise, 11-times in a row (2014-2025). He is 8-times Windows Insider MVP as well, and author of 'Windows Group Policy Troubleshooting' book. In 2015, Microsoft India accomplished him as 'Windows 10 Champion'. Being passionate Windows blogger, he loves to help others on fixing their system issues. Kapil has worked with official Microsoft Community Engagement Team (CET) on several community projects. You can subscribe him for news/updates and fixes for Windows.

2 Comments
Joy

Ok great. Thank you so much for the detailed instructions. One question I still have though is “What is considered an app?”

Kapil Arya Author

^^ Apps determined by Microsoft as friendly are considered as safe apps and are allowed via CFA feature.

Leave a Comment

Your email address will not be published. Required fields are marked *