Do you wish to run Windows 11 on VMware Workstation Player without changing your current operating system? It is simple to operate more than one OS on a single machine due to virtualization, and VMware Workstation Player is among the finest free programs to do so. It offers a secure and stable environment where you may be interested in learning more about Windows 11, or you might like to test an application before committing to an installation.

This guide will take you through a step-by-step guide on how to install Windows 11 on VMware Workstation Player. It is easy to follow, and in the end, you will have a working Windows 11 in a virtual machine.
Page Contents
Why Install Windows 11 in VMware Workstation Player?
Prior to the installation steps, here are some of the main benefits:
- Safe testing environment – Test Windows 11 without the need to touch your main operating system.
- Compatibility test run- Test the software before installing it in your main system.
- Test features – Try out Windows 11 features, such as Snap Layouts, Widgets, and Android apps.
- Easy and free installation – VMware Workstation Player does not cost anything to use at the personal level.
Prerequisites Before You Begin
To have a smooth installation, you should have:
- VMware Workstation Player (current version).
- Windows 11 ISO image (download Windows 11 ISO image file on the official Microsoft site).
- Minimum 4 GB RAM (8 GB recommended).
- A 64-bit processor that has virtualization enabled (Intel VT-x / AMD-V).
- Free storage space of 20 GB.
Install Windows 11 on VMware Workstation Player
1. Go to the VMware official site and download the VMware Player (https://www.vmware.com/products/desktop-hypervisor/workstation-and-fusion). Then launch the “.exe” file.

2. Now, visit the official Windows 11 download site by Microsoft (https://www.microsoft.com/en-us/software-download/windows11). Click on Download Windows 11 Disk Image (ISO) and store the file on your PC. This ISO image will serve as installation media for the virtual machine.

3. In setup wizard screen of VMware, click on “Next”. Accept the terms and conditions checkbox to continue. Then, follow the on-screen instructions. Finally, install the VMware Workstation Player.

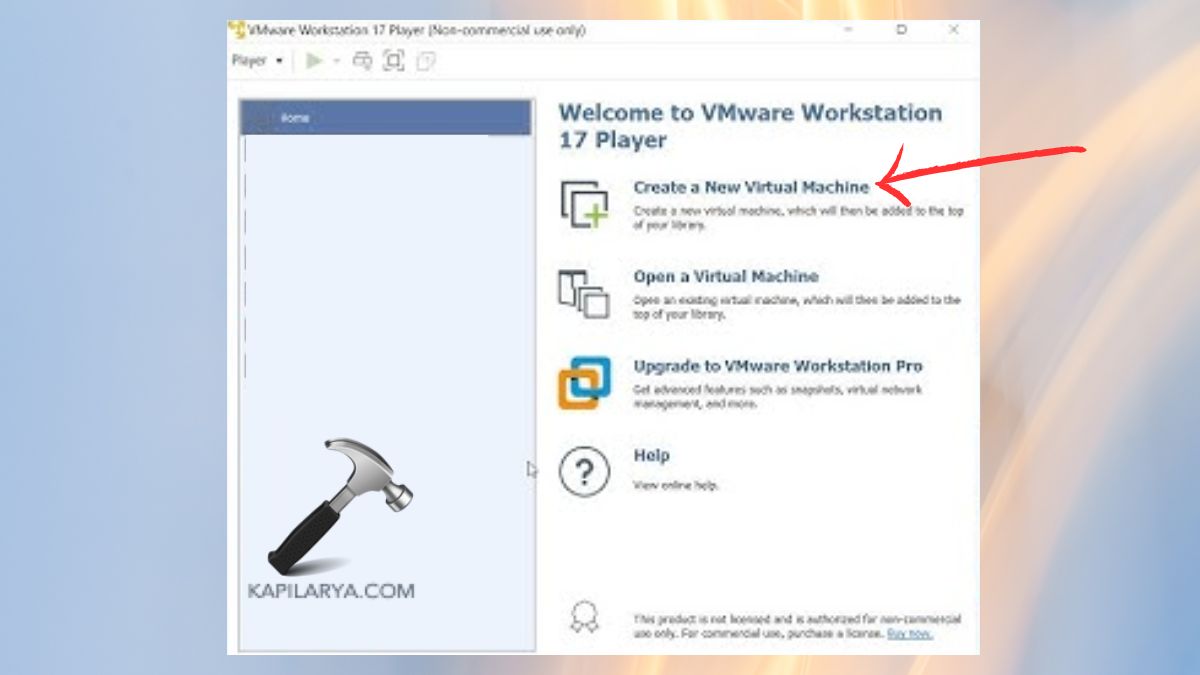
4. Now, choose “Create a new Virtual Machine”.
5. Select the ISO, give the VM a name, and select a storage location.

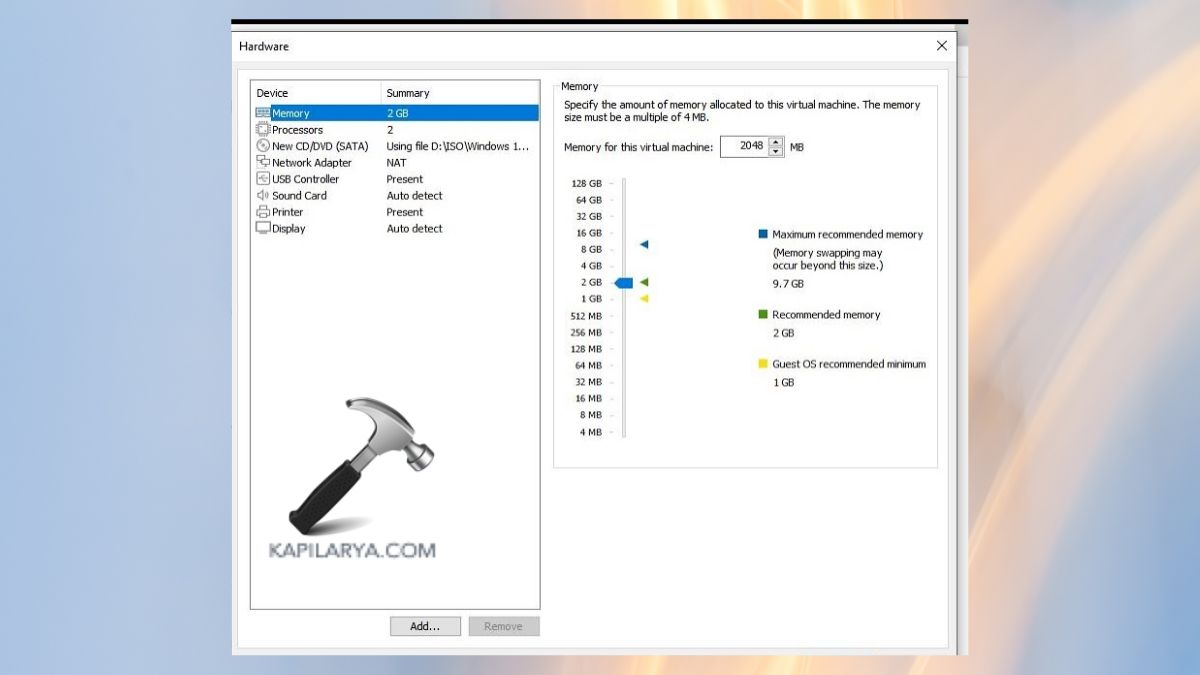
6. Set Configuration- Check the box of 4GB-8GB RAM, 2+ CPUs, and 64GB virtual hard disk.
7. Only TPM 2.0 and Secure Boot are requirements with Windows 11, and most virtual environments lack these by default. To avoid this, you can allow a virtual TPM in VMware. To see if it is available or not, modify the VMX file of your virtual machine:
managedVM.autoAddVTPM = "software"
smc.version = "0"

8. After customizing, boot the virtual machine by clicking on “Play virtual machine”.

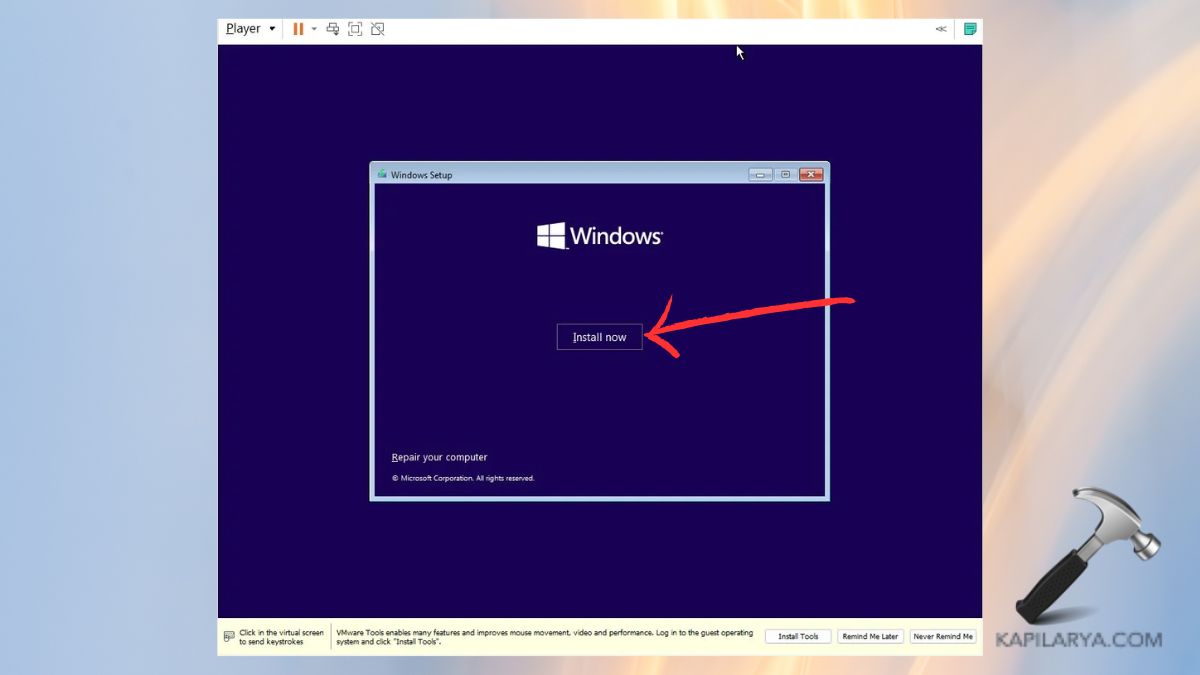
9. The Windows 11 installer will then start to run, during which you have to choose your region, language, and keyboard input. Click “Install Now” and, if you have a product key, then enter it; otherwise, skip this step and then select a Custom Installation.
Select the virtual hard disk that you have created previously and proceed. It will restart and install Windows 11 several times.
After installation is complete, Windows 11 will require you to configure some preferences, like country of residence, account, and privacy options. Once this is done, you will have the Windows 11 desktop inside VMware Workstation Player.
To smooth performance, you should install VMware Tools located in the Player menu. This enhances graphics, mouse movement, and file-sharing between your host & guest systems.
Frequently Asked Questions (FAQs)
#1 Can I install Windows 11 on VMware Workstation Player for free?
Yes. VMware Workstation Player is freely available (free of charge) to use (personal use), and the Windows 11 ISO itself is free to download (it is found on the Microsoft site).
#2 Do I need TPM 2.0 to run Windows 11 on VMware?
Not necessarily. VMware can allow you to mimic a virtual TPM or bypass the checks using the VMX file.
#3 How much RAM should I allocate for Windows 11 in VMware?
Anything over 4 GB will provide a much better experience, although we recommend 8 GB or more.
#4 Will my main operating system be affected?
No. Virtualization uses Windows 11 on a remote platform, which leaves your main operating system unharmed.
That’s it!