Would you like to install Copilot CLI on Windows 11? In case you are looking to find the easiest and most trustworthy method of installing the Copilot CLI of GitHub on your computer, this tutorial is what you need. Copilot CLI is an AI-based command assistance that is now available in your Windows Terminal, assisting in automating tasks, creating scripts, and accelerating development faster than ever.
Installation, authentication and setup permissions are the main problems faced by many users, and we have developed this step-by-step guide to make your installation a success.
Page Contents
How Copilot CLI Transforms Your Windows 11 Productivity
Many users are not aware that Copilot has some memory and session data that is not stored with Copilot when uninstalling Copilot CLI. You can instruct them to remove residual records without any harm. To fully delete all saved preferences, chat memory or Copilot behavior data, follow this guide.
The ability to automatically translate your natural language into commands that can be executed is one of the largest benefits of Copilot CLI on Windows 11. You do not have to memorize complicated instructions or use Google to find the exact syntax. Simply describe what you want, and Copilot CLI builds the appropriate PowerShell, CMD, or shell commands for you.
AI-Powered Commands
One of the most notable aspects of Copilot CLI is adaptive learning. With time, it understands your usage habits, your style of scripting and your routine activities. This implies that the more you use it, the smarter it gets, giving faster and more precise commands.
Cleaning temporary files, automating backups, scripting, and system tasks, Copilot CLI is your real-time AI assistant.
Example:-
You can simply ask to backup downloads folder daily: “?? create a script to backup downloads folder every day”
Copilot writes your script immediately and saves you minutes or even hours of typing.
Guide to Install Copilot CLI on Windows 11
The easiest and official way to install the GitHub version of Copilot CLI is with winget, as shown below.
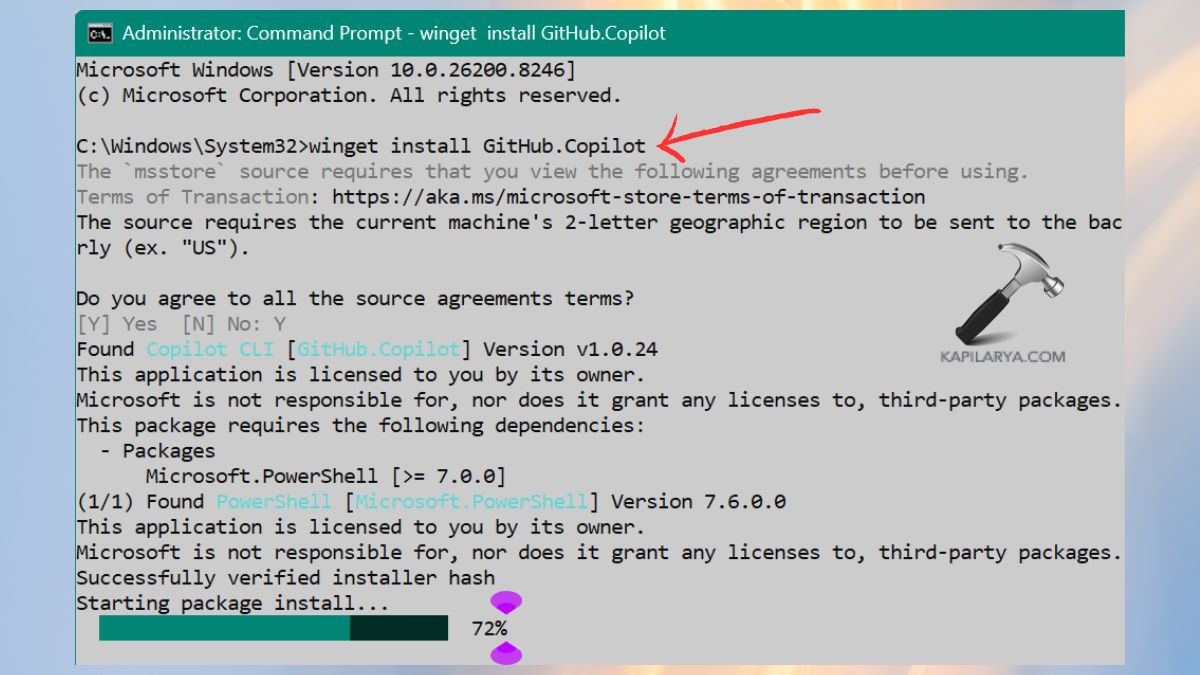
1. Click Start. Find Command Prompt or Windows Terminal. Right-click > Run as administrator. Running as an administrator prevents permission problems during installation.

2. Enter the following command and press Enter. This command will download and install the official GitHub Copilot CLI package on Windows 11.
winget install GitHub.Copilot
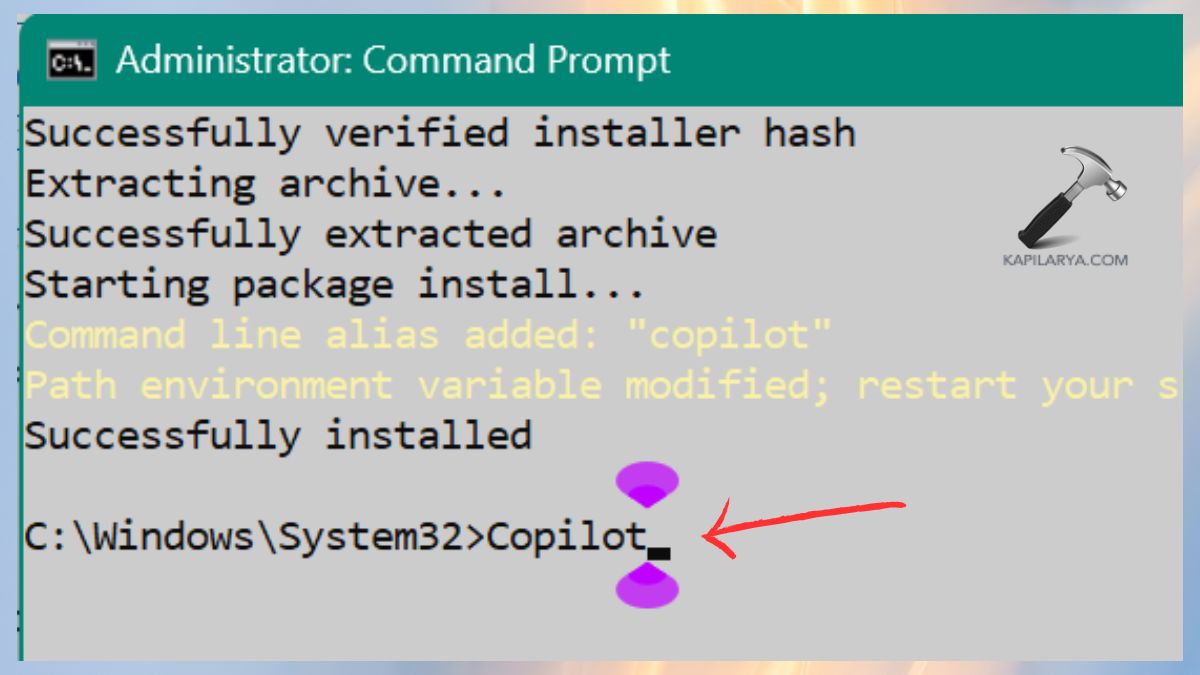
3. Once it is installed, start Copilot CLI with the following command. This will launch the Copilot CLI interface within your terminal.
Copilot
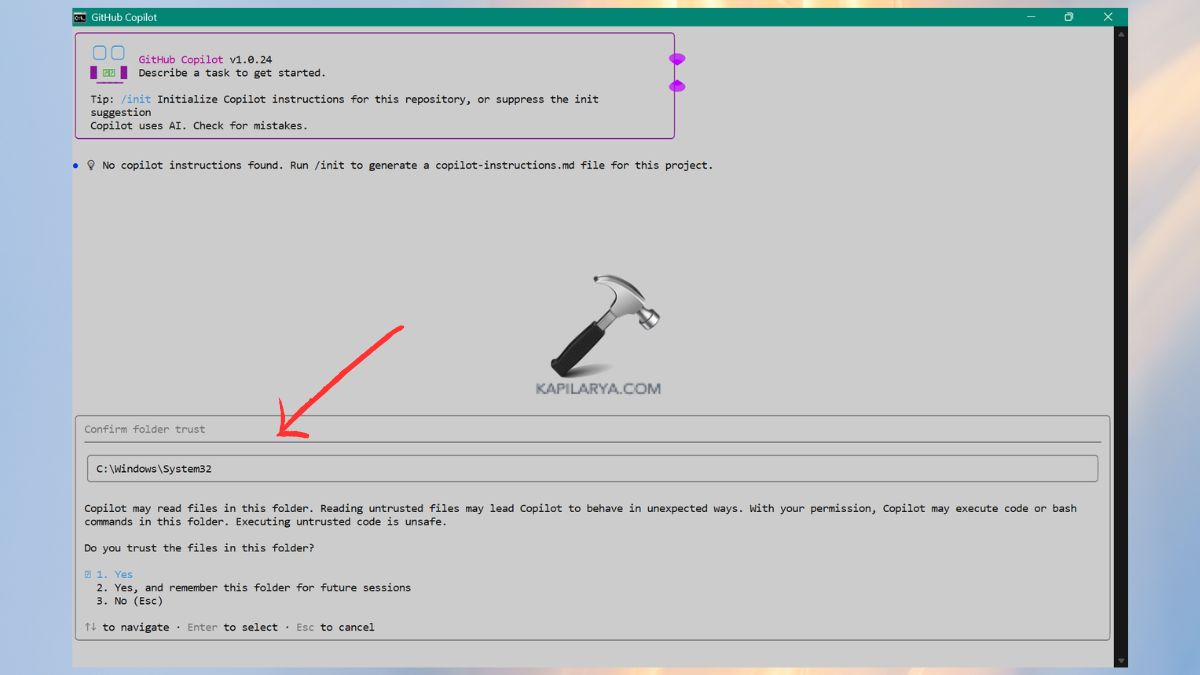
4. You will be presented with an option of whether you trust Copilot to access your system drive. You will have two choices. Choose the option that best suits your privacy needs.
- Option 1: Allow access only for this session
- Option 2: Allow access for current and future sessions
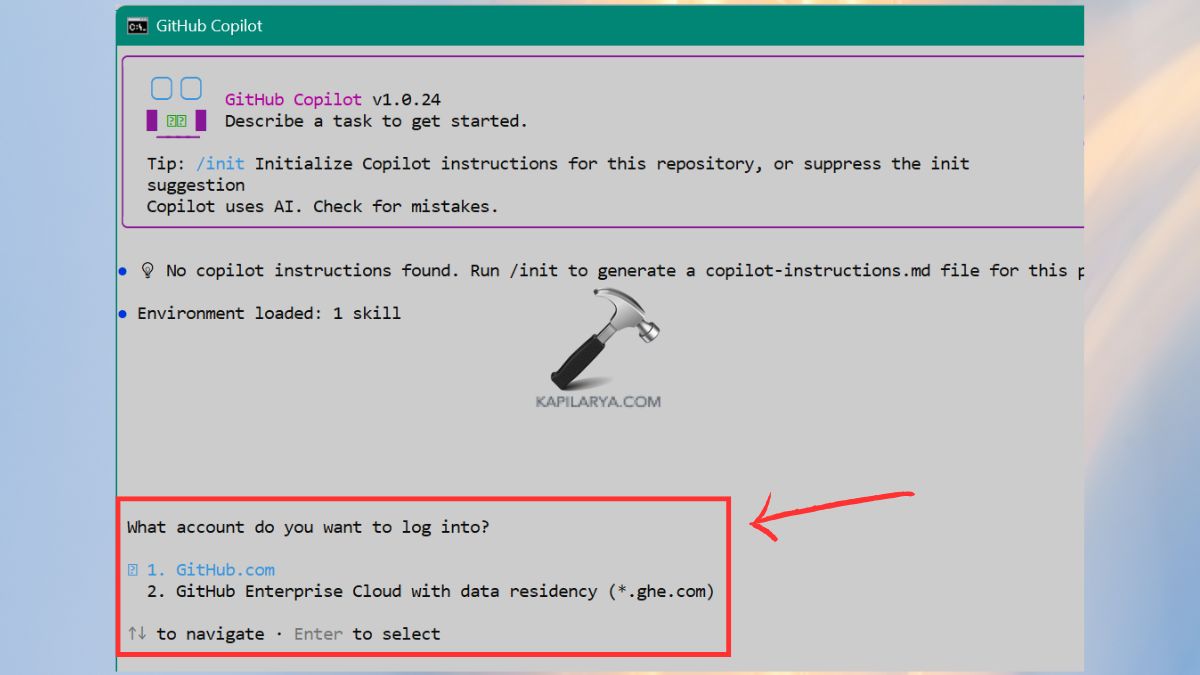
5. Choose GitHub.com as your sign-in. A single-use code will be displayed. Your browser will automatically open.
6. Log in to your GitHub account. Enter and verify the one-time verification code. After authentication, Copilot CLI will log in and connect to your GitHub account.
How to Uninstall Copilot CLI on Windows 11
If you ever decide to remove Copilot CLI, here’s how to do it safely and completely.
1. Open Start. Find Command Prompt or Terminal. Right-click > Run as administrator.
2. Enter this command and press Enter. This deletes the application in your system.
winget uninstall GitHub.Copilot

3. Open File Explorer.

4. Go along this road in Explorer – “C:\Users\YourUsername”. Locate and remove the “.copilot” folder (configuration and session data).
5. Open Credential Manager.

6. Click Windows Credentials. Find copilot-cli in Generic Credentials. Click Remove. Once this is done, all Copilot CLI traces will be removed out of your system.

Frequently Asked Questions (FAQs)
Why is Copilot CLI not starting after installation?
Make sure you’re running the terminal as administrator, and that Winget successfully completed the installation.
Do I need a GitHub subscription for Copilot CLI?
Yes, you must have an active GitHub Copilot subscription to use its AI features.
Is Copilot CLI safe to allow access to my system drive?
Yes, GitHub requires access to a drive to enable the CLI to create, edit, and read files when it assists with commands.
Can I reinstall Copilot CLI after uninstalling it?
Simply, re-run this install command in Command Prompt.
That’s it!