
A black screen during a Windows 11 installation or upgrade can be alarming, especially when the setup suddenly freezes with no error message. In some cases, users may only see a cursor, while others experience a completely blank display during installation, restart, or update.
Page Contents
Fixing Black Screen Problem – Windows 11 Install
This issue is commonly caused by faulty display drivers, incompatible peripherals, corrupted installation files, projection setting errors, or interrupted Windows updates. Follow these step-by-step solutions to fix the problem.
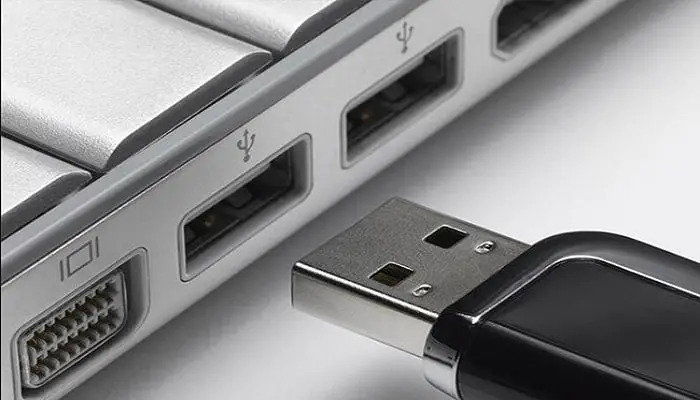
Method 1: Disconnect External Devices
External devices can sometimes conflict with Windows setup drivers and trigger a black screen during installation. Removing unnecessary hardware helps Windows focus only on essential components and often resolves the issue quickly.
1) Turn off your computer completely.
2) Disconnect non-essential devices like USB drives, printers, webcams, external monitors, and docking stations.
3) Keep only the keyboard, mouse, and primary monitor connected.
4) Restart the Windows 11 installation process.
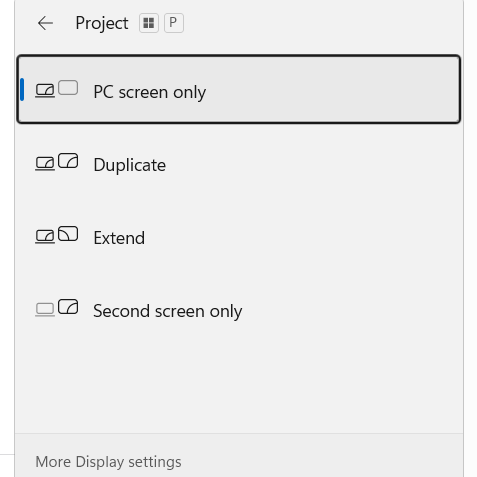
Method 2: Check Display Connections and Projection Settings
Sometimes Windows sends display output to the wrong screen or fails to detect the correct monitor during installation. Incorrect projection settings and loose cables are among the most common causes of black screen issues.
1) Ensure your monitor is powered on properly.
2) Check that the HDMI or DisplayPort cable is firmly connected.
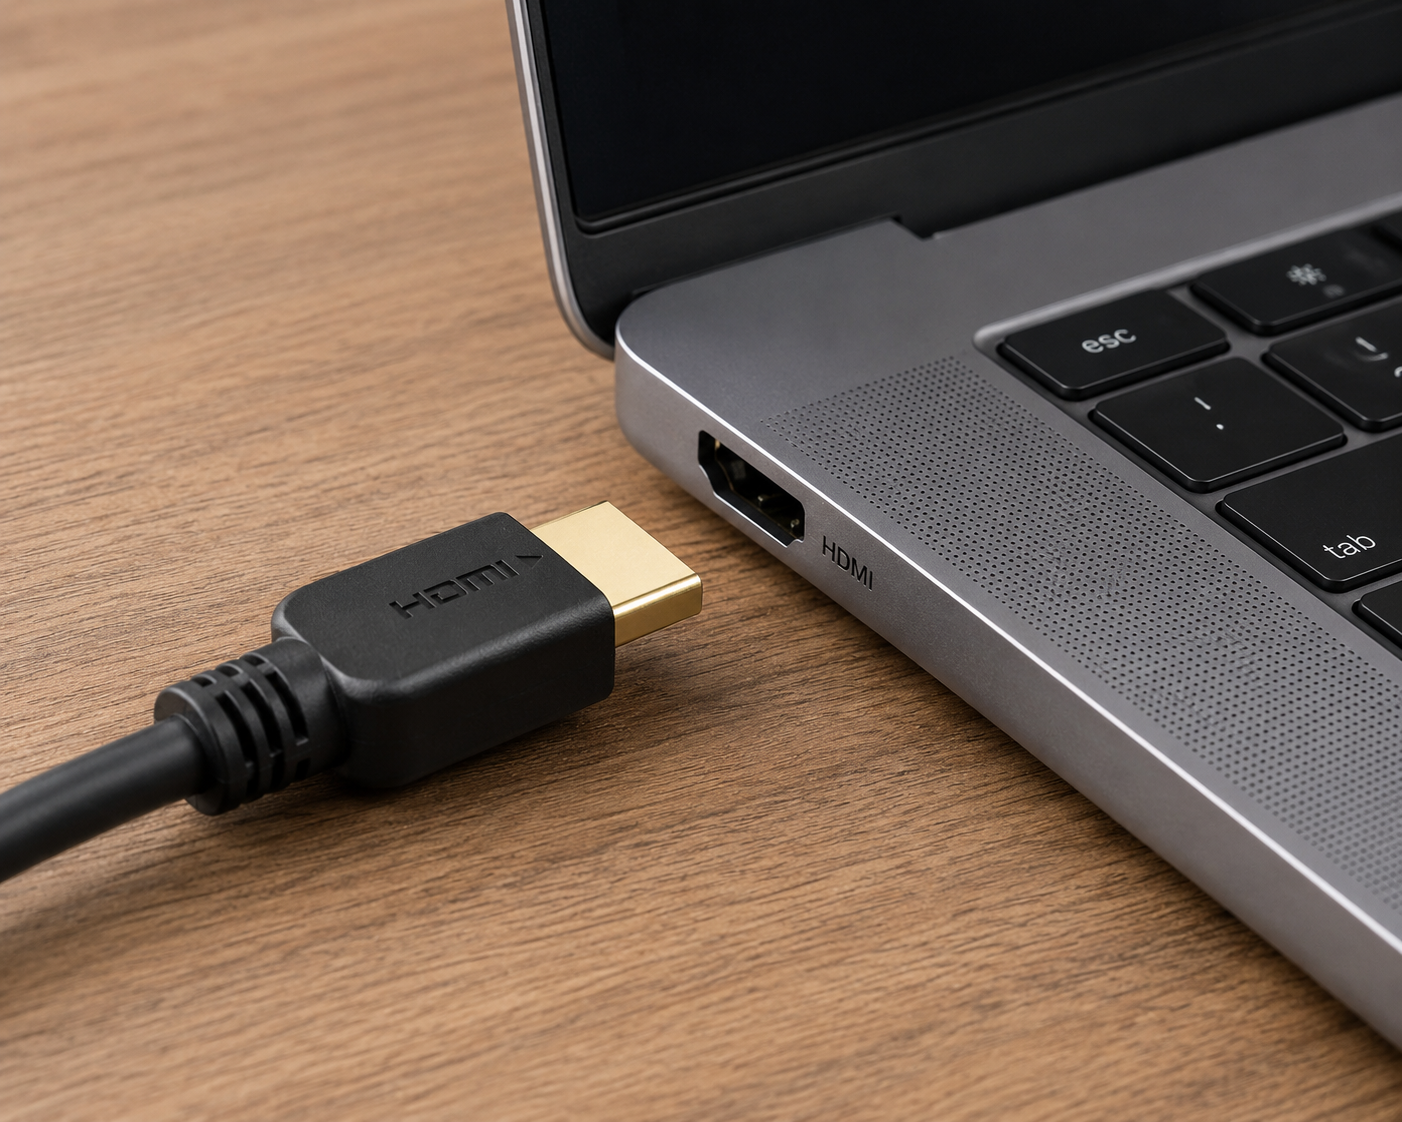
3) Press Windows + P repeatedly to cycle through display modes.
4) Try another monitor port or cable if available.
Method 3: Force Restart the PC
Sometimes the installation appears frozen even though Windows is still processing files in the background. A proper restart can recover the setup process and clear temporary installation glitches.
1) Press and hold the power button for about 10 seconds until the PC shuts down.
2) Wait a few seconds before turning it back on.
3) Restart the installation process.
4) Allow the setup enough time to continue before interrupting it again.

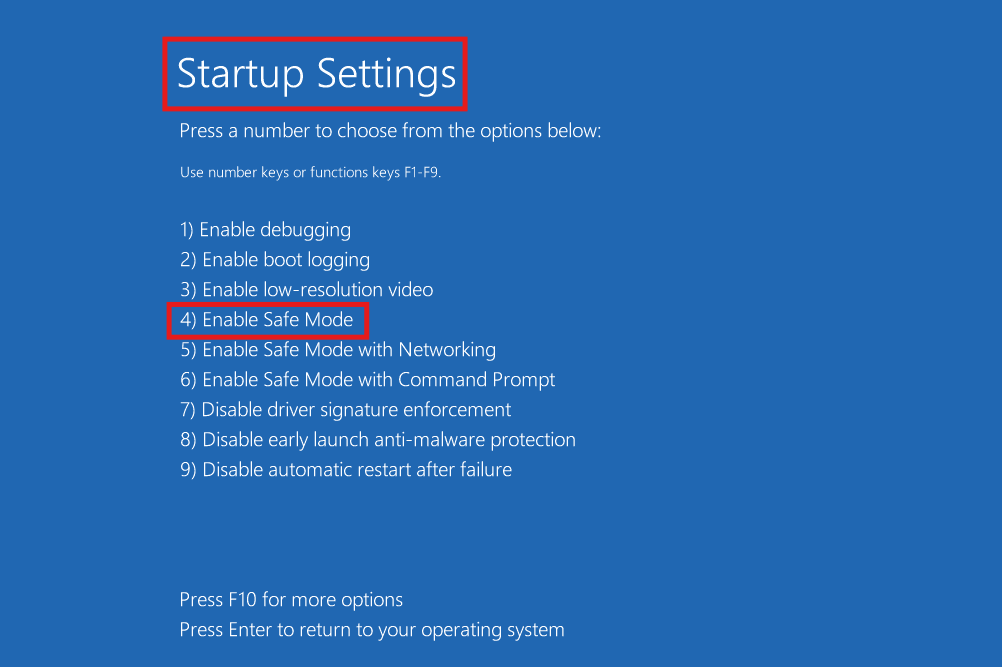
Method 4: Boot into Safe Mode and Update Graphics Drivers
Outdated or incompatible display drivers are one of the biggest reasons behind black screen problems during installation. Safe Mode loads only essential drivers, making it easier to troubleshoot graphics-related issues.
1) Enter the Windows Recovery Environment by interrupting startup multiple times.
2) Go to Troubleshoot and click on Advanced options. Choose Startup Settings.

3) Select Safe Mode.
4) Open Device Manager and update or reinstall the graphics driver.
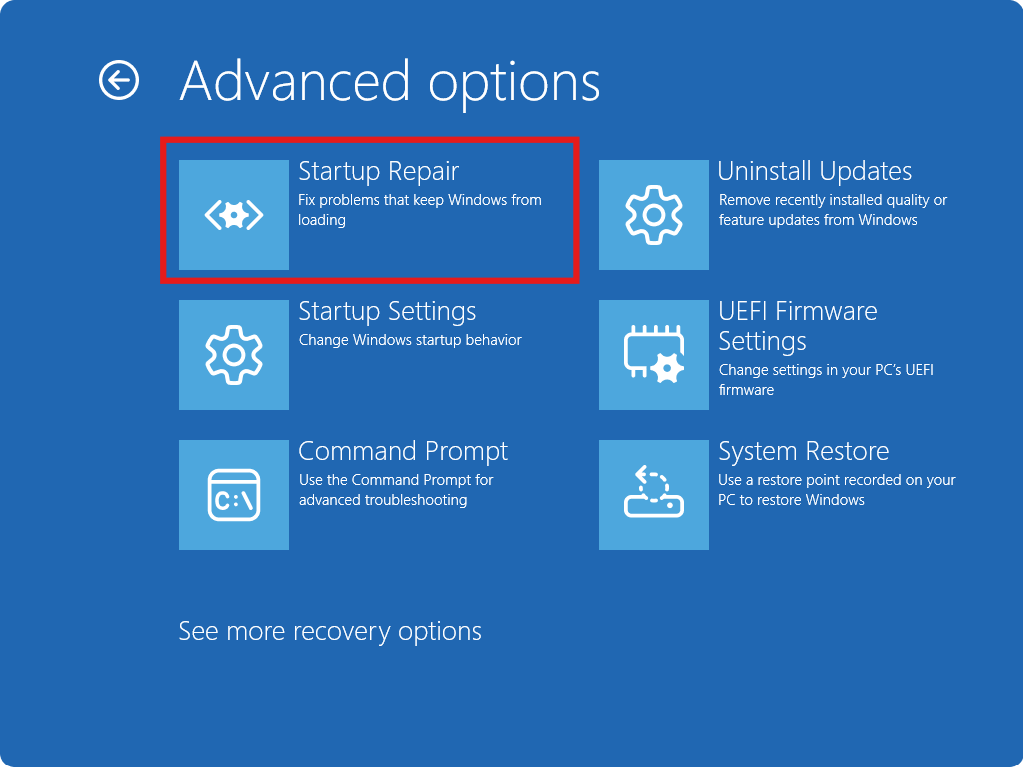
Method 5: Use Startup Repair or Remove Recent Updates
Corrupted updates or failed installation files can prevent Windows from loading correctly. Startup Repair automatically fixes boot-related issues and can restore normal installation behavior.
1) Boot into the Windows Recovery Environment.
2) Select Troubleshoot and choose Advanced Options.
3) Choose Startup Repair and let Windows scan for issues.
4) If the problem started after an update, uninstall the latest update from the recovery menu.
Final Thoughts
Black screen issues during Windows 11 installation are usually linked to display drivers, hardware conflicts, or interrupted updates. Although the problem looks serious, most users can fix it using simple troubleshooting methods.
By following the solutions above step by step, you can complete the Windows 11 installation successfully without reinstalling your entire system.


![[GUIDE] How To Make Clean Install Of Windows 10](https://www.kapilarya.com/assets/windows_10_wallpaper_1705148703-768x432.png)