

In Windows 11, the content specifically files, folders, registry keys can have different owners. If the content is reserved for Windows 11 processes, the owner could be system based accounts. Sometimes, to make operation on these content, you have to take the ownership first. For example, even being an administrator on your system, you may not be able to delete a specific folder. This is because you do not have the necessary ownership to delete the folder. You may be the one and only admin on your system but the file, folder or registry key you want to delete might be owned by a system account or process. In order to deal these type of cases, this guide will show you how to take ownership of files, folders, registry keys in Windows 11.
Page Contents
Take ownership of files, folders, registry keys in Windows 11
Option 1: Take ownership of files and folders
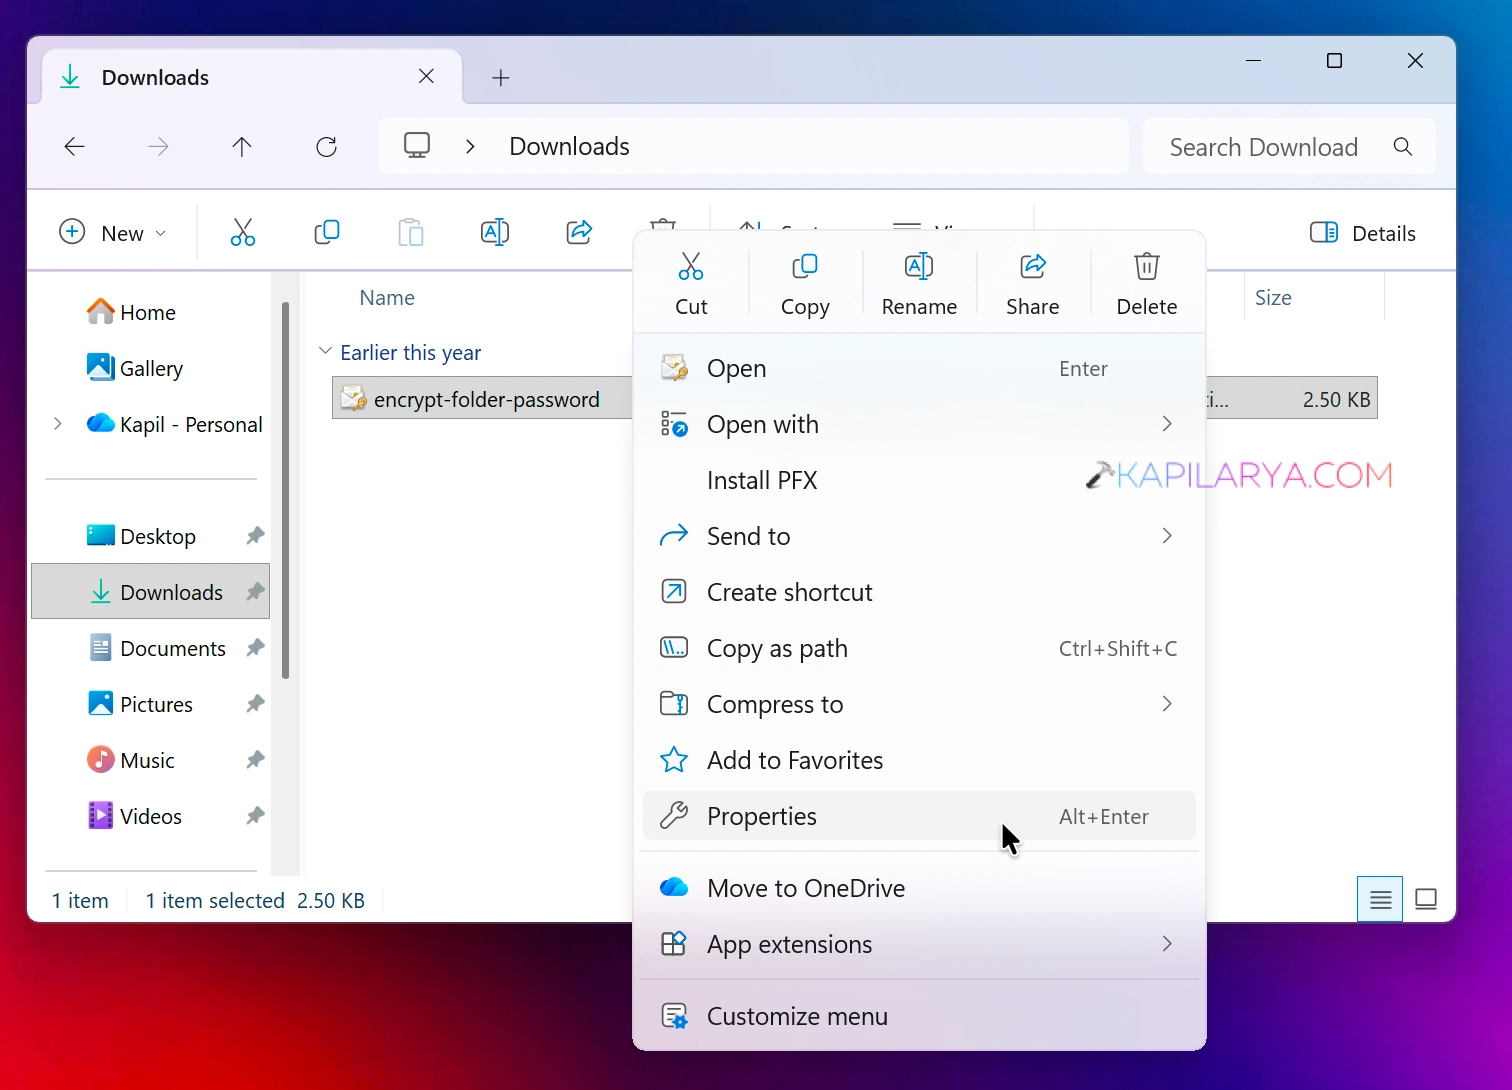
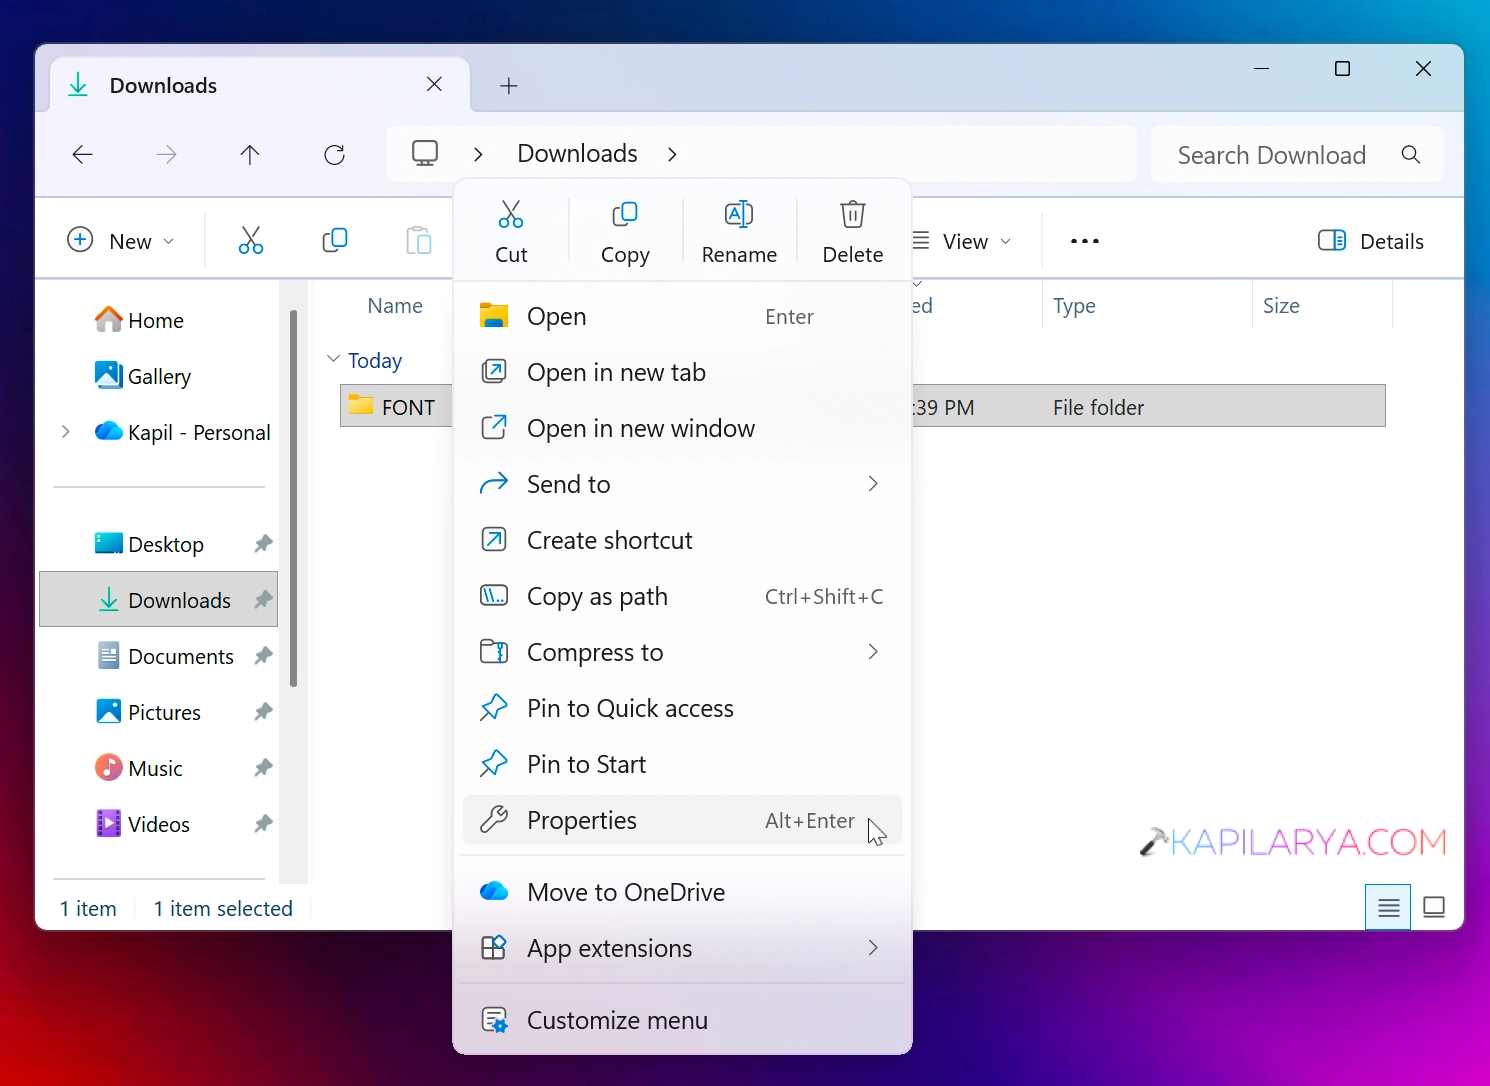
1. Right click on the file or folder for which you want to take ownership and select Properties. If it’s a file, the right click context would be like this:
If it’s a folder, the right click context would be like this:
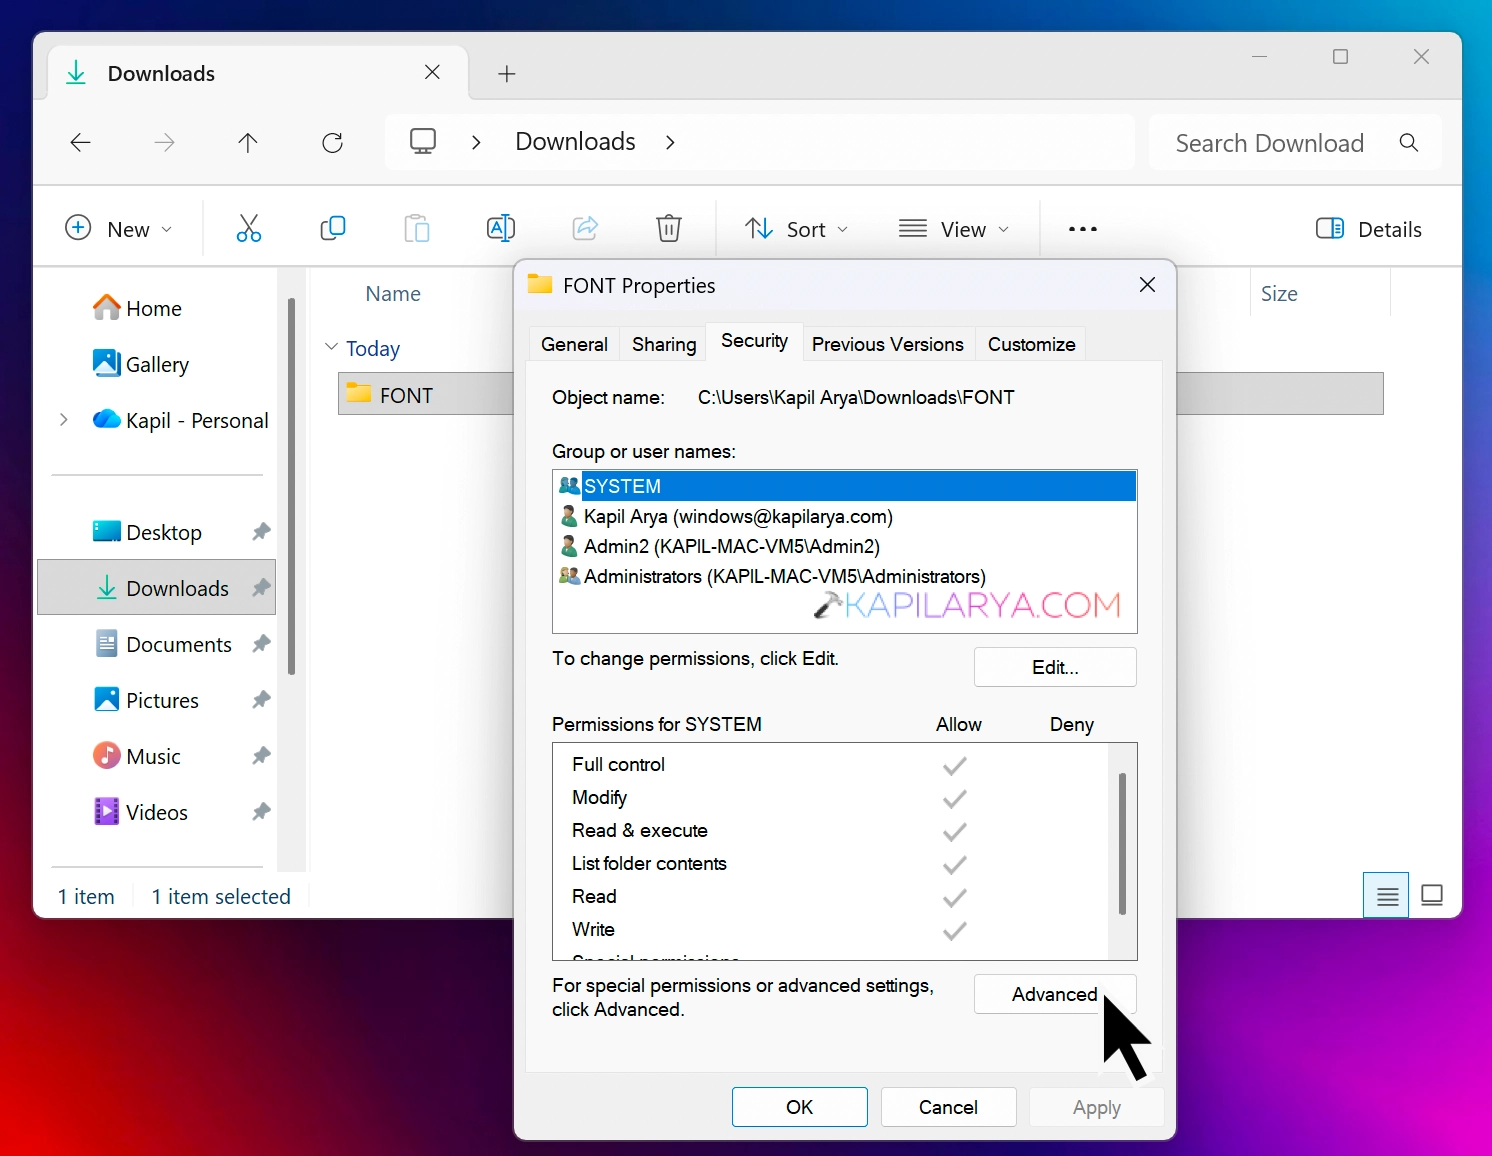
2. On the property sheet, switch to Security tab. Click on the Advanced button as shown in the below image.
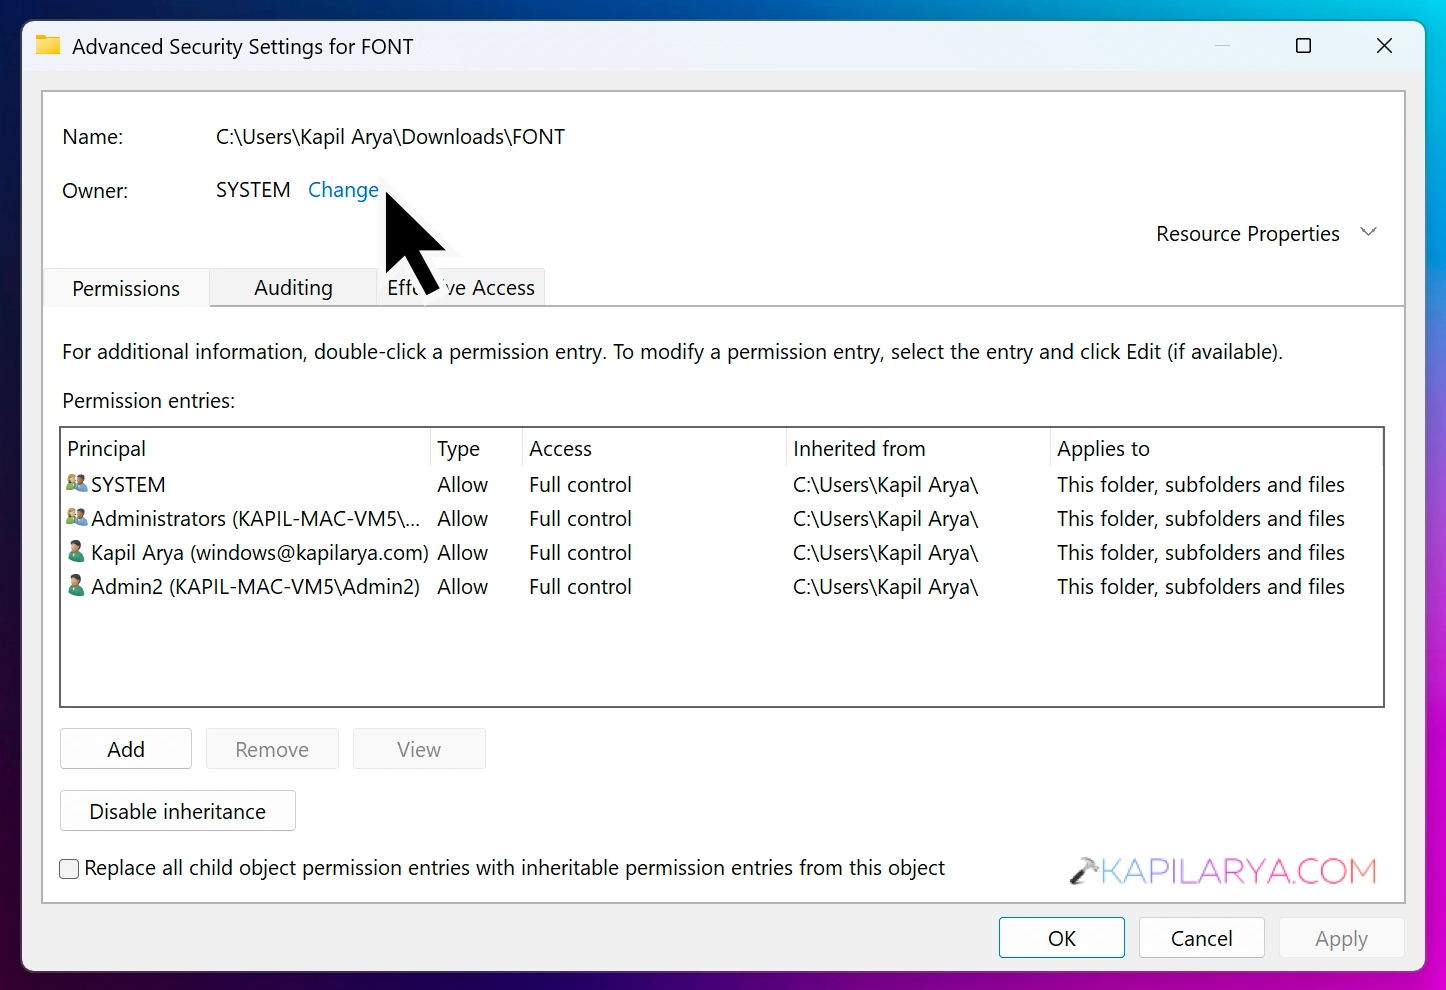
3. Then under Advanced security settings, you will be able to locate the current owner for the file or folder. Click on Change link next to owner name.
4. Then under Select user or group, click on Advanced button.
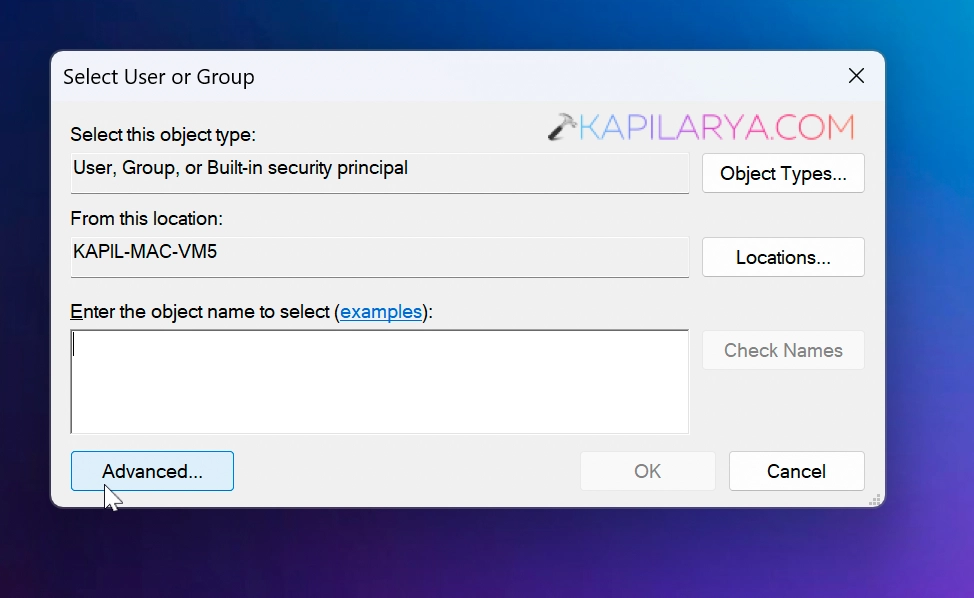
5. In the next window, click on Find now.
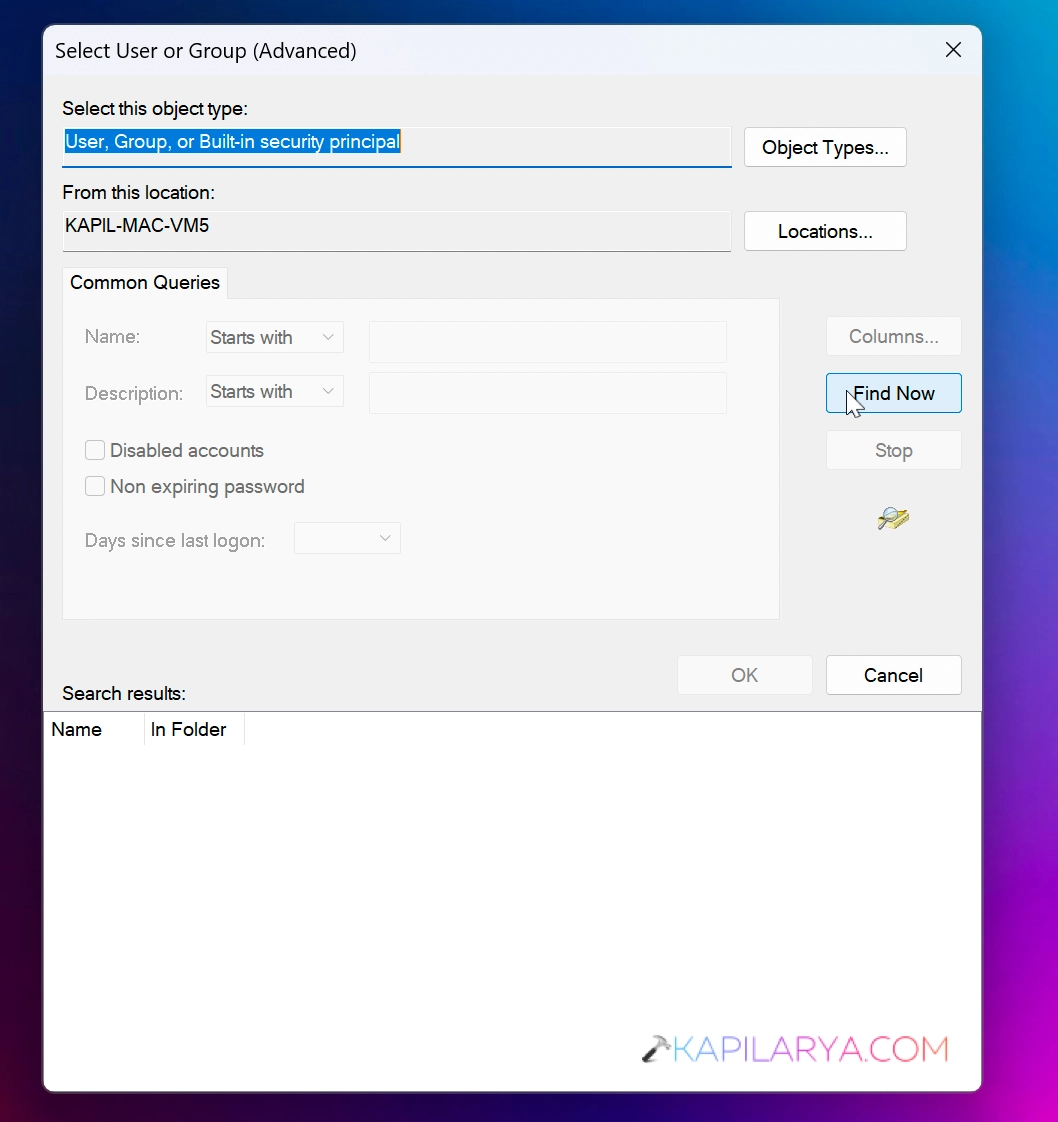
6. From the search results, locate your user account name, for which you want to take the ownership and then click OK.
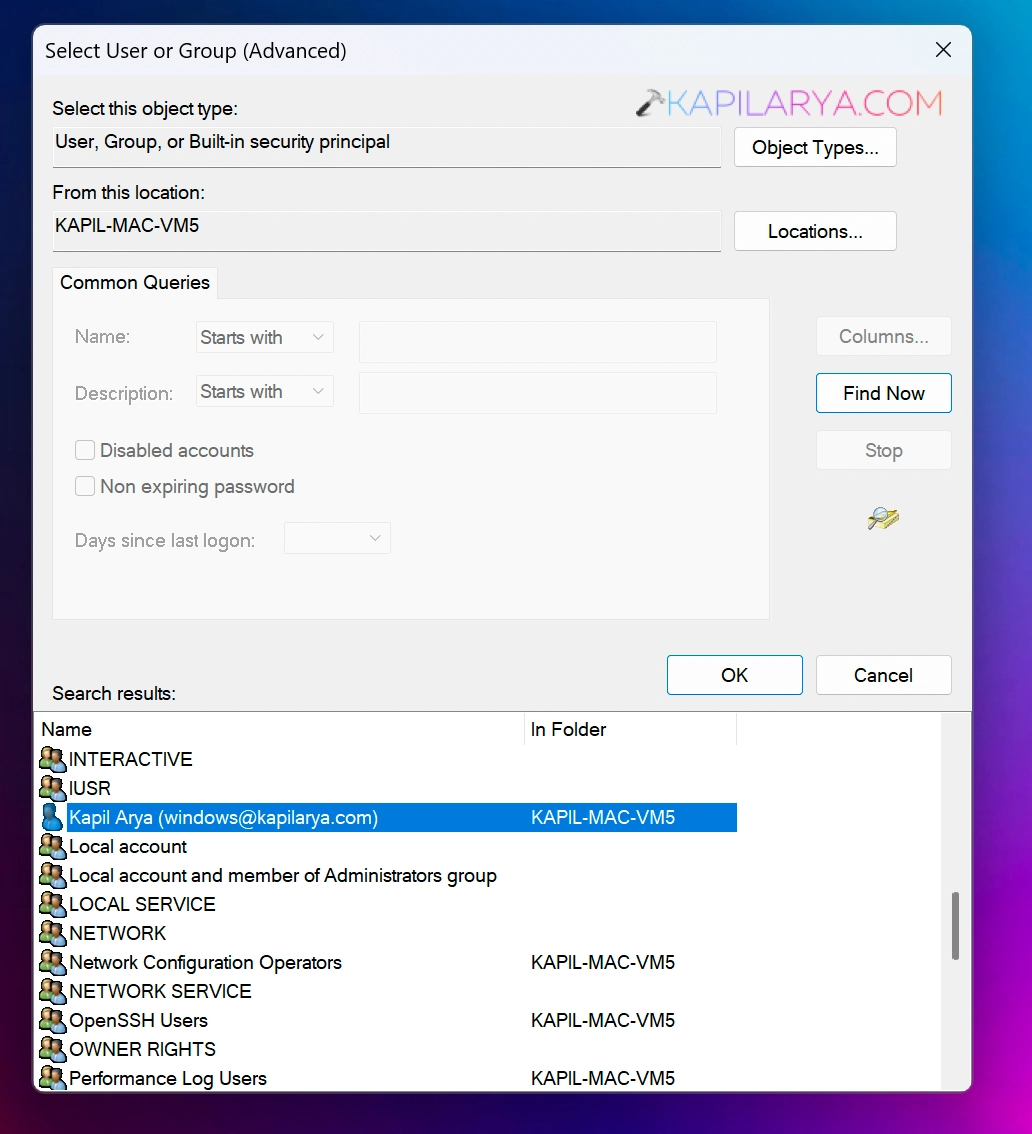
7. Now back in the Select user or group window, click OK.
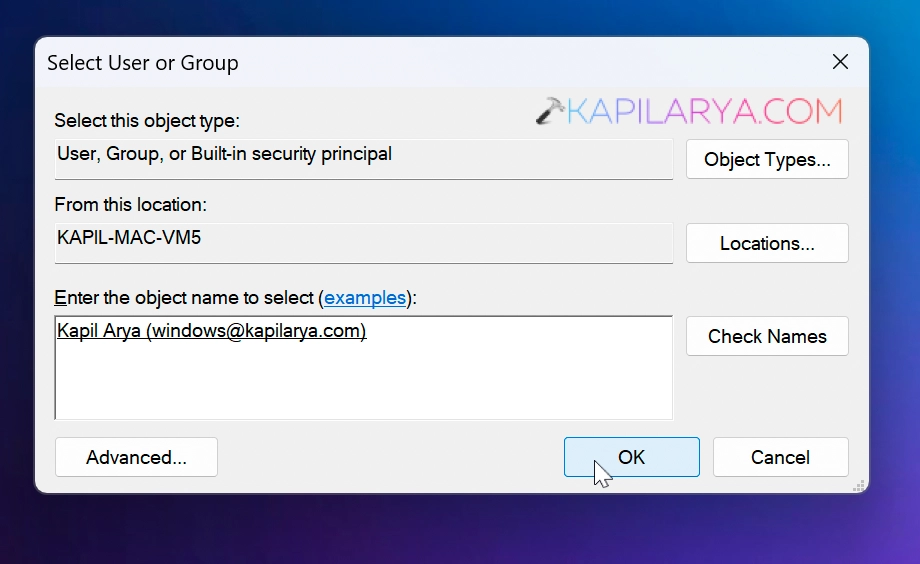
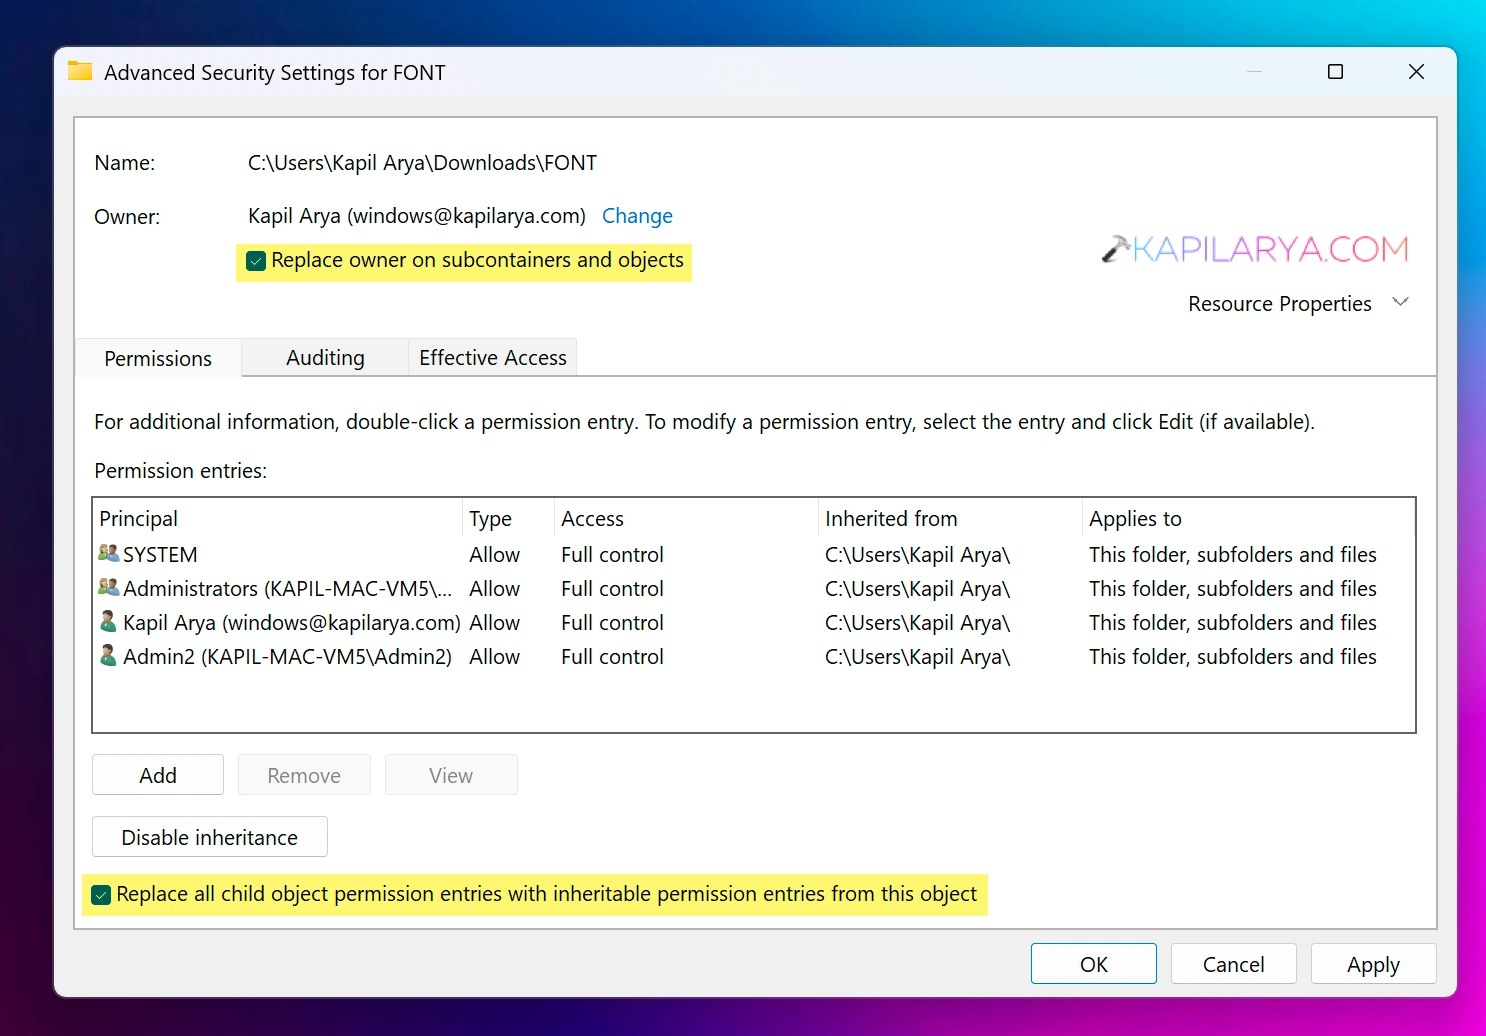
8. Now back in the Advanced security settings, make sure you check Replaced owner on subcontainers and objects, if you want to apply ownership on folder sub-content. You can also check replace all child object permission entries from this object option.
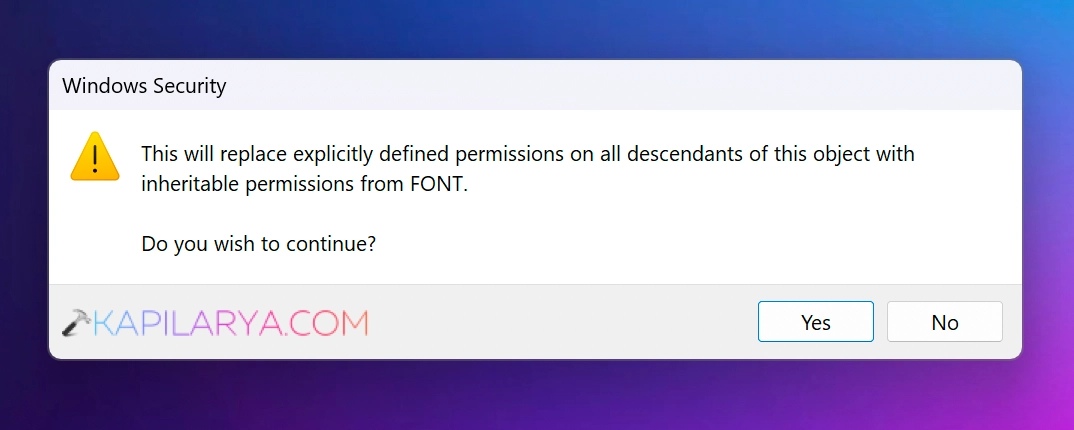
9. Click on the Yes button in the confirmation prompt.
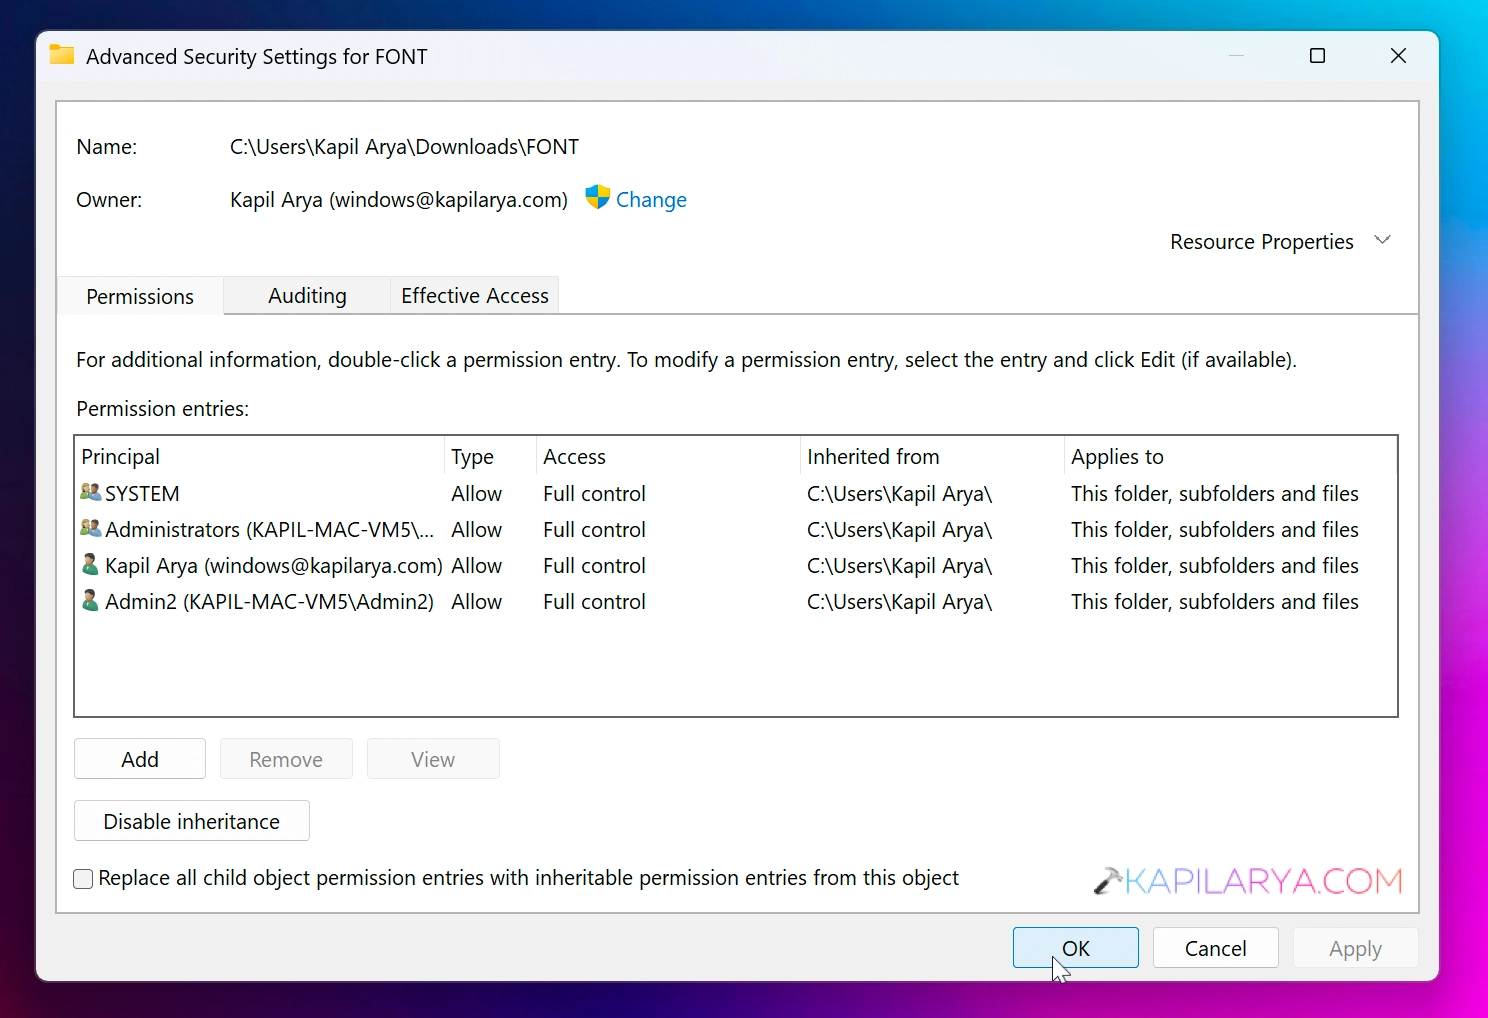
10. Back in the Advanced security settings window, click Apply followed by OK.
11. Now back in the folder or file property sheet, click Apply, OK.
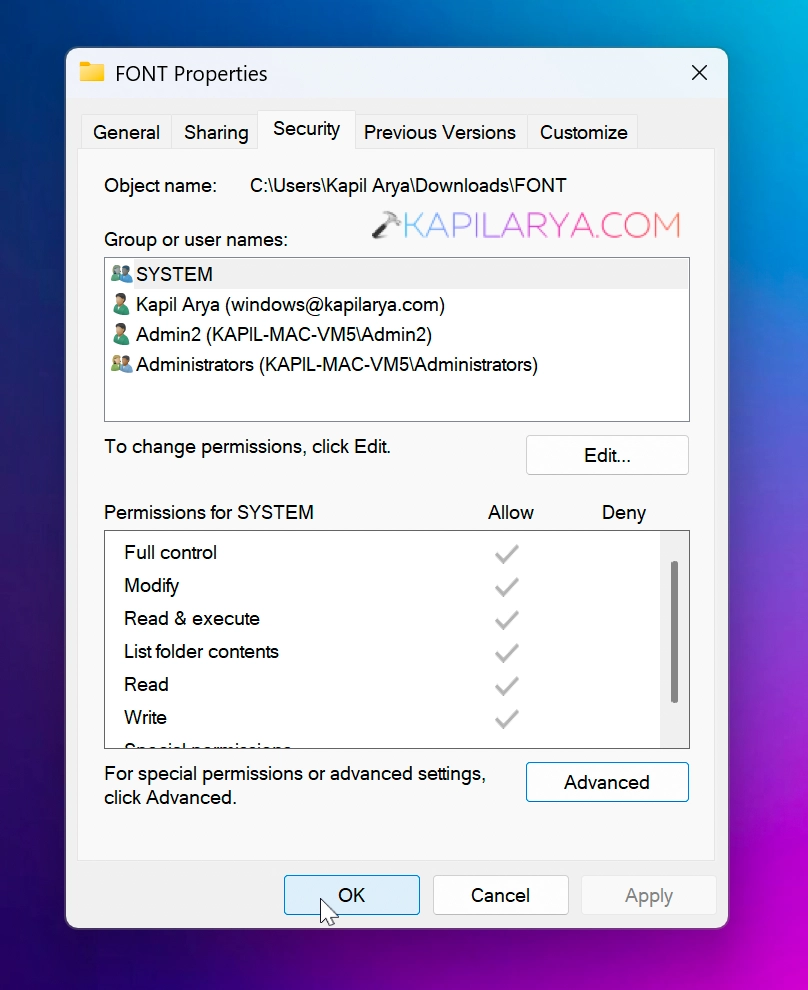
In this way, the ownership of the file or folder has been changed.

Option 2: Take ownership of registry keys
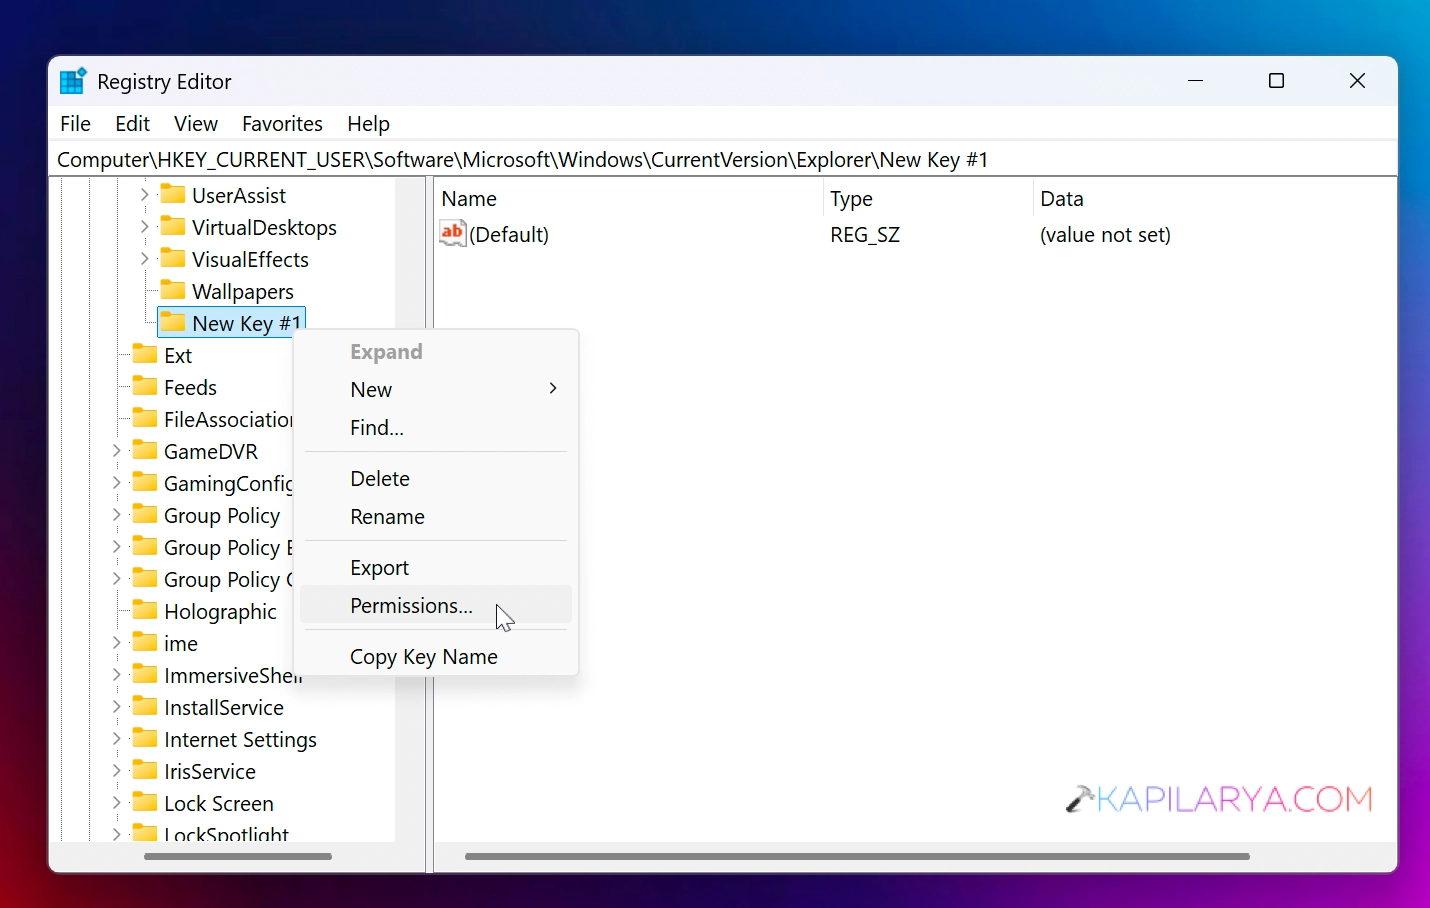
1. Right click on the registry key for which you want to take the ownership, and select Permissions.
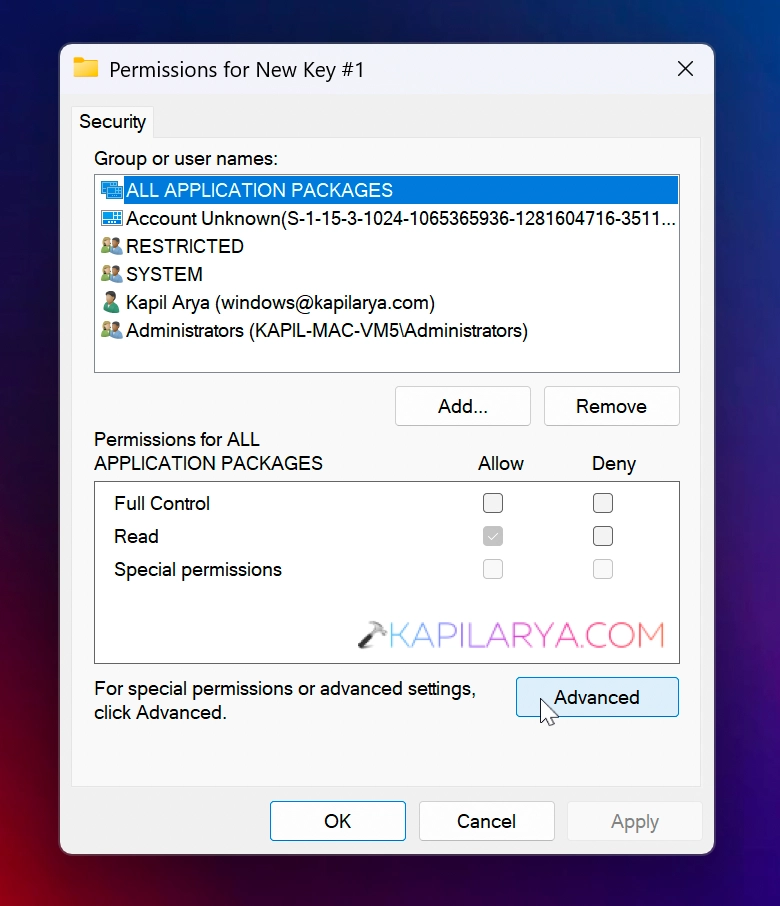
2. In the Permissions window, click on Advanced.
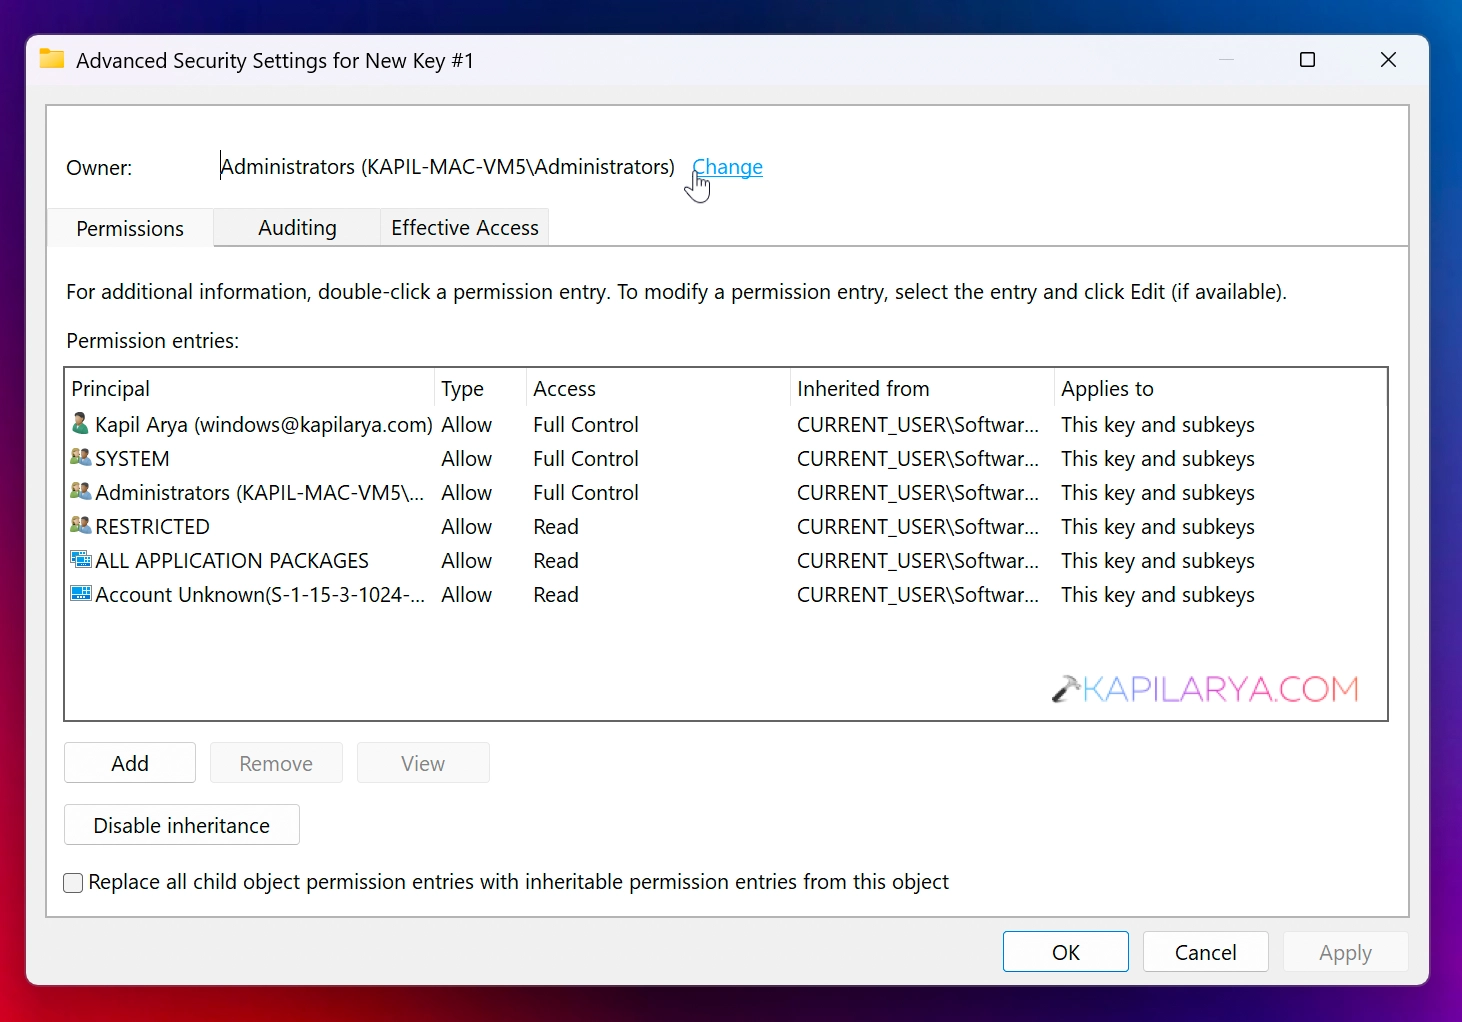
3. Under Advanced security settings window, the current owner for the registry key should be mentioned. Click on the Change link next to it.
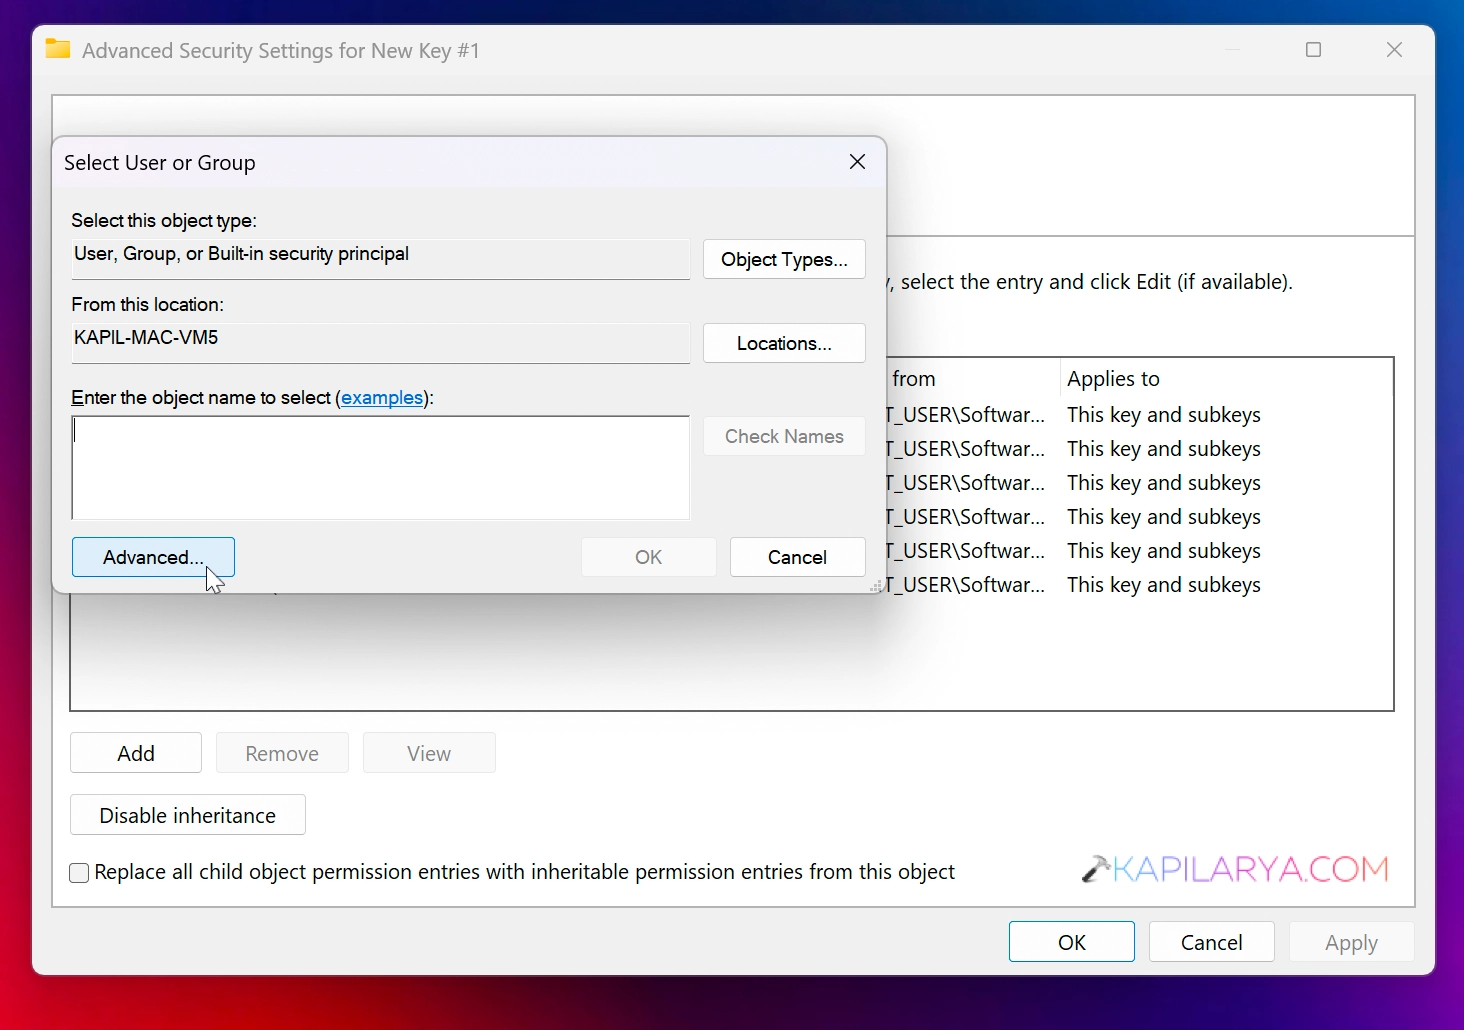
4. In the Select user or group, click Advanced.
5. Then click Find now in the next window.
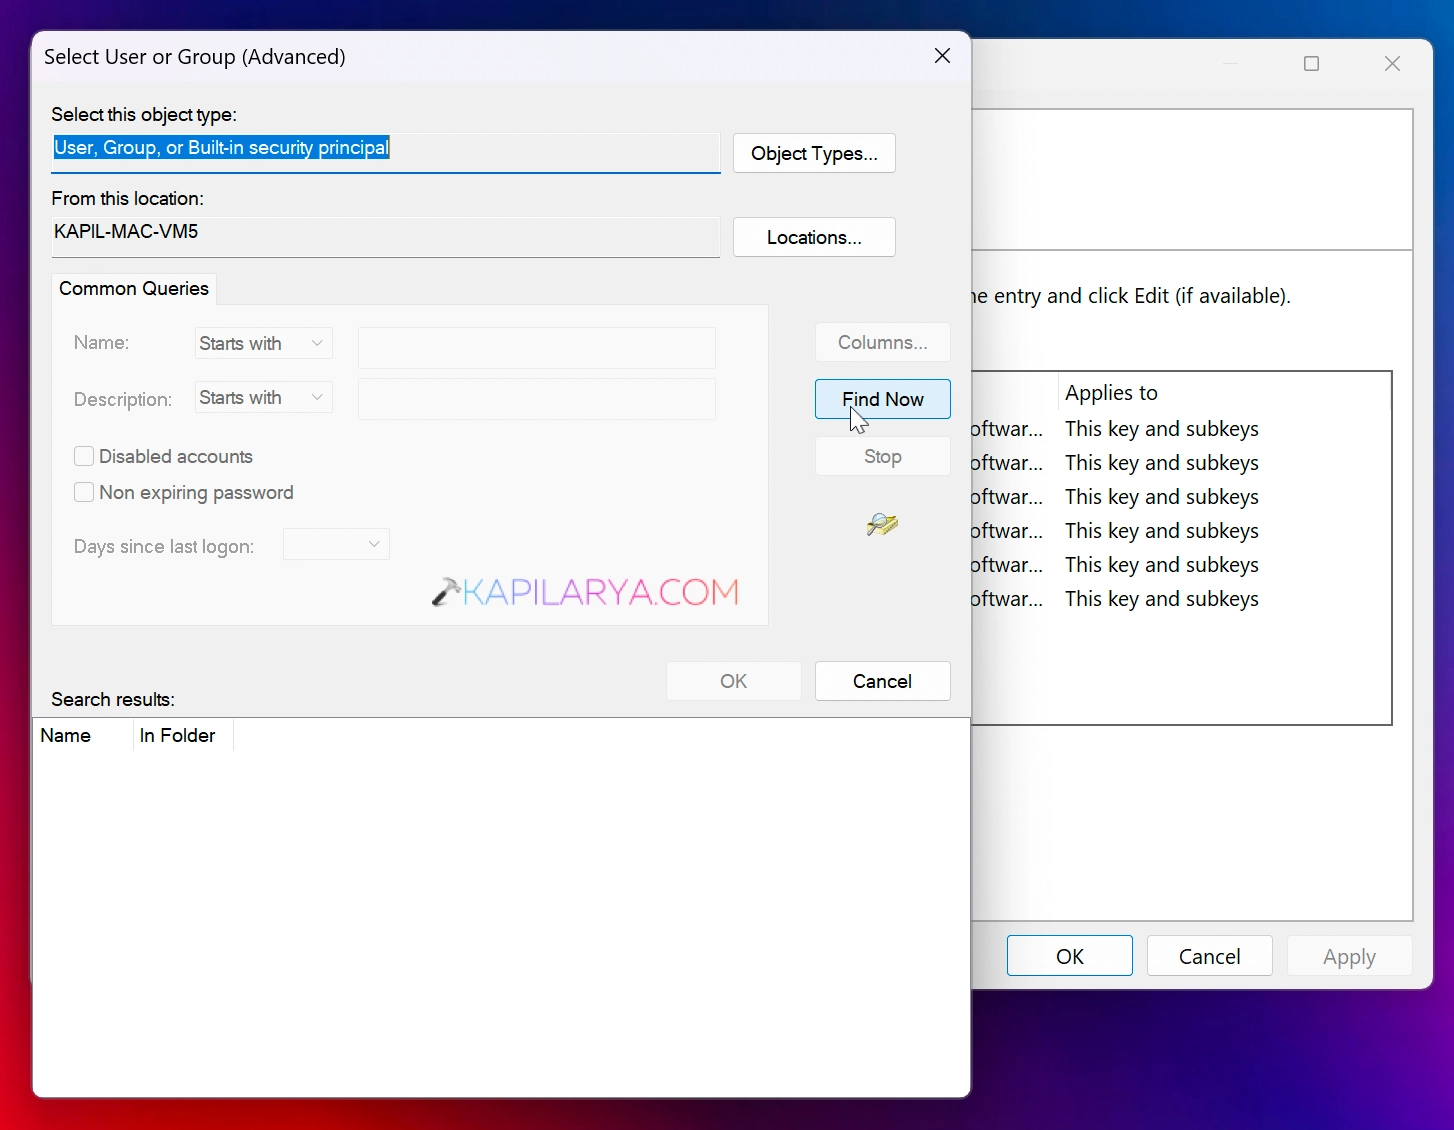
6. From the search results, locate your account you want to transfer the ownership. Click OK.
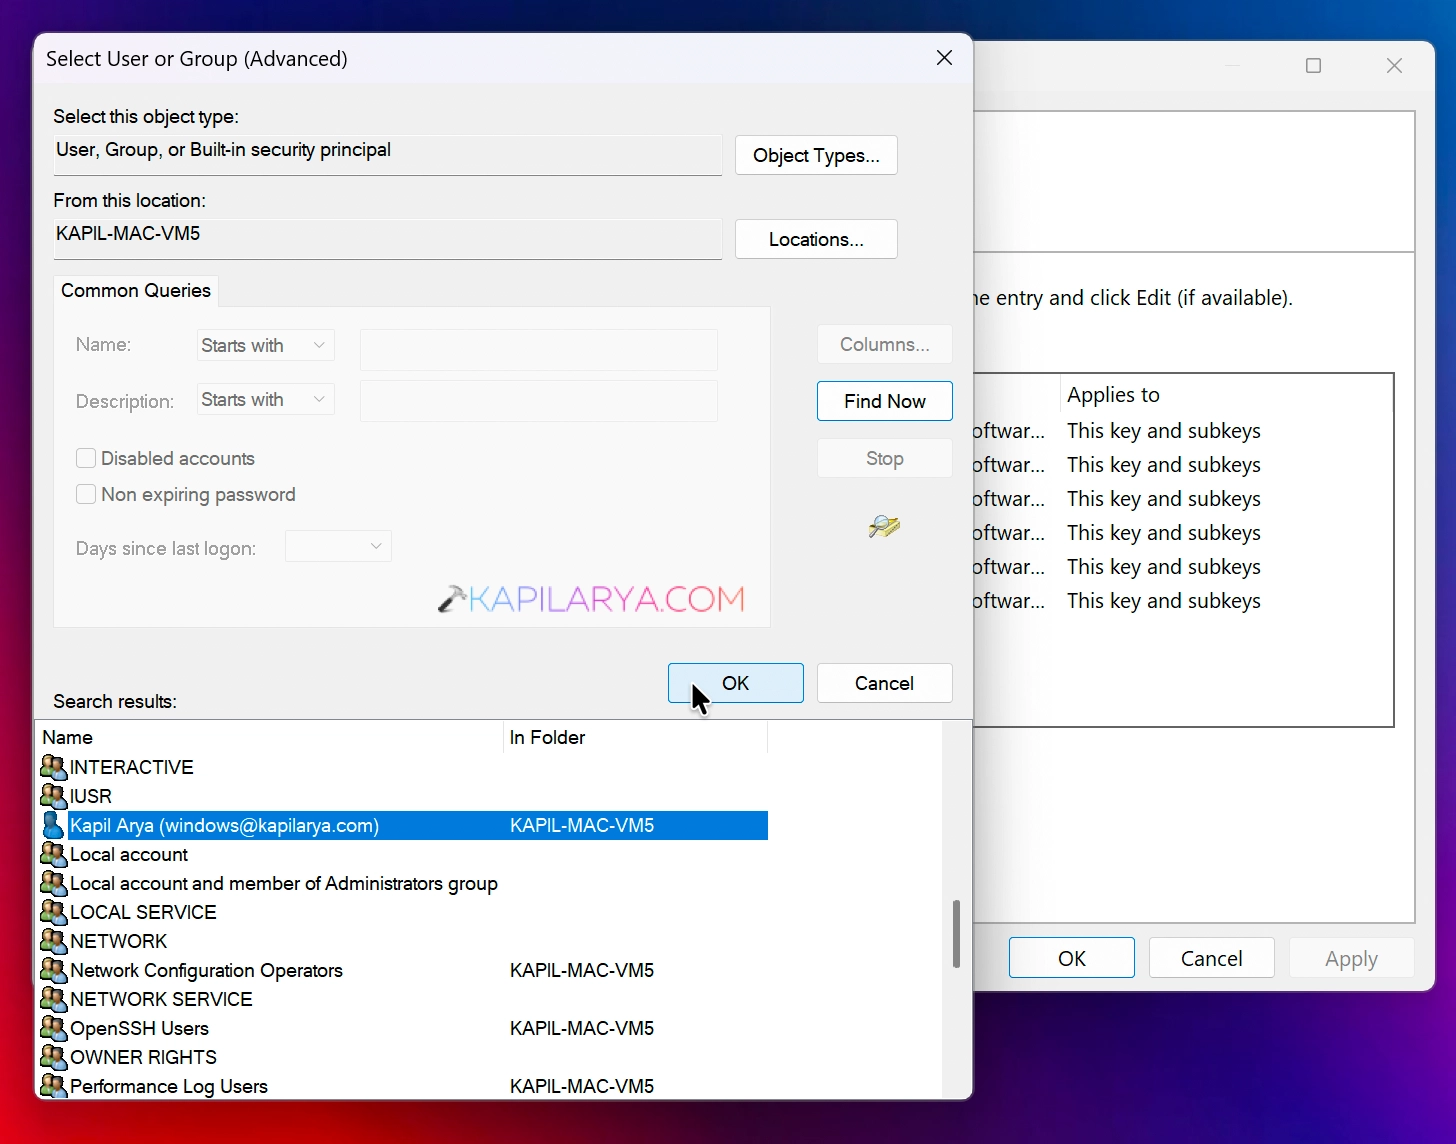
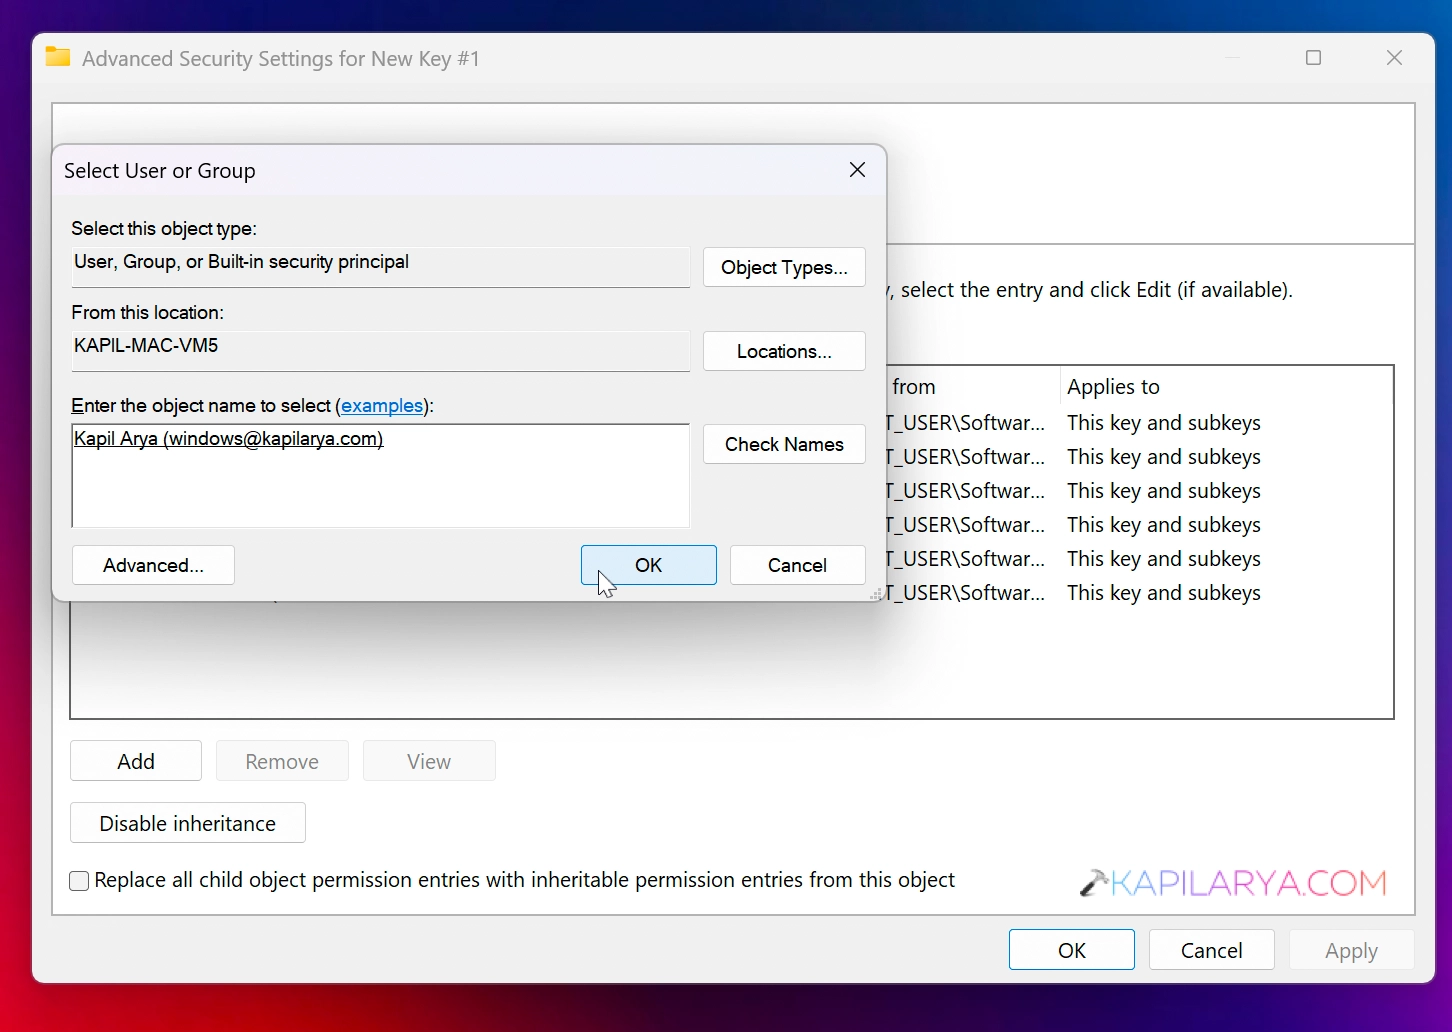
7. Then click OK in the Select User or group window.
8 .Now back in the advanced security settings, you can check Replaced owner on subcontainers and objects, if you want to apply ownership on registry subkeys. You can also check Replace all child object permission entries with inheritable permission from this object option. Click Apply.
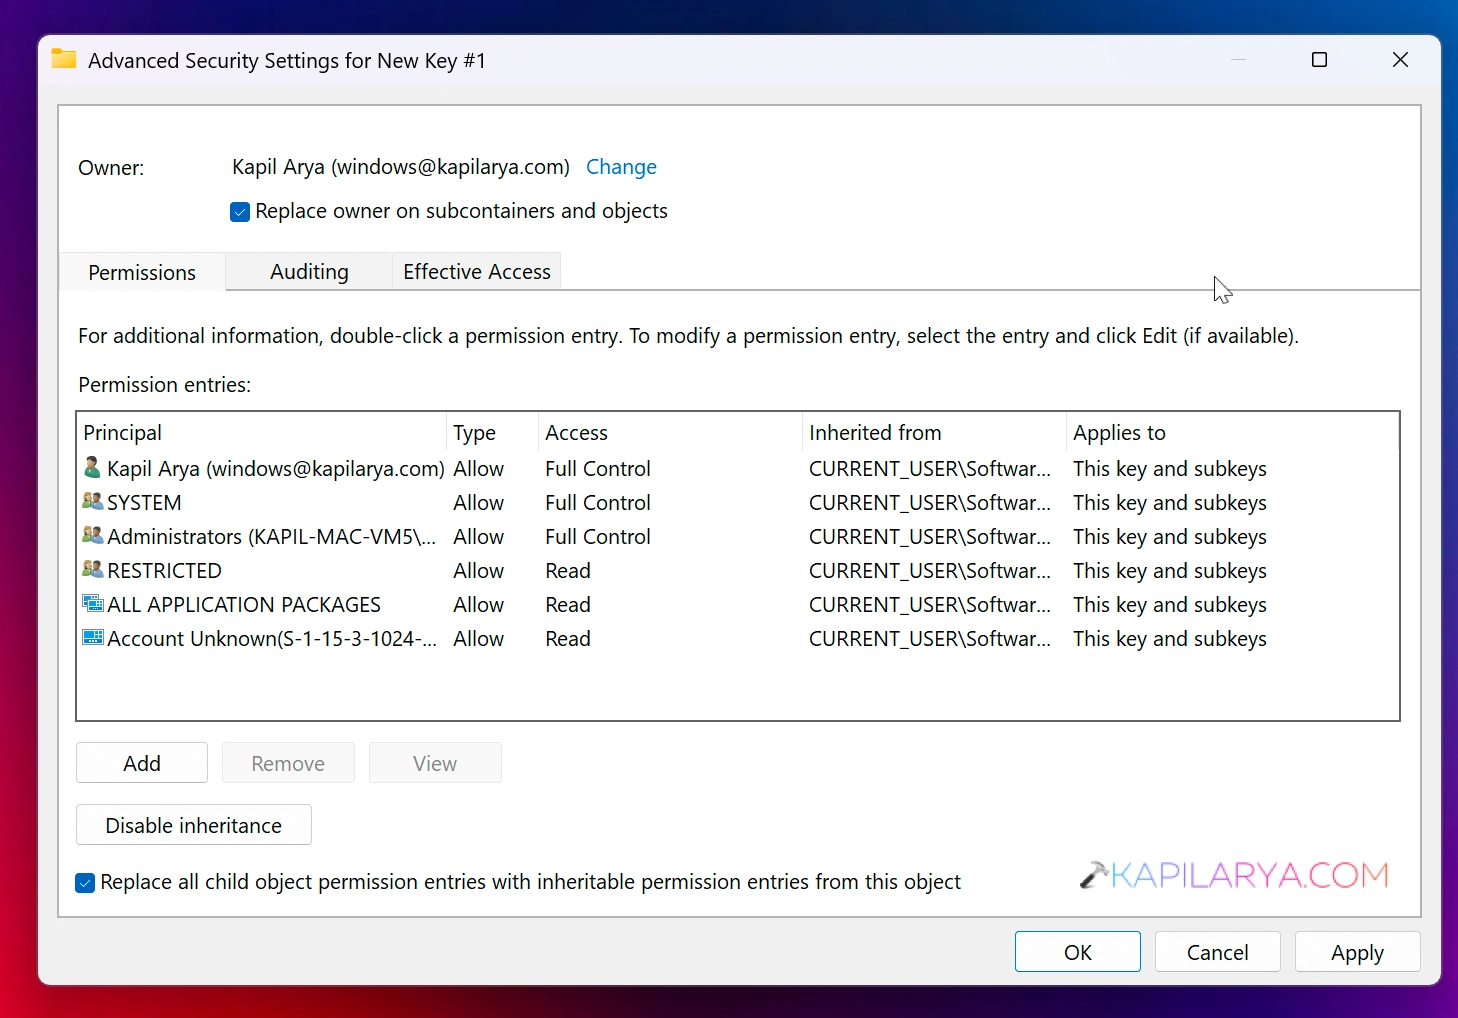
9. In the confirmation prompt, choose Yes.
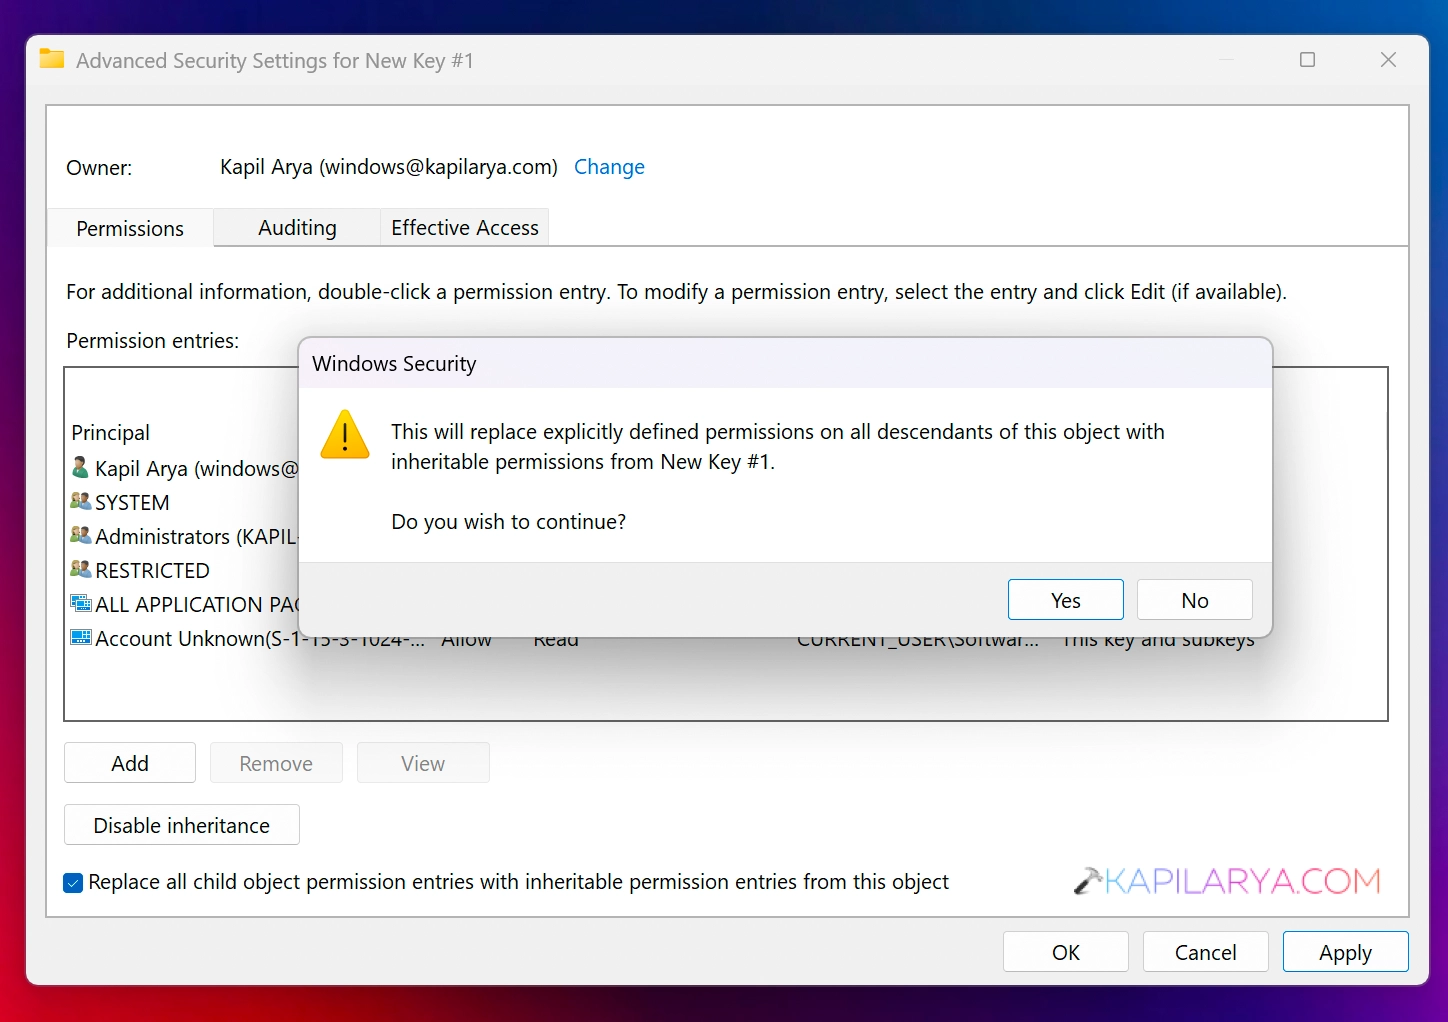
10. Then back in the Permissions window, click Apply followed by OK.
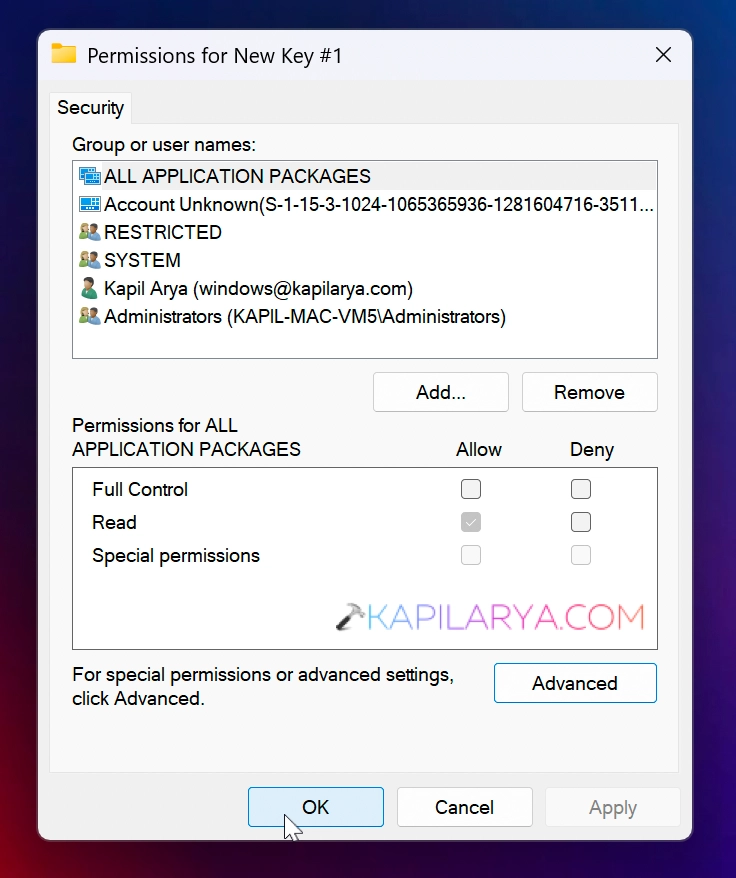
In this way you have successfully taken the ownership of registry key.

That’s it!




![Quick Access Crashes File Explorer in Windows 11 [6 Fixes]](https://www.kapilarya.com/assets/File-Explorer-1-768x552.png)

