
Do you know how to enable or disable Microsoft Defender Firewall? Microsoft Defender Firewall assists you in preventing malicious software and hackers to gain access to your system using Private, Pubic or Domain networks or the internet. Some organizations ask you to turn this firewall on to access their network services.
That’s why it is recommended to always turn Microsoft Defender Firewall On even if another firewall is running on your system. This helps in protecting the system from unauthorized access. In this post, you will learn how to turn Microsoft Defender Firewall off or on in Windows 11. So, let’s get started without further ado.
Page Contents
How to Enable/Disable Microsoft Defender Firewall in Windows 11
Way 1: Enable/Disable Microsoft Defender Firewall Using Defender
1. Firstly, open Settings through the Windows + I keyboard shortcut.
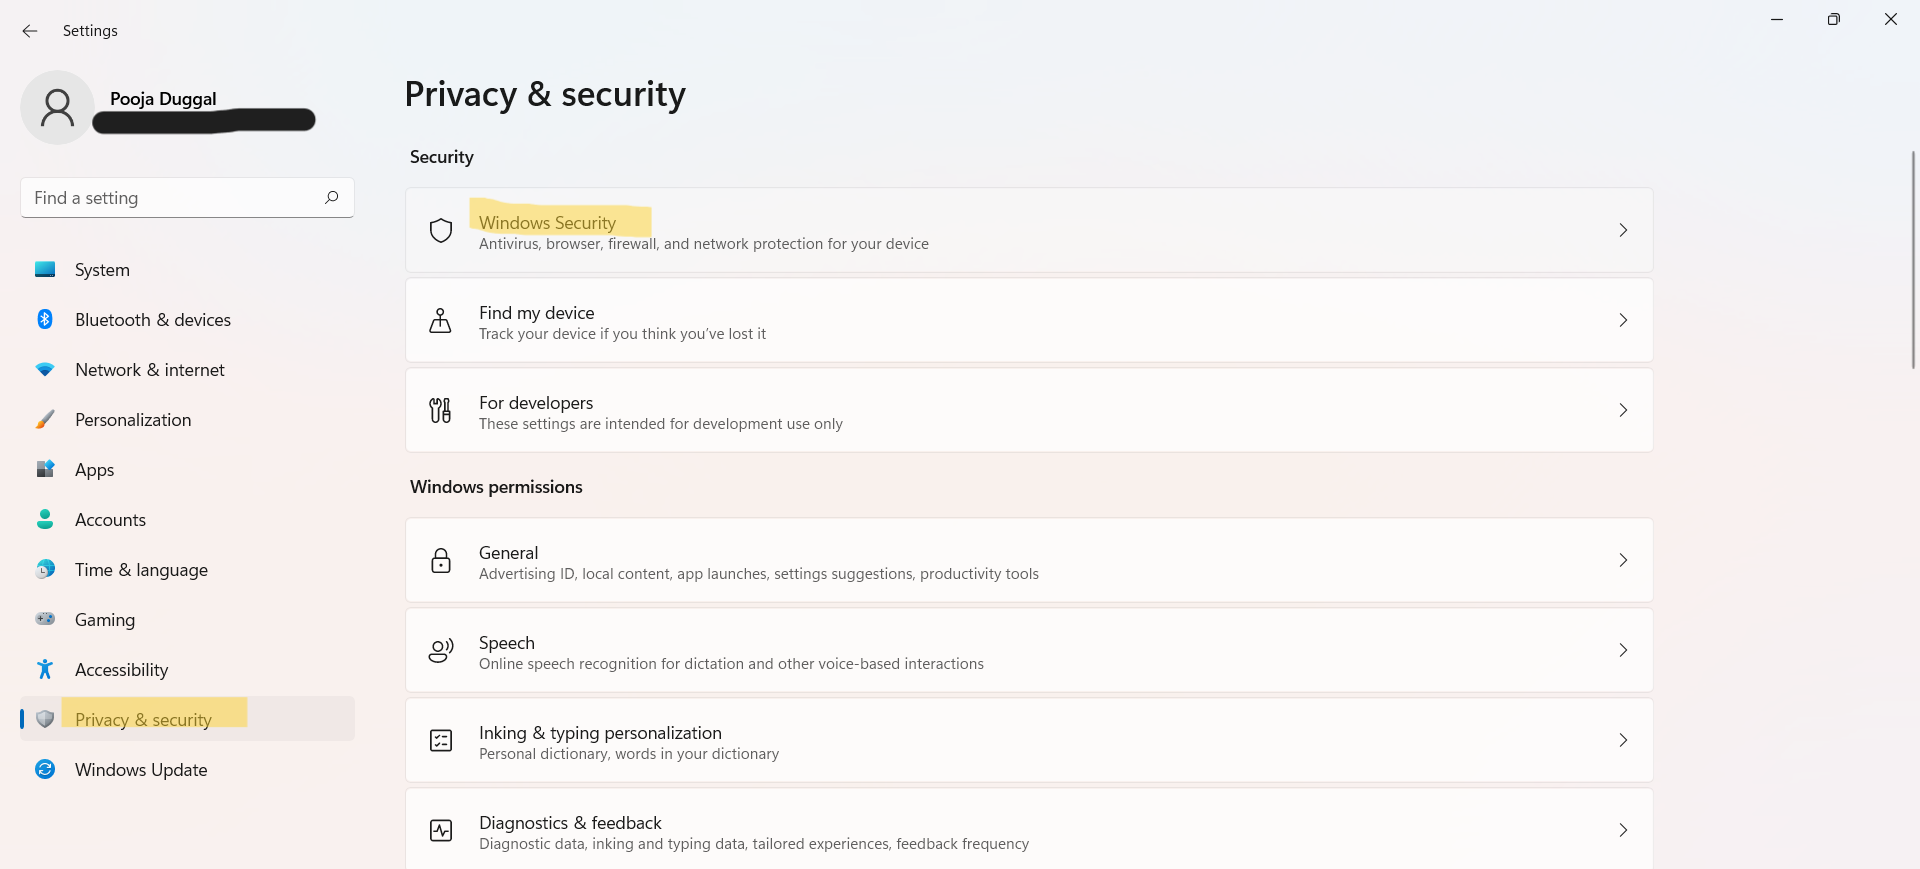
2. From there, click on Privacy & security and then, choose Windows Security.
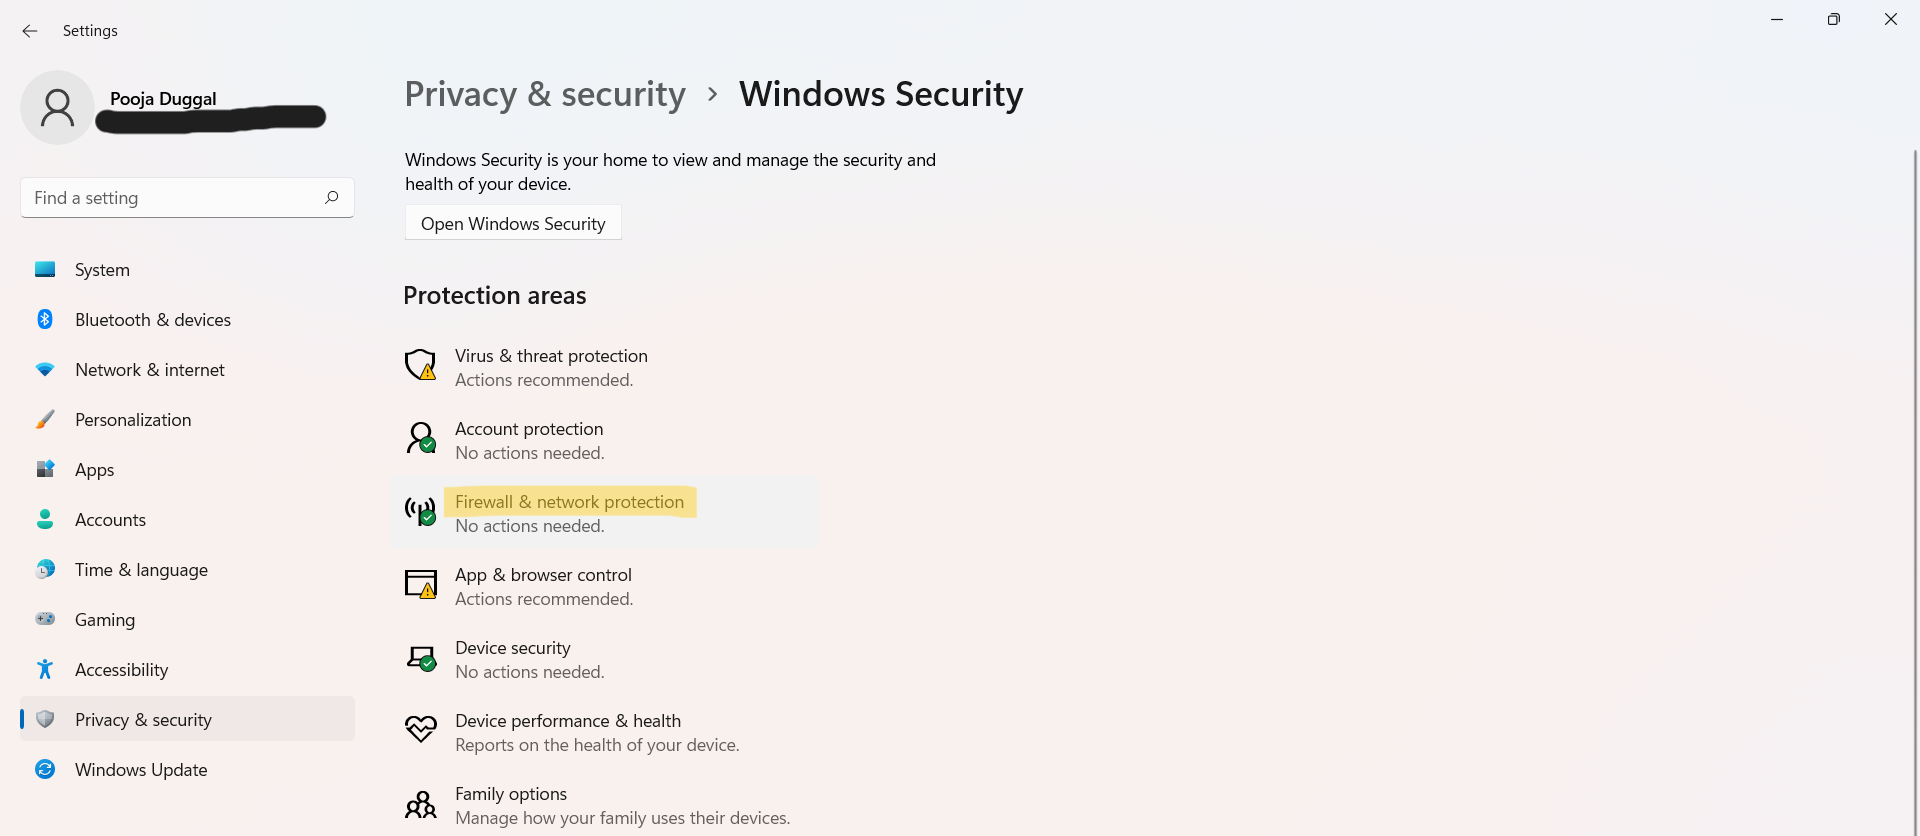
3. Next, select the Firewall & network protection option.
4. After that, you need to select a network profile. You will come across three options – Domain network, Private network and Public network. 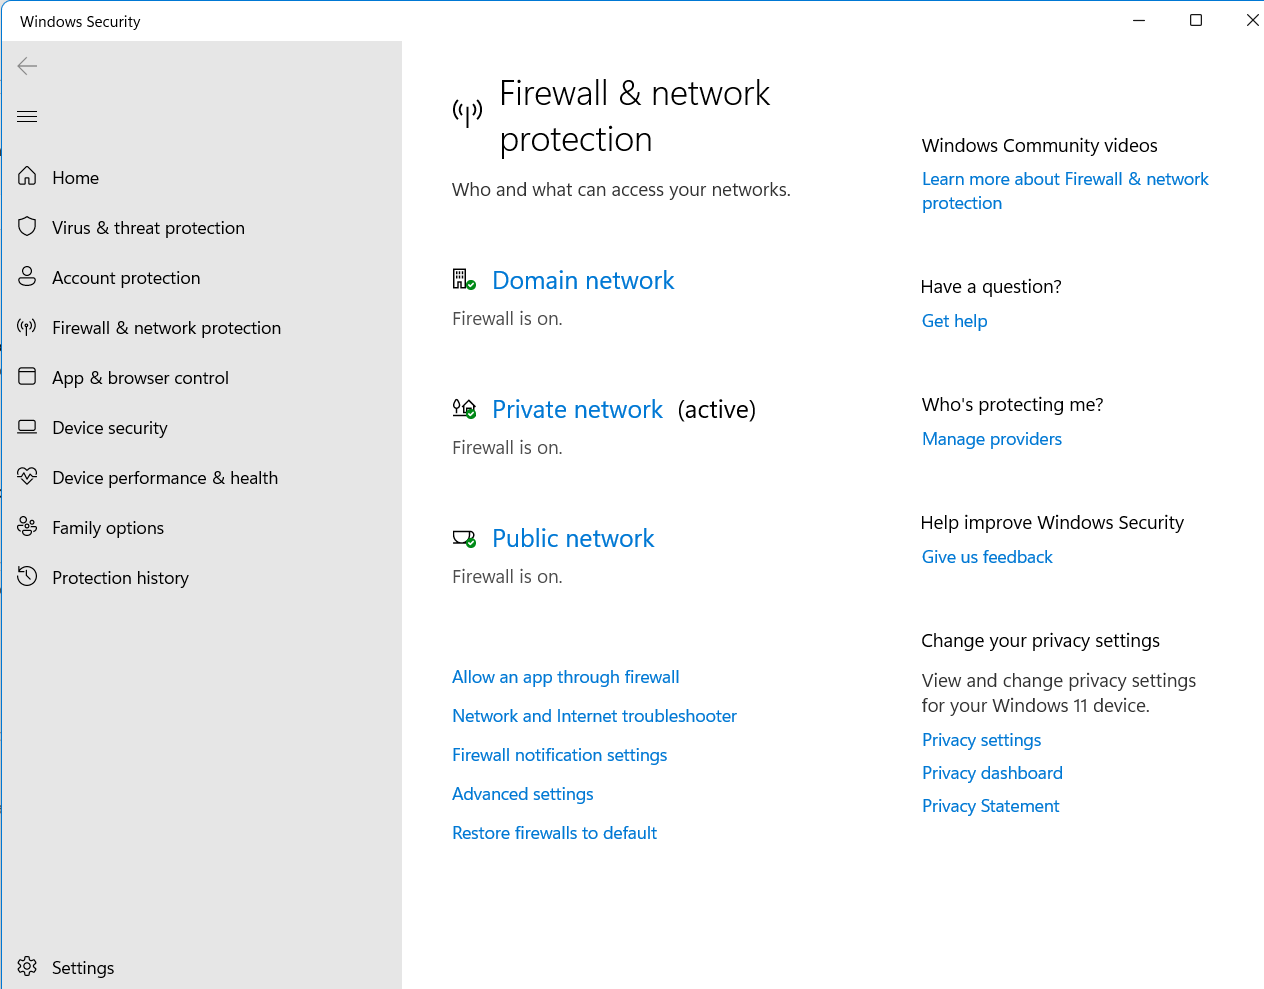
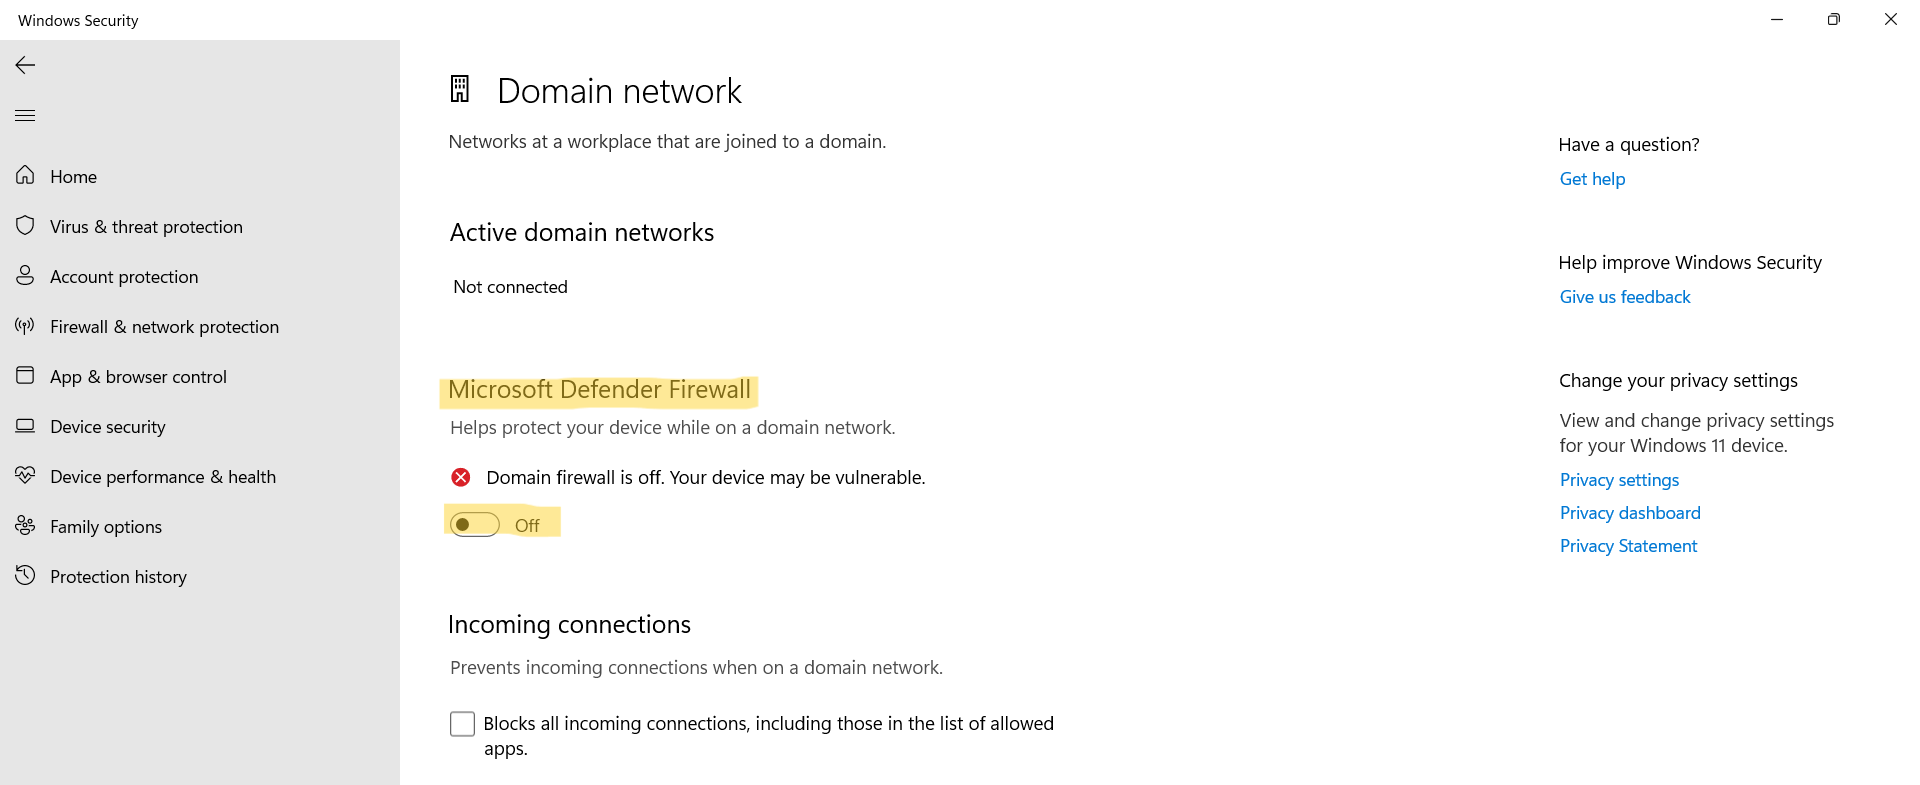
Once selected, turn the toggle ON present under Microsoft Defender Firewall.
Domain network:

Private network:

Public network:

In order to disable Microsoft Defender Firewall, switch the toggle to OFF. Turning off the firewall could make the device more susceptible to unauthorized access. If there is an application that is being blocked, it is better to allow the app through the firewall.
Domain network:
Private network:

Public network:

Way 2: Enable/Disable Microsoft Defender Firewall Using Registry Editor
 Registry Disclaimer: It is recommended to create a System Restore point first, if you’re not familiar with registry editing.
1. Initially, open the Run dialog box by pressing Windows + R tabs together on the keyboard.
2. Next, type regedit in the search box and press OK. If prompted, tap on Yes.

3. a) To enable Microsoft Defender Firewall for Public and Private networks, navigate to the location:
HKEY_LOCAL_MACHINE\SYSTEM\CurrentControlSet\Services\SharedAccess\Parameters\FirewallPolicy\StandardProfile

b) To enable Microsoft Defender Firewall for Domain networks, navigate to the following location:
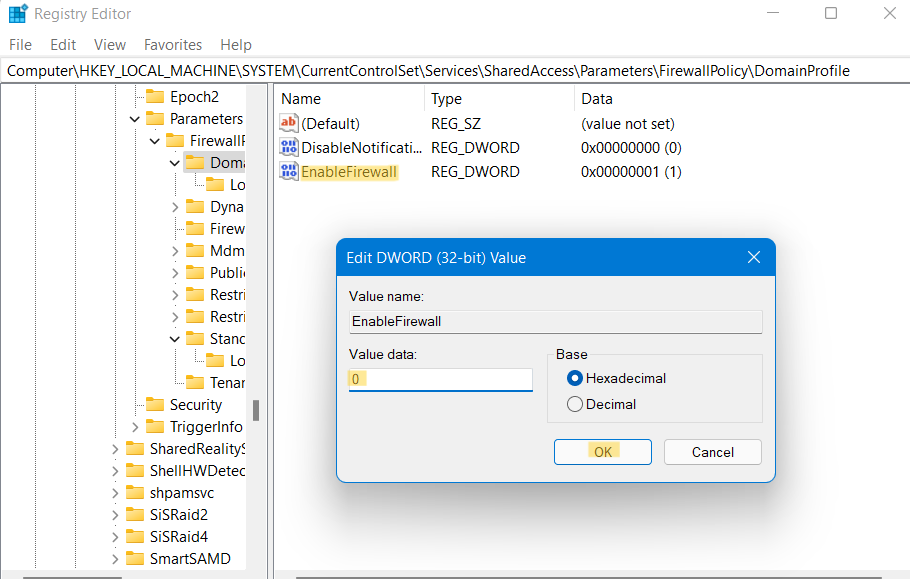
HKEY_LOCAL_MACHINE\SYSTEM\CurrentControlSet\Services\SharedAccess\Parameters\FirewallPolicy\DomainProfile

4. Once there, double-click on EnableFirewall to enable the Microsoft Defender Firewall and enter the value 1 to the Value data.
In order to disable Microsoft Defender Firewall, double-click on EnableFirewall and change the value to 0 as the value data.
Standard Profile:

Domain Profile:
5. Lastly, press OK and then, restart the system for saving the changes.
Video guide
For further information, you can refer this video guide:
So, these are some useful methods to turn Microsoft Defender Firewall ON or OFF.
Related: Enable or disable Windows Defender automatic scan or customize it.


