Windows 11 comes with some apps being pre-installed from Microsoft. These apps helps you to perform the basic functions and day-to-day task. For example you can use Photos app to view and edit images, while you can use, Microsoft Edge to browse web and view documents. The default apps has association with several file type or formats. Additionally, you can install the apps of your own choice from Microsoft Store or from the specific app vendor in case of third-party apps. After having the specific apps, if your Windows 11 keep changing default apps, this guide is for you.
Page Contents
Fix: Windows 11 keeps changing default apps
There could be several reasons, why windows 11 keeps changing the default apps. Some of them are listed below:
- A Windows update you installed reset the default apps
- If your profile is corrupted
- It could be due to a software conflict
- Incorrect system or app settings can also cause this
To resolve the issue, you can try out below mention fixes.
Fix 1: Resolved profile corruption or create a new account
If your profile is corrupted, it may not be able to retain the default apps.
To resolve the profile corruption, you can run sfc /scannow command. It would help you to fix corruption with system files.
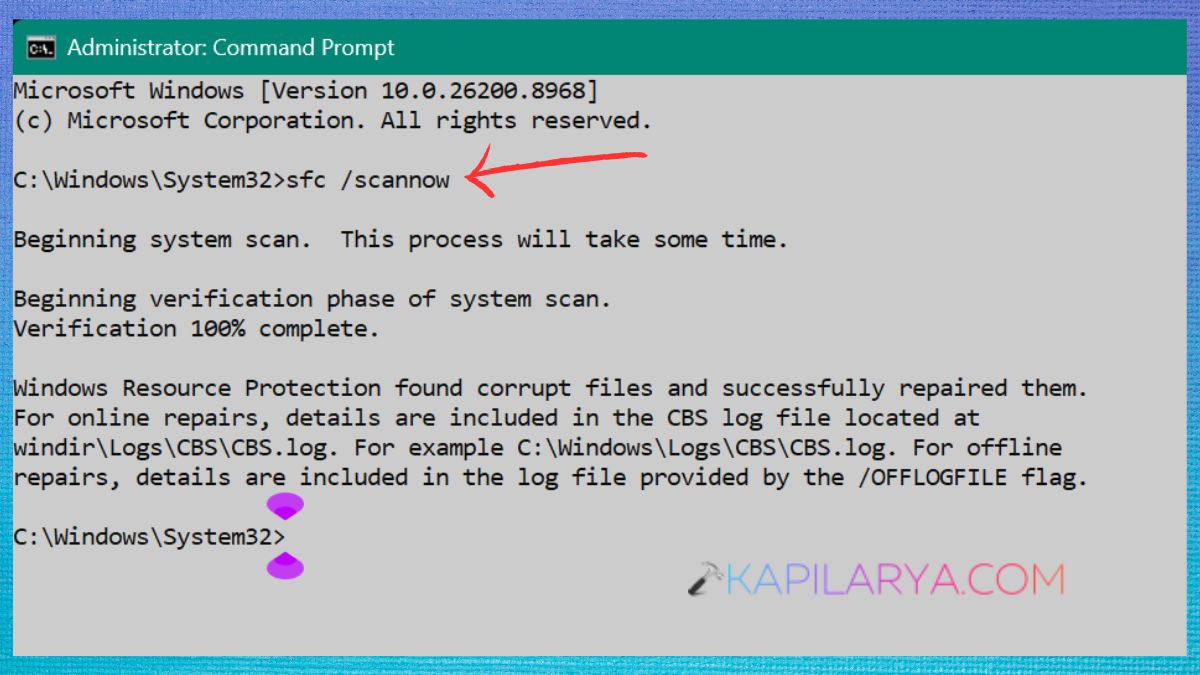
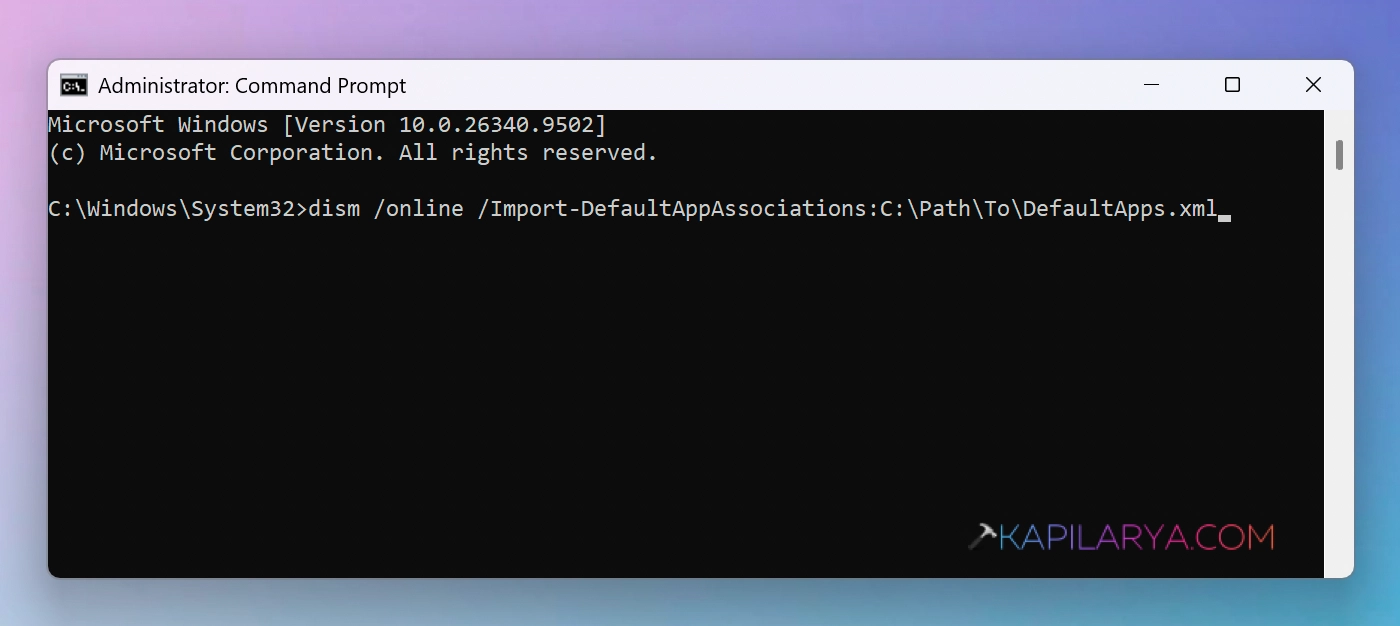
If the issue still purchases, you can run following command in the administrative Command Prompt:
dism /online /Import-DefaultAppAssociations:C:\Path\To\DefaultApps.xml
Fix 2: Using Registry
Sometimes, windows update may push windows 11 to keep changing default app apps to Microsoft programs. You can use this registry manipulation to change this behavior:
1. Right click on the Start button and select regedit.
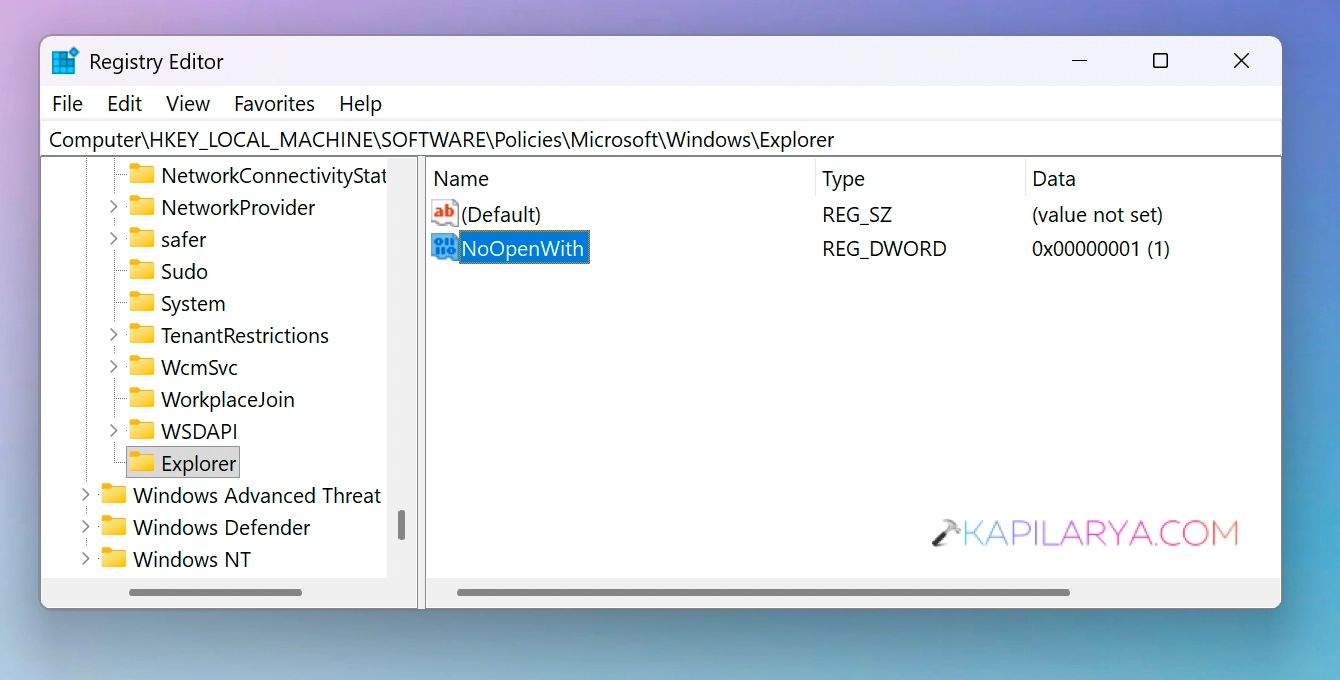
2. In the Registry Editor window, navigate to following registry key:
HKEY_LOCAL_MACHINE\SOFTWARE\Policies\Microsoft\Windows\Explorer
3. If the Explorer registry key is not there, you need to manually create it. Simply do a right click on the Windows registry key and select New > Key. Name the new newly created sub key as Explorer.
4. In the right pane of Explorer registry key, right click and select New > DWORD Value. Create a new registry DWORD and name it as NoOpenWith.
5. Now double click on NoOpenWith and set it’s Value data to 1.
6. You can now close the Registry Editor and restart the system.
Fix 3: Using Group Policy
If you are managing the systems for your clients in organization, you can deploy following policy setting.
1. Right click on the Start button and select Run.
2. In Run window, type gpedit.msc and click OK.
3. In the Group Policy Editor window, navigate here:
Computer Configuration > Administrative Templates > System > Default Associations Configuration
4. Now, locate the policy setting named Turn off Microsoft Default Associations. Double click on it to modify its status.
5. Set the policy setting to Enabled. Click Apply followed by OK.
6. You can now close the group policy editor window and restart your system.
That’s it!