Windows Sandbox is a lightweight, isolated and hardware-based Windows virtual environment. Once it is closed, its temporary files and applications are deleted, as is its system state. Currently, Microsoft has confirmed that Windows Sandbox is available on Windows 11 Pro, Enterprise, Pro Education/SE and Education editions, but it is not available on Windows 11 Home.
Here you’ll get a guide to solve Windows 11 Sandbox not working with practical step-by-step solutions. If the issue persists, begin with checks that are applicable to your situation before progressing to system repairs.
Page Contents
Why Is Windows 11 Sandbox Not Working?
Before delving into more complex solutions, it’s important to first understand what may be blocking Sandbox from launching. Common causes include:
- Windows 11 Home edition being installed.
- A hardware virtualization feature is disabled in the BIOS/UEFI.
- If Windows Sandbox is disabled or installed incorrectly.
- Virtualization features that are required are not enabled.Some required virtualization features are not enabled.
- Pending Windows updates
- Faulty Windows system files
- Low memory, CPU usage or free disk space.
- Wrong .wsb configuration file
- Issues with other virtualization software packages.
- Virtualizing a Windows 11 VM with no nested virtualization support. Virtualizing a Windows 11 VM (not using nested virtualization).
Microsoft has a list of requirements for the Windows Sandbox, which includes hardware virtualization, at least 4 GB of RAM, at least 1 GB of free disk space, and at least two CPU cores.
Fix: Windows 11 Sandbox Not Working
When Windows 11 Sandbox is not working, don’t immediately assume that the feature itself is broken. If the configuration is causing issues, then start the default Sandbox before trying to troubleshoot the custom .wsb file. You can quickly find out if the issue is due to Windows Sandbox or your configuration from this simple test. Otherwise, follow the solutions given below.
Fix 1: Check Whether Your Windows 11 Edition Supports Sandbox
When Windows 11 Sandbox isn’t working, one of the things to check is that the Windows version supports the feature.
Windows Sandbox can be installed on:
- Windows 11 Pro
- Windows 11 Enterprise
- Windows 11 Pro Education/SE
- Windows 11 Education
Not available for Windows 11 Home.
How to find out what version of Windows you are running?
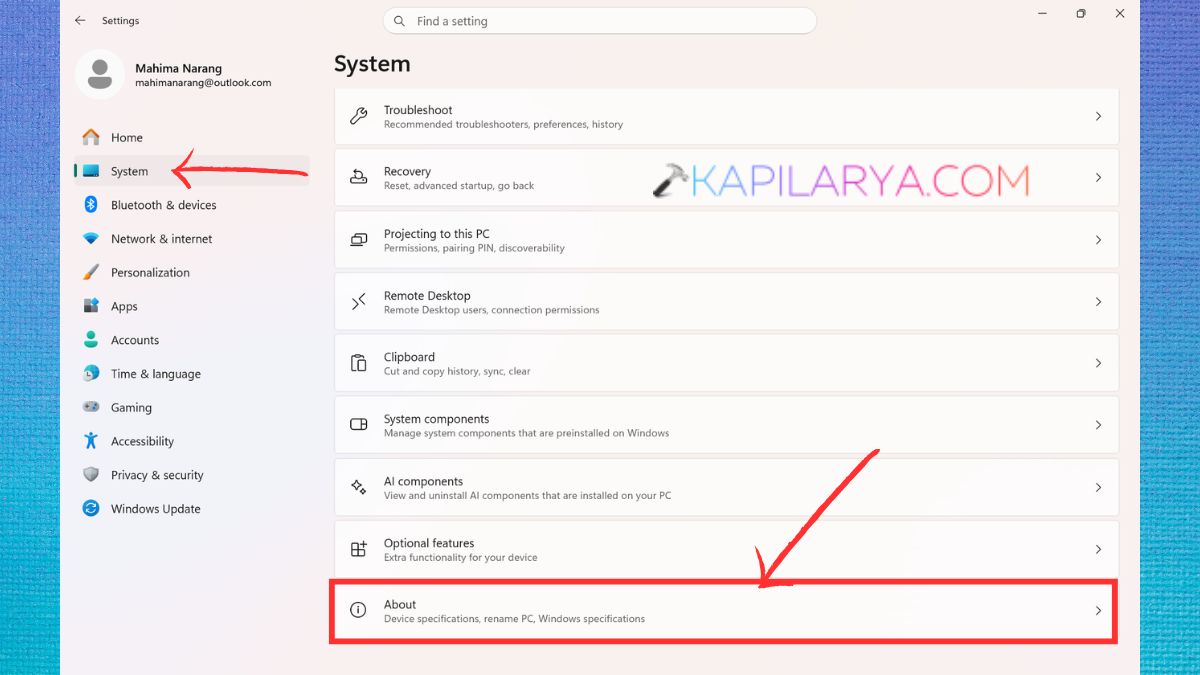
1. Click on Windows + I to open Settings. Select System. Choose About.
2. Check out the Windows specifications for the Windows. Check the Edition field.
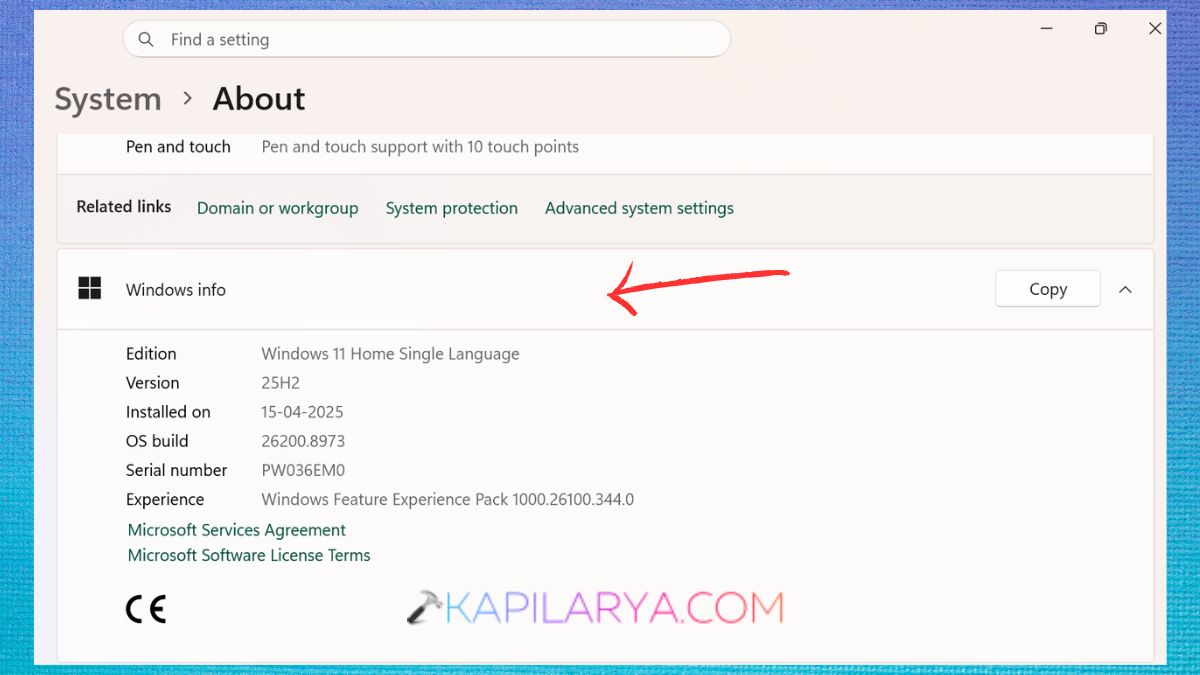
For Windows 11 Home users, Windows Sandbox will not be accessible from the Windows Features applet.
If you have a supported edition and can’t find Sandbox, proceed with the following solutions.
Fix 2: Make Sure CPU Virtualization Is Enabled
Windows Sandbox is a software that uses hardware virtualization. Even when the Windows feature is installed, Sandbox may not be able to start if virtualization is turned off in the BIOS or UEFI firmware of your computer.
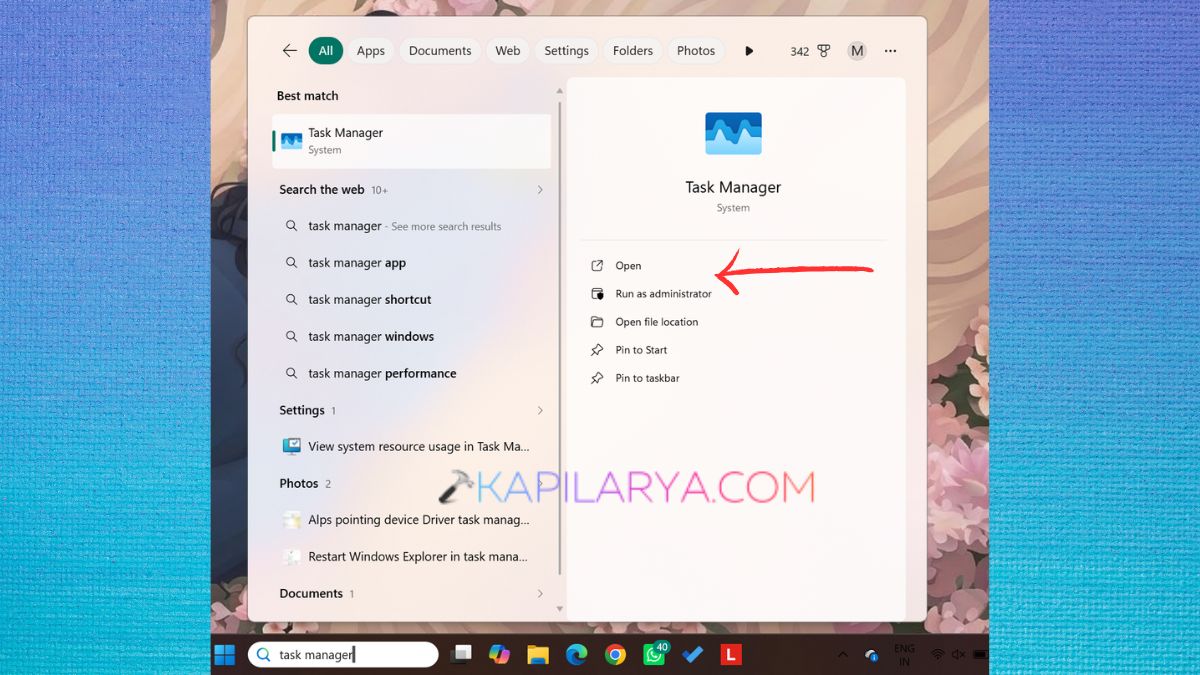
1. To open Task Manager, press Ctrl + Shift + Esc. You may open it via Start menu as well.
2. Select Performance. Click once on “CPU” to sort it. Look for Virtualization.
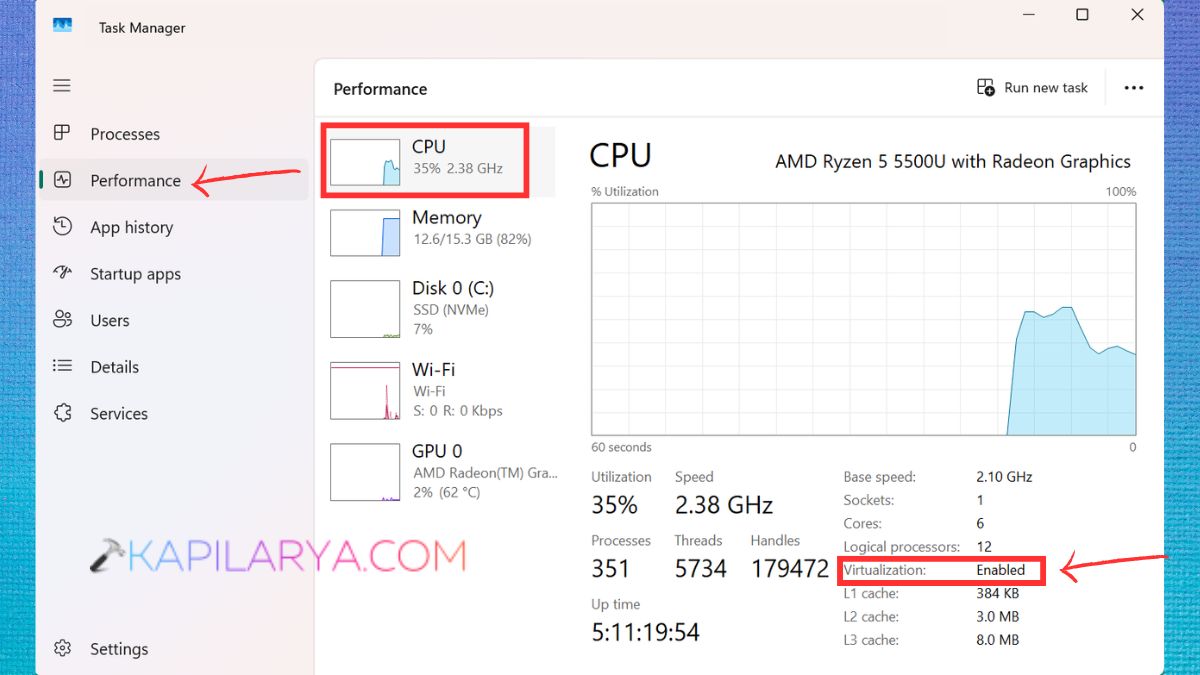
3. If it is Disabled, you must turn on virtualization in BIOS/UEFI. The names of the menus depend on the computer manufacturer.
4. Restart your PC. Use the manufacturer’s key to enter the BIOS/UEFI setup.
5. Search for a setting that has something to do with CPU virtualization. It can be called Intel Virtualization Technology (VT-x) on Intel systems. On AMD systems, it can be listed as SVM Mode or AMD-V. Enable the setting.
Save and restart Windows.
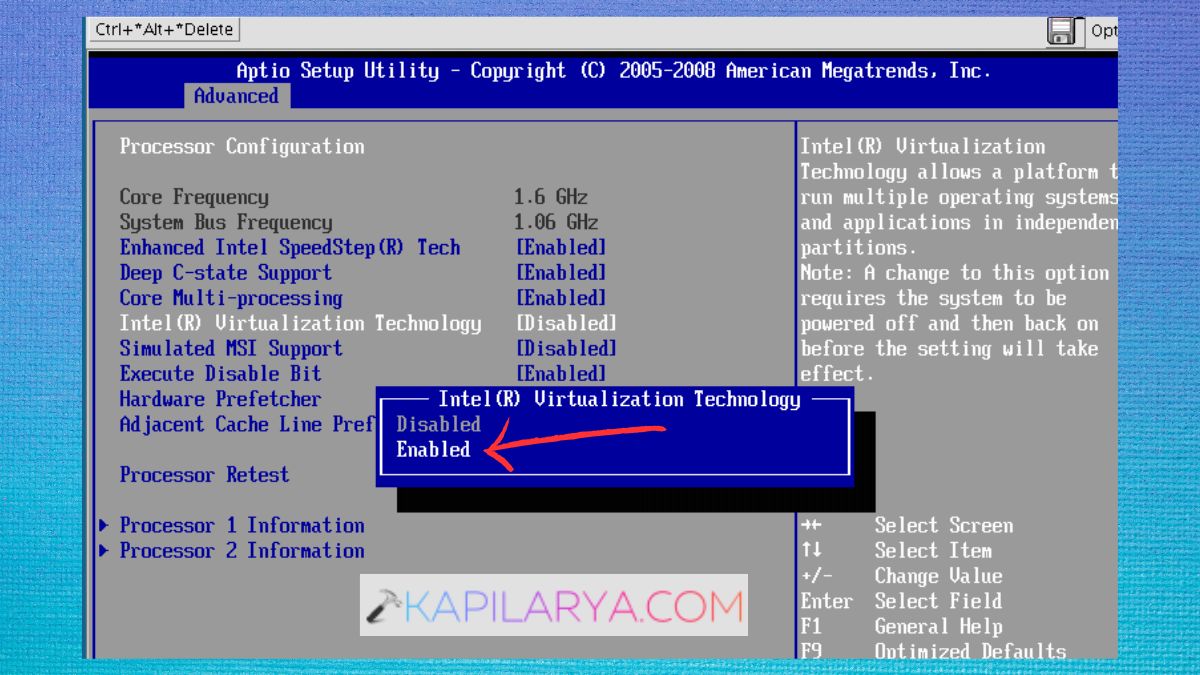
Windows Sandbox supports virtualization through a BIOS setting.Virtualization is a BIOS setting that is specific to Windows Sandbox.
Fix 3: Disable and Re-enable Windows Sandbox
The Windows Sandbox component may get corrupted after a Windows update or system change, or it may be incorrectly registered. Switching it off and back on again will re-initialise it.
1. Press Windows + R. Type this command.
optionalfeatures
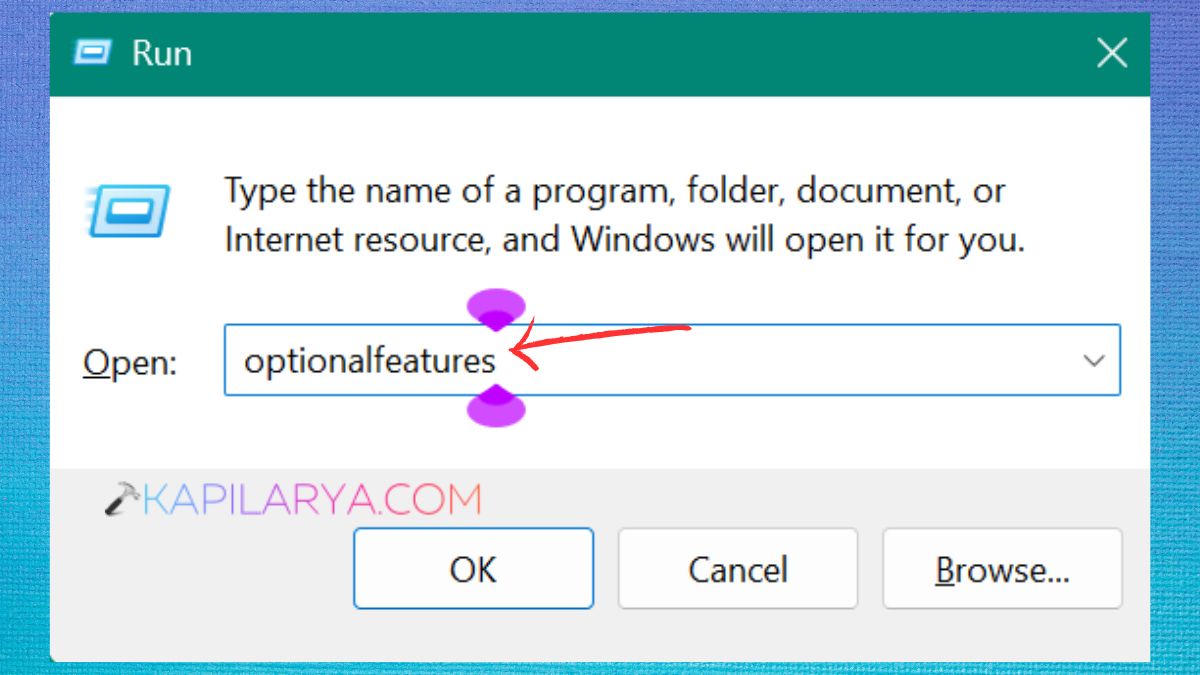
2. Find Windows Sandbox. Clear the checkbox. Click OK.
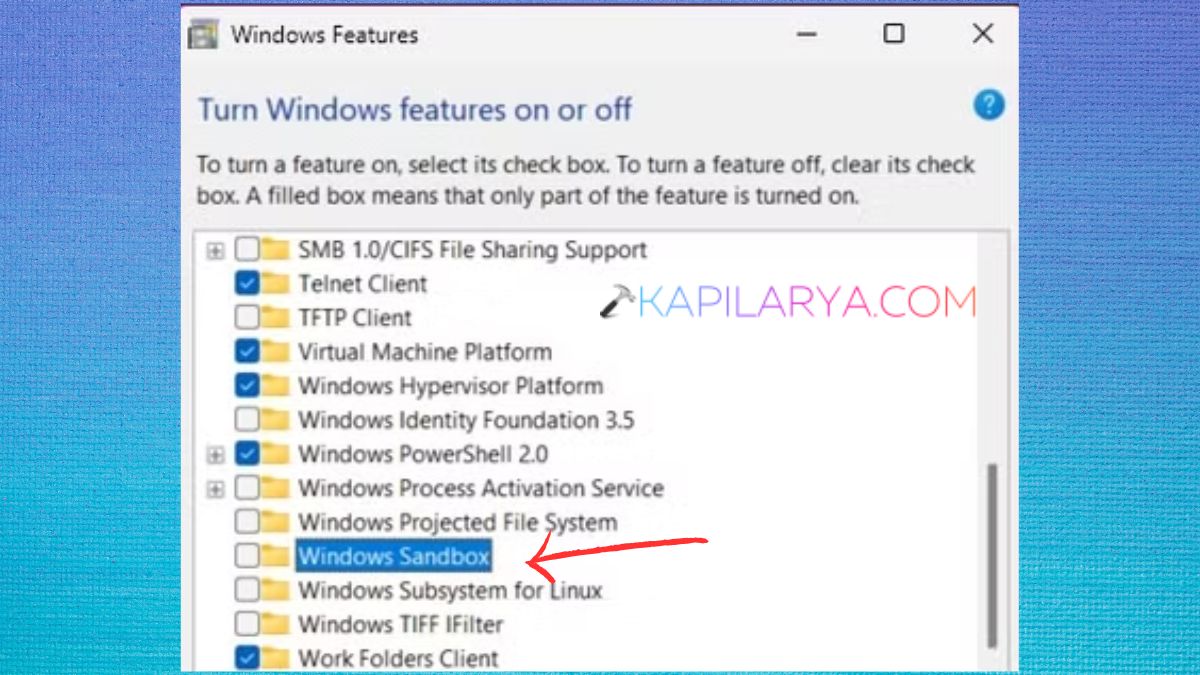
If Windows prompts you to restart the computer, do so.
3. Click on the Open Windows Features button again. Find Windows Sandbox. Select the checkbox. Click OK.
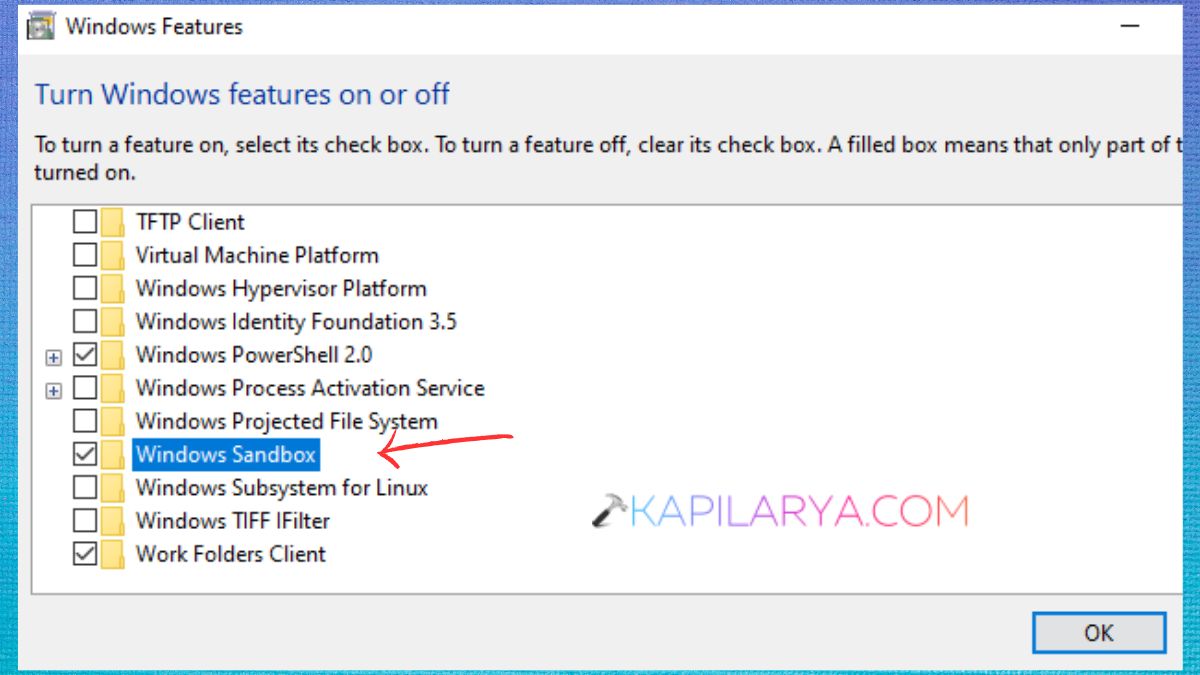
Restart Windows.
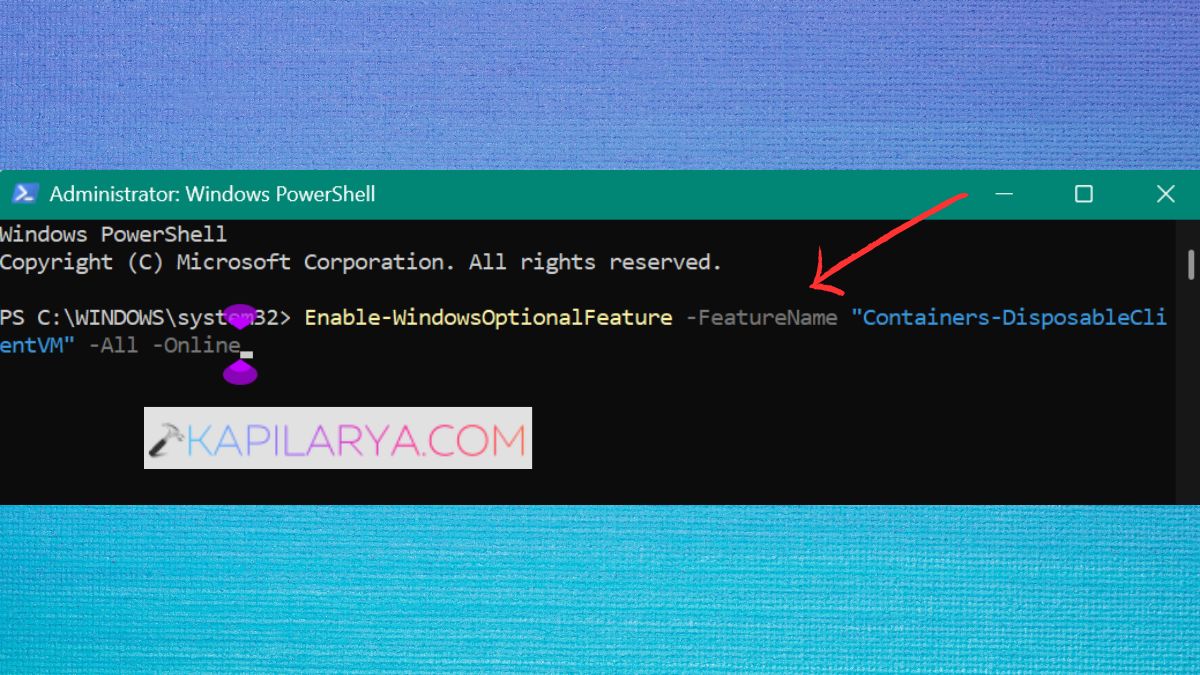
4. There’s also a PowerShell option to enable the Sandbox from Microsoft. First, open PowerShell as administrator.

5. Run the following command in the . Once restarted, go to the Start menu, look for Windows Sandbox, and run it again.
Enable-WindowsOptionalFeature -FeatureName "Containers-DisposableClientVM" -All -Online
Fix 4: Verify the Required Virtualization Features
Windows Sandbox depends on the virtualization infrastructure of Windows. If some components are disabled, Sandbox won’t start if they are related components.
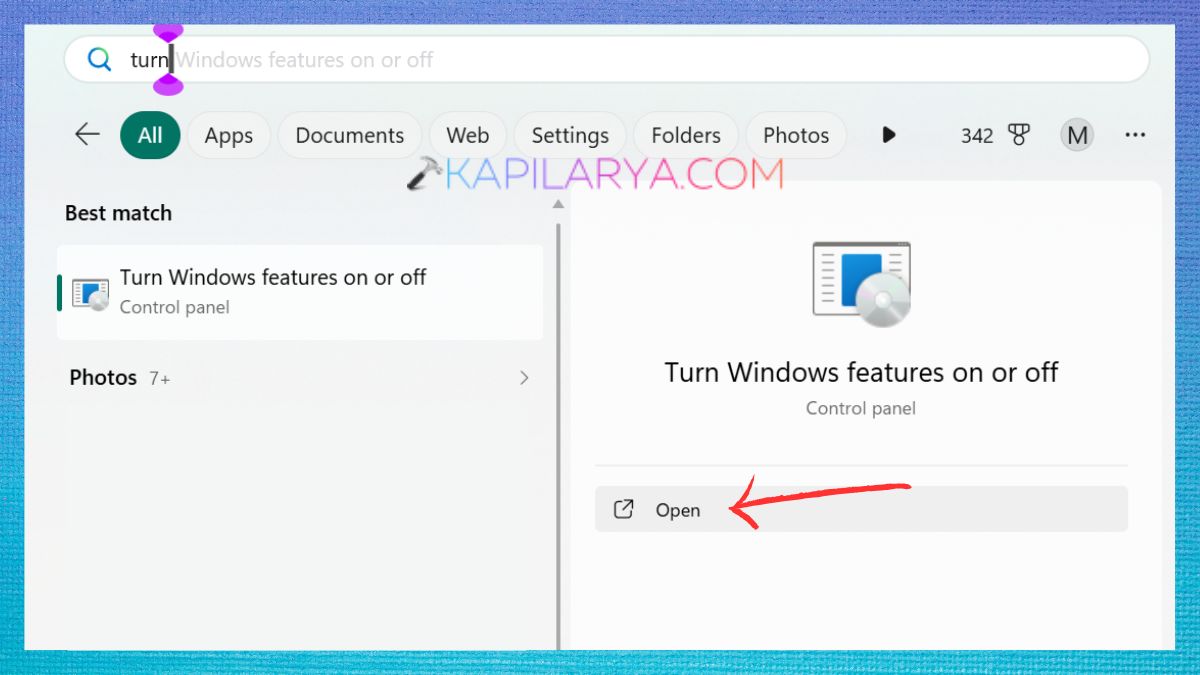
1. Open “Turn Windows features on or off” based on a search for: Windows Features.
2. Depending on your setup, review the following features relating to virtualization:
- Windows Sandbox
- Virtual Machine Platform
- Windows Hypervisor Platform
Hyper-V can also be relevant to virtualization troubleshooting, and may be available, depending on the supported edition of the operating system.
Once you have made any changes, click OK and then restart your computer.
How is this relevant? Windows Sandbox is based on the Microsoft hypervisor and hardware virtualization.
When dealing with a particular error message, do not change other Windows features simply because they include the term virtual. Only make changes that are relevant to your setup and then restart after the changes.
Fix 5: Install the Latest Updates in Windows 11 for Sandbox Not Working
An obsolete Windows installation may lead to issues with optional Windows features, virtualization components, drivers and the Sandbox application.
1. Press Windows + I. Go to Windows Update.
2. Tap Check for updates. Install any updates that are available.
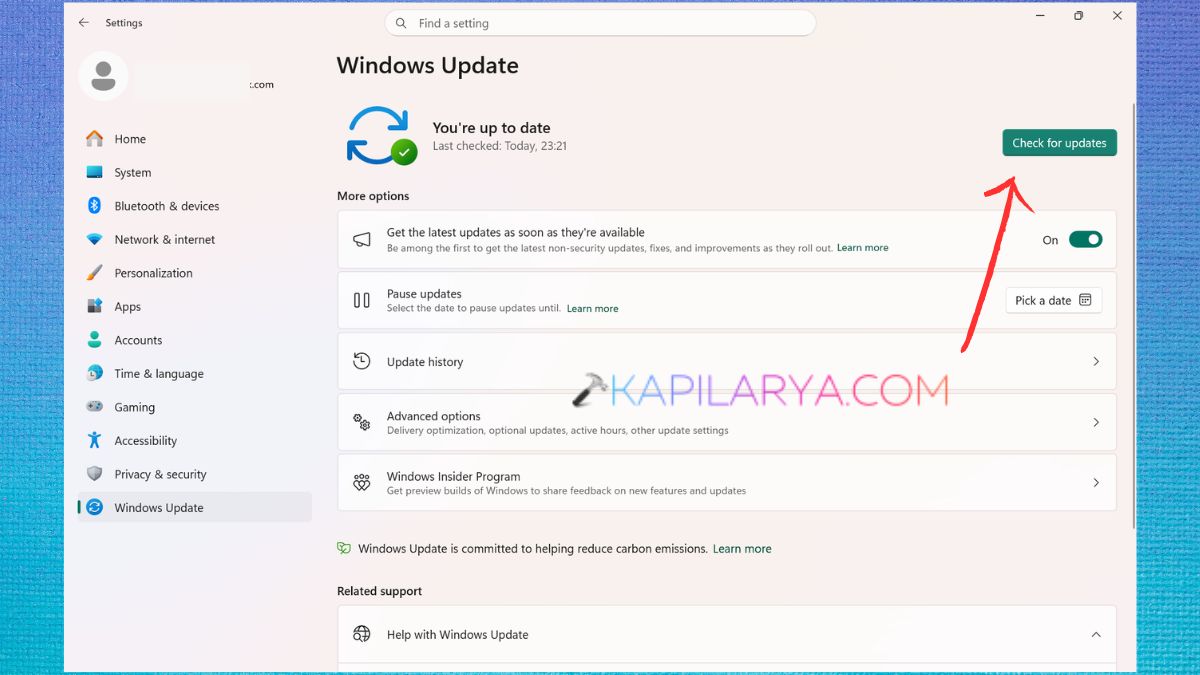
Restart your PC. Re-run Windows Sandbox.
Microsoft has also released the Microsoft Store for an updated Windows Sandbox experience. You can get this on Windows 11 version 24H2.
Fix 6: Repair Windows System Files With DISM and SFC
If Windows Sandbox does not function after a change, update, or unexpected restart, the Windows components might be corrupted.
Microsoft advises to resolve Windows corrupted components with DISM before using System File Checker (SFC).
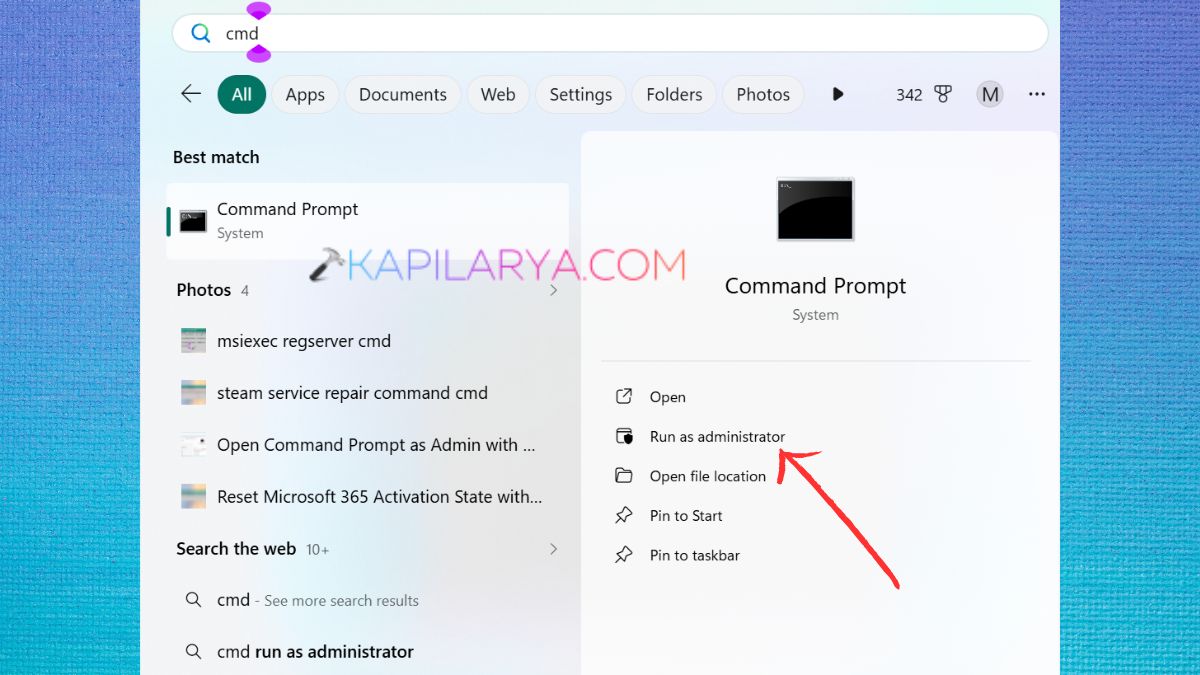
1. Search for Command Prompt. Right-click it. Click on the Run as administrator link.
2. Enter this.
DISM.exe /Online /Cleanup-image /Restorehealth
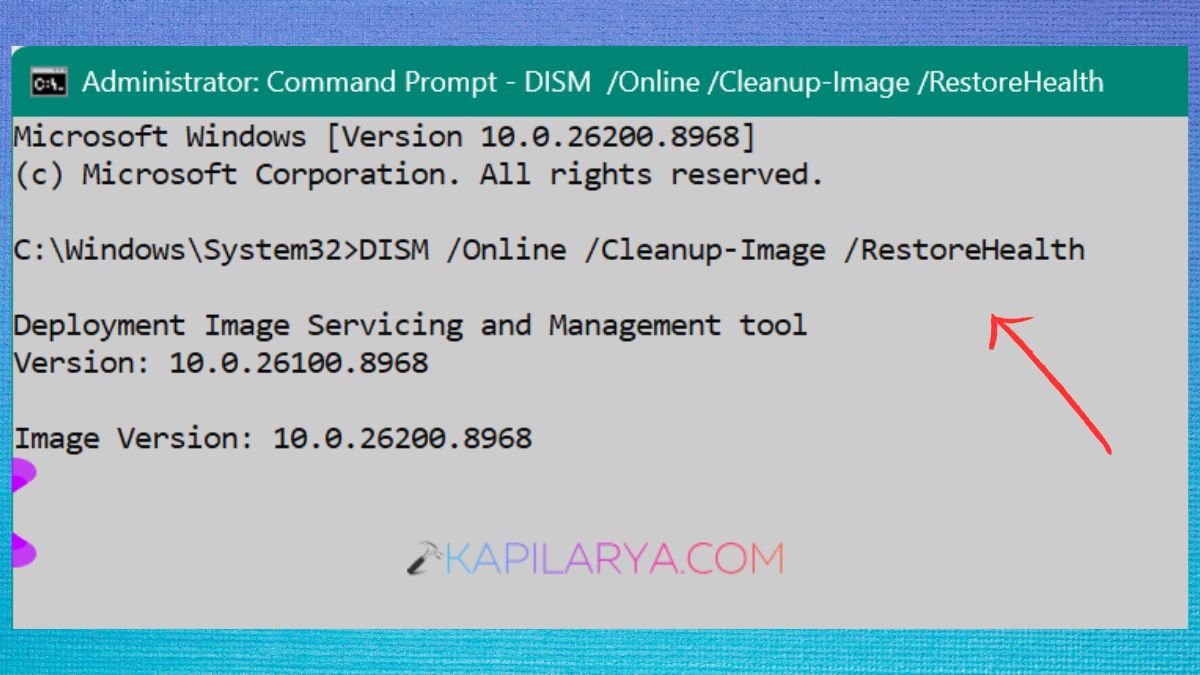
Wait until the operation is complete. The scan may take some time to complete, so do not close the Command Prompt during the scan.
3. Once DISM has completed its work, run this.
sfc /scannow
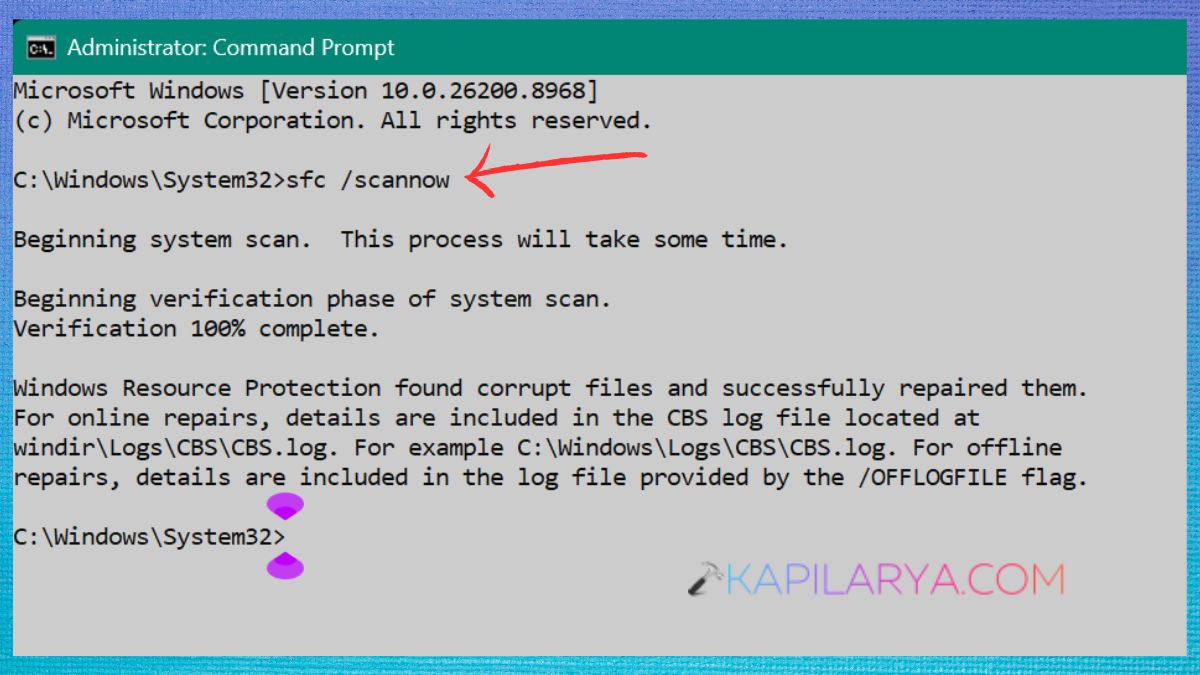
Enter and wait for the scan to go to 100%. SFC scans and replaces corrupted Windows system files with copies from the cache. After both commands run, reboot the computer and run Windows Sandbox again.
Fix 7: Free Up System Resources Before Launching Sandbox
Windows Sandbox consumes resources beyond those that are already used by Windows and any running applications.
These are the minimum requirements for Sandbox, according to Microsoft:
- At least 4 GB of RAM
- A free disk space of at least 1 gigabyte (GB) is required.
- A minimum of two CPU cores.
- Hardware virtualization enabled
Microsoft suggests 8 GB of RAM and 4 CPU cores (with hyper-threading) for a better configuration.
See if you can do these quick checks:-
1. Close unnecessary applications.
2. Open Task Manager and view the CPU and Memory usage.
3. Ensure that there is sufficient space on the Windows system drive.
4. Shut down or “End Task” any other virtual machines. Attempt to launch Sandbox again.
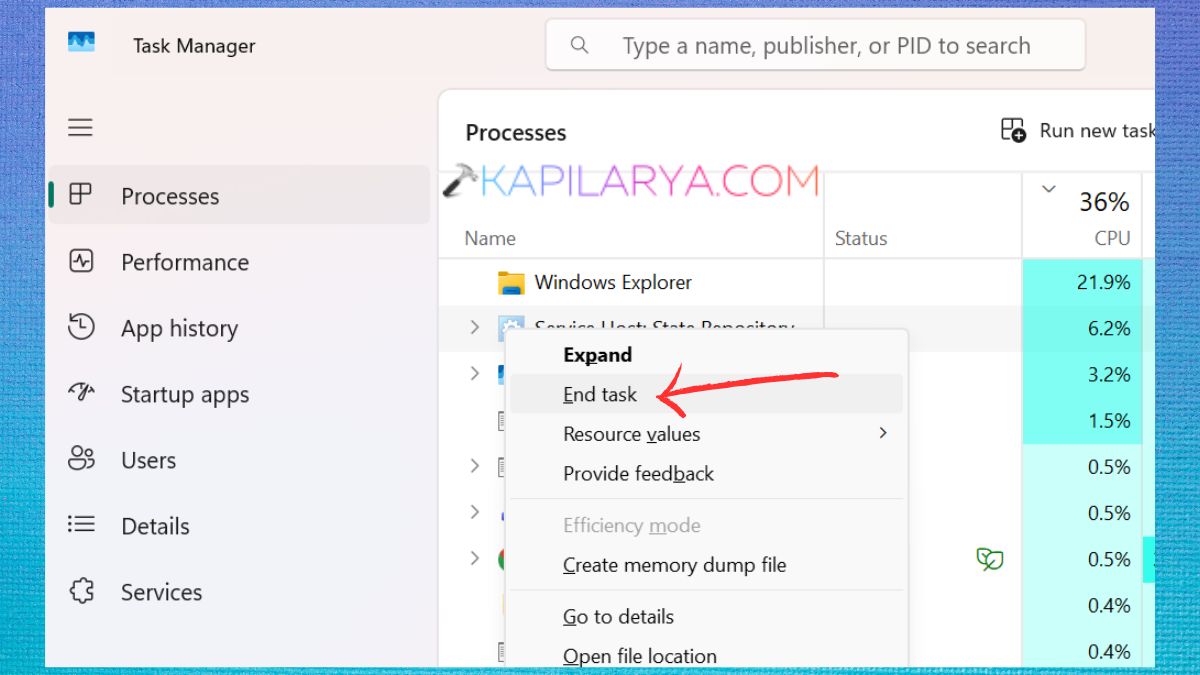
If your system is already using a lot of memory or CPU, Sandbox might take a long time to start up, or it may not start up correctly.
Fix 8: Test Whether a Sandbox Configuration File Is Causing the Problem
If you normally start Sandbox with a “.wsb” configuration file, then the configuration file itself may be to blame.
The .wsb files that Windows Sandbox supports can set up the following settings:-
- Virtual GPU
- Networking
- Mapped folders
- Logon commands
- The device features audio and video input as well.
- Clipboard redirection
- Memory allocation
- Protected Client
A malformed .wsb can prevent Sandbox from starting. Errors like E_INVALIDARG, which are listed by Microsoft for invalid Sandbox configuration files, are also documented.
Test with the default Sandbox and follow these steps –
1. Do not double-click your custom .wsb file; instead, click the Start menu. Search for Windows Sandbox.
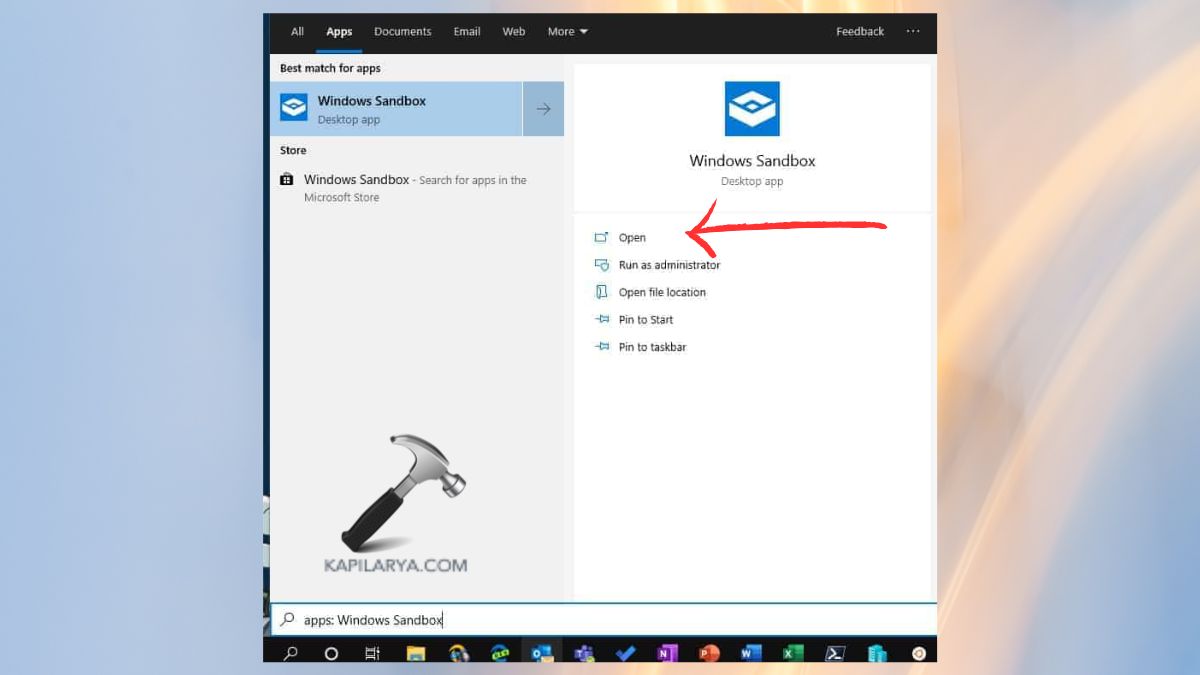
Start the application immediately.
2. See if the default Sandbox is opening.
If the default Sandbox works, then it is likely that the problem is related to your .wsb configuration.
3. Open Notepad and view these in your .wsb file:
- XML syntax
- Folder paths
- Commands
- Memory values
- Networking settings
- vGPU settings
According to Microsoft, ERROR_FILE_NOT_FOUND can be generated due to a missing configuration file, or E_INVALIDARG can be generated due to invalid .wsb content.
Fix 9: Check for Conflicts With Other Virtualization Software
If third-party virtualization apps are used, check if they are interfering with Windows Sandbox.
If Sandbox failed to function right after installing or updating another virtualization application, it is particularly worth checking in that case.
1. Shut down other VM machines.
2. Turn off virtualization programs.
3. Restart Windows.
4. Run Windows Sandbox as a stand-alone application.
5. Test and research the compatibility and configuration of the virtualization software if Sandbox is working.
6. See if Windows is running in another virtual machine as well. If that’s the case, you might need to enable nested virtualization on the host. Microsoft states that nested virtualization is a requirement if Sandbox is used within a VM.
Fix 10: Restart After Major Virtualization Changes to Fix Windows 11 Sandbox Not Working
Restarting is easy, but necessary after changing the virtualization settings or Windows optional features.
You should restart after:-
- Enabling CPU virtualization within the BIOS/UEFI.
- Installing or uninstalling Windows Sandbox
- The Windows Virtualization feature to change
- Apply large Windows updates. Apply large updates for Windows.
- Using system repair commands
- Changing virtualization software settings
This makes sure that the Windows hypervisor and components boot up with the new configuration.
Still can’t fix Windows Sandbox? Leave a comment below about your Windows 11 edition, Sandbox error message/code and what you have done so far. We will assist you with troubleshooting the problem.