By default, your Windows operating system checks for automatic updates in around every 22 hours. The time in which Windows is set to check for updates is called automatic updates detection frequency.
You can change this update detection frequency, if you want to allow Windows to check more faster for the updates. In this article, we’ll see how you can configure update detection frequency. Well, there is no direct setting to configure this in Control Panel or Settings app. But you can always use below mentioned registry manipulation to change update detection frequency.
How To Configure Automatic Updates Detection Frequency
Registry Disclaimer: The further steps will involve registry manipulation. Making mistakes while manipulating registry could affect your system adversely. So be careful while editing registry entries and create a System Restore point first.
1. Press  + R and put
 regedit in Run dialog box to open Registry Editor (if you’re not familiar with Registry Editor, then click here). Click OK.
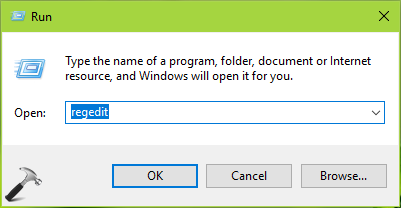
2. In left pane of Registry Editor window, navigate to following registry key:
HKEY_LOCAL_MACHINE\Software\Policies\Microsoft\Windows\WindowsUpdate\AU
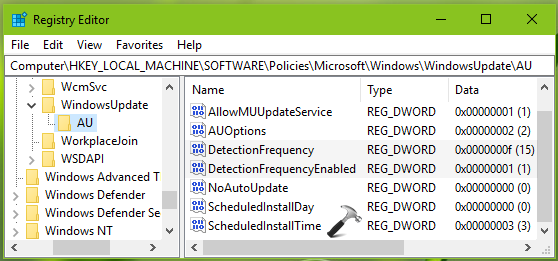
3. Now in the right pane of AU registry key, right click in blank space, select New > DWORD Value. Name the newly created registry DWORD (REG_DWORD) as DetectionFrequency. Similarly, create another registry DWORD and name it as DetectionFrequencyEnabled. Double click on DetectionFrequencyEnabled DWORD to modify its Value data:
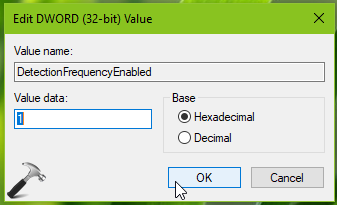
4. Set the Value data to 1. Click OK. Then double click on DetectionFrequency DWORD, choose Decimal Base and input the Value data n (indicates the time in hours to check for updates) between 1 to 15. Click OK.
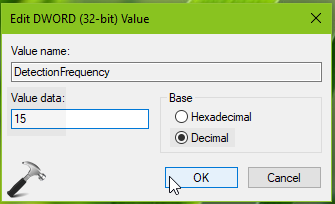
Close Registry Editor and reboot to make changes effective.
That’s it!
Important Note: The mentioned registry manipulation will work, only if ‘Specify intranet Microsoft update service location‘ GPO setting is Enabled. Also note that if Configure Automatic Updates GPO setting is Disabled, you can’t configure update detection frequency.