Many times it happens that you need another operating system to run/test some apps, games or for any other use, apart from your existing operating system. But installing a new operating system require a new device. The concept of virtualization can solve this problem, without the need of another device. Microsoft provides virtualization capabilities in Windows 11, via the Hyper-V feature. In this article, we’ll see how to enable Hyper-V in Windows.
Before enabling Hyper-V, it is essential that your system must meet its requirements. Not every system have capabilities to enable Hyper-V. Following are the basic requirements to activate and use Hyper-V on your system:
- You must be running Windows 11/10 Enterprise, Pro, or Education edition. You can’t use Hyper-V on Windows 11/10 Home.
- Your system should have 64-bit processor by Intel or AMD with Second Level Address Translation (SLAT).
- The system must have CPU support for VM Monitor Mode Extension (VT-c on Intel CPUs).
- A minimum of 4 GB memory on your system.
- You must have virtualization technology enabled in BIOS settings of your computer.
When above requirements meet by your system, the only you have ability to enable and use Hyper-V. If those requirements is not fulfilled by your system, you won’t be able to spot Hyper-V in your Windows 11.
Here is how you enable Hyper-V in your Windows 11 or 10.
Page Contents
How To Enable Hyper-V In Windows 11/10
Method 1: Using Turn Windows Feature On Or Off
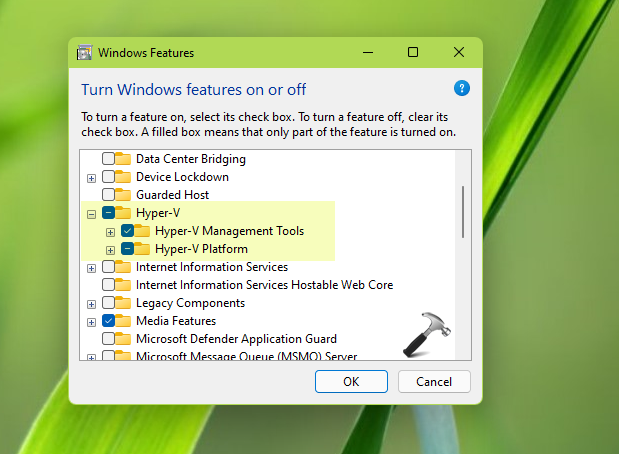
1. Search for ‘Turn Windows Features on or off‘ using Windows Search or Cortana and pick same from search results.
2. In the Turn Windows Features on or off window, tick mark the Hyper-V option. Also check mark sub-options to use all features of Hyper-V and click OK.
So this is how you can enable Hyper-V in Windows.
Method 2: Using Windows PowerShell
1. Open administrative Windows PowerShell using search or Cortana.
2. In administrative Windows PowerShell window, paste following and press Enter key:
DISM /online /Enable-Feature /All /FeatureName:Microsoft-Hyper-V
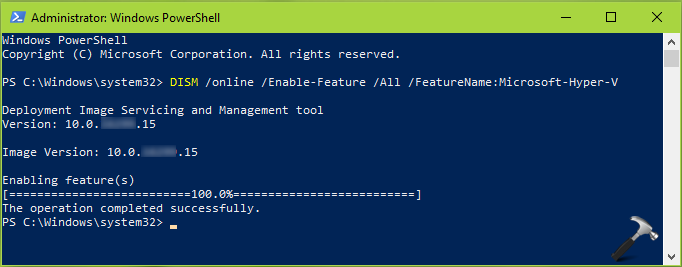
3. In few seconds, you’ll receive ‘The operation completed successfully’ message and the Hyper-V should be enabled now.
That’s it!
Related: How To Enable Nested Virtualization In Hyper-V.