You clicked on cancel. But nothing happened. And the print job stays stuck on Deleting in Windows 11. All the new documents are waiting behind it. Isn’t it frustrating? Well, yes, it is, and happens because the Print Spooler or print queue gets stuck.
Thankfully, you can now clear it in just a few simple steps, as outlined below.
Page Contents
Why Do Print Jobs Get Stuck?
The most common reasons are:
- The Print Spooler stops responding.
- A completed print job fails to clear.
- Corrupted print queue files block new jobs.
- Incorrect or duplicate printer ports cause errors.
How To Clear Stuck Print Jobs In Windows 11
Below are the solutions:
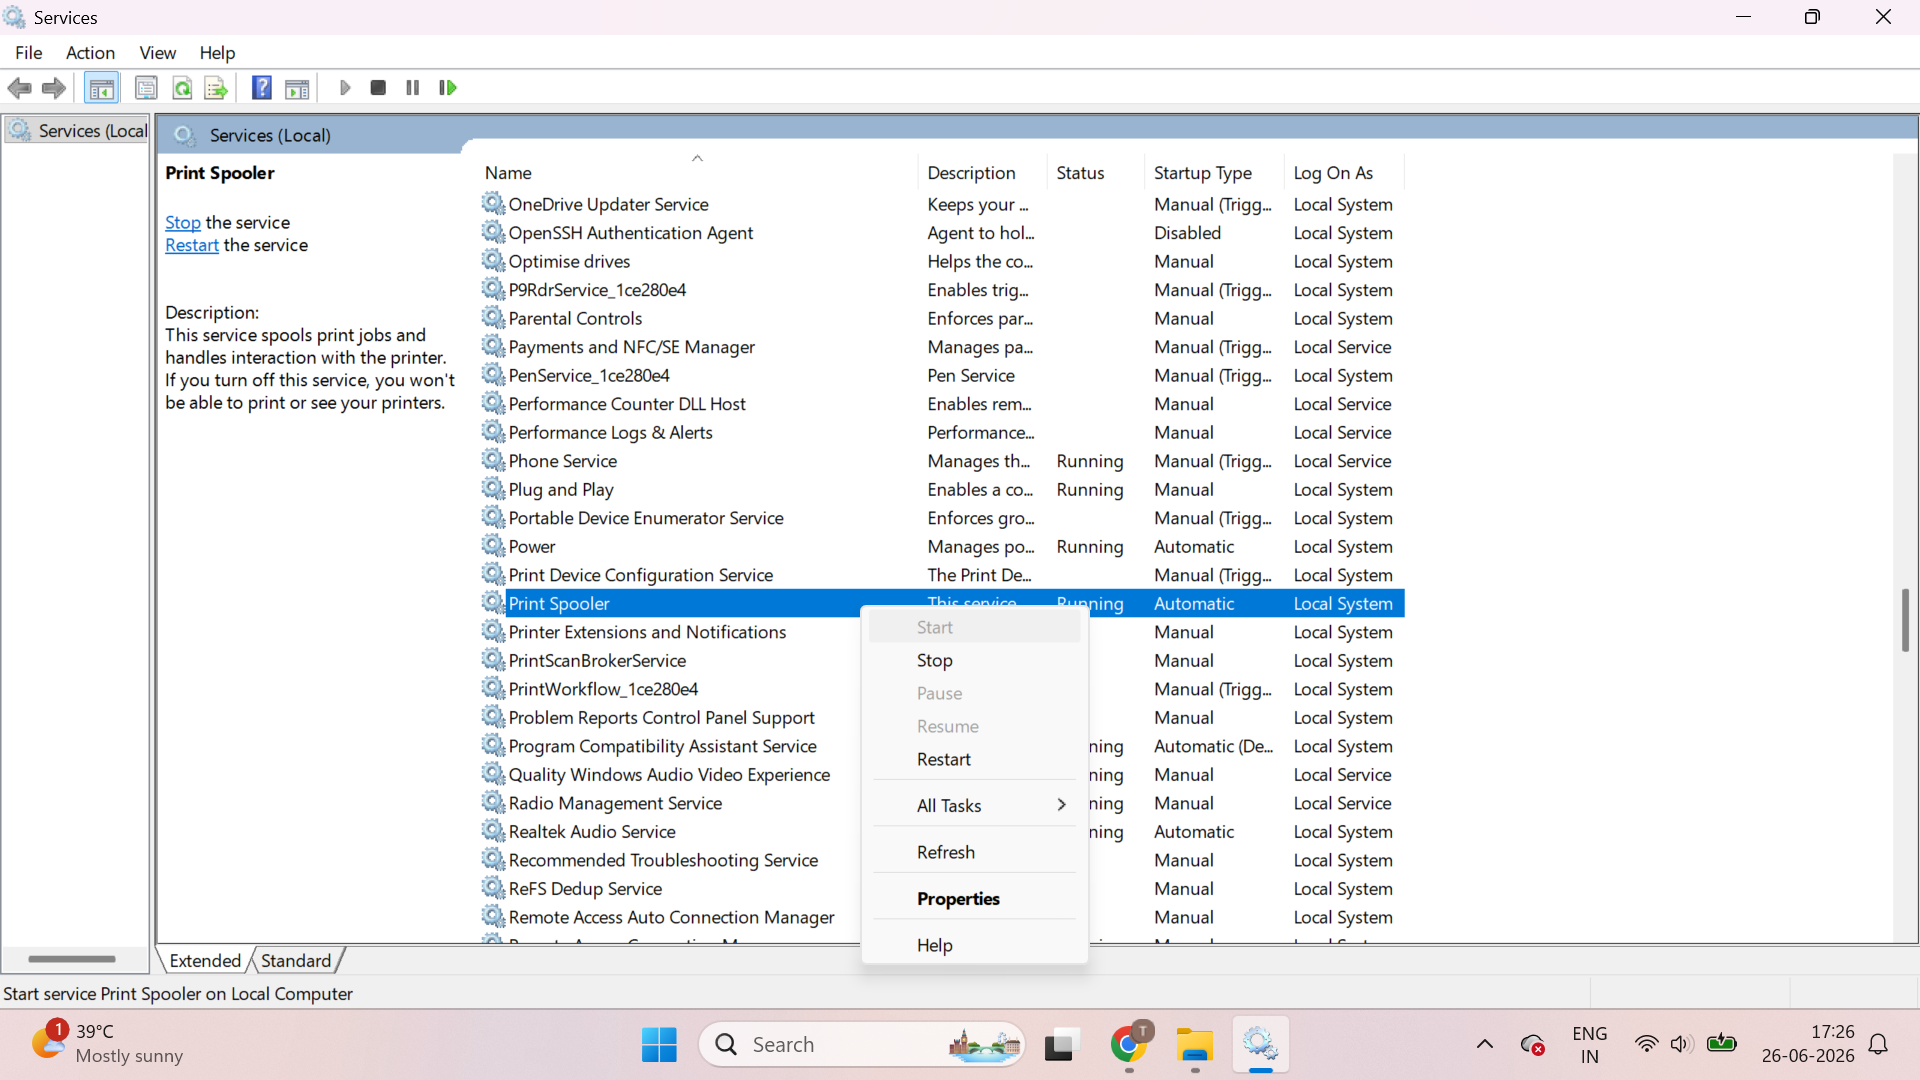
Method 1: Restart The Print Spooler
Restarting the Print spooler service often clears stuck print jobs without deleting any files. So, here is how to restart it:
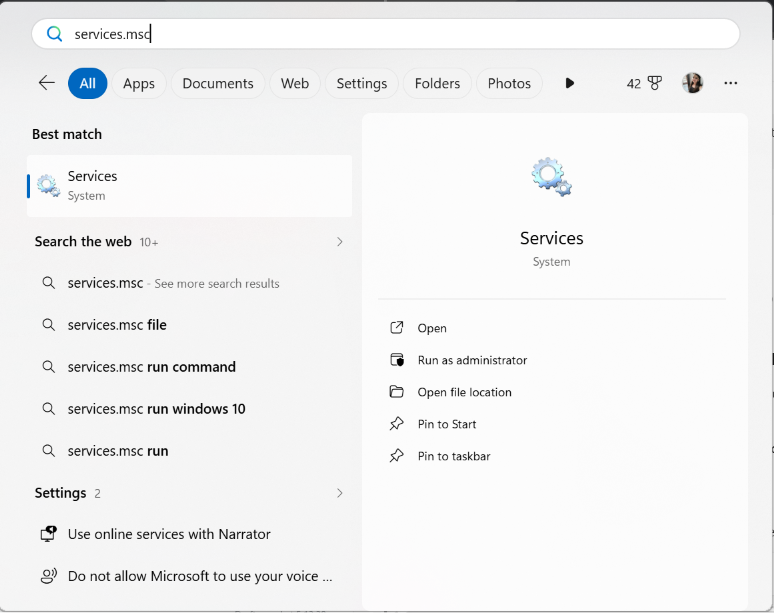
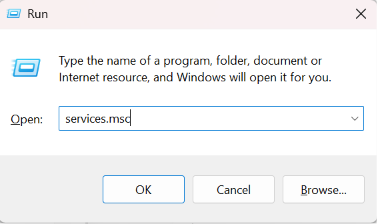
1. Press Windows + R, type services.msc then enter.

2. Find Print Spooler in the list.
3. Right click on it and select Restart.
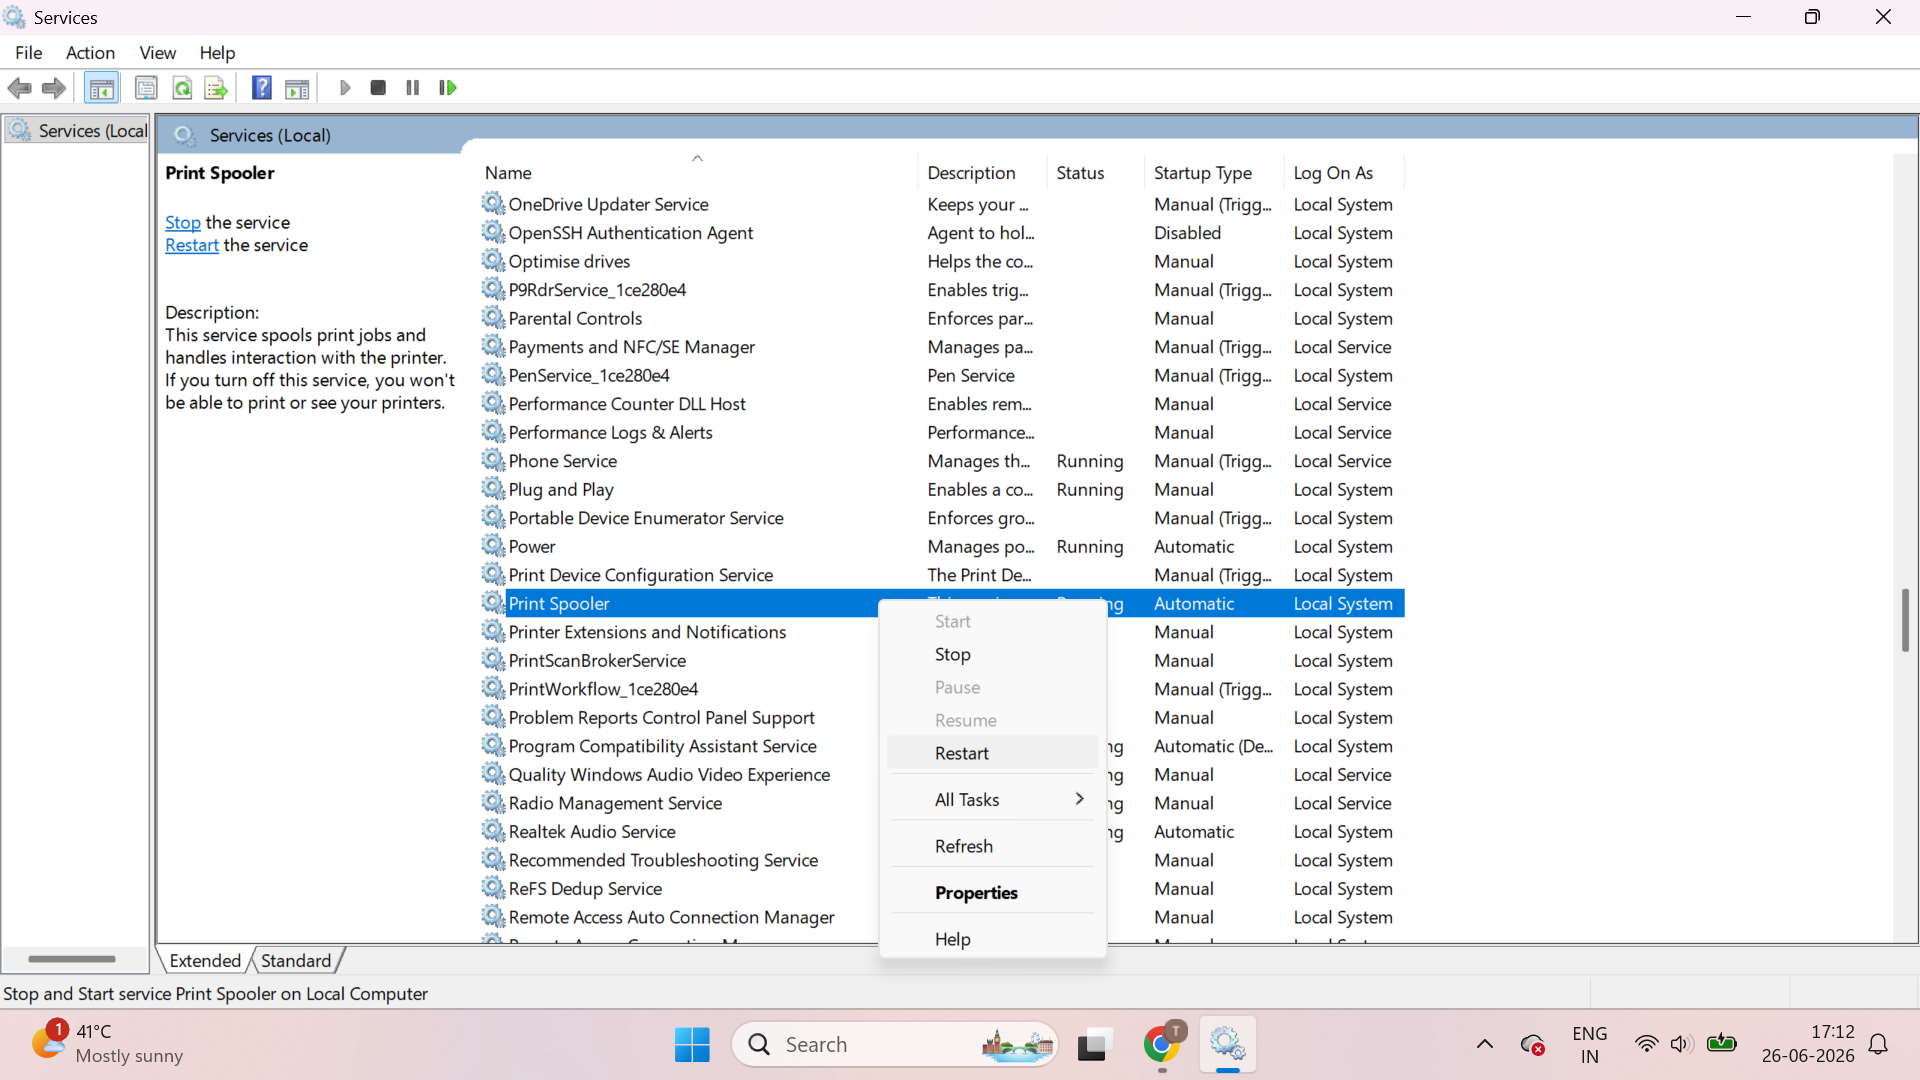
4. Wait a second, open the print queue, and check if the job is gone.
Method 2: Clear Print Spooler Folder
If restarting doesn’t work, delete the stuck spooler files.
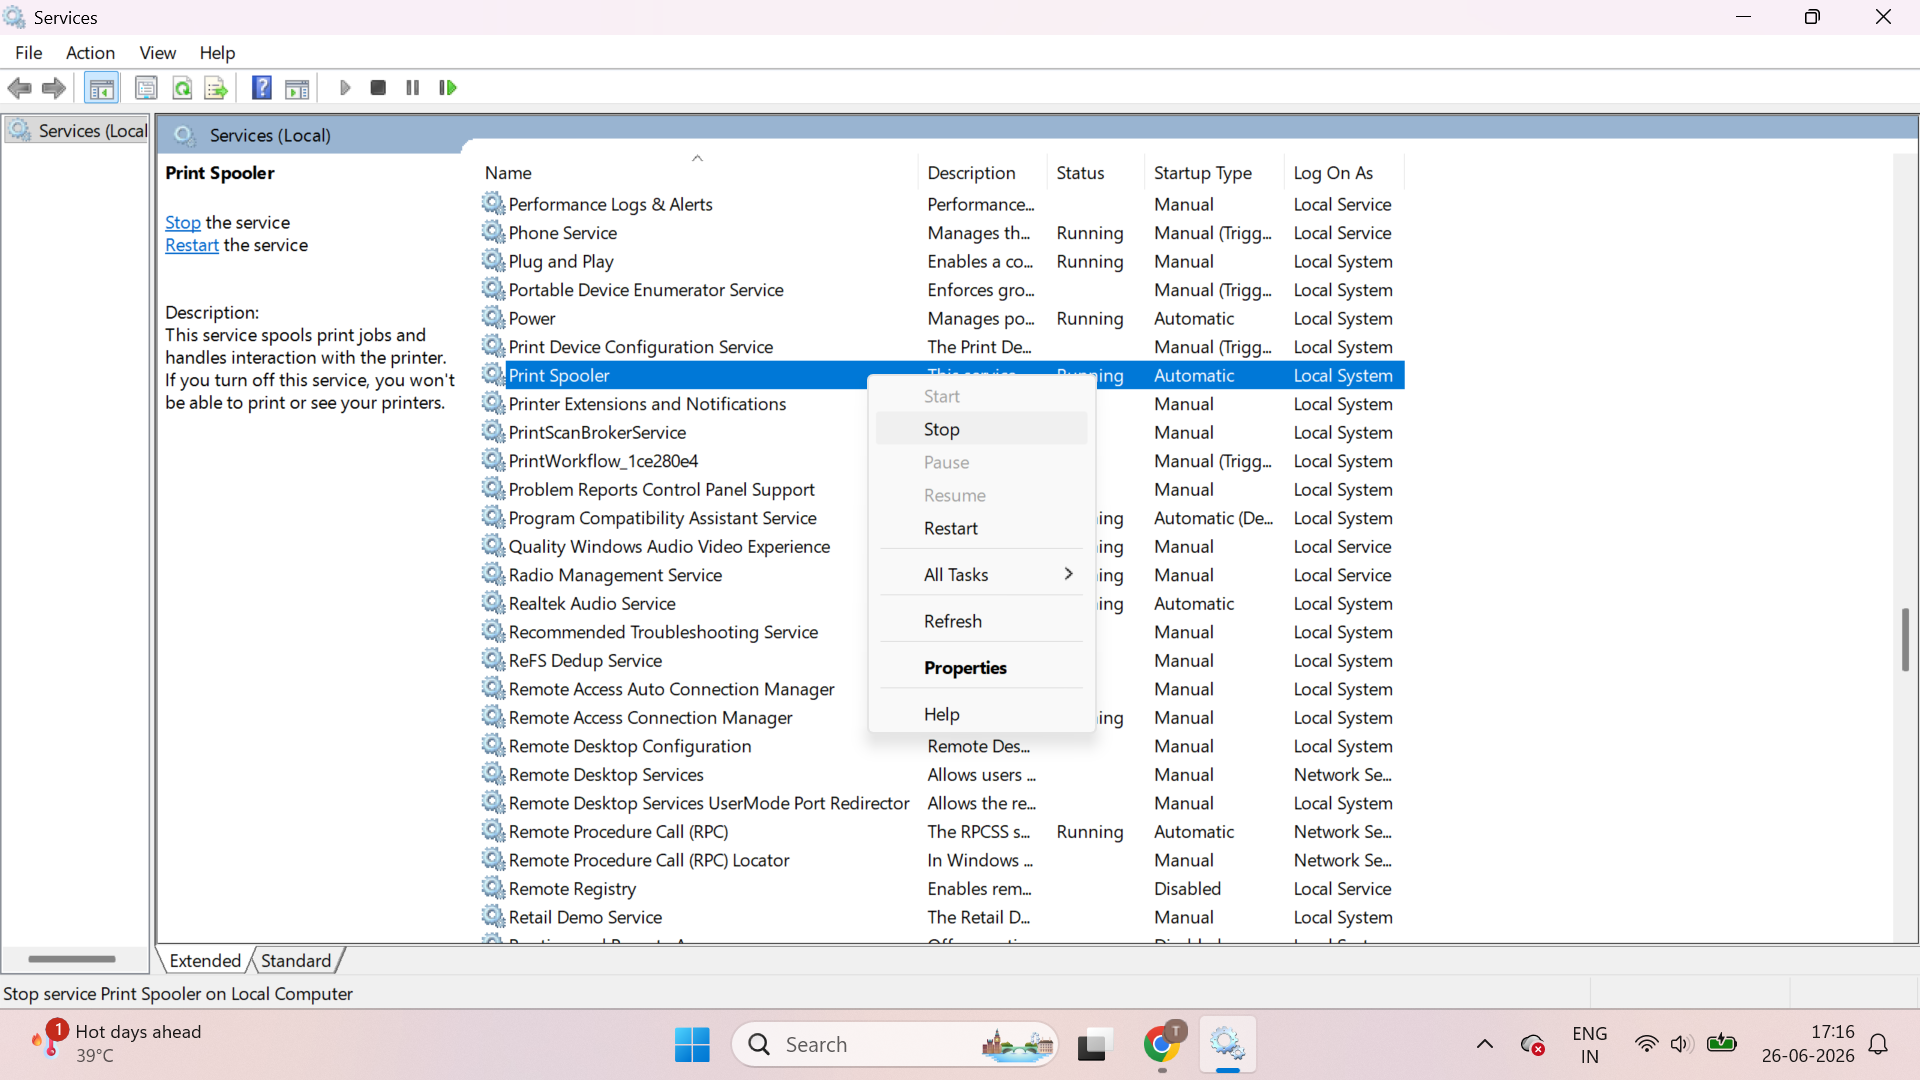
1. Open Services (using services.msc).
2. Right click on the Print Spooler and select Stop.
3. Open File Explorer.
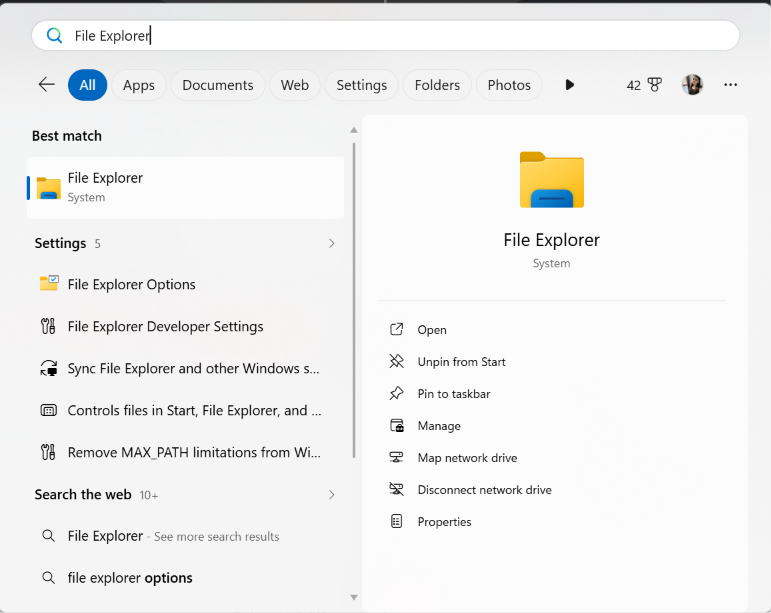
4. Go to:
C:\Windows\System32\spool\PRINTERS
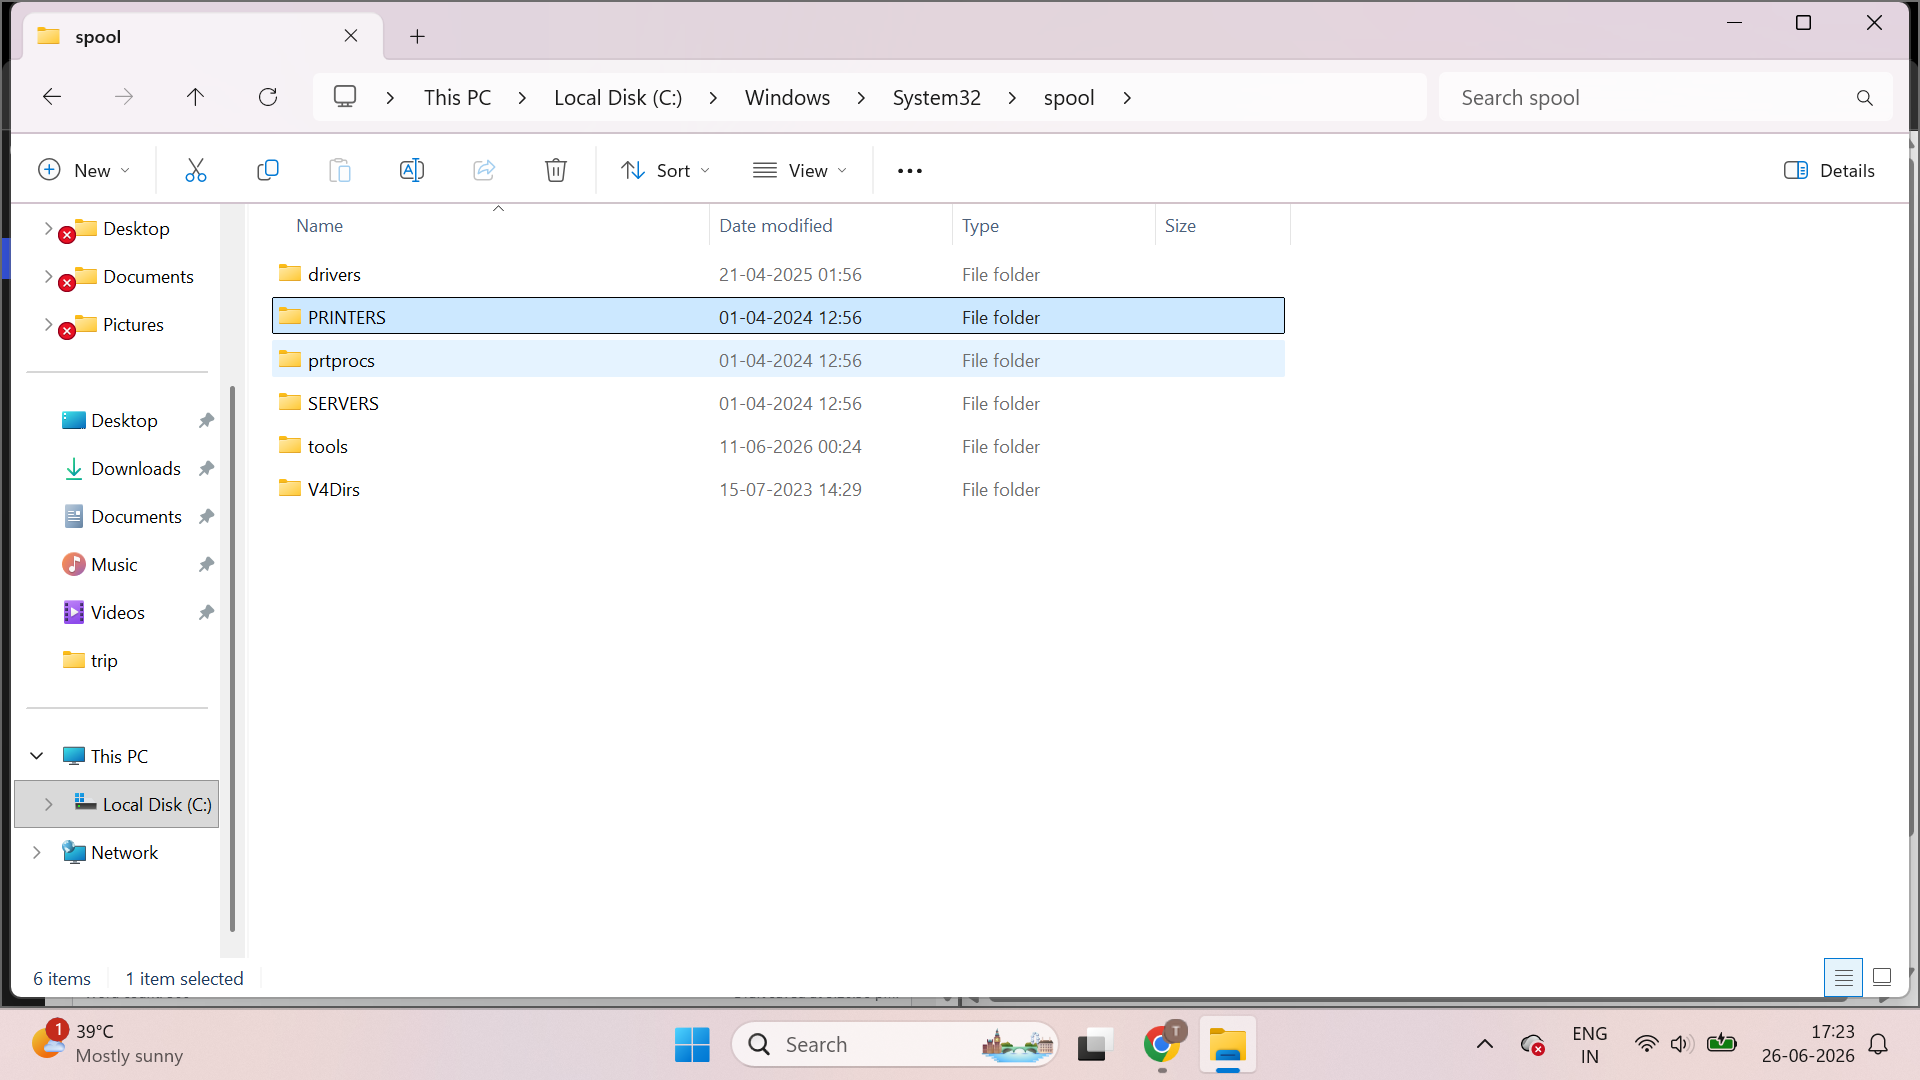
5. Delete all the files in the folder.
6. Return to Services.
7. Right-click Print Spooler and select Start.
8. Try printing again.
Method 3: Cancel The Print Queue To Clear Stuck Print Jobs
Sometimes you can remove the job directly. Follow the steps:
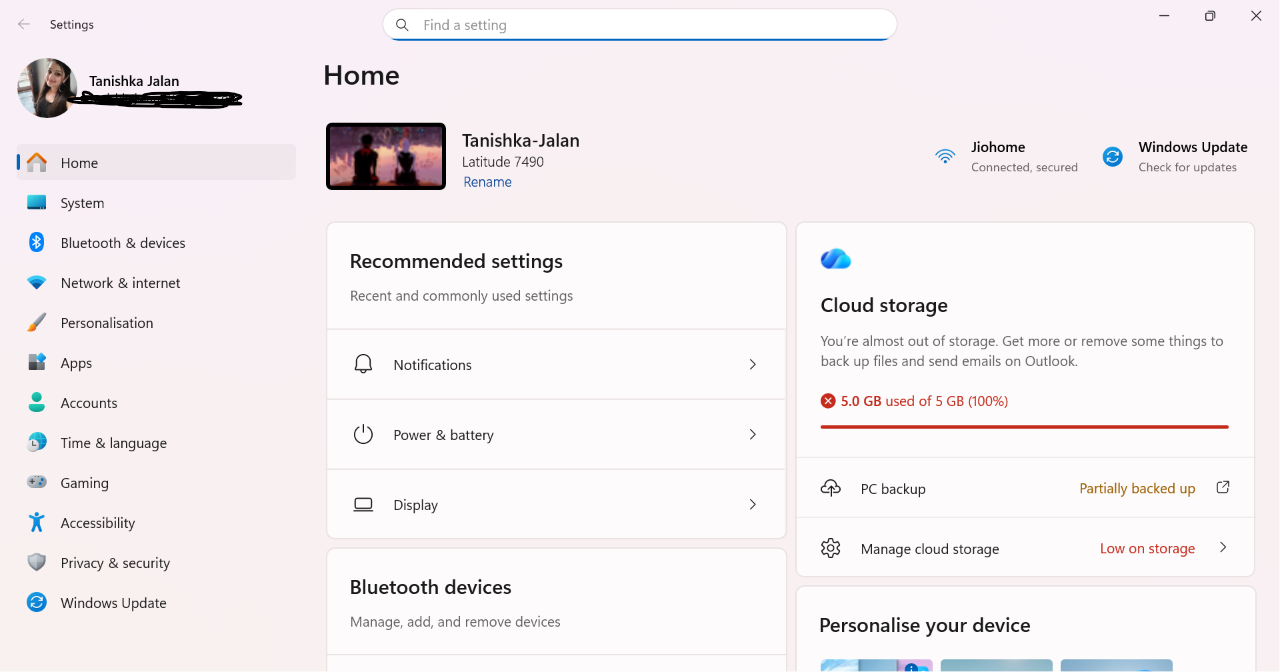
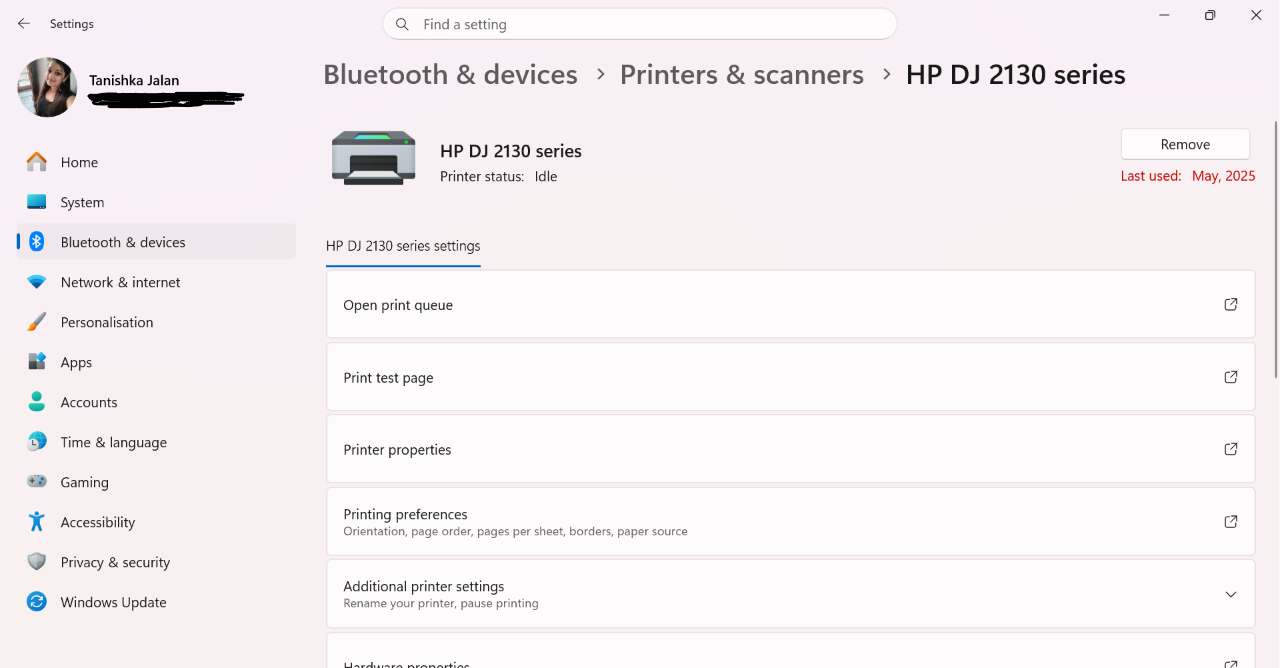
1. Press Windows + I to open Settings.
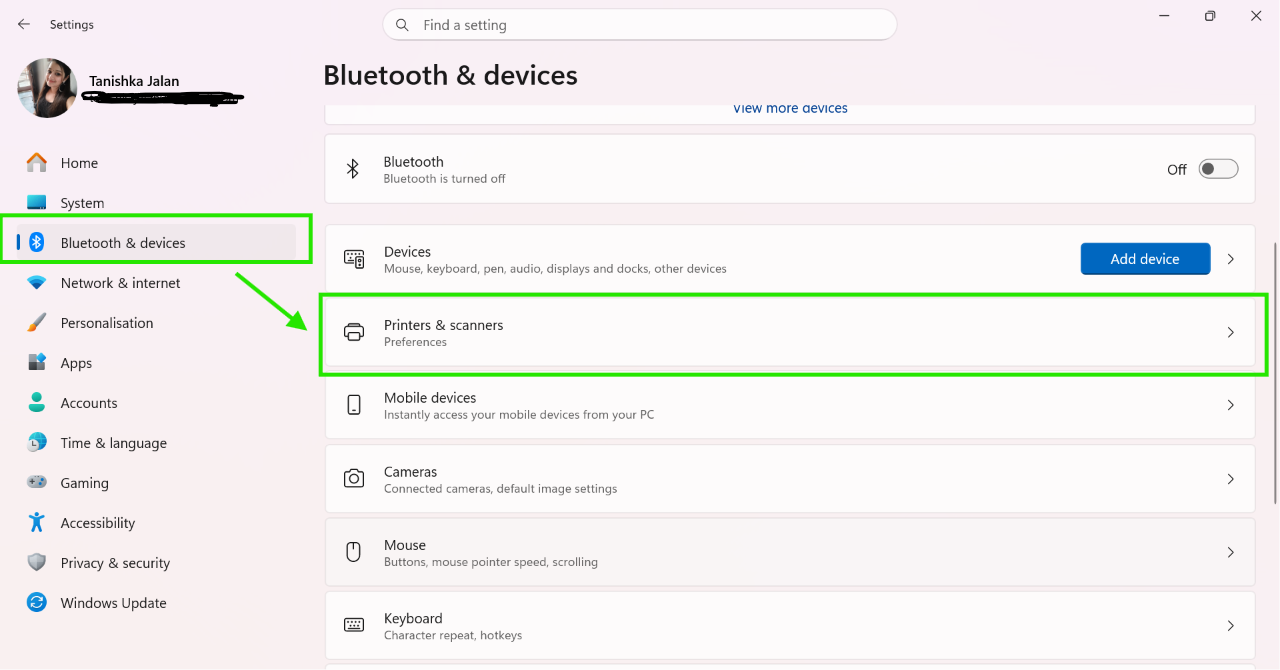
2. Go to Bluetooth & devices > Printers & scanners.
3. On your printer’s name, click Open print queue.
4. Right-click the stuck job and select Cancel.
5. If needed, click Printer > Cancel all the Documents.
Method 4: Remove Duplicate Printer Ports
Duplicate printer ports can cause print jobs to get stuck.
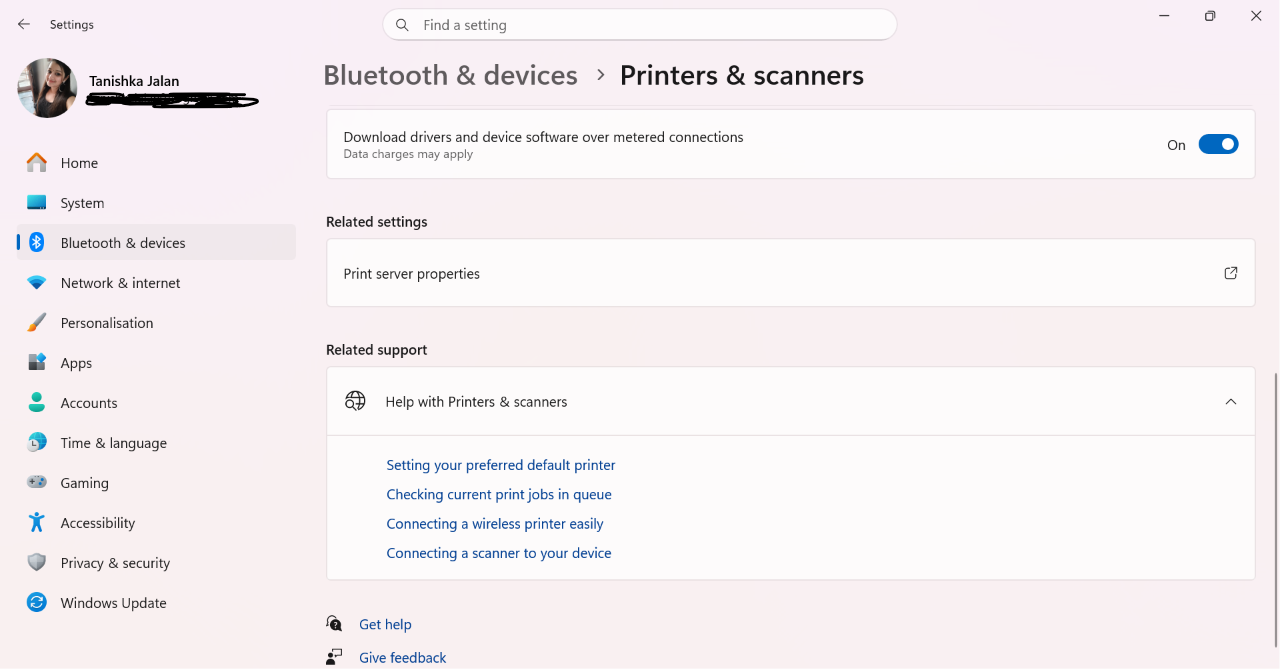
1. Open Settings > Bluetooth & device > Printers & scanners.
2. Scroll down and click Print server properties.
3. Open the Ports tab.
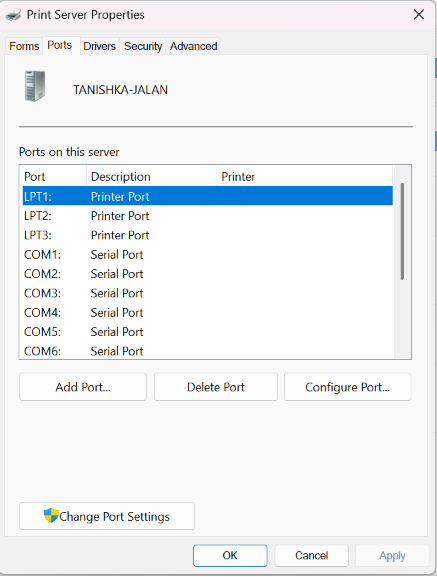
4. Look for a duplicate port for your printer.
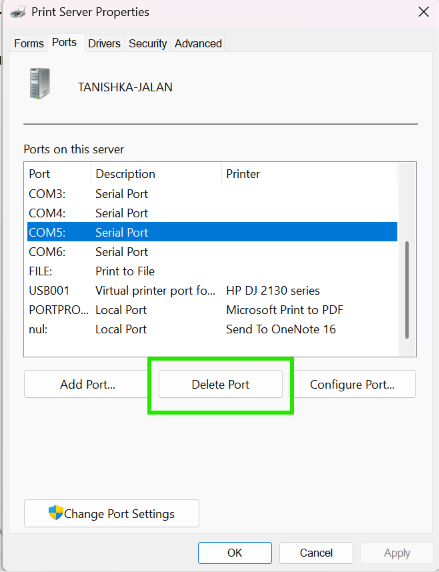
5. Select the duplicate entries and click Delete Port.
6. Add the printer again if required.
Method 5: Set The Print Spooler To Automatic
The Print Spooler should always start automatically.
1. Press Windows + R, type services.msc, and press Enter.
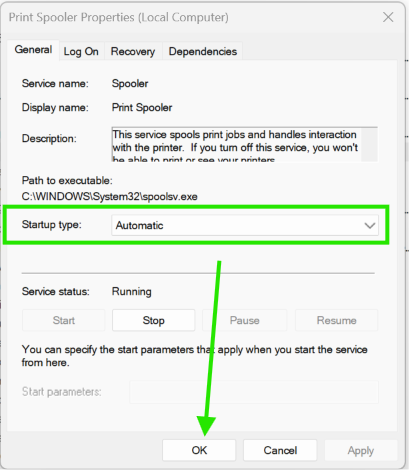
2. Double click on Print Spooler.
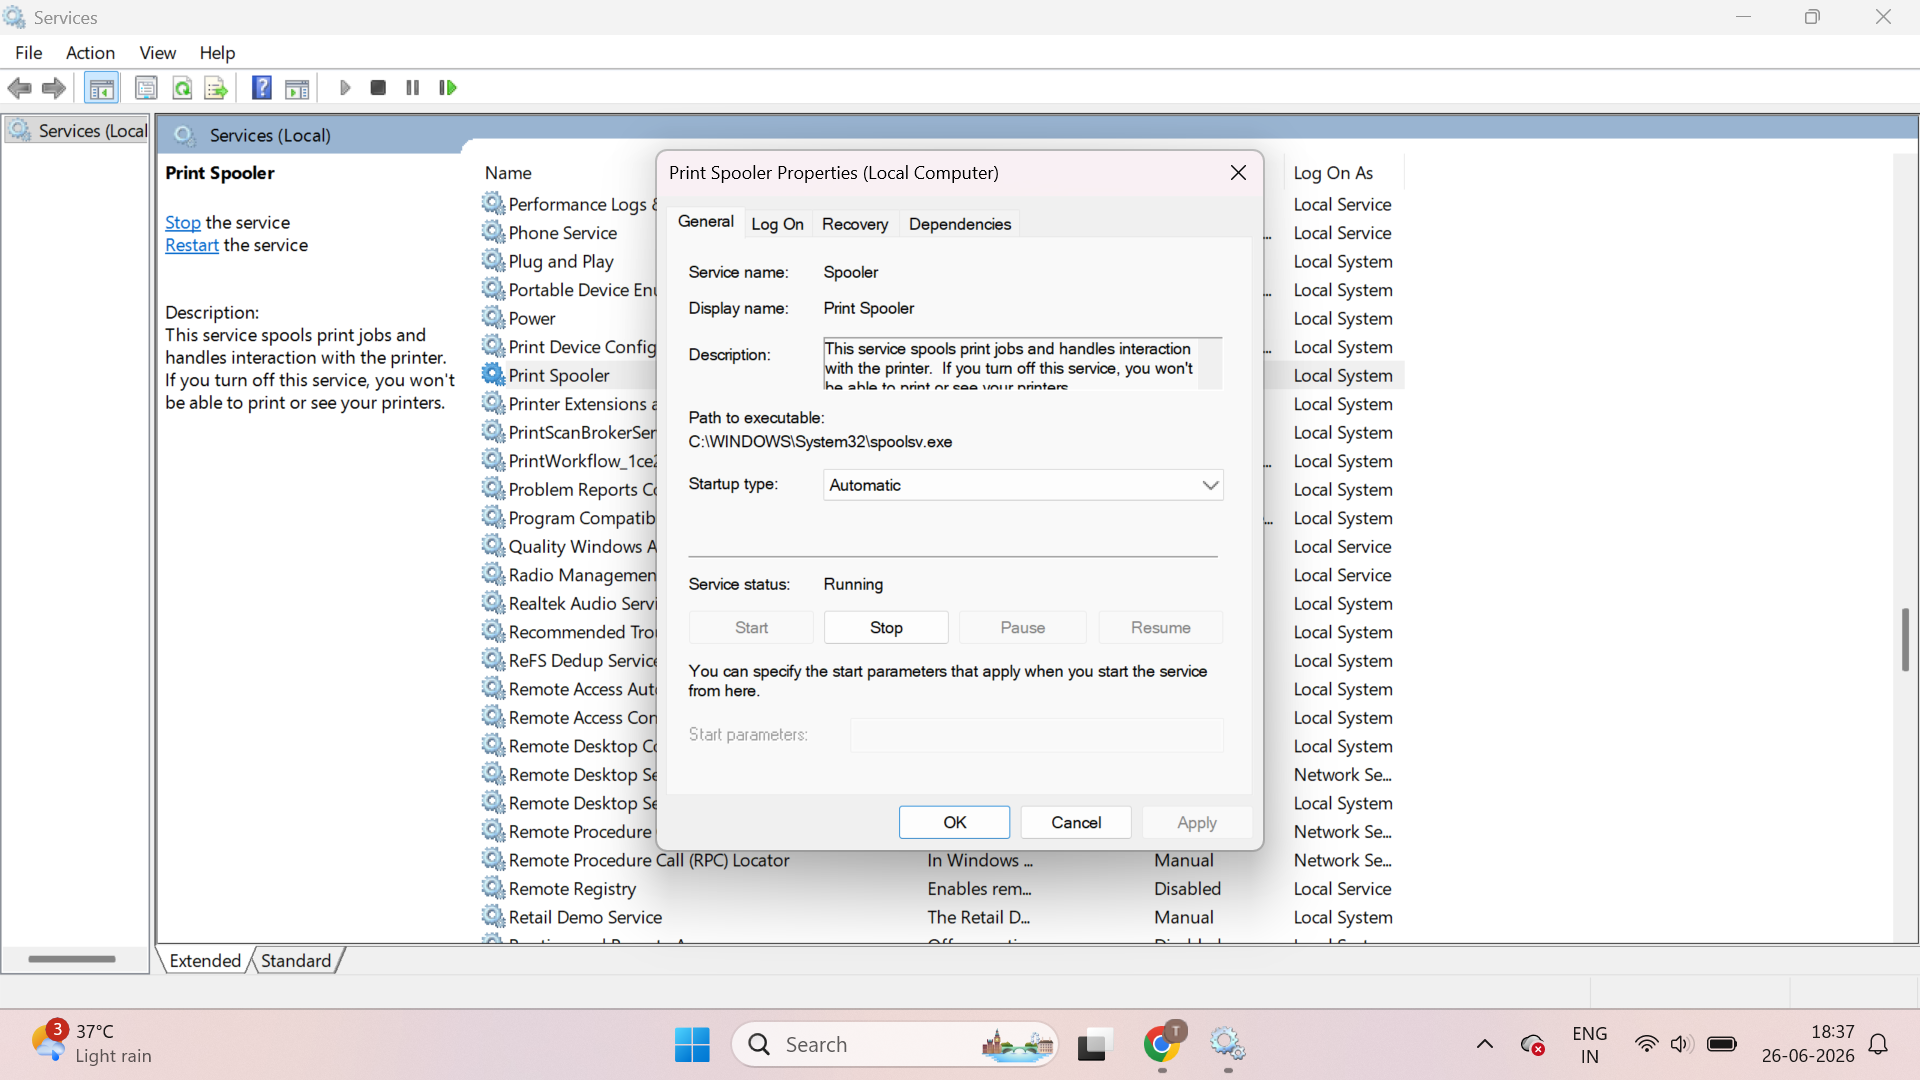
3. Set Startup type to Automatic.
4. Click Apply and OK.
5. Restart your computer and check the printer.
That’s it for now.
If you face any issue with above methods, drop us a comment and we’ll help.