
Upgrading from Windows 11 Home to Pro takes a few minutes. You can either upgrade by purchasing Pro upgrade from Microsoft Store or using the product key. But sometimes users encounter activation errors or find that the upgrade is incomplete. If you are facing the same issue, then follow the steps mentioned below to upgrade your Windows 11.
Page Contents
Windows 11 Home To Pro Upgrade Not Working
The steps to follow:
Method 1: Check If Windows 11 Home Is Activated
Windows 11 Home must be activated before you can upgrade to the Pro edition. Steps:
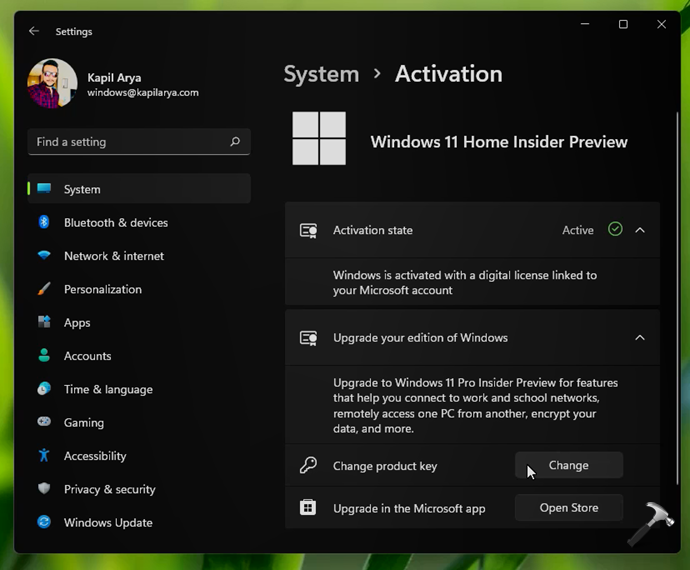
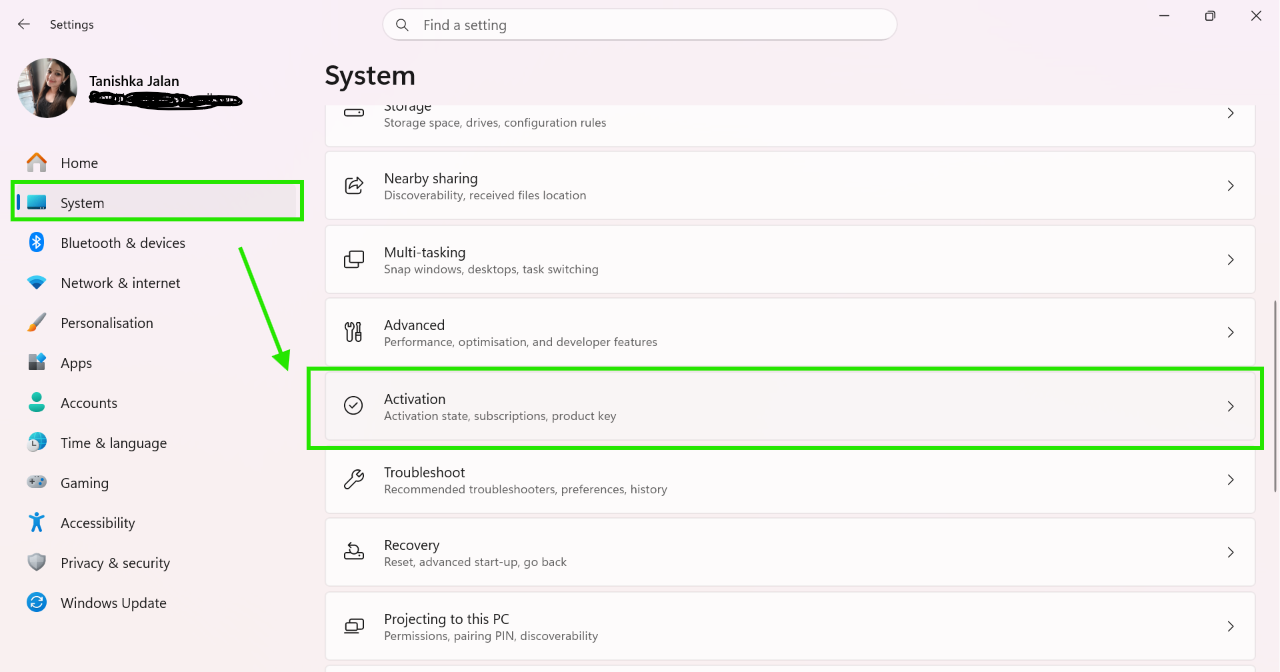
1. Press Windows + I to open Settings.
2. Go to System > Activation.
3. Check if Windows shows Active.
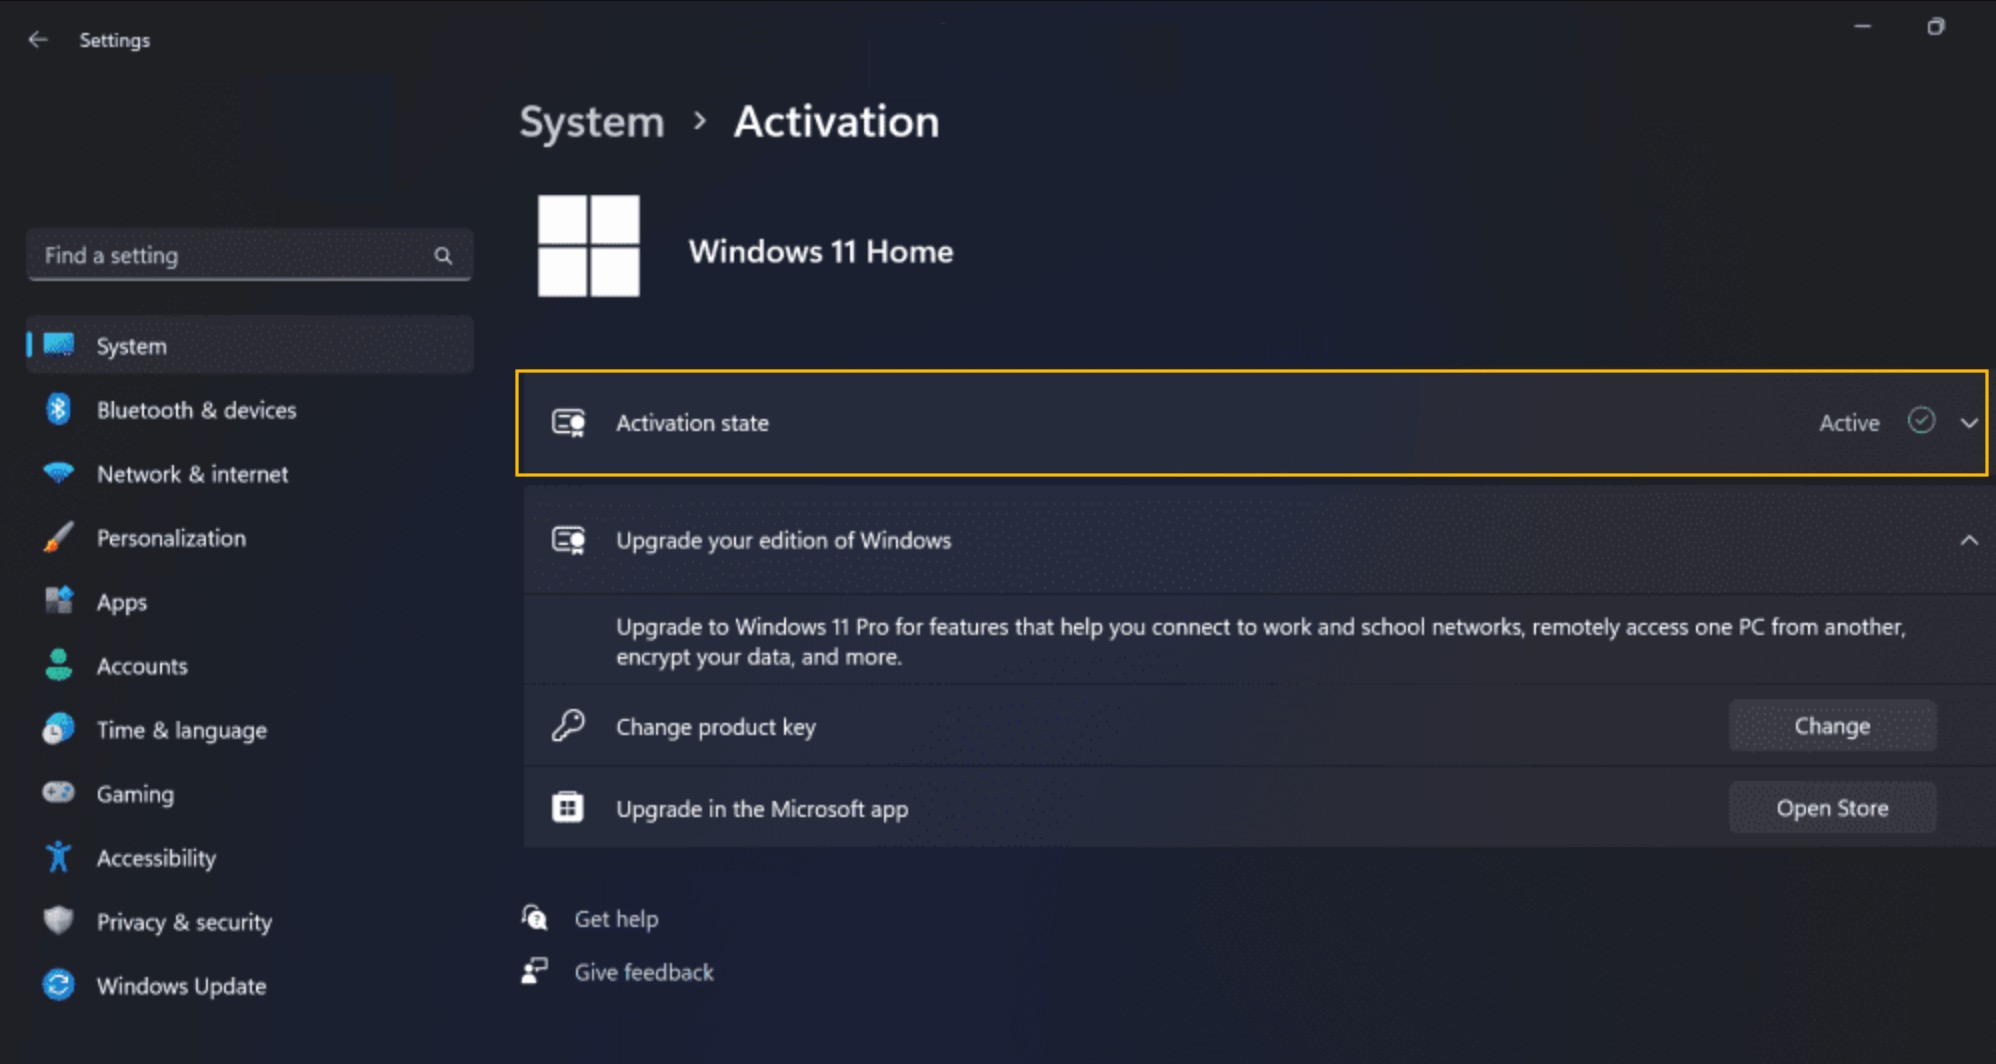
4. If it is not activated, activate Windows first using a valid Home product key.
5. Try upgrading to Windows 11 Pro again.
Method 2: Upgrade Using The Generic Windows 11 Pro Key
If the upgrade keeps failing, install the Pro edition first using Microsoft’s generic key. Follow the steps mentioned below:
1. Download your PC from the internet.
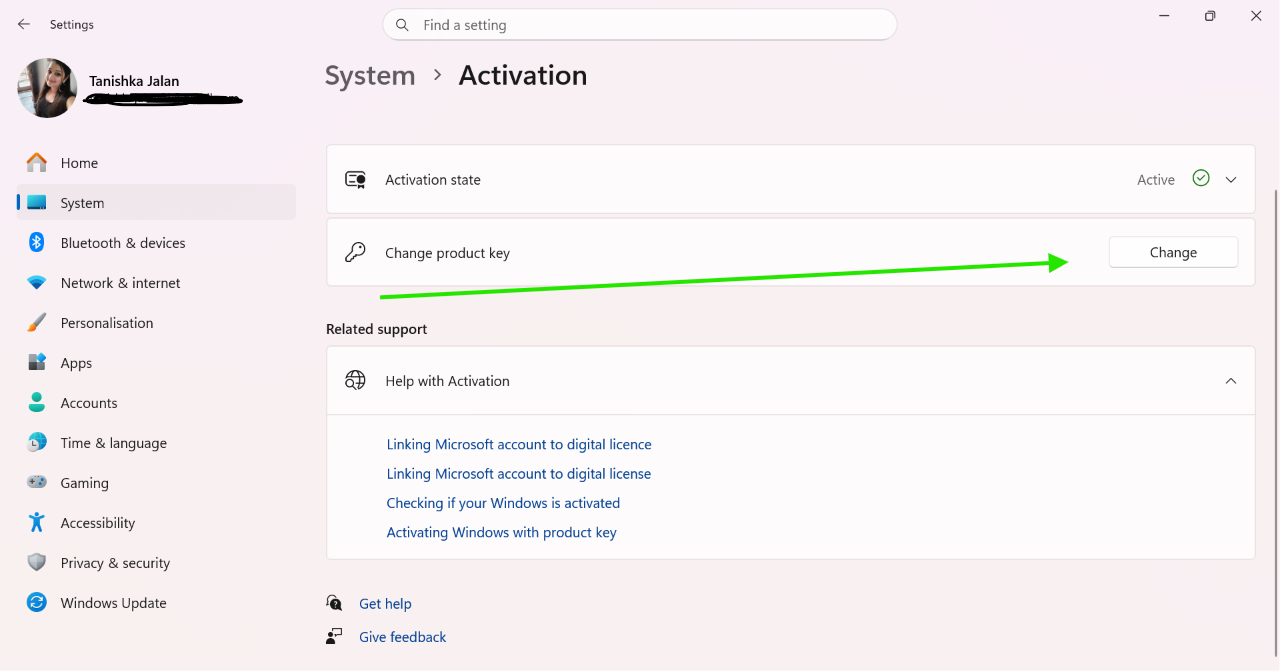
2. Open Settings > System > Activation.
3. Click Change product key.
4. Enter this generic key:
VK7JG-NPHTM-C97JM-9MPGT-3V66T
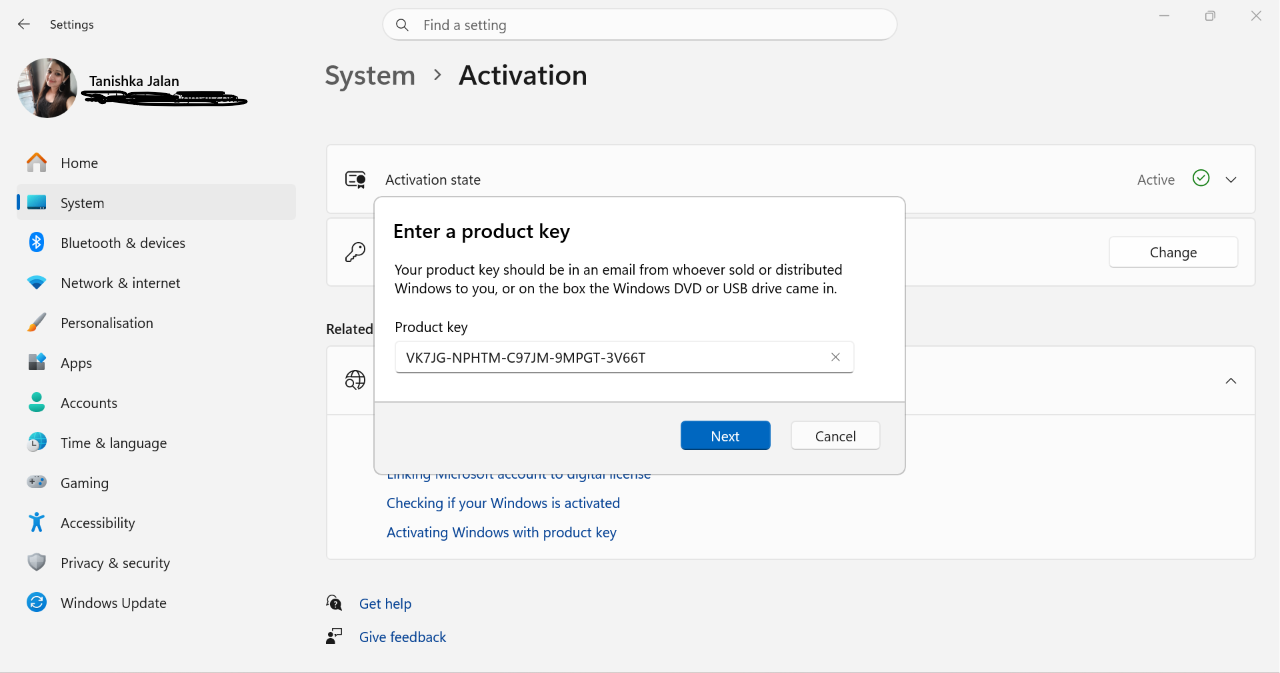
7. Click Next and complete the upgrade.
8. Reconnect to the internet.
9. Activate Windows 11 Pro using your purchased product key.
Method 3: Run SFC Scan
Corrupted system files can prevent the upgrade process from completing. Below are the steps:
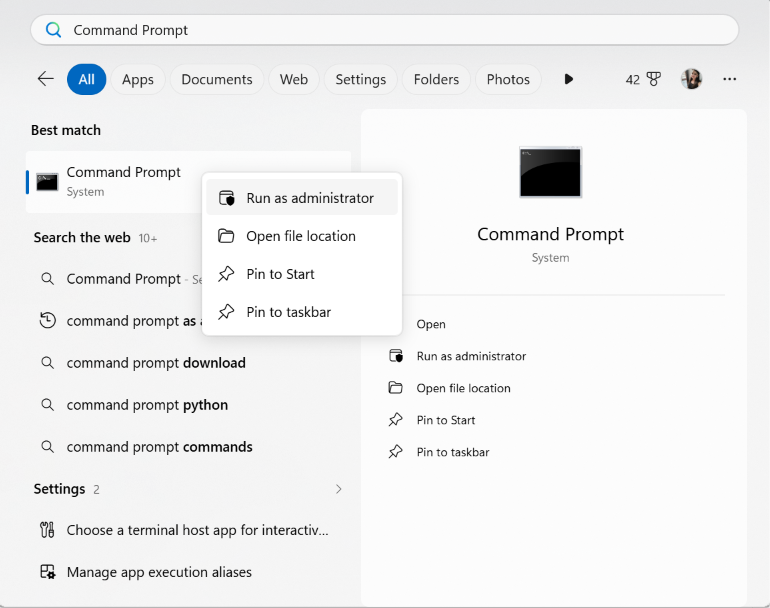
1. Search for Command Prompt.
2. Right click on it and select Run as administrator.
3. Run the sfc /scannow command and wait for it to finish.
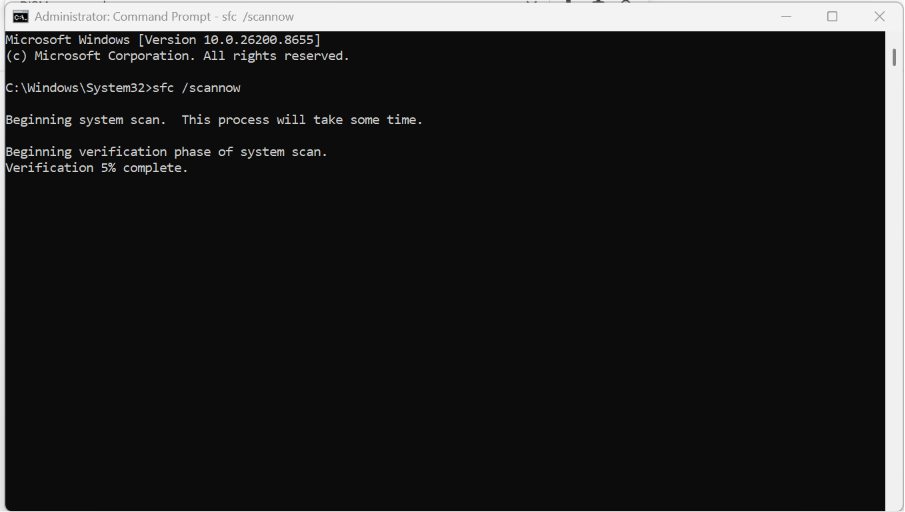
4. Restart your PC.
5. Try upgrading again.
Method 4: Clear The Microsoft Store Cache
If you purchase Windows 11 Pro through the Microsoft Store, clearing its cache may fix activation issues. Here is what you need to do:
1. Open Command Prompt as an administrator.
2. Type wsreset.exe and press Enter.
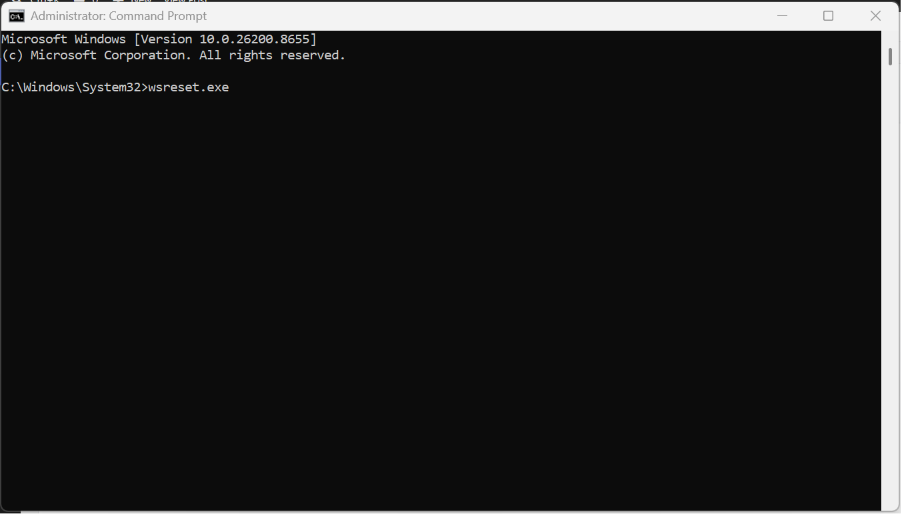
3. Wait for the Microsoft Store to open automatically.
4. Return to Settings > Activation and try the upgrade again.

Method 5: Check Windows 11 Pro System Requirements
Make sure your PC is fully compatible with Windows 11. Requirements are listed below:
1. 64-bit processor with 2 or more cores.
2. At least 4 GB RAM.
3. At least 64 GB storage.
4. TPM 2.0.
5. Secure Boot.
6. DirectX 12-compatible graphics.
There may be additional requirements, you can run PC Health Check to determine eligibility.
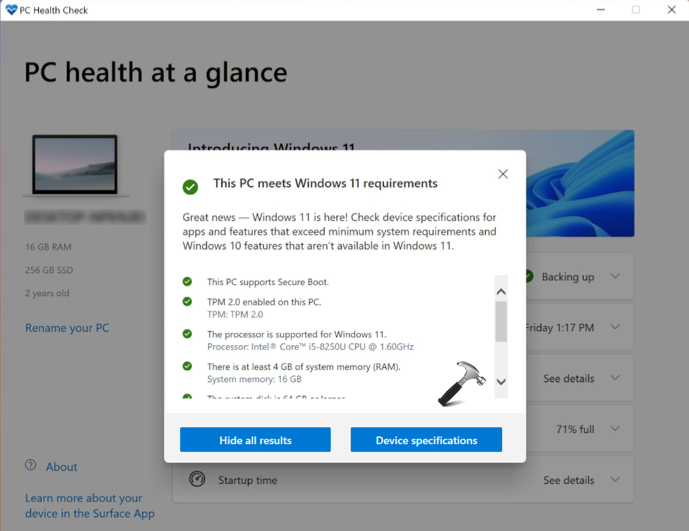
If your PC does not meet these requirements, the upgrade may fail.
Method 6: Perform A Clean Installation Of Windows 11 Pro
If none of the above methods works, perform clean install of Windows 11 Pro.
1. Download the Windows 11 Media Creation Tool.
2. Create a bootable USB drive.
3. If your PC keeps installing Windows 11 Home, create an "ei.cfg" file and place it inside the Sources folder on the USB drive. The file creation instructions mentioned in this guide.
4. Boot your PC using the USB drive.
5. Clean install Windows 11 Pro.
6. Activate it using your valid Windows 11 Pro product key. Find your product key using this guide.
That’s it!

