Earlier, we’ve seen how to manage your diagnostic data in Windows 10, in following guide:
How to manage diagnostic data in Windows 10
With reference to above linked guide, you can view diagnostic data using Diagnostic Data Viewer app. Also, you can delete diagnostic data at Settings app > Privacy > Diagnostics & feedback > Delete diagnostic data.
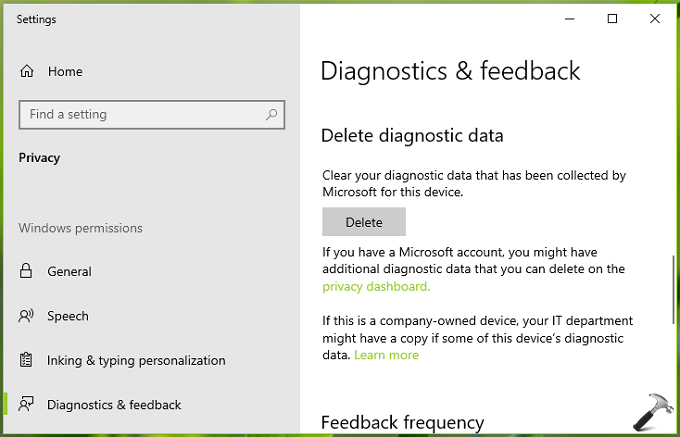
Now in this article, we’ll see how to enable or disable deleting diagnostic data in Windows 10. If you’re on Windows 10 build 17692 or later, you can configure a Group Policy setting for this. If you don’t want others to delete diagnostic data on your Windows 10, this setting is for you.
Here’s how to configure the policy:
How To Enable Or Disable Deleting Diagnostic Data In Windows 10
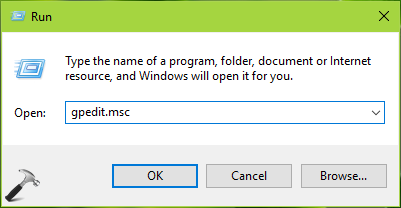
1. Press  + R and put gpedit.msc in Run dialog box to open Local Group Policy Editor. Click OK.
2. Next, in the GPO snap-in window, navigate here:
Computer Configuration > Administrative Templates > Windows Components > Data Collection and Preview Builds
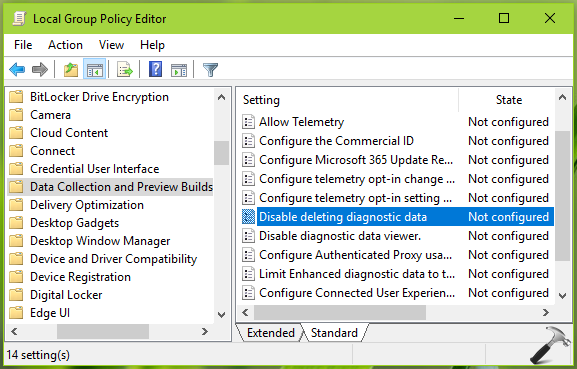
3. In the right pane of Data Collection and Preview Builds, look for the policy setting named Disable deleting diagnostic data. The policy is Not Configured by default. Double click on it to to modify its status:
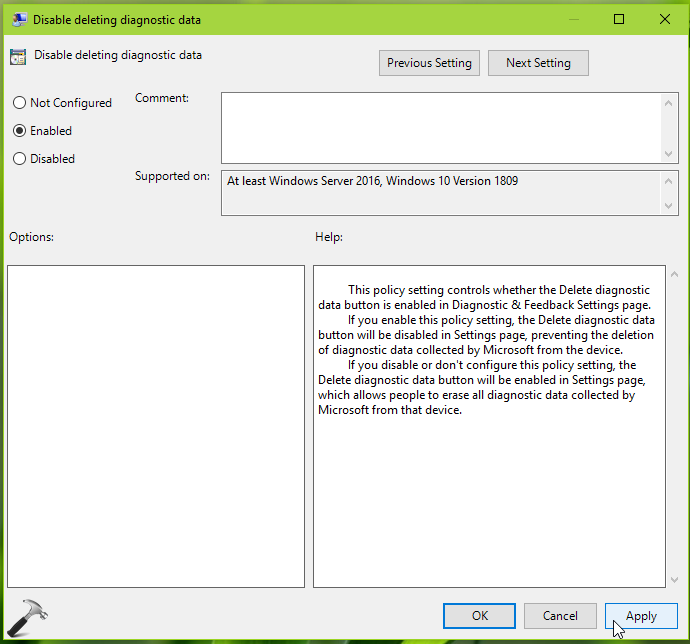
4. On the policy configuration window, you can set the policy to Enabled to prevent deleting diagnostic data. Due to this, Delete button will be greyed out for Delete diagnostic data section on Settings app (refer below screenshot).
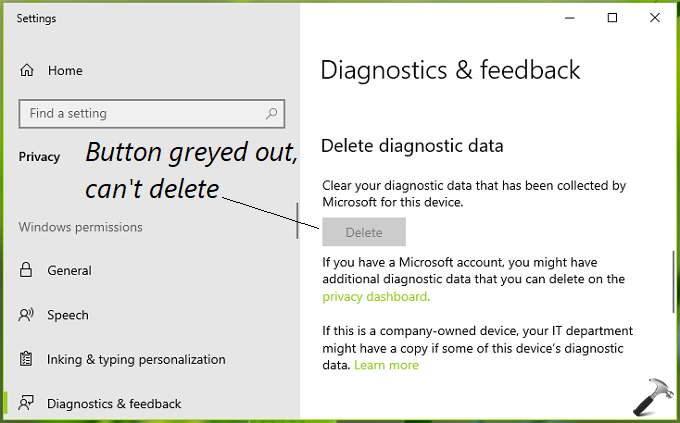
If you select Disabled or Not Configured, diagnostic data can be deleted, which is default setting. Click Apply followed by OK. Close the GPO snap-in and reboot to make changes effective.
So this is how you can enable/disable deleting diagnostic data in Windows 10.
That’s it!