
We all know that there are different sign-in or login options available in Windows 11. You can set up these sign-in options as per your convenience and as per availability of the required hardware. Apart from the traditional password, you can choose a variety of sign-in options, such as Windows Hello options requiring your biometric access. When you have multiple sign-in options available, setting a default sign-in option is also a requirement. In this article, we will help you to set default sign-in option in Windows 11.
Basically, there is no method to set up a default sign-in option natively. Windows is so designed that the sign-in option you frequently use automatically becomes the default sign-in option. But if you desire to set a specific sign-in option as default one, you need to modify registry in that case.
Page Contents
Set default sign-in option in Windows 11
Manual steps
1. Press  + X and select Terminal (Admin).
2. In Terminal window, paste wmic useraccount get name,sid and press Enter key.
3. Note down the SID for the user account you want a default sign-in option.

4. Press + R and type regedit in Run dialog box. Click OK or press Enter key.
5. In left pane of Registry Editor window, navigate to following registry key:
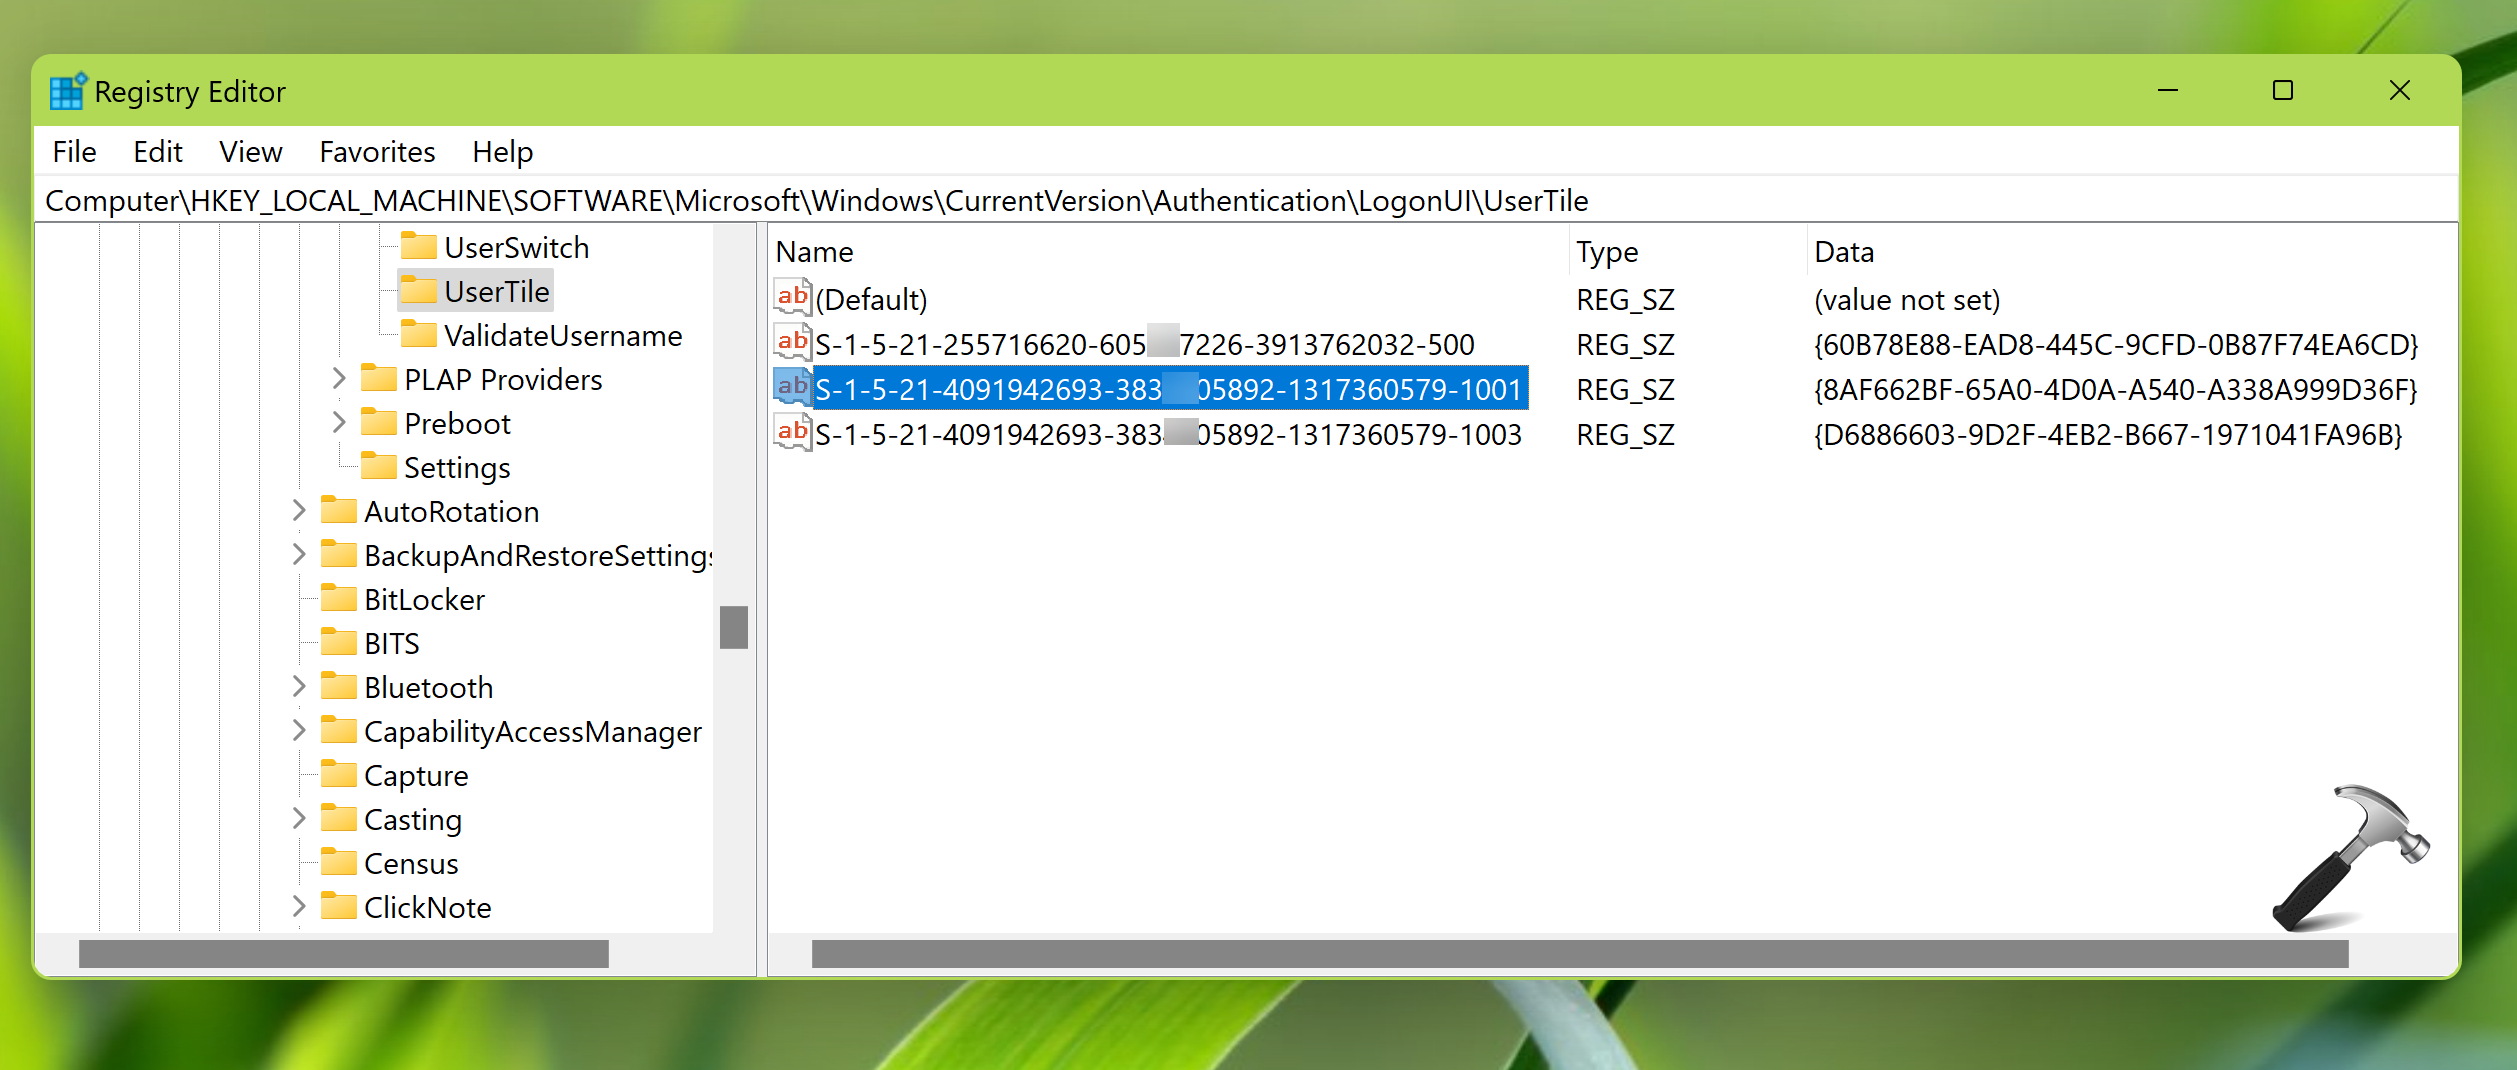
HKEY_LOCAL_MACHINE\SOFTWARE\Microsoft\Windows\CurrentVersion\Authentication\LogonUI\UserTile
6. In the right pane of UserTile, locate the user account SID (we got in step 3) named registry string. Set its Value data to either of the following GUID for corresponding sign-in option:
- Password: {60B78E88-EAD8-445C-9CFD-0B87F74EA6CD}
- Microsoft Account: {F8A0B131-5F68-486C-8040-7E8FC3C85BB6}
- PIN: {D6886603-9D2F-4EB2-B667-1971041FA96B}
- Windows Hello Fingerprint: {BEC09223-B018-416D-A0AC-523971B639F5}
- Windows Hello Face: {8AF662BF-65A0-4D0A-A540-A338A999D36F}
- Picture Logon: {2135F72A-90B5-4ED3-A7F1-8BB705AC276A}
7. Once you set the value data for the sign-in option you want, just close Registry Editor and reboot your system to make change effective.
After restart, you’ll have the sign-in option you want, as default one.
Video guide
For live demonstration of above method, checkout this video:
That’s it!


Thank you! Excellent article and was very useful in helping me set up Windows Hello Face as the default login method!
^^ Glad to help Kathy 😎
That helped, but only until I used another method with fingerprint scanner (I got laptop). Then the registry is overwritten.
^^ This method works better if you’ve set all sign-in options prior and then you set a default sign-in option.
Thank you very much. You are the only guy posted actual solution on changing default singin method. Everywhere else idiots are advising on how to create a new PIN.
^^ Glad it helped!
I’m on Windows 11 Pro, 23H2, 22631.4169 as of 9/19/2024. It looks like I can’t make password the default. Even if I delete and disable my pin (via the forgot my pin->cancel), when I restart I see:
Something happened and your PIN isn’t available. Click to setup your PIN again.
If I click sign in options, then I am able to click another option like touch or password. After I reboot it goes back to trying to setup pin.
Same experience if I have “For improved security, only allow Windows Hello sign-in for Microsoft accounts on this device” On or Off.
I’ve tried the registry edit, but it gets reverted back after a reboot. I’d like to avoid using local account. Any ideas?
Thank you!
didn’t work for me. even after verifying the sid for username id registry was correct. it still gives him the choice of how to log into windows. wanted hello pin. but everything works. even password
In Windows 11 wmic is depreciated, use this instead >> Get-CimInstance -ClassName Win32_UserAccount | Select-Object name,sid
^^ Thanks for sharing this 😎
Didn’t work for me.
Followed the steps ok, but it still prompts me for fingerprint every time, won’t do pin without clicking through the options each time to get there.
Although the registry edit described here works to change the default sign in option to password, it is not permanent. I’m running Windows 11 Pro, and every single time Microsoft issues a Windows Feature Update (e.g. Windows 11, version 25H2), the registry gets set back to the default of using the PIN or login. I need to retain a PIN for other functions on my PC, so I can’t completely disable it, but I want the Windows login to ALWAYS be the password.
Is there a way to make this change truly permanent, such as locking an entry in the registry? Or maybe change a setting elsewhere, such as in Group Policy Editor?
ˆˆ IMO, there are no dedicated Group Policy for this. Feature updates may revert the changes, I do agree. I’ll surely update this article, if I found something else.