Among its many features, Windows offers a delete confirmation prompt feature. Through this feature, users get a prompt whenever they delete a file. It confirms whether they want to continue deleting the file or folder they selected. This helps users to avoid deleting important files. However, this feature is hidden in some Windows editions. So, how to enable delete confirmation prompt in Windows 11?
It is quite easy to get this confirmation prompt on your system before every deletion. In order to enable this feature on your Windows PC, go through the following effective methods:
Page Contents
Enable delete confirmation prompt in Windows 11
Method 1: Enable delete confirmation prompt with Recycle Bin Properties
1. Firstly, right-click on the icon of Recycle Bin. From the context menu, choose Properties.

2. In the General tab, tick mark the box present next to Display delete confirmation dialog.
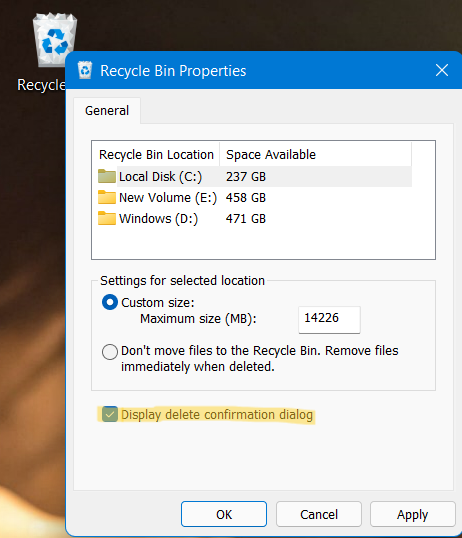
3. Once done, click on Apply and then, hit OK.
After that, you will get the delete confirmation prompt before you delete anything.
Method 2: Enable delete confirmation prompt using Registry Editor
1. In the first place, open the Run dialog box. After that, type regedit in the Run dialog box to open Registry Editor.

2. Now, you have to navigate to the following location:
HKEY_CURRENT_USER\Software\Microsoft\Windows\CurrentVersion\Policies
3. Once there, you need to create a new key. To do so, you have to right-click on the empty space and choose New and then, select Key.
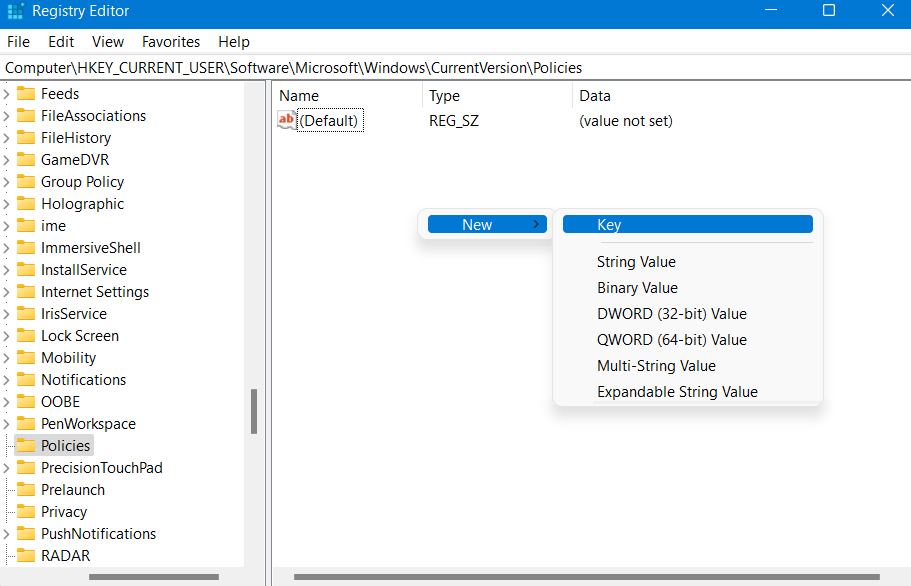
4. Now, rename the key as Explorer. Once done, click on it and create a DWORD named ConfirmFileDelete in the right pane.

5. After that, right-click on the newly created DWORD. Now, change the value data to 1 to get the delete confirmation prompt.

6. Next, reboot your system after closing Registry Editor.
Now, you will be able to see the delete confirmation prompt.
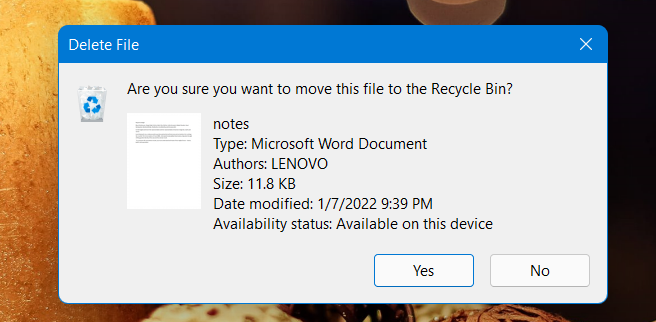
So, these are two methods to get the delete confirmation prompt in Windows 11. Now, you do not need to worry over how to get the delete confirmation prompt on your Windows PC.