
If your wired connection on Windows 11 feels sluggish, downloads lag, file transfers crawl, or streaming stutters, the issue might not be your ISP. Often, the culprit lies in configuration settings, DNS or driver problems, or router and cable issues, which require you to fix the slow Ethernet speed.
Page Contents
Fix Windows 11 Slow Ethernet Speed
Below are six reliable fixes to get your Ethernet speed back up. Try one at a time, then test your connection after each attempt.
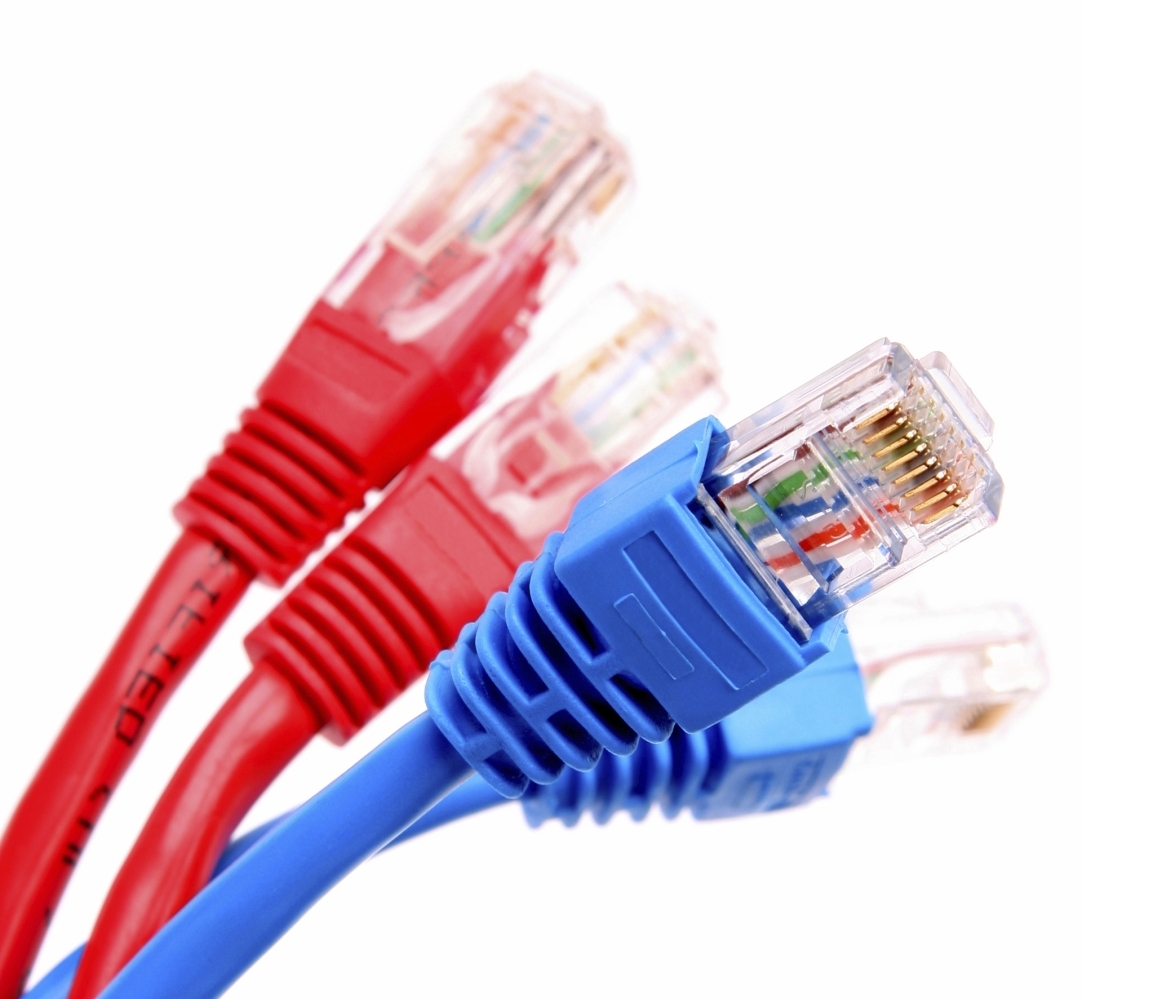
Fix 1: Check the Ethernet cable and router/modem hardware
1. Make sure you use a good-quality Ethernet cable (Cat 5e or Cat 6) for gigabit speeds.
2. Confirm that the cable is plugged into the correct LAN port on your router and PC (not a WAN/modem-only port).
3. Try a different cable or a different router port to rule out faulty hardware.
4. If possible, test another device on the same network to see if the problem recurs. This helps identify whether it’s PC-side or network-side.
Fix 2: Disable VPN or security software temporarily
Third-party VPN clients are a known cause of slow LAN speed.
1. Go to Settings, then Apps, and then Apps & Features.
2. Scroll down to locate the VPN client software, click the three-dot menu next to it, and select Uninstall.
3. Restart your PC and check if the speed has improved without the VPN client installed.
Fix 3: Adjust to a Different DNS Server
A slow DNS server can cause lag. Switching to a public DNS server often improves performance.
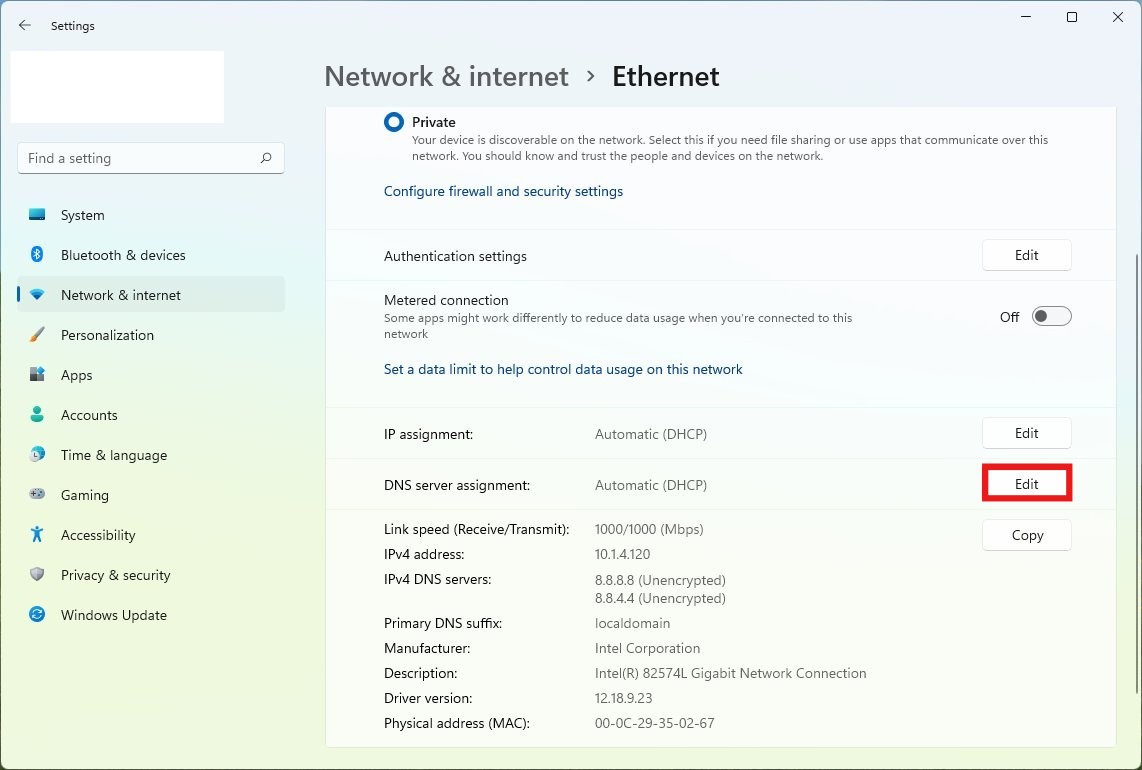
1. Open Settings and go to Network & internet and then Ethernet.
2. Under DNS server assignment, click Edit.
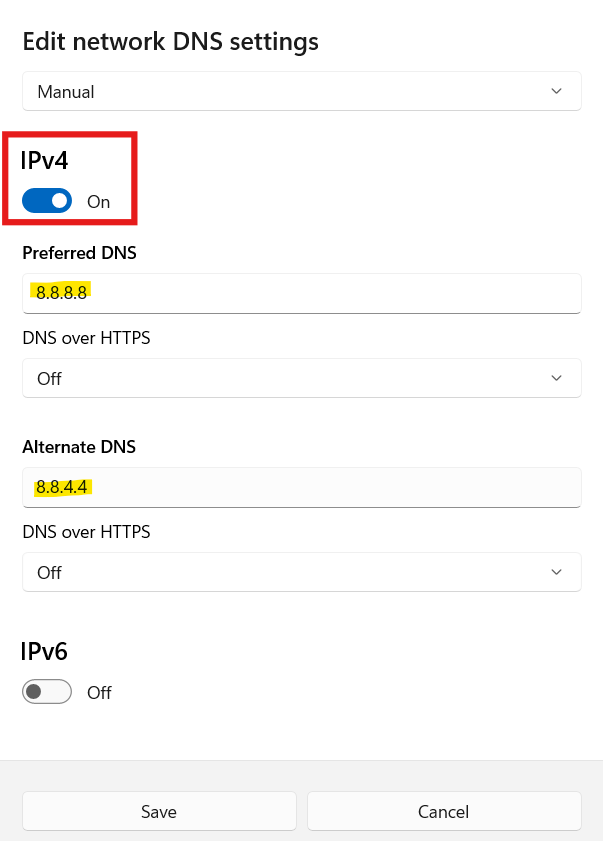
3. In the pop-up, set the dropdown menu to Manual.

4. Set the toggle of IPv4 to On, and enter a public DNS (e.g., 8.8.8.8 as Preferred DNS, 8.8.4.4 as Alternate DNS for Google DNS).
5. Click Save and test your Ethernet speed again.
Fix 4: Change Speed & Duplex settings for Ethernet adapter
Improper Duplex settings can cause performance issues.
1. Go to Settings, then Network & Internet and then Advanced Network Settings. After that, select More network adapter options.
2. Right-click your Ethernet connection and go to Properties, then Configure, and then the Advanced tab.
3. Under properties, find “Speed & Duplex.”
4. Set the value to “1.0 Gbps Full Duplex” (or the maximum supported for your adapter/router).
5. Click OK and restart your PC, then retest your connection speed.

Fix 5: Update or reinstall the network adapter driver
1. Open Device Manager and expand Network adapters, then locate your Ethernet adapter.
2. Right-click it, select Update driver, and then Search automatically for drivers.
3. If update doesn’t works, right-click again and choose Uninstall device.
4. Restart your PC and let Windows reinstall a fresh driver automatically.
5. Check Ethernet speed after driver reinstall.

Fix 6: Suspend the Windows Background Update Service
The background Windows Update service can consume significant bandwidth.
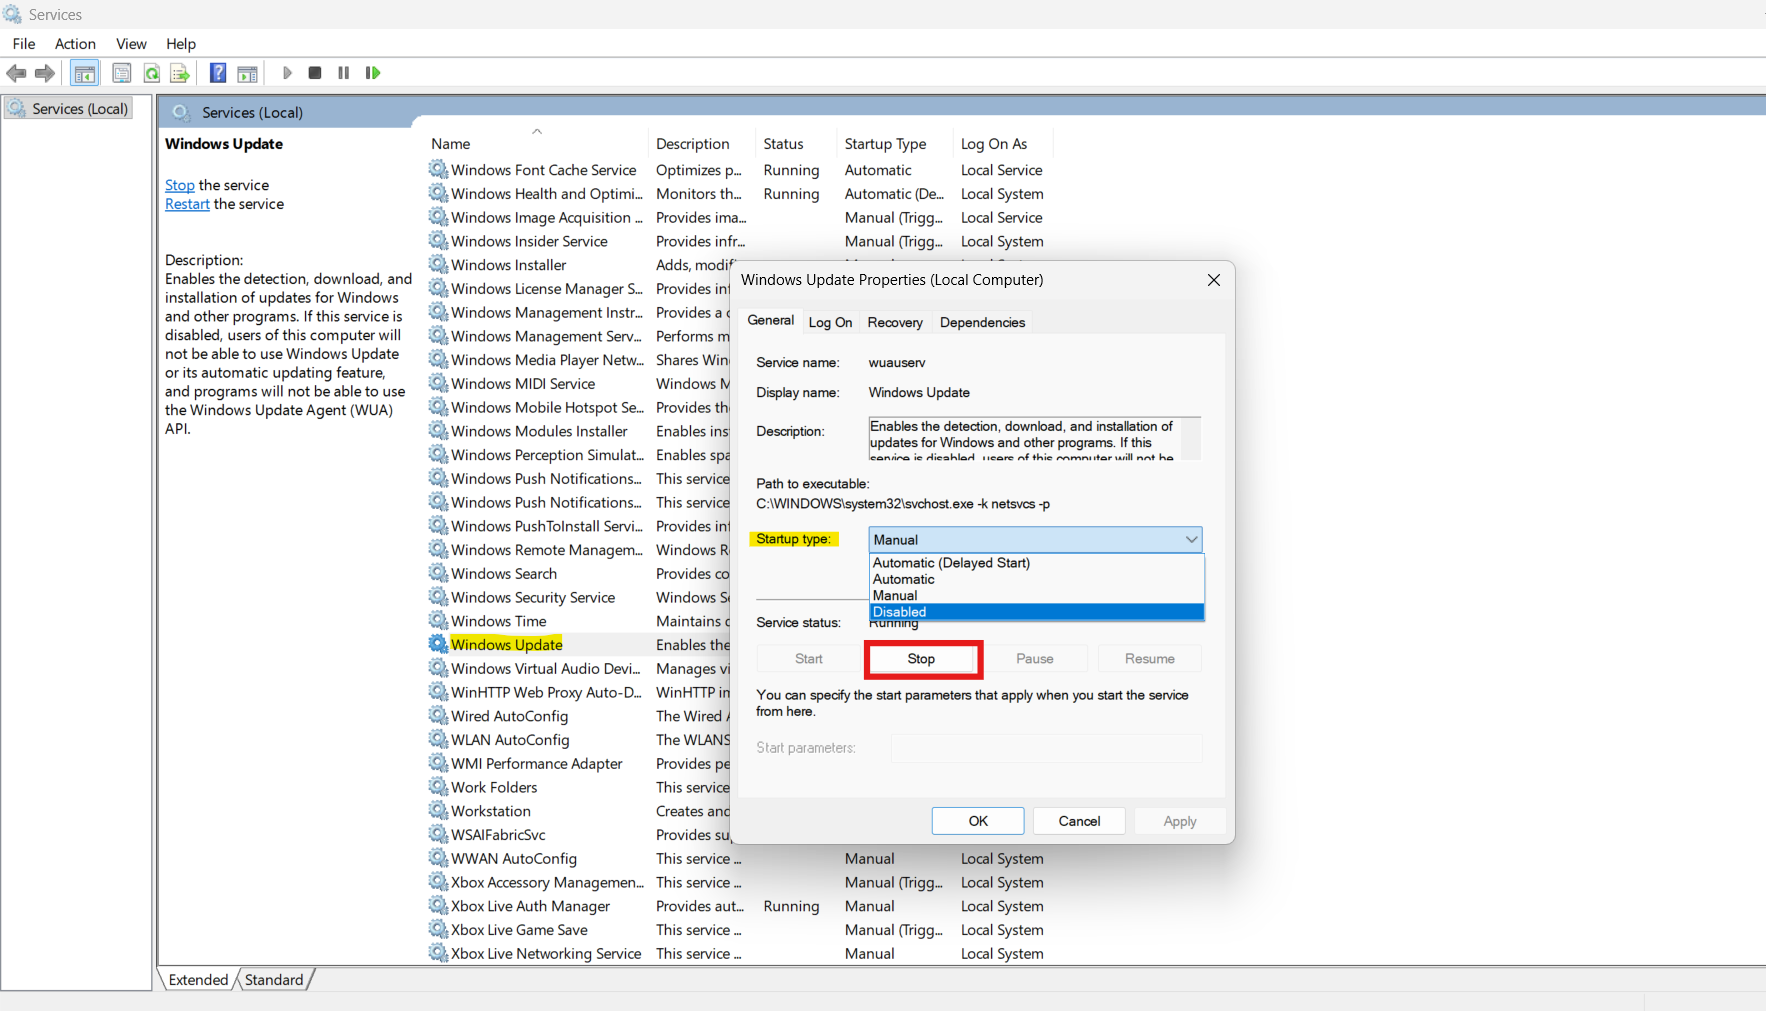
1. Open the Services window (press Win+R) and type services.msc.
2. Scroll down to Windows Update, double-click it, and click Stop in the Properties window.
3. Change the Startup type to Disabled. Click Apply and OK.
Fix 7: Turn off IPv6 support on your Ethernet adapter
Some users find that disabling IPv6 (Internet Protocol Version 6) can resolve speed issues.
1. Go to Settings > Network & Internet. Then click Advanced network settings > More network adapter options.
2. Right-click the Ethernet adapter and select Properties.
3. Untick the checkbox next to Internet Protocol Version 6 (TCP/IPv6) and click OK.

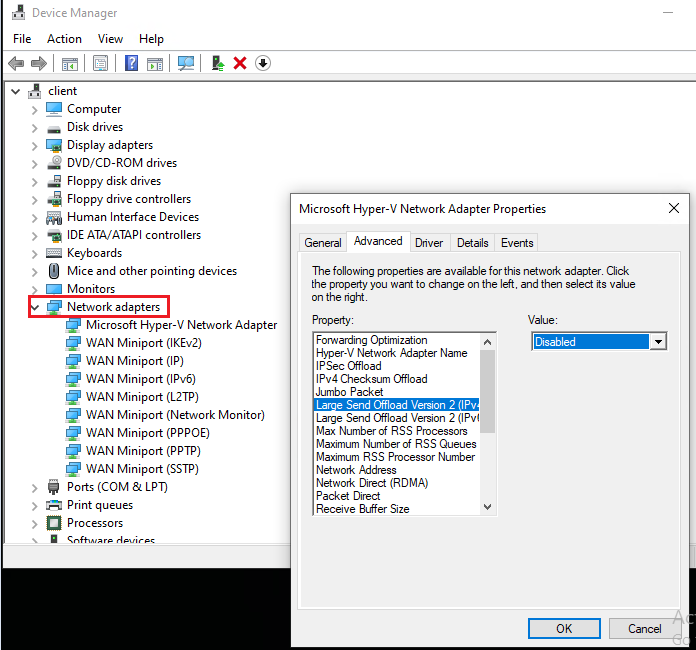
Fix 8: Disable Large Send Offload (LSO) for your network adapter
Disabling the Large Send Offload (LSO) feature can sometimes fix slow LAN speed.
1. Open Device Manager and expand Network adapters.
2. Right-click your Ethernet adapter and select Properties, then go to the Advanced tab.
3. Select Large Send Offload v2 (IPv4) from the Property menu and choose Disabled from the Value menu.
4. Click OK to save the change.
Quick tips
1. After each fix, reboot before re-testing the network speed.
2. Ensure your router firmware is updated and that no bandwidth-limiting settings (QoS, port limits) are enforced.
3. If multiple devices share the same network, test Ethernet speed on another device to rule out ISP or router issues.

![The mapped network drive could not be created [Detailed fix]](https://www.kapilarya.com/assets/Network-Drive.jpg)

![Stop sharing a folder in Windows 11 [Guide]](https://www.kapilarya.com/assets/Network.png)