Is the Windows 11 Installation Assistant not working in the system? You have landed on the right page. Perhaps the Windows 11 Installation Assistant is not progressing beyond the 0, or is not responding, or just throws some error at random.
It is necessary to know about Windows upgrades before leaping into troubleshooting and pressing the button. They are dependent on the well-being of the system, drivers, background services, the capacity of your storage, and even your antivirus. One interrupted installation may make the Installation Assistant crash. That is why the following techniques are aimed at fixing at the root level, that makes sure that your device is completely prepared to be upgraded.
Page Contents
Fix Windows 11 Installation Assistant not working
By using this, Windows Installation Assistant errors can always be corrected, and you will be able to continue using Windows 11.
Fix 1: Check If Your Device Meets Windows 11 Requirements
Windows 11 is more restrictive in hardware. In case any of your devices do not coincide with them, the Installation Assistant will experience an error.
Minimal Requirements
- Processor: 1GHz or faster, 64-bit
- RAM: 4GB or more
- Storage: 64GB minimum
- TPM: Trusted PlatformModule (TPM) 2.0.
- Secure Boot: Enabled
- Graphics: DirectX 12 supportable.
Check with Health Check App
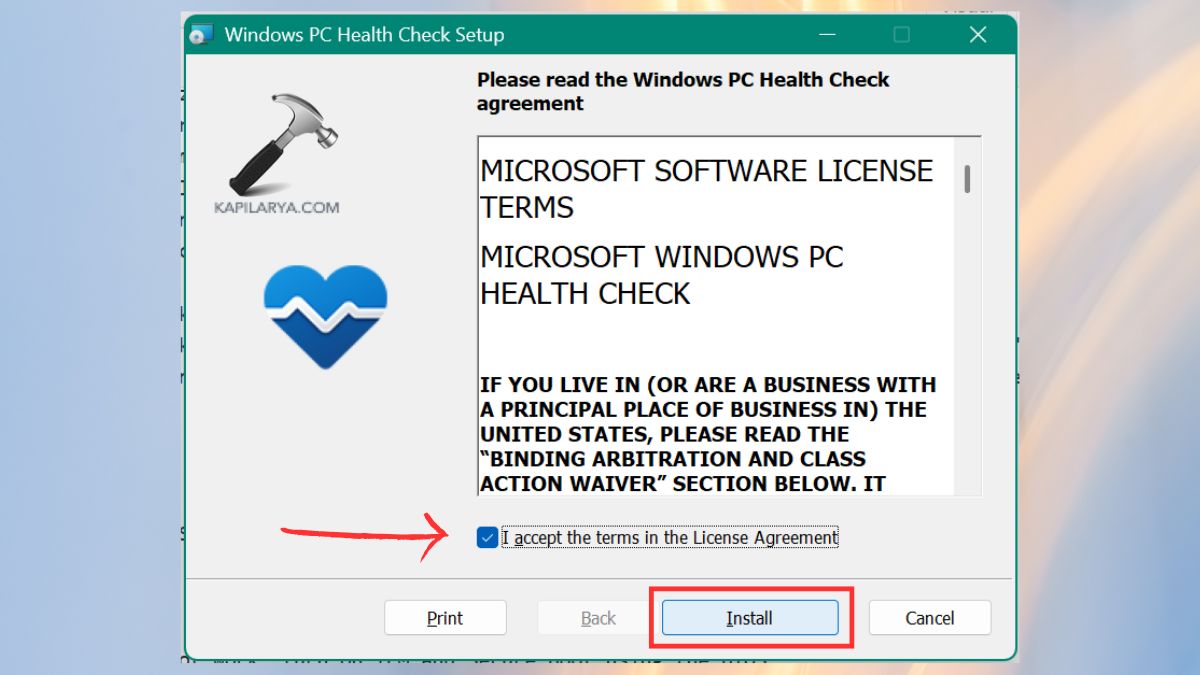
1. Grab the PC Health Check application by Microsoft: “https://aka.ms/GetPCHealthCheckApp“. Launch the tool, accept the terms, to install it.
2. Now, select Check Now. Screen the compatibility report.
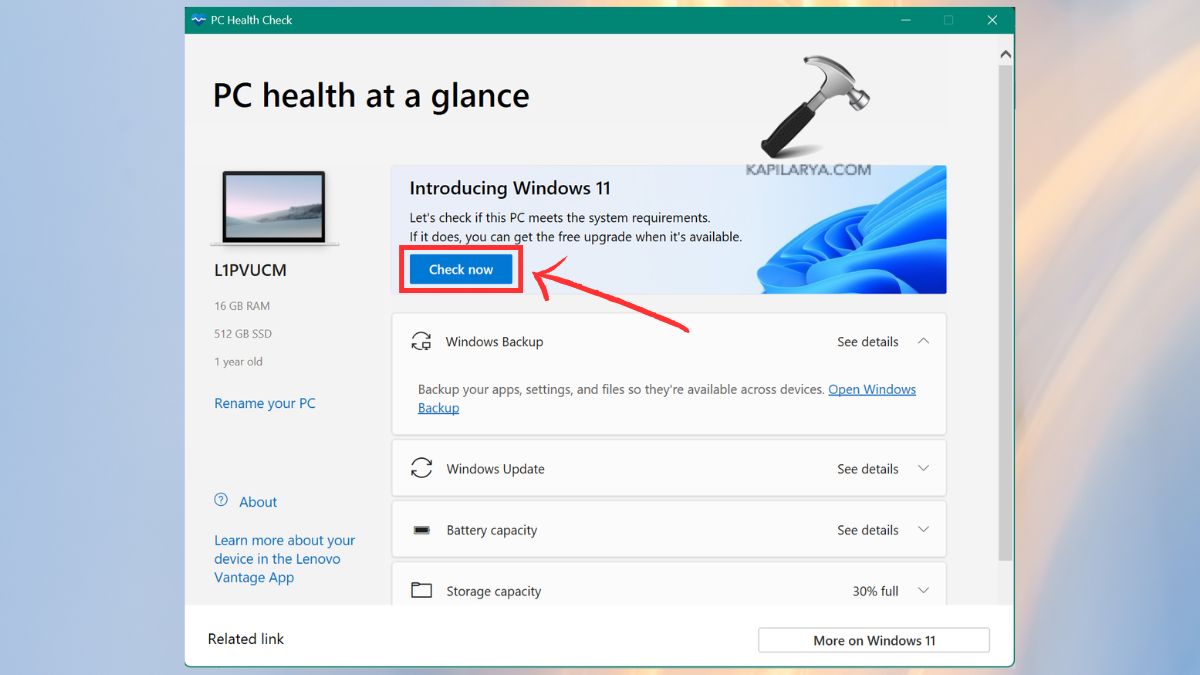
In case your system does not work, turn on TPM and Secure Boot using the BIOS.
Fix 2: Run the Windows 11 Installation Assistant as Administrator
In some cases, the Assistant cannot be effective because of restraints.
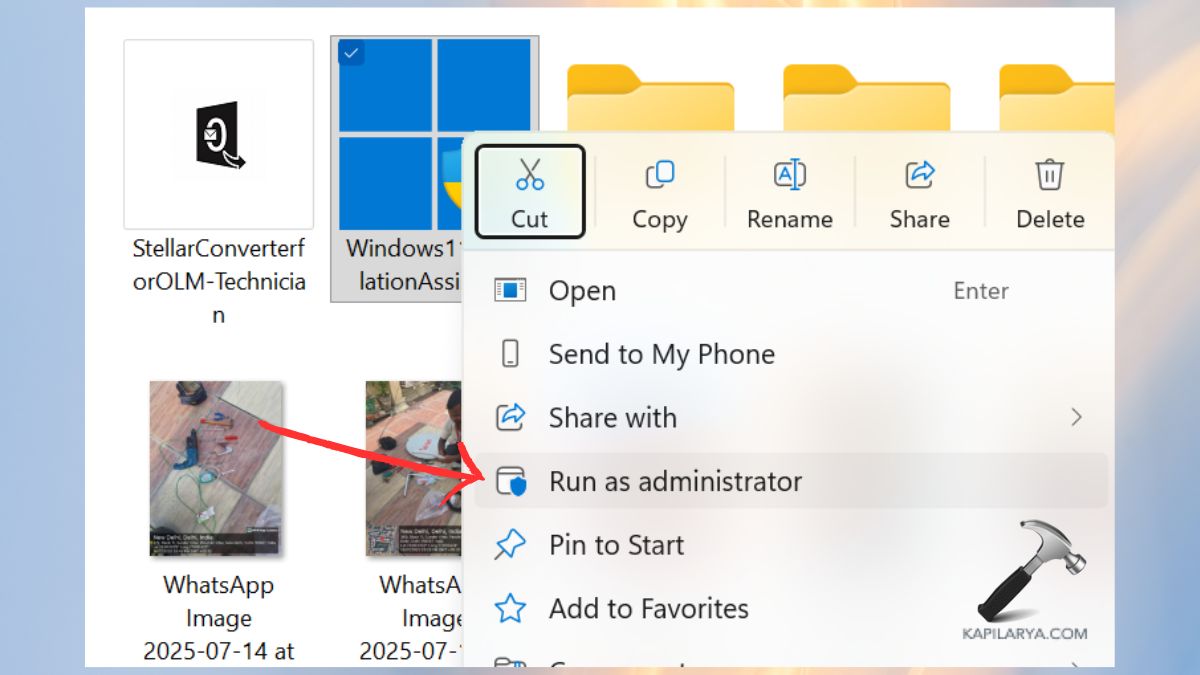
1. Open the Windows 11 Installation Assistant file by a right-click. Select Run as administrator. Enable the User Account Control (UAC) prompt.
2. Retry the installation. Exercising with high privileges tends to rectify the permission-related problems.
Fix 3: Disable Your Antivirus or Firewall Temporarily
Installing antivirus software or the default Windows Defender can stem out installation elements.
1. Select the antivirus dashboard. Switch off Turn Real-Time Protection.
2. Stop firewall protection, where possible.
3. Then, restart the Installation Assistant.
Note: System protection should be turned on again after installation.
Fix 4: Run System File Checker (SFC) to Repair Corrupt Files
Installation Assistant will not be able to run correctly on corrupted Windows components.
1. Press Win + R, enter cmd and open Command Prompt as an administrator.

2. Run this command. Allow the verification to be done.
sfc /scannow

Restart the PC. In case they detect some problems and fix them, reinstall.
Fix 5: Update Your Graphics Driver and Windows OS
Windows 11 has extensive dependence on new system drivers. Older graphics drivers might result in launch failures, crashes or freezes in installations.
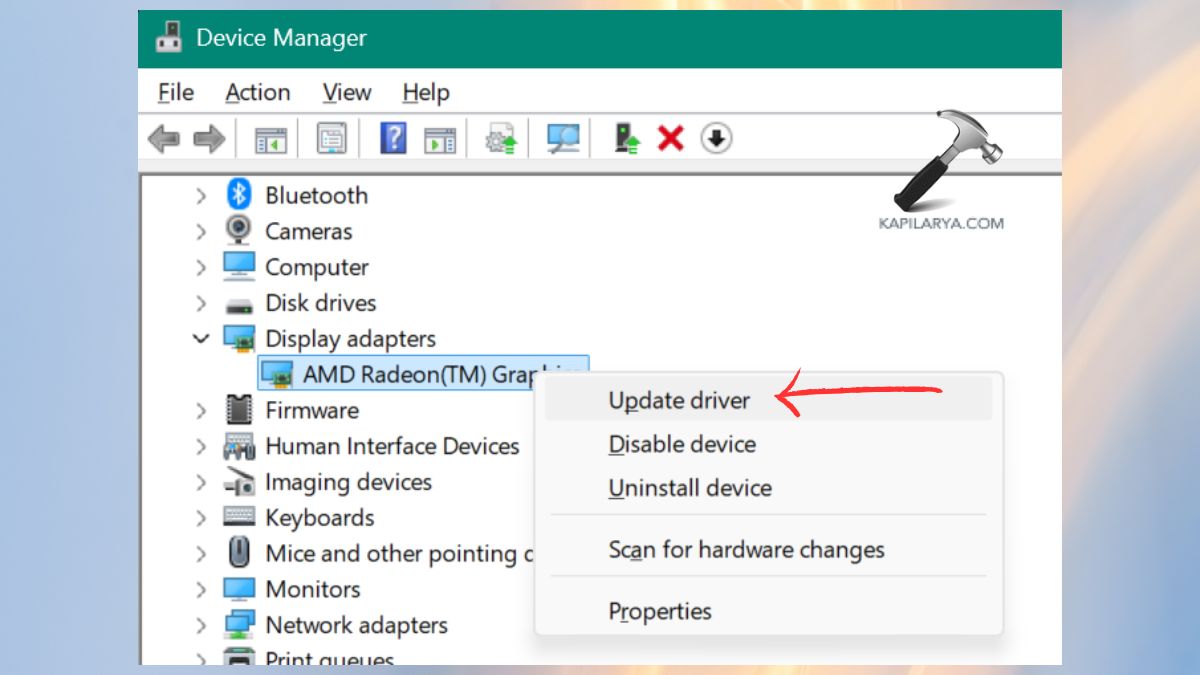
1. Click Windows + X and from the menu, select Device Manager.
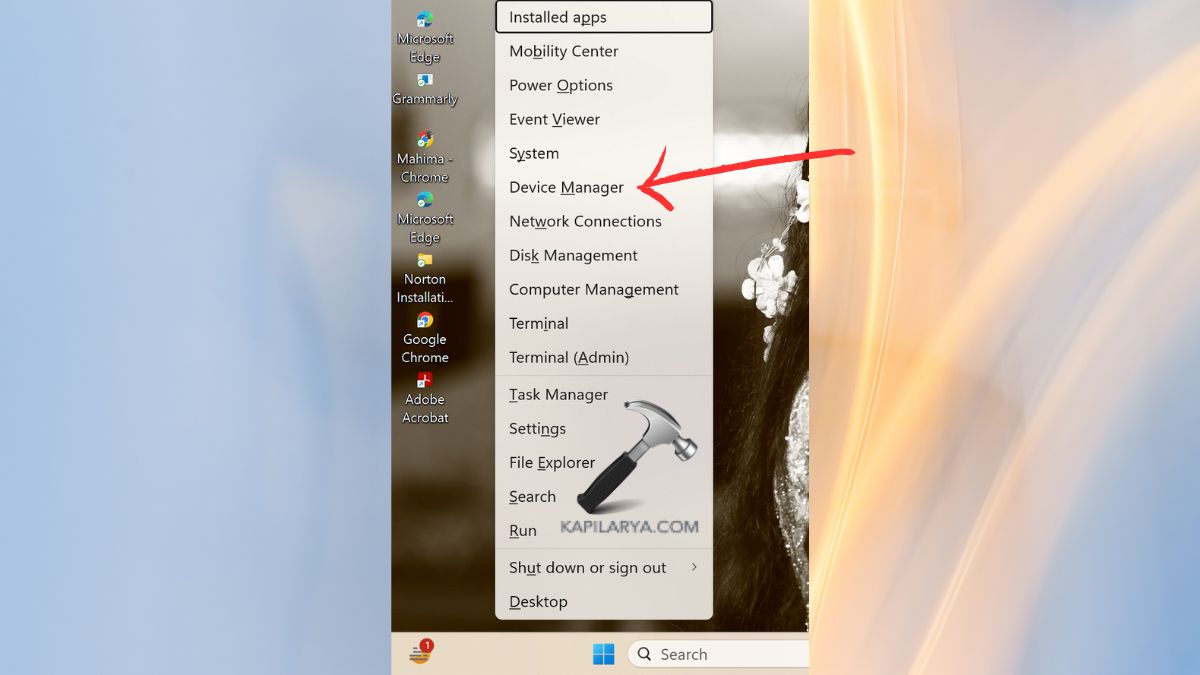
2. Expand Display adapters. Right-click your GPU. Click Update driver > Search automatically.
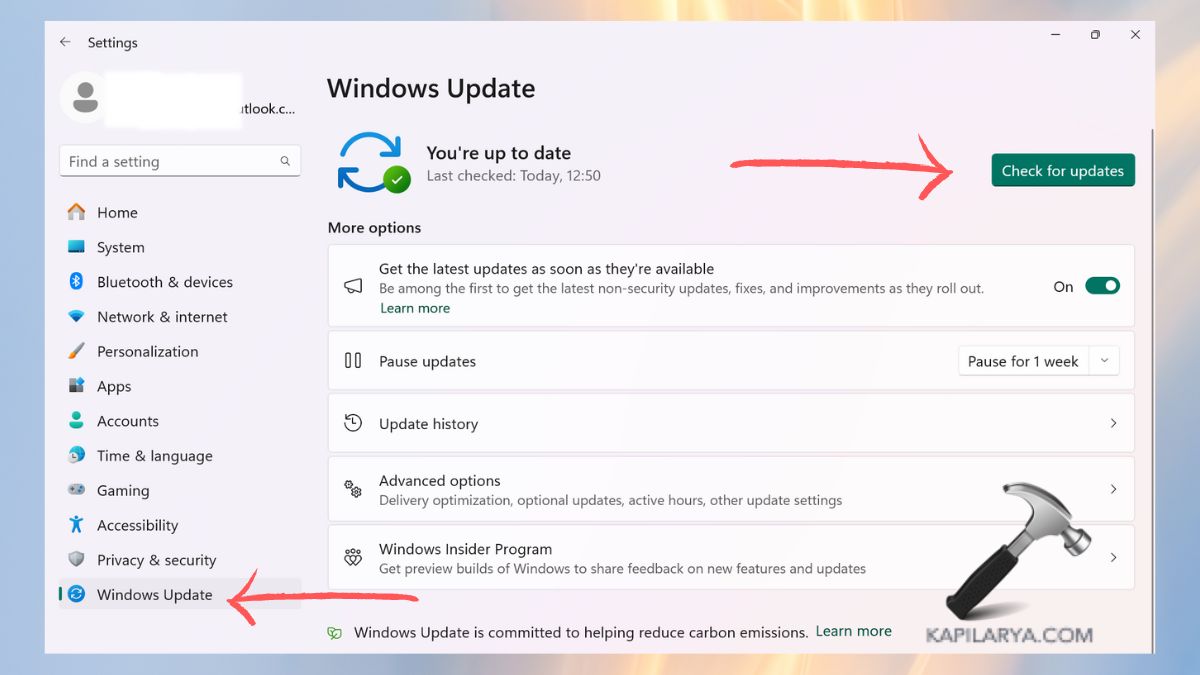
3. Click on Settings > Windows Update.
4. Click Check for updates. Install all pending updates.
Restart the system PC. This is because maintaining everything is a guarantee that the performance will be smooth and any compatibility problems will be avoided.
Fix 6: Reset Windows Update Components
In case the Installation Assistant is frozen, not loading or encounters errors repeatedly, the Windows Update elements may be corrupted.
1. Launch Command Prompt with administrative privileges and execute each line.
2. Stop Update Services:-
net stop wuauserv
net stop bits
net stop cryptsvc
net stop msiserver

3. Rename Update Folders:-
ren C:\Windows\SoftwareDistribution SoftwareDistribution.old
ren C:\Windows\System32\catroot2 catroot2.old
4. Restart Services:-
net start wuauserv
net start bits
net start cryptsvc
net start msiserver
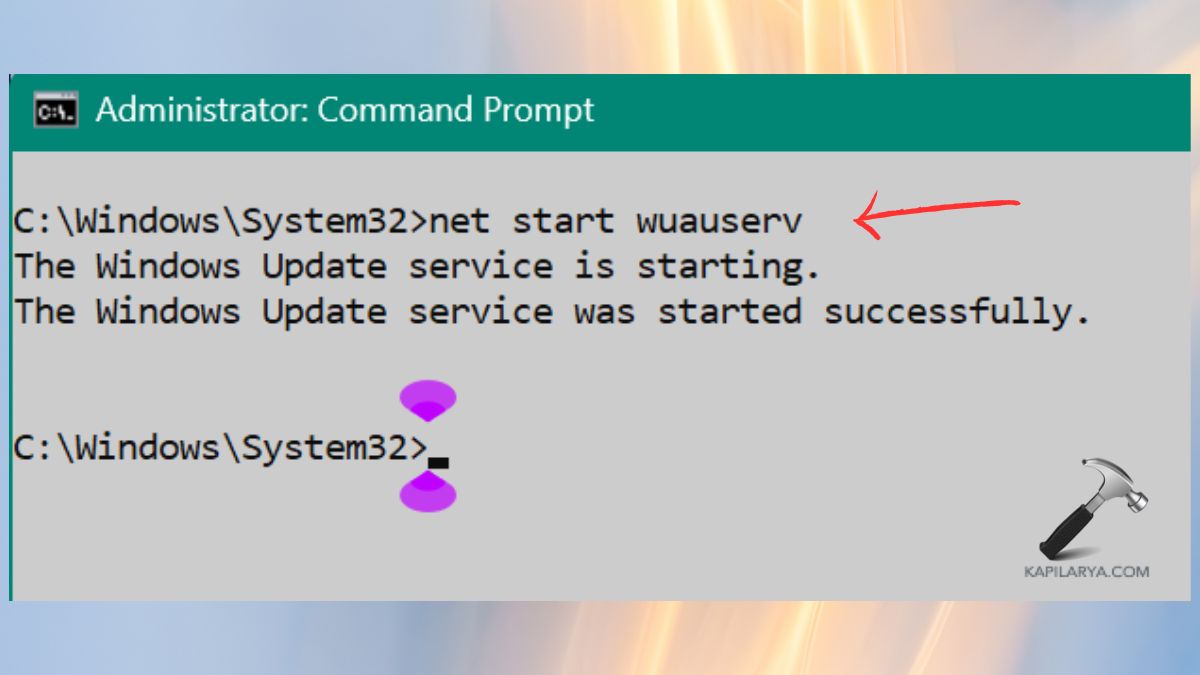
At this point, turn on your computer again and attempt to run the Installation Assistant.
Fix 7: Check Storage Space and Internet Connection Stability
Windows 11 Installation Assistant needs a working network connection and sufficient storage to be able to work.
1. Open File Explorer. Clicking right on C: Drive, pick Properties.
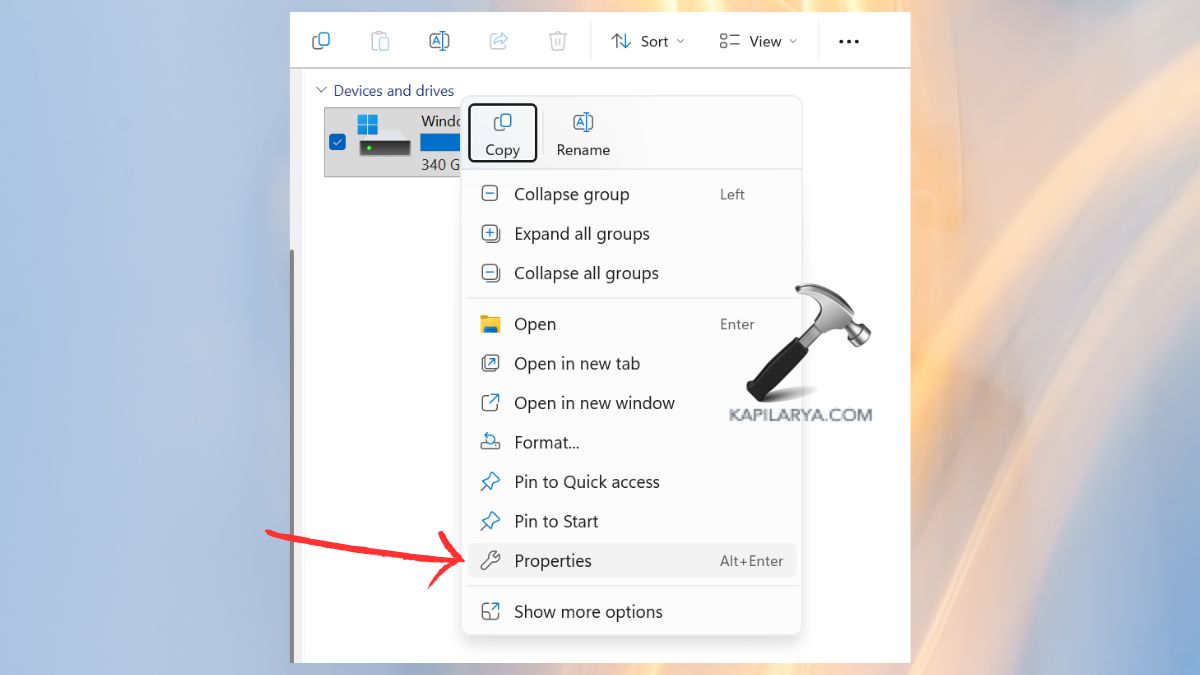
Make sure that you have a minimum of 20-25 GB of free memory.
2. Clear Space If Needed. Clear out old Windows updates. Empty Recycle Bin.
3. Ensure Internet Stability. When using a Wi-Fi that is not very stable, use a mobile hotspot.
Any minor disturbance can make the assistant skip or break down.
Fix 8: Use the Media Creation Tool as an Alternative Installation Method
If nothing works, one can always depend upon the media creation tool provided by Microsoft as the most dependable and general.
1. Get the Windows 11 Media Creation tool by Microsoft:- “https://www.microsoft.com/en-us/software-download/windows11”.

2. Open it > Run as administrator. Choose Upgrade this PC now. Accept terms and choose your preferences. Use instructions as displayed onscreen.
Allow the tool to download Windows 11. When you are asked to restart, do it. The approach circumvents numerous Installation Assistant problems, and it is a well-known one among technicians and advanced users.
Frequently Asked Questions (FAQs)
Why is the Windows 11 Installation Assistant stuck at 99%?
This normally occurs as a result of slow internet, corrupted update files, limited storage space or even because the background applications are preventing the installation.
Do I need TPM 2.0 for Windows 11?
The standard installation, which is the one installed with the Installation Assistant, requires TPM 2.0 and Secure Boot.
Can I install Windows 11 without losing my data?
Yes, you can upgrade by using the Installation Assistant or the Media Creation Tool, and you will not have to delete files.
What is the safest alternative if the assistant continues failing?
The most efficient tool to use and upgrade to Windows 11 without errors is the Media Creation Tool, which is the safest option to use.
That’s it!