You open a colourful photo. Click on the Print button and expect a vibrant printout. But instead, your printer prints black and white or simply grayscale. This is the most common problem in Windows 11. It often happens after a driver update, printer reset, or a change to an incorrect print setting. In this article, we’ll be fixing Windows 11’s grayscale printing – with some easy solutions.
Page Contents
Why Grayscale Printing Stops Working In Windows 11
Several things can cause Grayscale Printing in Windows 11. Below are some of them:
- Incorrect printer settings
- Low or empty colour ink cartridges
- Corrupted printer drivers
- App-specific print overrides
- Print Spooler service issues
So, before you replace your printer, try the fixes shared below.
Fixing Windows 11 Grayscale Printing Not Working
Fix 1: Disable Grayscale Printing In Windows Settings
Sometimes Windows 11 automatically enables grayscale printing as the default option. Here are the steps to turn it off.
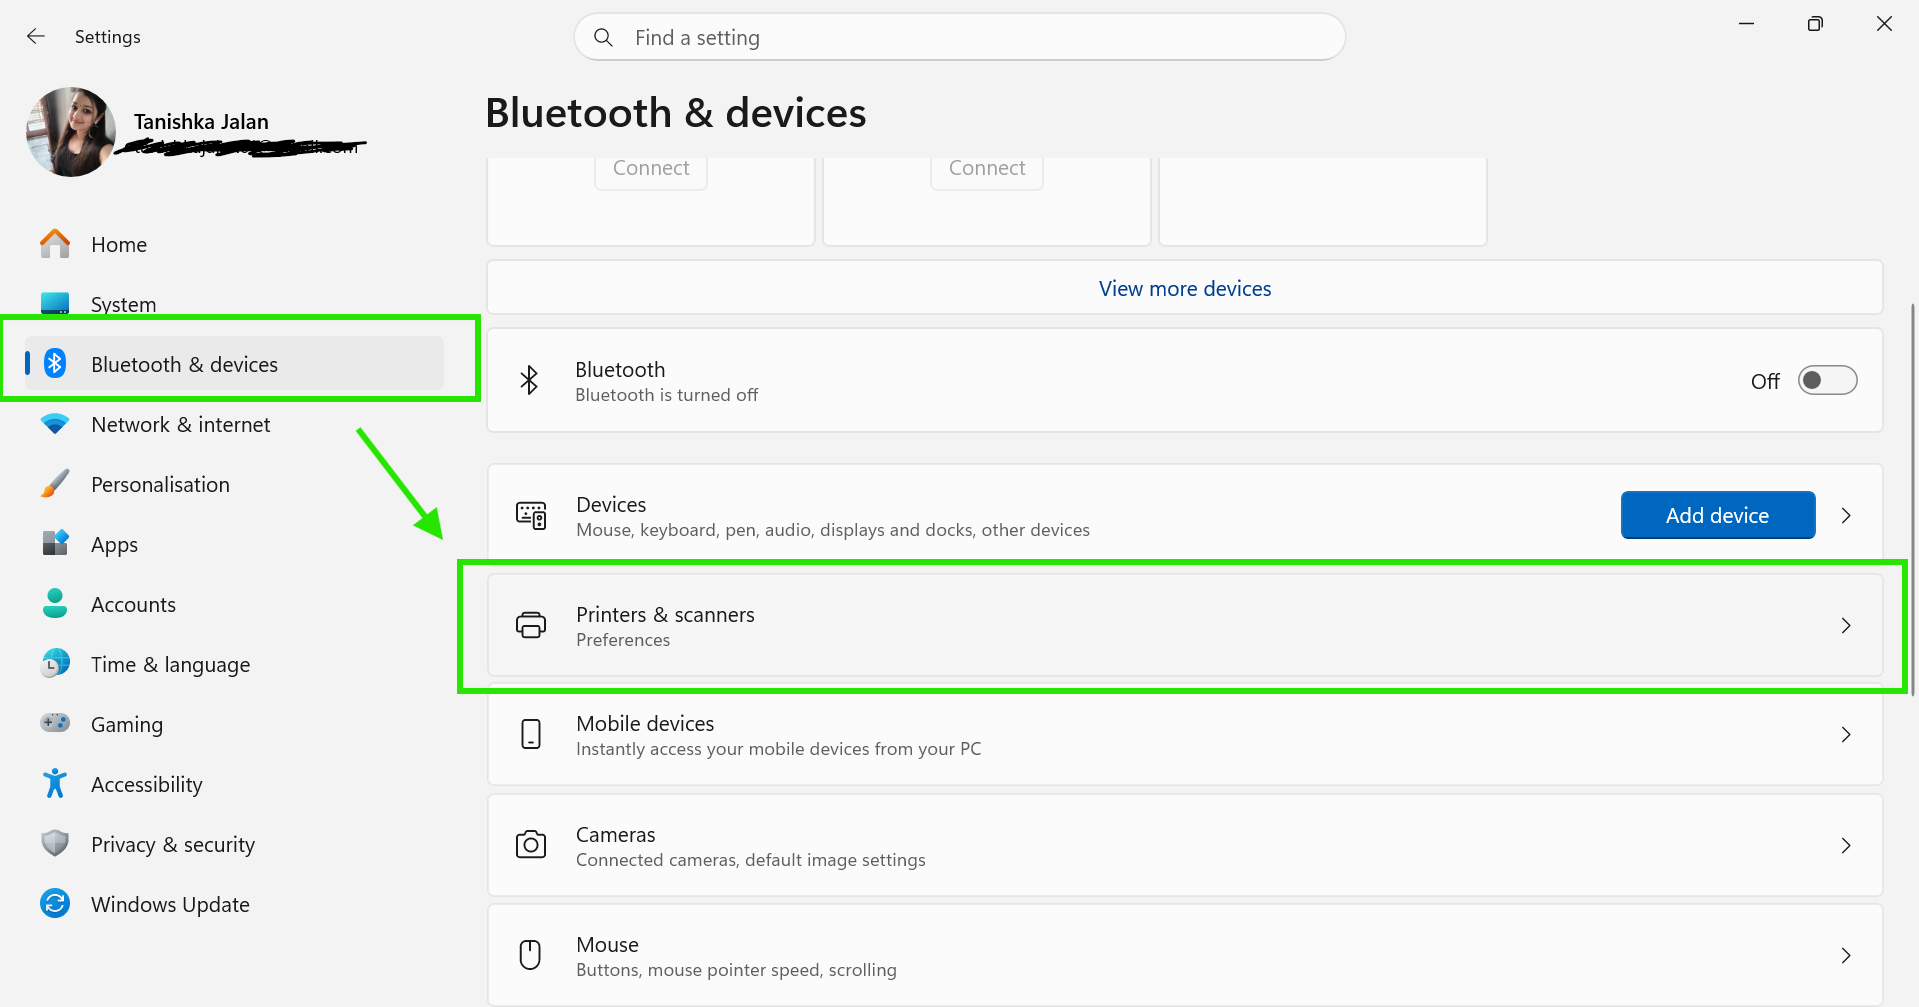
1. Press Windows + I to open Settings.
2. Go to Bluetooth & devices > Printers & scanners.
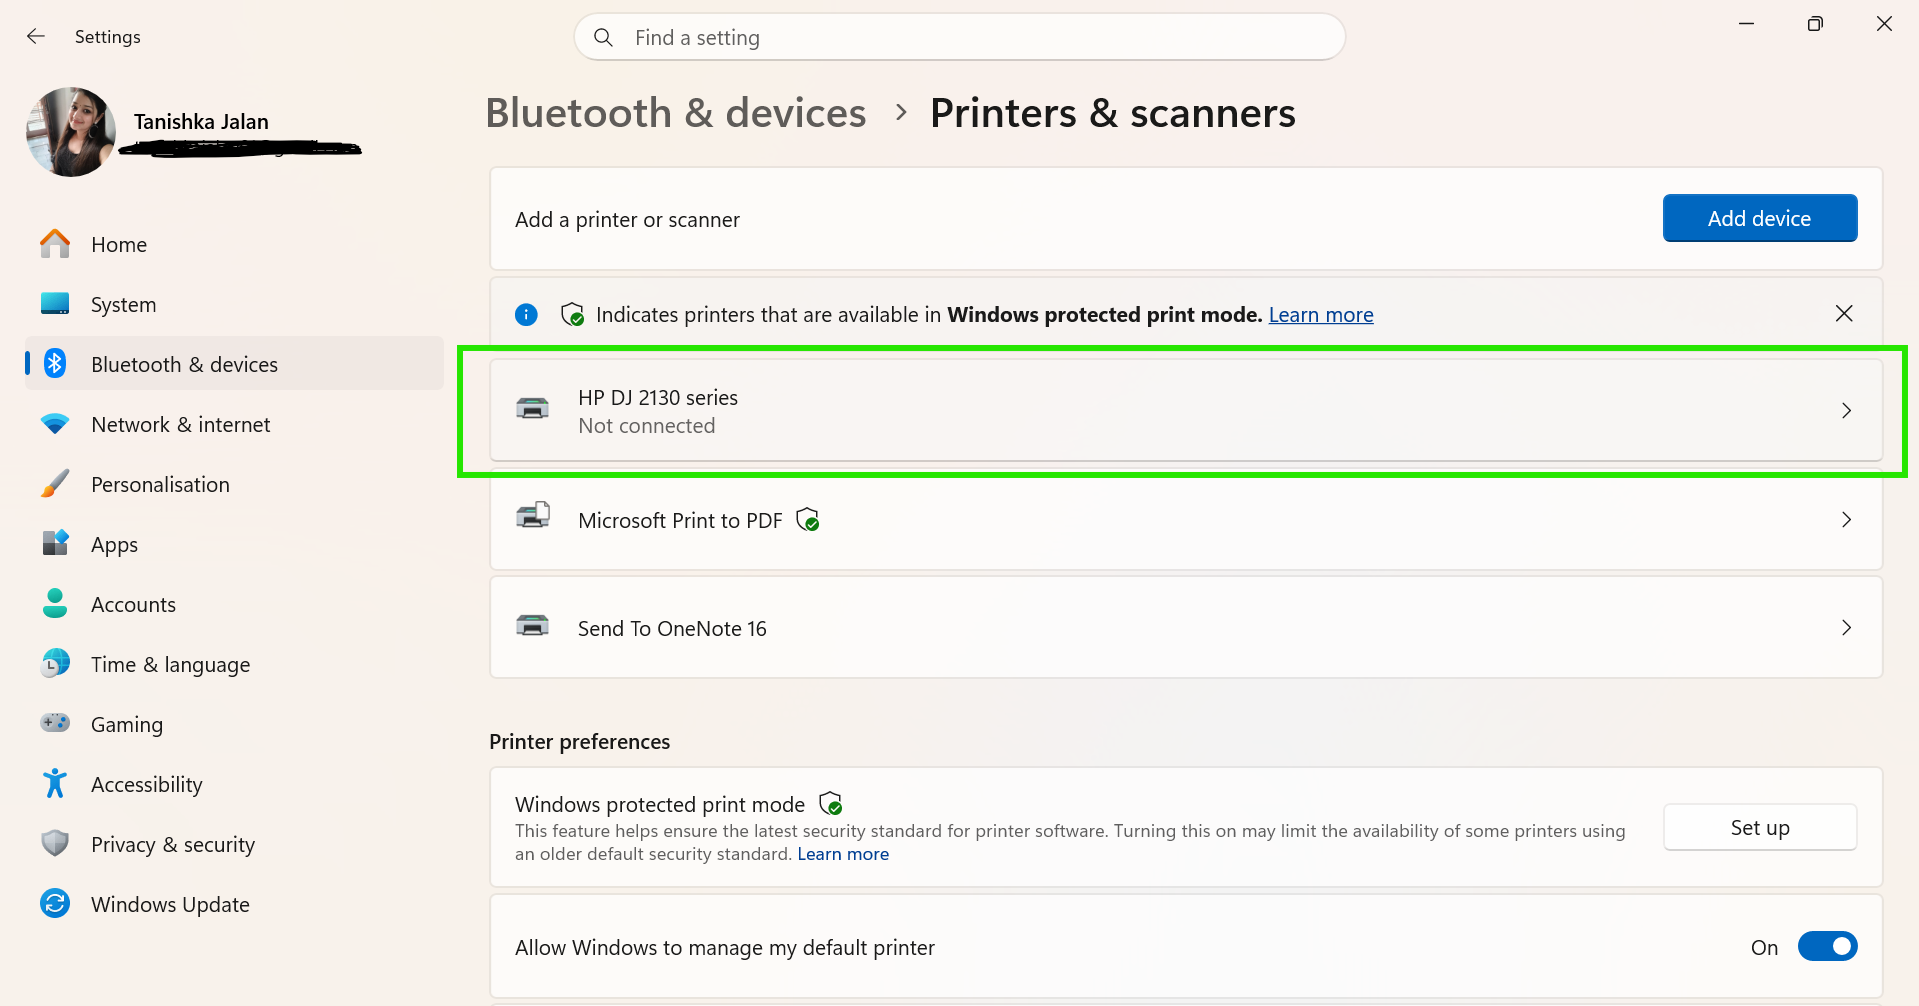
3. Select your printer.
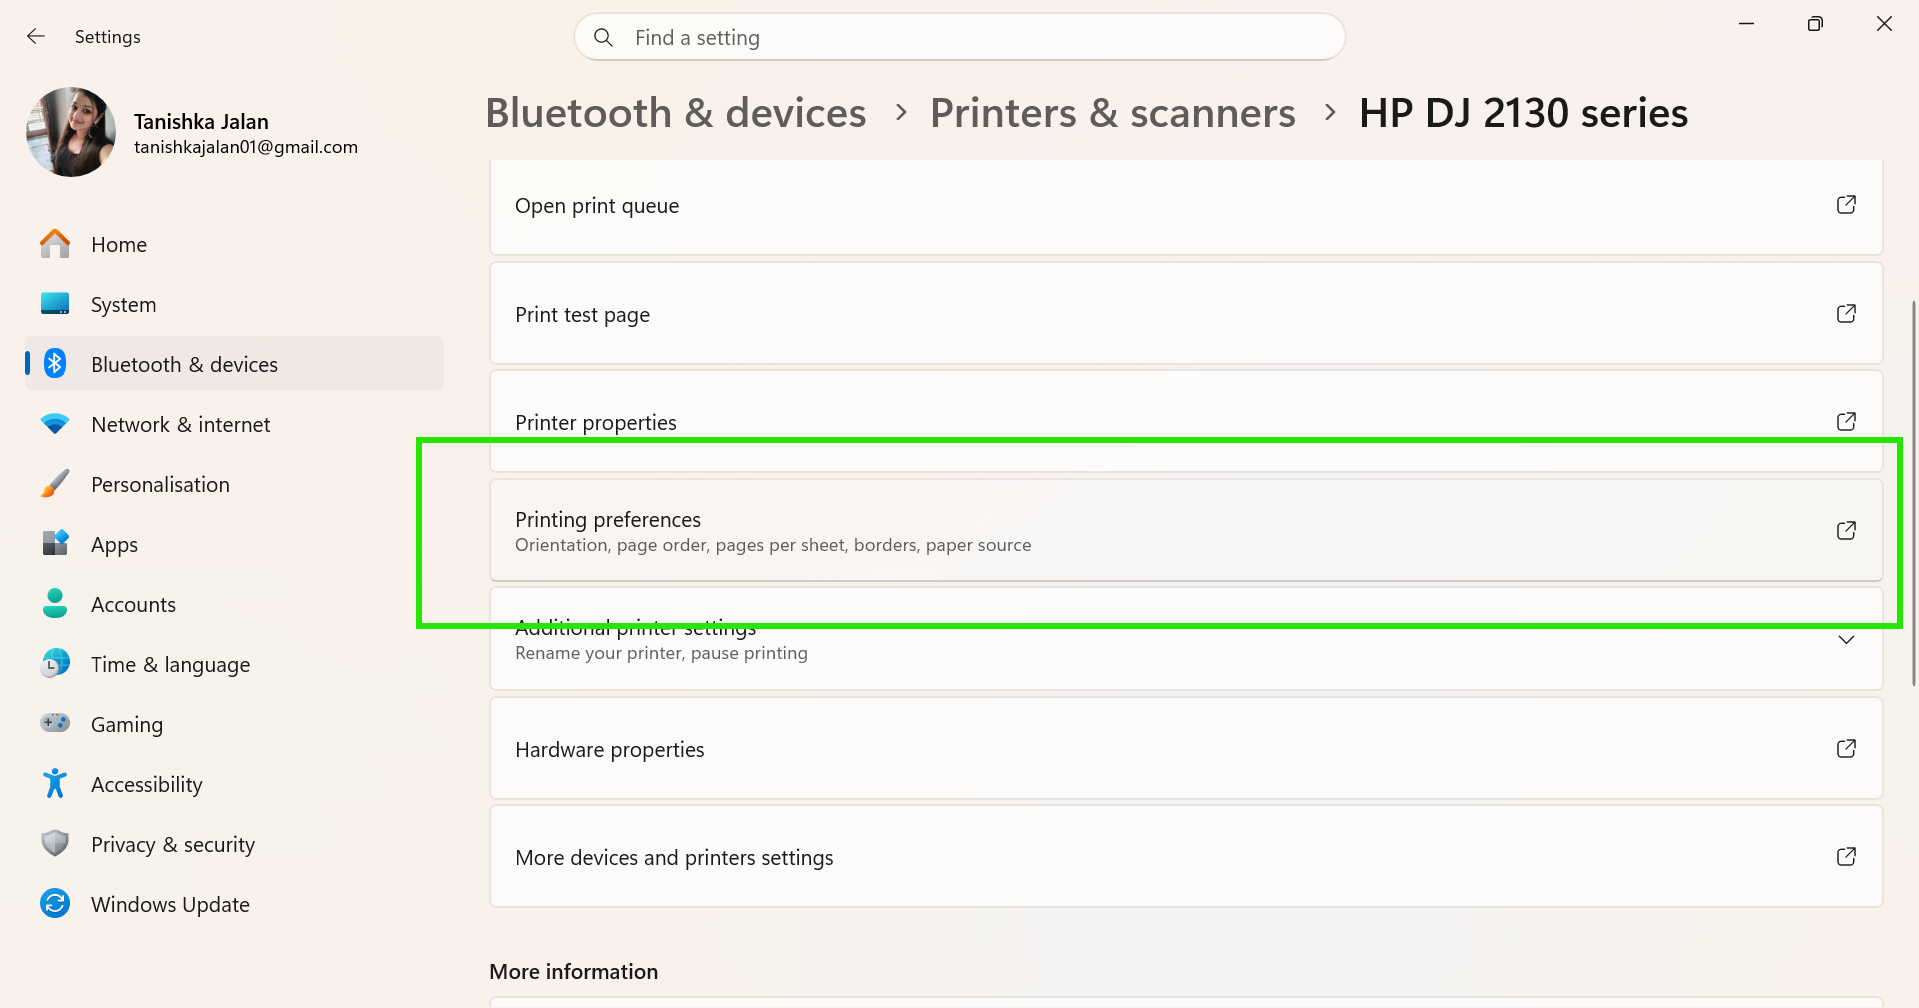
4. Click Printing preferences > Paper/Quality.
5. Look for options like:
- Black & White
- Colour
6. Select Colour instead.
7. Click Apply and then OK.
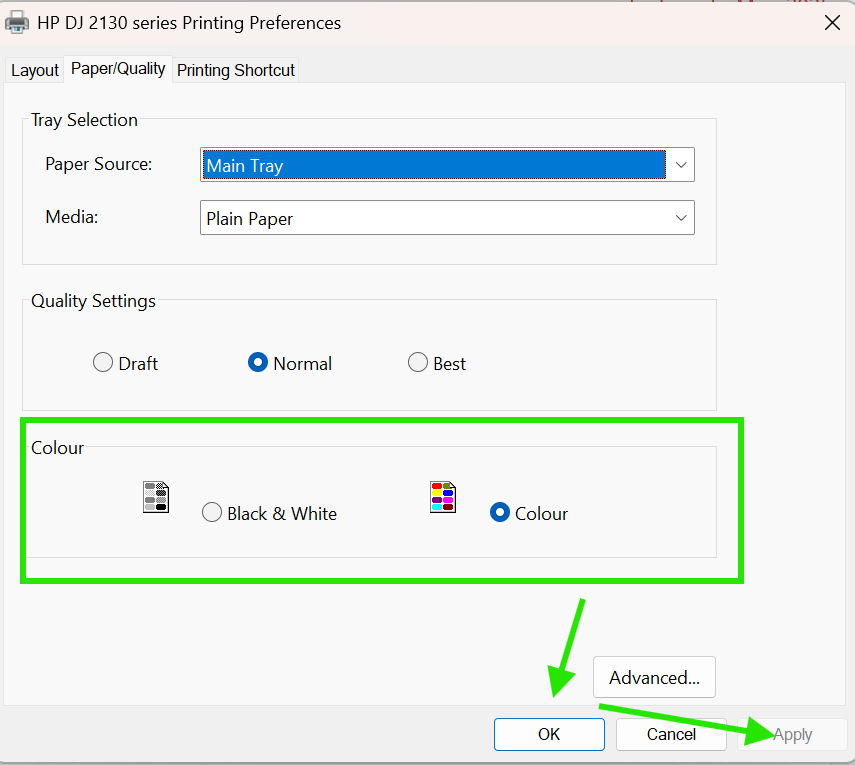
Also, check each tab, such as Main, Paper/Quality, or Advanced. That’s because some printers hide colour settings there.
Fix 2: Check Colour Settings Inside The App
Apps override your printer’s default settings. Let’s see how to fix Windows 11’s grayscale printing in different apps:
Google Chrome or Microsoft Edge
1. Press Ctrl + P.
2. Open the Colour dropdown menu.
3. Select Colour instead of Black and White.

Microsoft Word or PowerPoint
1. Open the print window.
2. Click Printer Properties.
3. Disable the Grayscale Printing option.
Photos App
1. Press Ctrl + P.
2. Click More settings.
3. Find Colour mode and select Colour.
Fix 3: Check Your Printer’s Ink Level To Fix Windows 11’s Grayscale Printing
Sometimes, low-ink colour can prevent printers from printing in colour properly.
What You Should Do
1. Open your printer software.
2. Check the colour ink levels.
3. Replace empty cartridges or refill the ink tank.
4. Use original ink for better print quality.
Fix 4: Restart The Print Spooler Service
Print Spooler service controls printing tasks in Windows 11. And sometimes there may be a problem. So to fix it, restart the service:
1. Search for Services in Windows Search.
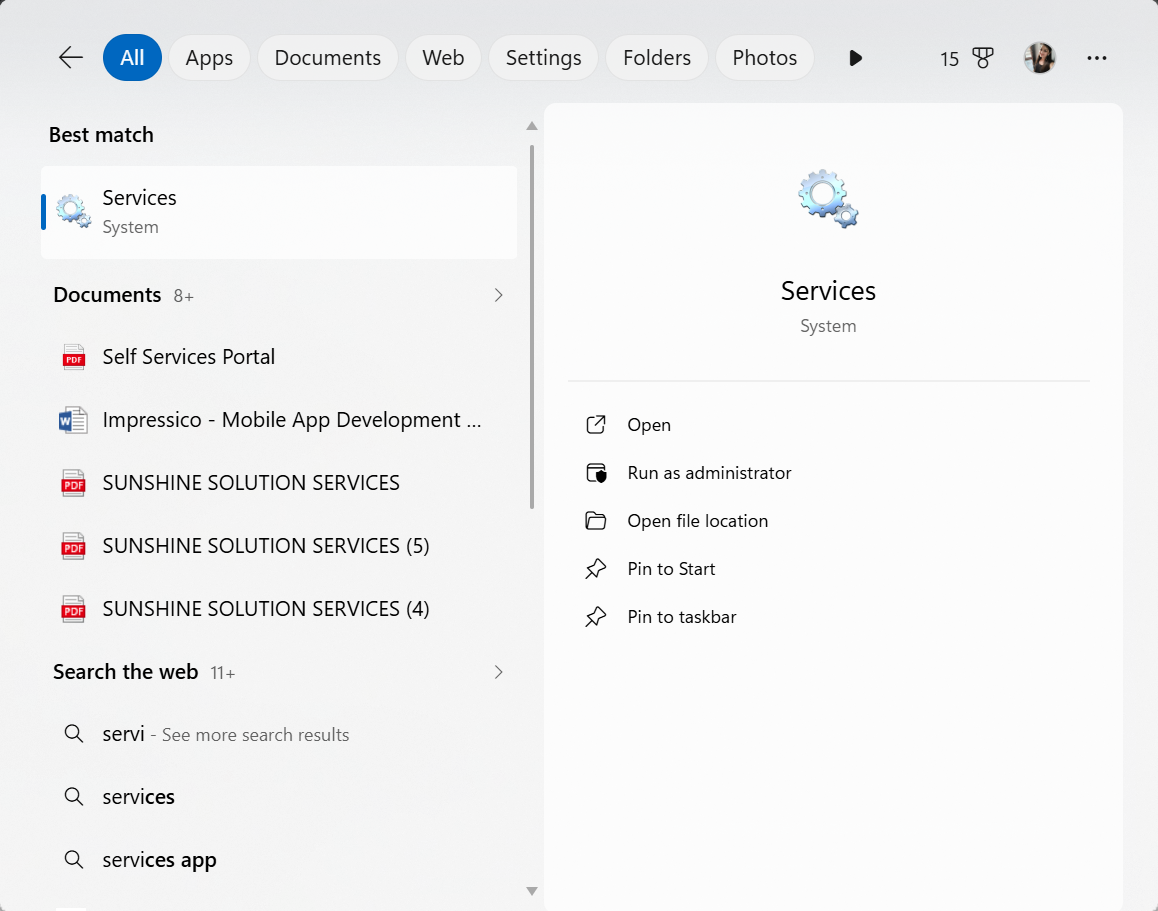
2. Open it and find Print Spooler.
3. Double-click it.
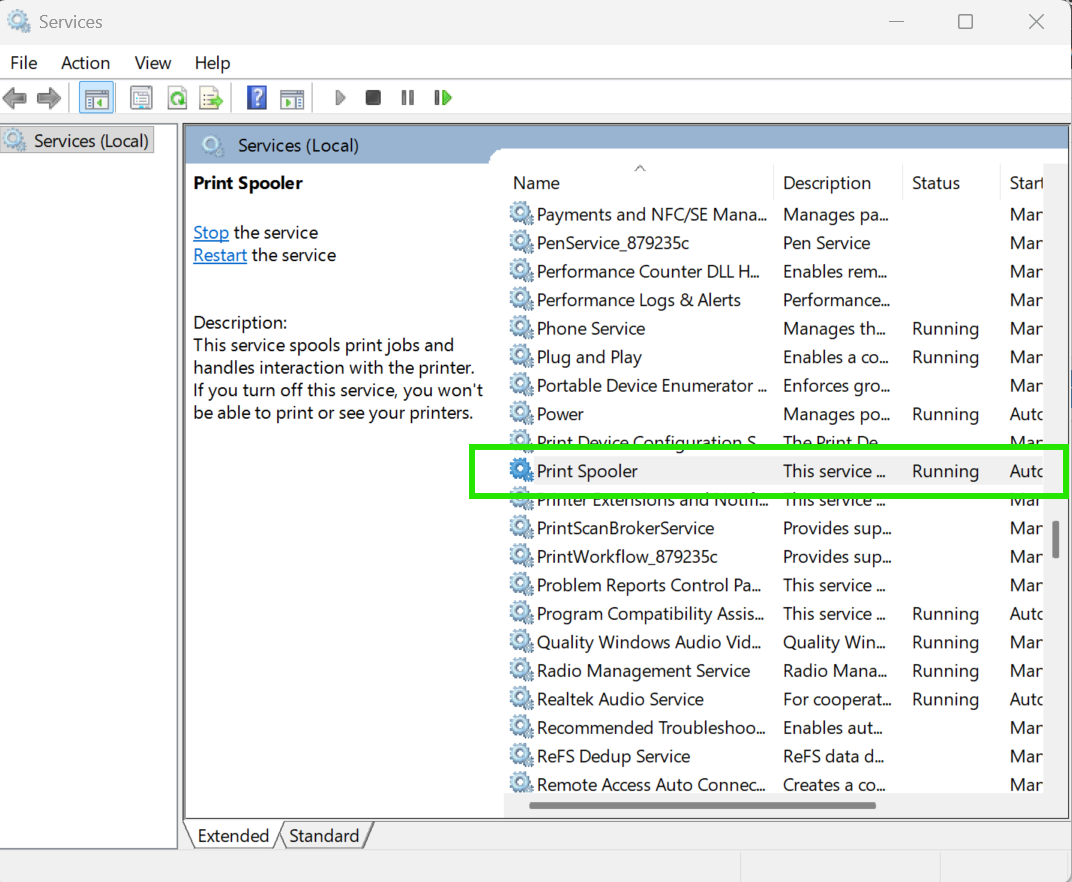
4. Click Stop first.
5. Then click Start again.
6. Set Startup type to Automatic.
7. Click OK to save the changes.
Fix 5: Update Or Reinstall The Printer Driver
Outdated or corrupted printer drivers can cause a grayscale printing problem in Windows 11. So, here are the steps to reinstall it:
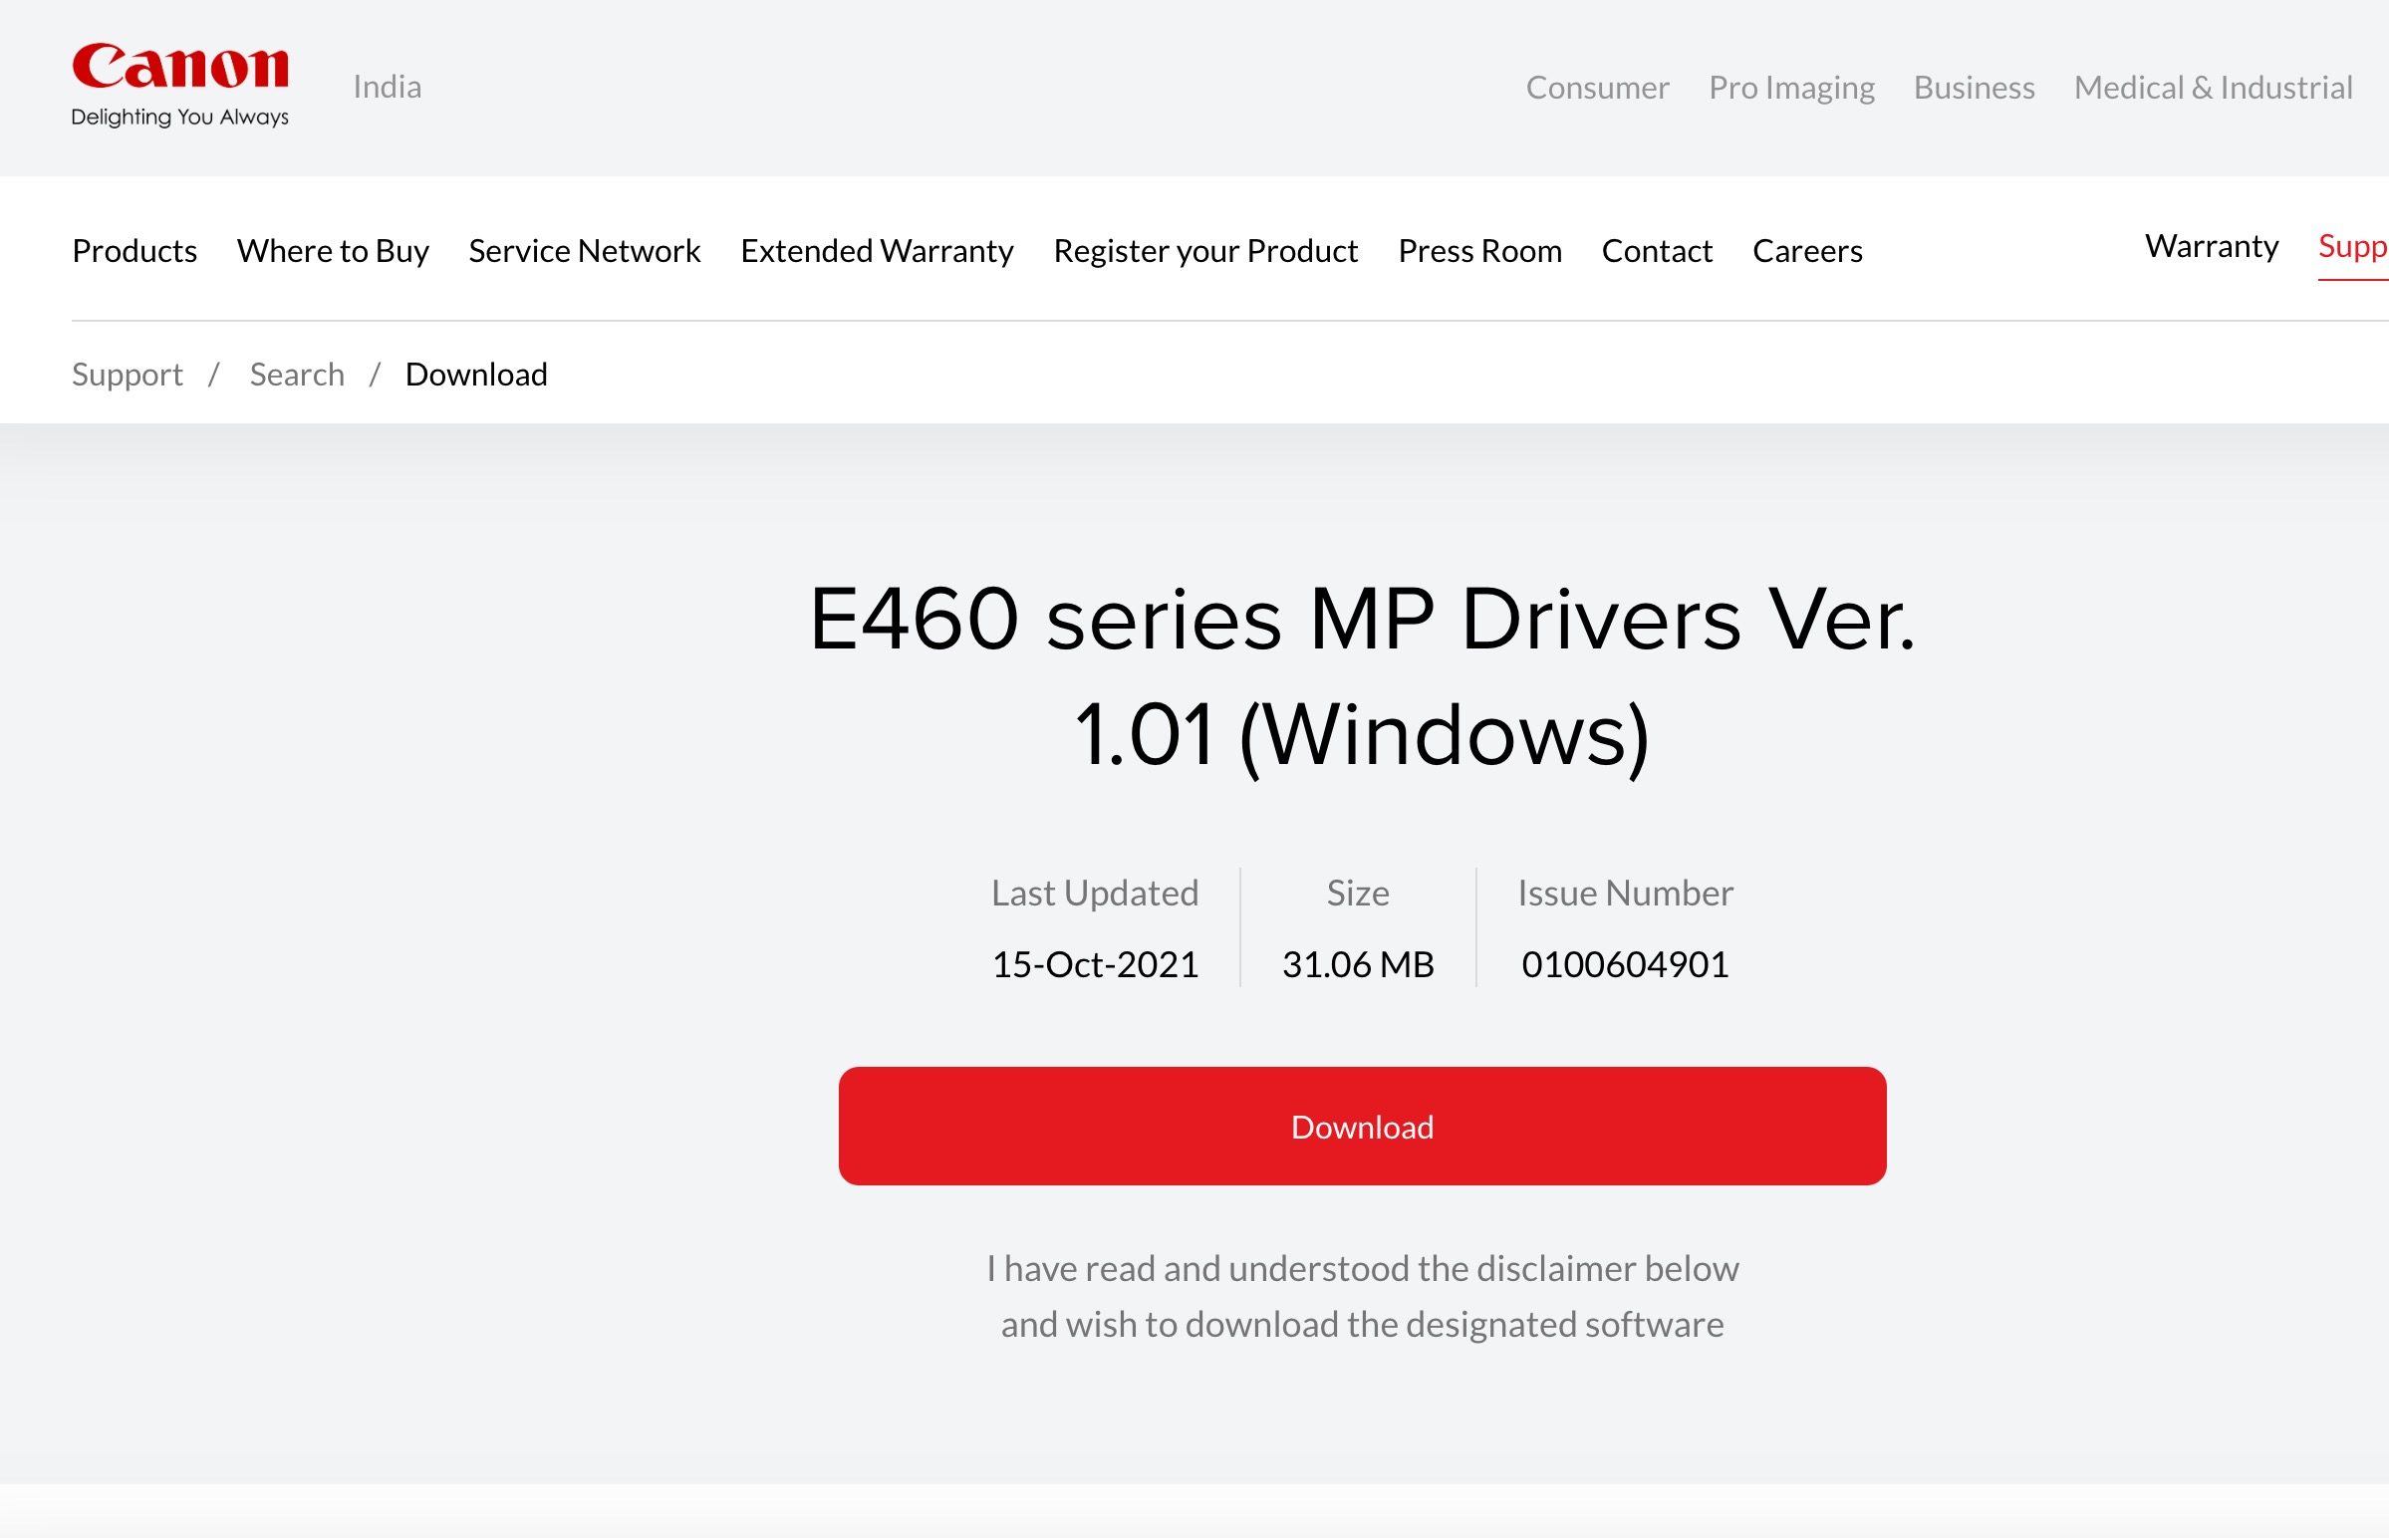
1. Visit your printer manufacturer’s official website.
2. Download the latest driver for your printer model.
Example shown for Canon printers:
3. Install the driver on your PC.
4. Restart your computer after installation.
5. Avoid using generic Windows printer drivers whenever possible.
Fix 6: Reset Your Printer
Resetting the printer can fix Windows 11 grayscale printing when it stops working. So here are the steps to reset your printer:
1. Open your printer menu (physically on some printer’s display) or printer companion app.
2. Find the Reset or Restore Factory Settings option.
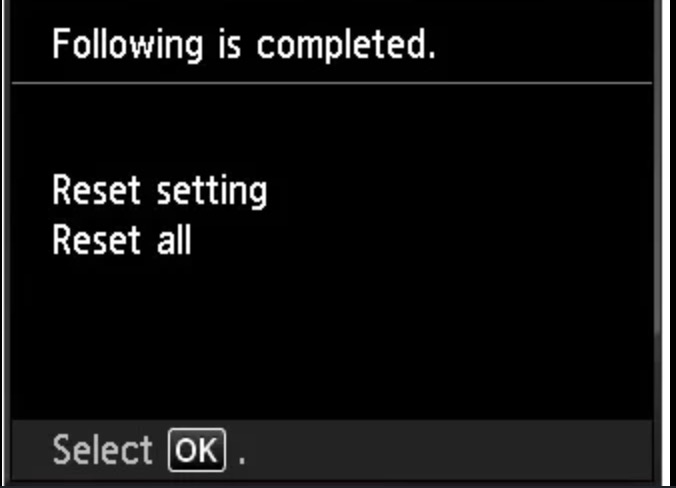
3. Start the reset process and wait for it to finish.
4. Reconnect the printer to your Windows 11 PC.
5. Print a test page to check if colour printing works properly again.
So that’s how you can fix Windows 11’s grayscale printing not working.